
Summary of Contents for Rapid Connect
- Page 1 USER’S GUIDE Rapid Connect IIOT MONITORING SYSTEM INSTRUCTION MANUAL IB 109050 02 C03b Rapid Connect Monitoring System 2023-05-03...
- Page 2 Rapid Connect User’s Guide Published April 2023 Revision 3 Copyright © Rapid Granulator AB This user guide provides an overview of Rapid Connect, as well as the user-facing functionality of the web portal. INSTRUCTION MANUAL IB 109050 02 C03b...
-
Page 3: Table Of Contents
Is Rapid Connect secure? ......................1:1 1.4. Which machines can I use with Rapid Connect? ..............1:2 1.5. How many machines can I use with Rapid Connect? ............... 1:2 1.6. How can I view my data? ......................1:2 Support ............................... 2:1 2.1. - Page 4 CONTENT 4.14. How do I handle alarms? ......................4:14 4.15. What does the status icons mean? ..................4:16 Profile Settings ........................... 5:1 5.1. How do I edit my profile? ......................5:1 5.2. How do I change my registered email address? ................ 5:1 5.3. How do I change my profile name?.................... 5:2 5.3. How do I add or change my phone number? ................
-
Page 5: Introduction
The web portal is accessed through a web browser, see section 4 “Web portal” on page 4:1. For more information about the hardware used in the Rapid Connect system, see Section 3 “Hard- ware” on page 3:1. 1.3. -
Page 6: Which Machines Can I Use With Rapid Connect
How many machines can I use with Rapid Connect? There is no limit on how many machines can be used with Rapid Connect. A gateway is able to re- ceive data from up to 50 sensor nodes, within a 150 metre radius. If you would like to monitor more machines in a single facility, it is possible to add more gateways. -
Page 7: Support
Support 2.1. What documentation is available for Rapid Connect? This user guide provides an overview of Rapid Connect and its functions. This user guide is availa- ble in all official EU Member State languages. For installation of new sensor nodes, or connection of new sensors to existing sensor nodes, sepa- rate user manuals are available. - Page 8 SUPPORT This page intentionally left blank INSTRUCTION MANUAL IB 109050 02 C03b...
-
Page 9: Hardware
HARDWARE Hardware 3.1. What hardware does Rapid Connect use? Rapid Connect uses at least one sensor node and one gateway. By default, all machines delivered with Rapid Connect is provided with a current transformer which monitors power consumption, and a Modbus temperature sensor which monitors temperature and vibrations. -
Page 10: What Data Can The Sensor Node Collect
HARDWARE 3.3. What data can the sensor node collect? 230V 24V AC Main supply Digital input 24V DC Main supply ModBus 24V DC External temperature Digital input Analogue input CT1 / CT5 I/O-link 24V DC Digital output The sensor node is provided with 24 input points which allows for input from various sensors. Power consumption can be monitored with a current transformer. -
Page 11: What Does The Led On The Sensor Node Signal
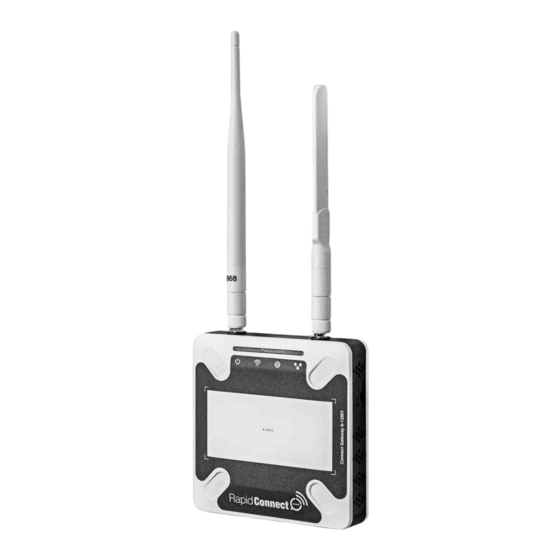
3.4. What is a gateway? A gateway is the point in the Rapid Connect system where your data leaves your facilities. The gateway receives data from up to 50 sensor nodes, within a 150 metre radius. The gateway transmits the collected data to a cloud database. -
Page 12: How Does The Sensor Node Communicate With The Gateway
The gateway is provided with a SIM card which facilities cellular communication. The SIM card is specially configured by Rapid before delivery. When the gateway is powered on, the gateway immediately established communication with the cloud database. It is also possible to connect an ethernet cable to the gateway’s ethernet port, if a more stable con- nection is required. The gateway is plug-and-play, and your firewall does not require configuration in order for the gateway to communicate over ethernet. 3.7. -
Page 13: Software
What software does Rapid Connect use? Rapid Connect uses a web portal. The web portal is a website where you are able to view all the data that’s been collected from your machines. The web portal allows you to easily visualise the status of your production, and the health of your machines. -
Page 14: How Do I Activate My Account
1. Follow the link in the email you received when you were added as a user. 2. Select a login method from the drop down list. You are able to login with a password, or with a Google or Microsoft account. Rapid recom- mends that you choose to login with a password, as this makes it easier for Rapid to help with login issues. 3. Fill out a secure password. -
Page 15: How Do I Navigate The Web Portal
3. Alarm list. Toggles a drop-down list with all unacknowledged alarms. 4. Notifications. Toggles a drop-down list with all unacknowledged notifications. A button allows for acknowledgement of the notifications. When acknowledged, the notifications are removed from the list. 5. Profile menu. Allows access to the profile settings page, and the ability to log out from the web portal. 6. Documentation. Opens a new browser tab with documentation for the web portal. 7. Main menu. Toggles a menu which allows for additional navigation. The contents of the main menu depends on the level that you are currently on. Rapid Connect Monitoring System 2023-05-03... - Page 16 PORTAL 4.6. How do I navigate the web portal? Following icons are only visible on the company level and department level. 1. Grid view. 2. List view. 3. Map view. 4. Aggregate view. Following icons are only visible on the machine level. 1. The current scope of the displayed data. 2.
-
Page 17: How Is The Web Portal Structured
• List view, shows the departments and machines in a table. • Map view, shows the machines’ geographical location on a map. • Aggregate view, shows all data collected from all departments and machines in aggregate. Different statuses for the machines are indicated by icons. See section “What does the status icons mean?” on page 4:13. Rapid Connect Monitoring System 2023-05-03... - Page 18 Map view Map view shows the machines’ geographical location. The location of the machine is indicated by a Rapid logo. The map view does not show the geographical location of the departments. Map view is activated by pressing the map icon in the portal’s top bar. INSTRUCTION MANUAL IB 109050 02 C03b...
- Page 19 The chart at the bottom of the aggregate view shows a summary of the machines’ temperature, power consumption and vibration levels. Only one aggregate can be shown at a time. Switch which aggregate is shown in the graph by clicking the respective slide-toggle. Rapid Connect Monitoring System 2023-05-03...
-
Page 20: What Does The Widgets On The Machine Level Mean
PORTAL 4.8. What does the widgets on the machine level mean? The machine level is provided with widgets which display different types of information, and allows for different types of actions. The layout of the widgets varies. There are standard and optional widgets. Standard widgets “Energy” shows the current power consumption. The sum of the machine’s total power consump- tion is shown underneath the pie chart. The sum shows the total power consumption during the specified time. The chart can be zoomed into, by dragging a rectangle over the period that you wish to inspect. The labels underneath the chart is clickable, and allows for visualation of specific parameters. - Page 21 X-axis (horizontal vibrations) and Y-axis (vertical vibrations). The vibration chart shows low-frequency and high-frequency vibrations. The chart can be zoomed into, by dragging a rectangle over the period that you wish to inspect. The labels underneath the chart is clickable, and allows for visualation of specific parameters. You can receive a notification, if the vibration levels in the machine are too high. See section 5.5 “How do I enable notifications?” on page 5:5. Rapid Connect Monitoring System 2023-05-03...
- Page 22 “Overload” indicates that the machine is connected to a power supply, is processing material, and is overloaded. The machine’s status is determined by the machine’s power consumption and vibrations. The limit for each machine status is defined in the machine’s template. The template is designed by Rapid before delivery of the machine. Optional widgets “Normal”, “Stop” and “Emergency” shows the percentage of each status that the machine has been in during the specified interval. In the example above, the machine has been connected to a power supply and has been running.
-
Page 23: How Can I See Data From A Specific Time Period
The scope can be changed by pressing the date button in the portal’s top bar. You can chose to show data collected during a specific hour, day, week, month, quarter or year. The current scope is displayed in the top bar. In the example above, the current scope is set to 30 September, 2022. To revert to the default scope, press the “Today” button. 4:11 Rapid Connect Monitoring System 2023-05-03... -
Page 24: Can I Print My Data To Paper
PORTAL 4.10. Can I print my data to paper? Yes, it is possible to generate PDF reports for specific machines. 1. Go to the machine level. 2. Click on the button “PDF Reports”. 3. Set the scope you would like to show data from. 4. Select the template that you would like to use. 5. Click OK. 6. -
Page 25: How Do I Schedule Maintenance Reminders
2. Click the “Log maintenance” button on the maintenance widget. 3. Set the maintenance note. This should be a description of what has been done, for example “Changed the knives” or “Tensioned the drive belts”. 4. Click the “Maintenance performed” button. The maintenance is logged and the interval is reset. 4:13 Rapid Connect Monitoring System 2023-05-03... -
Page 26: How Do I Handle Alarms
PORTAL 4.14. How do I handle alarms? Alarms for a machine can be handled in the web portal. When an alarm is raised, a symbol is displayed on the company and/or department level, to indicate that a machine within the company and/or department has an active alarm. The type of alarm that is active can be seen on the machine level. - Page 27 1. Click on any alarm. The alarm page is displayed. 2. Click on the “Acknowledge All” button. 3. All alarms are acknowledged. The alarms are marked with green checkmarks, to indicate that they are acknowledged. 4:15 Rapid Connect Monitoring System 2023-05-03...
-
Page 28: What Does The Status Icons Mean
PORTAL 4.15. What does the status icons mean? Following icons indicate the status of the machine in summary: Good! No alarms are active, maintenance has been done. (Green) Accepted! No alarms are active, maintenance should be scheduled. (Yellow) Warning! No alarms are active, maintenance should be carried out or the ma- chine is overheated. -
Page 29: Profile Settings
3. The profile settings page is displayed. For information on how to edit specific profile settings, see the remainder of this chapter. 5.2. How do I change my registered email address? It is not possible for you to change your registered email address. If you would like to change your registered email address, contact our support department. Rapid Connect Monitoring System 2023-05-03... -
Page 30: How Do I Change My Profile Name
PROFILE SETTINGS 5.3. How do I change my profile name? 1. Go to the profile settings page. 2. Fill out your first name in the field “First name”. 3. Fill out your last name in the field “Last name”. 4. Click “Save settings” to save the settings. 5. Your new first and last names are saved to your profile. INSTRUCTION MANUAL IB 109050 02 C03b... -
Page 31: How Do I Add Or Change My Phone Number
PROFILE SETTINGS 5.3. How do I add or change my phone number? Notifications about alarms or status updates for any given machine can be sent as a text message to your phone. To receive notifications by text message, you first need to add a phone number to your profile. 1. Go to the profile settings page. 2. Fill out your phone number in the field “Phone number”. The phone number must begin with your country’s extension code, for example “+46” for Sweden. 3. Click “Save settings” to save the phone number. 4. The phone number is saved to your profile. Rapid Connect Monitoring System 2023-05-03... -
Page 32: How Do I Activate Dark Mode
PROFILE SETTINGS 5.4. How do I activate dark mode? 1. Go to the profile settings page. 2. Click the slide toggle “Dark theme” to toggle the dark theme on or off. The theme choice is automatically saved, and you do not have to press “Save settings”. To revert to the light theme, click the slide toggle again. INSTRUCTION MANUAL IB 109050 02 C03b... -
Page 33: How Do I Enable Notifications
PROFILE SETTINGS 5.5. How do I enable notifications? Notifications can be enabled in the notifications settings on the profile settings page. “Context” determines which machines you wish to receive notifications from. You can receive noti- fications from all machines within a department, or from a specific machine within a department: Groups The configured notification will be activated for all machines in the group. A group is the department or the company to which the machine(s) belong(s). Machines The configured notification will be activated for the chosen machine only. Rapid Connect Monitoring System 2023-05-03... - Page 34 PROFILE SETTINGS 5.5. How do I enable notifications? “Notify when” determines when you will receive a notification, for example when a machine is over- loaded, or when a gateway has lost its connection. Alarm/Event A notification will be sent if an alarm or other event is triggered. The type state changed of event can be configured with a filter (see below). Controller A controller has established a communications link. A controller is the connected communications interface between two entities. A controller can for example be the interface which checks that LoRa has been successfully established between the sensor node and the gateway, or the interface which checks that a Modbus connection between a sensor and the sensor...
- Page 35 Once a notification has been added, additional options can be displayed by clicking on “Configured notifications”. “Notify by” determines how you will receive notifications. There are three ways to receive notifica- tions: Portal A pop-up notification is shown in the portal. Email A message is sent to your registered email address. A text message is sent to your registered phone number. If the notification event “Alarm/Event state changed” is selected, filters can be added to specify the exact types of events you wish to be notified about. The filter settings are accessed by clicking the cogwheel icon next to the notification in the “Configured notifications” list. Alarm A notification is sent if an alarm is activated. Service A notification is sent if a service action has been registered. Stop A notification is sent if a machine has been stopped. Rapid Connect Monitoring System 2023-05-03...
-
Page 36: How Do I Disable Notifications
PROFILE SETTINGS 5.6. How do I disable notifications? 1. Go to the notification settings. 2. Click on “Configured notifications” to show all configured notifications. 3. Click on the rubbish bin icon next to the notification that you no longer wish to receive. 4. The notification is removed. INSTRUCTION MANUAL IB 109050 02 C03b... -
Page 37: How Do I Change My Region
1. Go to the profile settings page. 2. Go to the section “Login method”. 3. Click on the login method you would like to use. You are able to authenticate yourself with a password, or with your Google or Microsoft ac- count. Rapid recommends that you choose to authenticate yourself with a password, instead of a Google or Microsoft account, as this makes it easier for Rapid to help you with login issues. Rapid Connect Monitoring System 2023-05-03... - Page 38 PROFILE SETTINGS This page intentionally left blank INSTRUCTION MANUAL IB 109050 02 C03b 5:10...
-
Page 39: User Management
View report Create comments Create attachments View process views Create events Classify events Create reports View report schedules Update report schedules Rapid Connect Monitoring System 2023-05-03... -
Page 40: How Do I Add More Users
USER MANAGEMENT 6.2. How do I add more users? 1. Go to the main menu. 2. Click on “User Management”. 3. Make sure that the tab “Users” is selected. 4. Click on “Invite new user”. 5. Fill out the new user’s credentials. 6. Click “Send invitation”. 7. An invitiation message with an activation link is sent to the user’s email address. The user must activate their new account before being able to access the web portal. -
Page 41: How Do I Edit An Existing User
The user can be assigned a new user role and be given access to a new department with the set- tings in “Assign new role”. “Edit profile” allows the advanced user to edit the user’s profile settings for them. See section 5 “Profile Settings” on page 5:1. Rapid Connect Monitoring System 2023-05-03... -
Page 42: How Do I Reset A User's Password
USER MANAGEMENT 6.4. How do I reset a user’s password? If the user has lost their password, you can reset it for them by editing their profile: 1. Go to “User Management”. 2. Make sure that the tab “Users” is selected. 3. Click on the person that you would like to reset the password for. 4. Click “Edit profile” in the side pane to the right. 5. Under the section “Change password”, fill out the user’s new password. 6. Press “Change”. INSTRUCTION MANUAL IB 109050 02 C03b...
Need help?
Do you have a question about the Connect and is the answer not in the manual?
Questions and answers