Advertisement
Quick Links
Product Usage instructions:
• This product is a desktop device and is not designed for handheld use.
Installation:
This product is a desktop product and should be installed on a stable surface. Follow the steps below
to install:
1. Choose a suitable location for the product, ensuring proper ventilation.
2. Place the QP Pro 2 on the selected surface, making sure it is level and secure.
FCC Radiation Exposure Compliance
This product complies with FCC radiation exposure limits. To ensure safe usage, please adhere to
the following guidelines:
• Keep a minimum distance of 20 cm between the radiator of the device and your body.
• Do not modify or tamper with the device's internal components.
• Follow all safety instructions provided in the user manual.
Frequency Band Restrictions
The operation of this device in the frequency band 5150-5250 MHz is restricted to indoor use only.
Do not use this product outdoors within this frequency range.
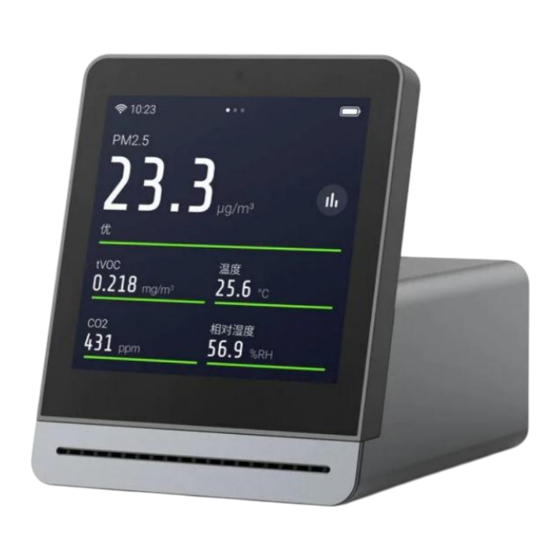
QP Pro 2 Air Monitor
Advertisement

Summary of Contents for SMART AIR QP Pro 2
- Page 1 1. Choose a suitable location for the product, ensuring proper ventilation. 2. Place the QP Pro 2 on the selected surface, making sure it is level and secure. FCC Radiation Exposure Compliance This product complies with FCC radiation exposure limits. To ensure safe usage, please adhere to the following guidelines: •...
- Page 2 Power On • When the product is turned off, press and hold the button on the top to turn it on. • If the product does not respond, please charge it first. Using Instructions: Change Screen • Swipe the screen left or right to change the main page. Readings...
- Page 3 • When you are on the readings page, you will see readings with different font sizes. Tap any of them to display it at the top. Alarm • Go to the control page, tap “ “, and you can manage the alarms. Over-limit Alert...
- Page 4 • Go to control page, tap “ ” > “Over-limit Alert”, and you can manage the alerts. Calibrate CO2 Reading Manually • If the CO2 reading is abnormal, you can go to “ ”, choose “CO2 Calibration” > “Manual Calibration”, then follow the instructions on the device to proceed. Sensor Instructions:...
- Page 5 Sensor Malfunction • Readings will appear as dashes in the event of a malfunction. Replace the PM Sensor • Unplug the charging cable and remove the back cover: • Turn the latch clockwise, and the PM sensor will pop out partially, take it out:...
- Page 6 • Push the latch with the new PM sensor to the right, then push the sensor in until the latch returns. • Put on the back cover.
-
Page 7: Historical Data
Historical Data: • Tap “ ” the button in the top right to check the historical data for this reading when you are on the readings page Reading Interpretation... - Page 8 • Tap the large number on the readings page to check the reading’s interpretation. App Instructions: Connect Qingping+ App • Please visit qingping.co/plus or scan the QR code below with your phone to download the Qingping+ app. • Alternatively, search for 'Qingping+' on the App Store or Google Play. •...
- Page 9 Settings: Automation • If you want to add this product to another supported smart home platform, simply go to the control page, tap “ ”, choose 'Automation,' and select the platform you would like to use Reset • Go to the control page, tap “ ”, choose 'Reset,' and follow the instructions to proceed.
- Page 10 • Press and hold the top button, then tap the power off icon when it appears. • If the product does not respond, continue pressing the top button to force it to shut down. Attention: • This product is neither waterproof nor dustproof. •...
Need help?
Do you have a question about the QP Pro 2 and is the answer not in the manual?
Questions and answers