Table of Contents
Advertisement
Quick Links
Advertisement
Table of Contents

Related Manuals for Jacob Jensen Climate Station


Summary of Contents for Jacob Jensen Climate Station
- Page 1 User Manual Climate Station & Sensor Unit Jacob Jensen...
- Page 2 Congratulations on your new Jacob Jensen® product. Jacob Jensen embodies the honesty and simplicity of our founder’s vision, focusing on the essentials of the product experience. Your new purchase pushes the boundaries of everyday objects, combining function with meaningful design.
-
Page 3: Table Of Contents
1. Safety Instructions .................................. 2. Product Overview ..................................2.1 Climate Station ................................. 2.2 Sensor Unit ..................................... 3. Using your Climate Station ............................3.1 Getting started ................................. 3.2 Connecting a Sensor Unit ..........................4. Mounting ......................................4.1 Climate Station ................................ - Page 4 It contains instructions on how to use your new purchase correctly and how to maintain its functionality with regular use. Jacob Jensen and our partner F&H Group A/S reserve the right to make improvements to enhance the product experience without prior notice.
-
Page 5: Safety Instructions
1. Safety Instructions • Do not ingest the batteries, as it may cause chemical burns. • If the button cell battery is swallowed , it can cause severe internal burns in just 2 hours and can lead to death. • Keep new and used batteries away from children. •... -
Page 6: Product Overview
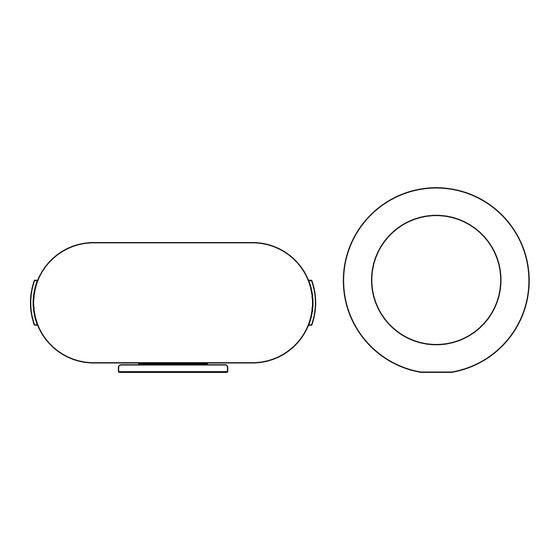
2. Product Overview 2.1 Climate Station Front Temperature in Celsius/ Fahrenheit Humidity Location Magnetic table stand Back (without cover) Celsius or Fahrenheit switch Batteries Link button Press to link an optional external Sensor Unit... -
Page 7: Sensor Unit
2.2 Sensor Unit Front Temperature in Celsius/Fahrenheit Connected channel/Channel Selection active Location selection active Humidity Low battery indicator Note: ‘Channel’ and ‘Location’ is only shown when the selection is active. The battery icon is only shown if they need to be changed. -
Page 8: Using Your Climate Station
Fahrenheit ( ) by using the switch on the back. 3. Place the back cover back on your Climate Station. Now you are ready to go. Your Climate Station will display the temperature and humidity, based on where it is placed indoors. -
Page 9: Mounting
Climate Station once to enter Radio Frequency (RF) reception mode and link to a Sensor Unit. The Climate Station will search for nearby sensors on Channel 1, 2, 3 or 4. Note: If you press the button again, you will exit RF mode. -
Page 10: Sensor Unit
Front Back (This side facing the wall) The Climate Station should not be mounted more than 2 meters above the floor N.B.: When placing the adhesive pad and mounting the bracket, ensure that the side with the Jacob Jensen logo faces away from the wall. -
Page 11: Care And Maintenance
For optimal performance, ensure the Climate Station and Sensor Unit are clean. 5.1 Low Battery Warning When the battery is low, the display on the Climate Station will show a low battery warning. • First warning: The warning will appear approximately one month before the battery is fully depleted - when the voltage drops to around 2.8V. -
Page 12: Troubleshooting Guide
6. Troubleshooting If the Climate Station or Sensor Unit operates slowly, try the following actions. • Wait 10 seconds after removing the battery before inserting them again and let the Climate Station load. • Avoid pressing the keys continuously if the device responds slowly. - Page 13 F&H Group A/S hereby declares that the Wireless Climate Station item number 34197 complies with directive 2014/53/EU. The full text of the EU declaration of conformity is available at the following Internet address: www.fh- group.dk F&H Group A/S hereby declares that the Wireless Sensor item number 34198 complies with directive 2014/53/EU.
Need help?
Do you have a question about the Climate Station and is the answer not in the manual?
Questions and answers