Advertisement
Quick Links
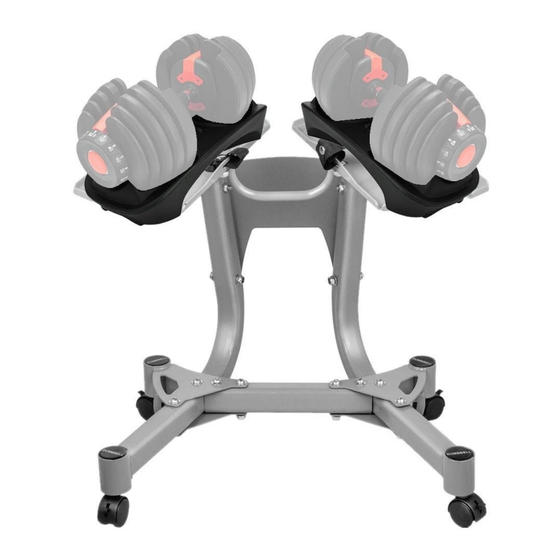
Vielen Dank für den Kauf eines
Kurzhantelständers KS1.
Bitte lesen Sie sich die folgenden Installationshinweise
sorgfältig durch. Die Motea GmbH übernimmt keine Haftung für
Sach-
und/oder
Personenschäden,
die
durch
eine
unsachgemäße beziehungsweise mangelhafte Montage oder
Nutzung entstehen.
Technische Änderungen, Druckfehler und Irrtümer vorbehalten.
Thank you for purchasing a
dumbbell stand KS1.
Please read the following installation instructions carefully.
Motea GmbH accepts no liability for damage to property and/or
personal injury resulting from improper or defective installation
or use.
Technical changes, misprints and errors excepted.
Scope of delivery
Lieferumfang /
Advertisement

Summary of Contents for motea Cranit KS1
- Page 1 Thank you for purchasing a dumbbell stand KS1. Please read the following installation instructions carefully. Motea GmbH accepts no liability for damage to property and/or personal injury resulting from improper or defective installation or use. Technical changes, misprints and errors excepted.
-
Page 2: Scope Of Delivery
Scope of delivery Lieferumfang / Description Description Bottom cross brace Left stabilizer Washer Screw 3“ Right stabilizer Stand leg Screw 2.75“ Spring washer / Left platform Screw 1” Right platform Caster Towel bar Foot peg Center plate Hex key Holding strap Assembly instructions Aufbauanleitung / Note: Do not fully tighten the screws until the end of assembly. - Page 3 Assembly instructions Aufbauanleitung / x 1 - x 1 - x 2 - x 2 - x 2 - Assemble the right leg as shown in the illustration. x 1 - x 4 - x 4 - x 4 - Connect the support legs to the cross strut.
- Page 4 Assembly instructions Aufbauanleitung / x 4 - x 4 - x 4 - x 4 - Install the central plate on the legs. Make sure that the edges of the central plate are against the outside of the legs and that the logo is aligned the right way round. x 1 - x 2 - x 2 -...
- Page 5 Assembly instructions Aufbauanleitung / x 1 - x 2 - x 2 - x 2 - Fit the right-hand platform to the right-hand support leg. When aligning the plate, make sure that the holes are facing inwards. x 1 - x 4 - x 4 - Mount the towel rail.
- Page 6 Assembly instructions Aufbauanleitung / x 4 / x 4 - x 4 - x 2 - x 2 - Install holding straps and optionally castors or feet.
Need help?
Do you have a question about the Cranit KS1 and is the answer not in the manual?
Questions and answers