TP-Link TL-PA4010P, TL-PA4015P Manual
- User manual (28 pages) ,
- Specifications (2 pages) ,
- Quick installation manual (2 pages)
Advertisement
About This Guide
This guide is a complement to Quick Installation Guide. The Quick Installation Guide provides instructions for quick internet setup, while this guide contains details of each function and demonstrates how to configure them in typical scenarios.
Features available in Powerline Adapter may vary by model and software version. Powerline Adapter availability may also vary by region or ISP. All images, steps, and descriptions in this guide are only examples and may not reflect your actual Powerline Adapter experience.
†Compatible with all HomePlug AV and AV2 Standard Powerline adapters. This product may not be compatible with routers or gateways with firmware that has been altered, is based on open source programs, or are non-standard or outdated.
‡Maximum Powerline signal rates are the physical rates derived from HomePlug AV/ AV2 specifications. Actual Powerline data throughput and Powerline range are not guaranteed and will vary as a result of network conditions and environmental factors, including electrical interference, volume of traffic and network overhead, AFCI circuit breaker, and whether Powerline is located on a separate circuit.
Conventions
In this guide, the following conventions are used:
| Convention | Description |
| Teal Underlined | Hyperlinks are in teal and underlined. You can click to redirect to a website or a specific section. |
| Teal | Key information appears in teal, including management page text such as menus, items, buttons and so on. |
 Note: Note: | Ignoring this type of note might result in a malfunction or damage to the device. |
 Tips: Tips: | Indicates important information that helps you make better use of your device. |
More Info
- The latest software, management app and utility are available from the Download Center a thttps://www.tp-link.com/support.
- The Quick Installation Guide (QIG) can be found where you find this guide or inside the product package.
- Specifications can be found on the product page at https://www.tp-link.com.
- A TP-Link Community is provided for you to discuss our products athttps://community.tp-link.com.
- Our Technical Support contact information can be found at the Contact Technical Support page at https://www.tp-link.com/support.
Get to Know Your Powerline Adapter
Product Overview
TP-Link powerline adapter aims to extend your existing home network, with the help of your home's electrical circuit.
The integrated power socket on the powerline adapter provides an outlet for other electronic devices. Its built-in noise filter eliminates electrical signal noise and therefore guarantees the high quality transmission of data via powerline.
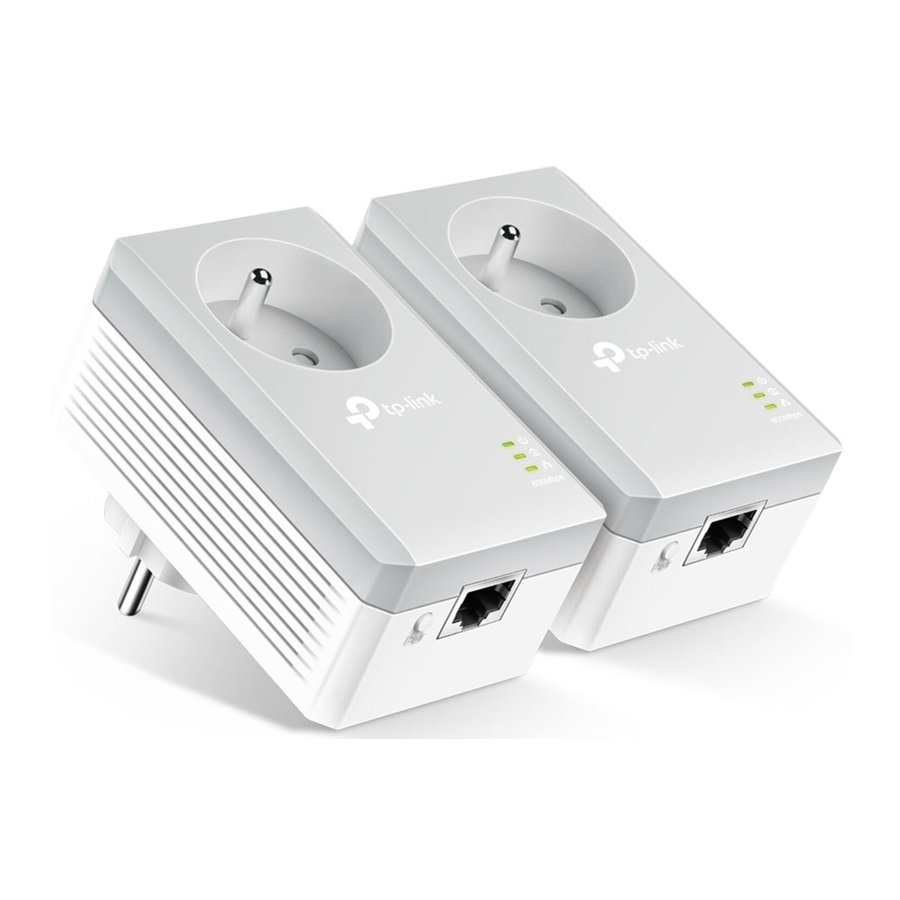
Product Appearance
Your powerline adapter may differ in appearance slightly from that depicted because of the region and product version. TL-PA4010P (European version) is used for demonstration in this guide.
LED Legend

LEDs indicate the powerline adapter's working status. For more details, please refer to the following table.
| Name | Status | Indication |
 Power Power | On/Off Blinking | The powerline adapter is on or off. Quickly: Pairing is in process. Slowly: Power-Saving Mode is on.* |
 Powerline Powerline | On Off | The powerline adapter is connected to a powerline network. The powerline adapter is not connected to any powerline network. |
 Ethernet Ethernet | On Off | The Ethernet port is connected. The Ethernet port is not connected. |
* If the device connected to the adapter is turned off or inactive for more than 5 minutes, the powerline adapter will automatically switch to Power-Saving Mode.
Physical Interface

Integrated Electrical Socket
The integrated electrical socket is a pass-through AC outlet used to power other electronic devices. Its built-in noise filter reduces electrical noise and therefore guarantees performance.
Power Plug
The powerline adapter has a Plug that can be connected to a power socket.
Pair Button
Press and hold the button for 1 second to set up or join a powerline network. Go to Secure Your Powerline Network by Pairing for more information.
Press and hold the button for more than 6 seconds to reset the powerline adapter to factory defaults.
Ethernet Port
Connect the Ethernet port to your wired devices, such as a computer, a router or a game console, via an Ethernet cable.
Use Your Powerline Adapter
Before You Start
Powerline adapters work in pairs. You should have at least two powerline products to build a powerline network. To optimize your network performance, please follow these principles:
- All powerline adapters should be on the same electrical wiring system.
- Avoid plugging in powerline adapters and high-powered household devices (such as washing machines and refrigerators) close to one another.
- Plug the powerline adapter directly into a wall outlet. Do not plug the powerline adapter into a power strip, extension cord, or surge protector.

- Use the powerline adapter only in below directions.


Extend Your Wired Network by Plug & Play
I want to:
Use two powerline adapters to set up a new powerline network in my house.
For example, I have a router in my house, but there are not enough LAN ports for all my wired devices. I don't want complex and expensive cabling. People told me that I can solve this problem with two powerline adapters.
How can I do that?
- Connect one of the powerline adapters to an available LAN port of the router using an Ethernet cable.
- Plug the powerline adapter into a wall outlet.
- Plug the other powerline adapter into a wall outlet on the same electrical circuit at the place you want internet. Wait until the powerline LED
![]() turns on.
turns on.
![warning]() Note: If the LED is off, refer to What should I do if the Powerline LED
Note: If the LED is off, refer to What should I do if the Powerline LED ![]() is off? for detailed information.
is off? for detailed information. - Connect your wired device, such as a computer or game console, to the powerline adapter via an Ethernet cable.

 turns on.
Done!
Now enjoy the internet!
Secure Your Powerline Network by Pairing
All powerline adapters share some common factory settings, and can communicate with one another. If you want your powerline adapters to communicate only with your own powerline adapters, you should pair them. Thus a secured powerline network is formed and other powerline adapters can no longer join your powerline network without being paired.
Note: You can only pair two devices at a time.
I want to:
Secure my powerline network and prevent other powerline devices from being added to my network.
For example, I've extended my network using the Plug & Play method. Now I want to secure my network.
How can I do that?
- Verify all powerline devices' Power LEDs
![]() are solid on.
are solid on.
![information]() Tips: We recommend that you plug in your powerline devices near each other, or as close to each other as possible when pairing. Your settings will not be affected. The devices can be relocated to where they are needed once pairing is complete.
Tips: We recommend that you plug in your powerline devices near each other, or as close to each other as possible when pairing. Your settings will not be affected. The devices can be relocated to where they are needed once pairing is complete. - Press the Pair button on one of the powerline devices for 1 second. Its Power LED
![]() starts blinking.
starts blinking. - Within 2 minutes, press the Pair button on another powerline adapter for 1 second. Its Power LED
![]() starts blinking. When the Powerline LED
starts blinking. When the Powerline LED ![]() turns on, the pairing process is complete.
turns on, the pairing process is complete.


Done!
Enjoy your secure powerline network!
Add Another Powerline Adapter
I want to:
Add a new powerline adapter into the existing powerline network to extend my network.
For example, I've already set up a powerline network using powerline devices, but the network does not reach everywhere I need it to. I purchased another one to further extend my network.
How can I do that?
- Plug the new powerline adapter into a wall outlet near one of the existing powerline devices.


- Wait for a minute, and check whether the Powerline LED
![]() turns on. If it's on, skip to step 3. If it's not, continue with step 2 to pair the new powerline adapter into the secured powerline network.
turns on. If it's on, skip to step 3. If it's not, continue with step 2 to pair the new powerline adapter into the secured powerline network. - Press the Pair button on one of the existing powerline devices for 1 second. Its Power LED
![]() starts blinking.
starts blinking. - Within 2 minutes, press the Pair button on the new powerline adapter for 1 second. Its Power LED
![]() starts blinking. When the Powerline LED
starts blinking. When the Powerline LED ![]() turns on, the pairing process is complete.
turns on, the pairing process is complete.

- Press the Pair button on one of the existing powerline devices for 1 second. Its Power LED
- Relocate the new powerline adapter to the place where wired internet access is needed.


Done!
Enjoy the internet through your extended network!
Manage Your Powerline Network via tpPLC Utility
The tpPLC utility enables you to view and manage your TP-Link powerline network. Its bold and intuitive interface helps you easily configure each powerline device.
You can find the utility and its user guide on the product support page at https://www.tp-link.com.
FAQ (Frequently Asked Questions)
How do I reset my powerline adapter?
With the powerline adapter plugged into the wall socket, press and hold its Pair button for more than 6 seconds until the Power LED ![]() goes off momentarily and comes back on.
goes off momentarily and comes back on.
What should I do if the Powerline LED ![]() is off?
is off?
- Try another wall socket and make sure all powerline devices are on the same electrical circuit.
- Try to set up a powerline network by pairing. Refer to the section aboveSecure Your Powerline Network by Pairing for instructions.
- If the problem persists, contact our Technical Support.
How to troubleshoot if there is no internet connection via my powerline network?
- Make sure all powerline devices are on the same electrical circuit.
- Make sure the Powerline LEDs
![]() are lit on all of your powerline devices. If they are not, pair all powerline devices according to Secure Your Powerline Network by Pairing.
are lit on all of your powerline devices. If they are not, pair all powerline devices according to Secure Your Powerline Network by Pairing. - Make sure all devices are correctly and securely connected.
- Verify that you have an internet connection by connecting your computer directly to the modem or the router.
What can I do if a successfully-paired powerline device does not reconnect after it has been moved to a new location?
- Try another socket on the same electrical circuit.
- Try to pair it again, and make sure the Powerline LED
![]() is on.
is on. - Check for possible interference due to washing machines, air conditioners or other household appliances. Some powerline devices have an integrated electrical socket. You can plug appliances into this socket to remove the electrical noise originating from them, using a power strip if necessary.
Website: http://www.tp-link.com/us/
Tel: +1 626 333 0234
Fax: +1 909 527 6804
E-mail: sales.usa@tp-link.com
Safety Information
- Keep the device away from water, fire, humidity or hot environments.
- Do not attempt to disassemble, repair, or modify the device.
- For passthrough devices, plug the power strips into the integrated electrical sockets of the devices, but devices of the same or another type not be stacked in normal use.
![]()
- Plug the powerline devices directly into the wall outlets but not the power strips.
- Make sure the power socket has a good contact with the ground.
- Nicht hintereinander stecken.
- Operating Temperature: 0°C ~ 40°C (32°F ~104°F) Please read and follow the above safety information when operating the device. We cannot guarantee that no accidents or damage will occur due to improper use of the device. Please use this product with care and operate at your own risk.

Explanation of the symbols on the product label
Symbols may vary from products.
Note: The product label can be found at the bottom of the product and its I.T.E. power supply.
| Symbol | Explanation |
 | Class II equipment |
 | Class II equipment with functional earthing |
 | Alternating current |
 | DC voltage |
 | Polarity of output terminals |
 | Indoor use only |
 | Dangerous voltage |
 | Caution, risk of electric shock |
 | Energy efficiency Marking |
 | Protective earth |
 | Earth |
 | Frame or chassis |
 | Functional earthing |
 | Caution, hot surface |
| | Caution |
 | Operator's manual |
 | Stand-by |
 | "ON"/"OFF" (push-push) |
 | Fuse |
 | Fuse is used in neutral N |
 | Caution, avoid listening at high volume levels for long periods |
 | Disconnection, all power plugs |
| m | Switch of mini-gap construction |
| µ | Switch of micro-gap construction (for US version) Switch of micro-gap / micro-disconnection construction (for other versions except US) |
| ε | Switch without contact gap (Semiconductor switching device) |
Documents / Resources
References
TP-Link Product Support - Wireless Networking Equipment Support
![www.tp-link.com]() WiFi Networking Equipment for Home & Business | TP-Link
WiFi Networking Equipment for Home & Business | TP-Linkhttps://community.tp-link.com
![www.tp-link.com]() WiFi Networking Equipment for Home & Business | TP-Link
WiFi Networking Equipment for Home & Business | TP-Link![www.tp-link.com]() WiFi Networking Equipment for Home & Business | TP-Link
WiFi Networking Equipment for Home & Business | TP-Link
Download manual
Here you can download full pdf version of manual, it may contain additional safety instructions, warranty information, FCC rules, etc.
Advertisement


Need help?
Do you have a question about the TL-PA4010P and is the answer not in the manual?
Questions and answers