Advertisement
- 1 Introduction
- 2 Unpack Your Gift Box
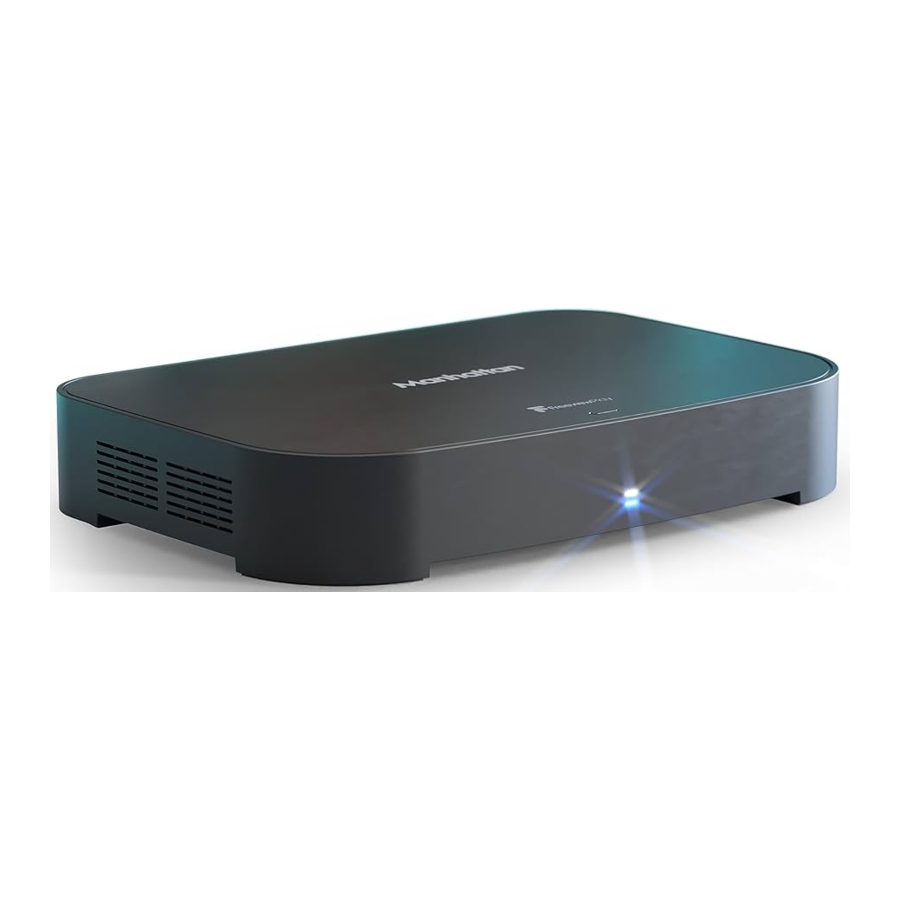
- 3 Top & Front Panel Features
- 4 Connect Up
- 5 Switch On & Set Up
- 6 Accessibility Options
- 7 Home Screen & Menus
- 8 Watching TV
- 9 TV Guide
- 10 Recordings
- 11 Live Pause
- 12 Featured & On Demand
- 13 Watchlist
- 14 Search
- 15 Reminders
- 16 Controlling Your TV
-
17
Troubleshooting
- 17.1 No picture or sound from the unit
- 17.2 No signal after moving home
- 17.3 The unit switches off after 3 hours
- 17.4 You've forgotten your PIN
- 17.5 Loop Out doesn't work in Standby
- 17.6 Video in apps buffers/stutters or stops altogether
- 17.7 The unit does not respond to the unit remote
- 17.8 Clearing Recently Deleted recordings doesn't free up space
- 17.9 The start or end of recorded programmes is missing
- 18 Your Remote
- 19 Documents / Resources
Introduction
We're excited to bring you all your favourite TV, all in one place and all for free. From edge-of-the-seat thrillers to laugh-a-minute comedies, your T4•R makes it easy to find and enjoy all your favourite subscription-free channels and programmes.
Learn All About Your Product
Available on our website or directly on the T4•R, the Help section is where you'll find detailed information on setting up, using, configuring and troubleshooting your T4•R.
→ Help on the Web
Scan the QR code with your phone or visit:
manhattan-tv.com/help/t4r

→ Help on the T4•R
After installing, press HOME then select Help.
Unlock the Full Unit Experience
While your T4•R works great as a standalone TV recorder with an aerial, connecting it to the internet unlocks its full potential. Enjoy popular apps such as BBC iPlayer, ITVX and more, along with integrated catch up and a vast collection of on demand programmes and movies. To get started, simply connect your T4•R to your Wi-Fi or use an Ethernet cable to connect to your router.
 Before You Plug In
Please read the Safety section of the Important Information booklet.
Unpack Your Gift Box

Top & Front Panel Features

Connect Up
You Need
- A TV with an HDMI input.
- A TV aerial and cable. While indoor (portable) aerials may pick up some Freeview channels, for best results and full coverage, use a rooftop aerial.
Required Connections

- Connect a TV aerial cable (not included) from your aerial wall socket to the T4•R's AERIAL IN socket.
- Connect the included HDMI cable from an HDMI socket on your TV to the T4•R's HDMI socket.
- Connect the included power adapter to the T4•R's POWER socket, then plug the other end into a wall socket that is turned off.
Optional Connections
- If you'd rather use a wired connection instead of Wi-Fi, connect an Ethernet cable (not included) from the T4•R's ETHERNET socket to your broadband router.
- To use your TV's tuner, connect an aerial cable (not included) from your T4•R's LOOP OUT socket to your TV's aerial socket. Please note that to conserve energy, the LOOP OUT socket is disabled in standby. However, after set-up you can change this by pressing HOME and going to: Settings > System > Standby Options.
- If you have an AV receiver that doesn't support HDMI, you can connect an optical audio cable (not included) from your T4•R's OPTICAL socket to your AV receiver.
Switch On & Set Up
- Insert the batteries into the T4•R remote. To do this, slide the cover on the back of the remote, and match the+ and - symbols to what is marked on the inside of the compartment. Then, replace the cover.
- Turn on your TV.
- Turn on the wall socket you connected the T4•R to and it will switch on.
- Your TV should automatically switch to the HDMI input you connected the T4•R to. If it doesn't, use your TV remote to select the correct input. Most TV remotes use a button labelled AV, SOURCE, INPUT,
![]() or
or ![]() , which will cycle through the TV's inputs with each press.
, which will cycle through the TV's inputs with each press. - Follow the on-screen instructions to set up your T4•R.
Accessibility Options
Zoom Menus
Press ZOOM on your T4•R remote to enlarge menus for easier viewing. To return to normal size, press ZOOM again.
Accessibility Settings & Menu Preferences
Customise accessibility and menu preferences in the Settings menu by pressing HOME and selecting Settings. Choose Accessibility & Language for Subtitles and Audio Description options, and Menu Preferences to adjust menu transparency, set the default TV Guide view and more.
Filter Programmes
All menus enable you to filter programmes by Subtitles, Audio Description or Sign Language. The current filter status is displayed on-screen alongside a hint to press ![]() to show filter options. By default, filters are cleared after the T4•R enters standby. To change this, press HOME and go to: Settings > Menu Preferences > Clear Filters Automatically.
to show filter options. By default, filters are cleared after the T4•R enters standby. To change this, press HOME and go to: Settings > Menu Preferences > Clear Filters Automatically.
Subtitles & Audio Description
While watching TV, press S/AD, then select the on-screen option to turn Subtitles or Audio Description on or off.
Home Screen & Menus

The Home Screen
Quickly access all your T4•R's menus, apps and live programmes from the Home Screen. Press HOME on your T4•R remote to open it from anywhere.
Navigating Menus
Use the directional pad to navigate through menus and press OK to select the highlighted item. When a programme is highlighted, the actions you can take and the related buttons to press are shown at the top of the screen. For example, you can press OK to watch a live programme or set a reminder for an upcoming programme, and press ![]() to get more information about a programme, including showings, future episodes and episodes available to play on demand.
to get more information about a programme, including showings, future episodes and episodes available to play on demand.
Press BACK to return to the previous step, such as the current time when browsing the TV Guide, or back to the previous menu.
Exiting Menus & Apps
To close menus and return to full-screen TV, press EXIT. You can also press EXIT to close an app like BBC iPlayer and return to where you opened it.
Watching TV

Browsing Channels & Programmes
While watching TV, press ![]() to show the Channel Browser. Use the directional pad to browse what's on later or on other channels. If you've added favourite channels (see "Favourite Channels"), press
to show the Channel Browser. Use the directional pad to browse what's on later or on other channels. If you've added favourite channels (see "Favourite Channels"), press  to cycle through them.
For more information about a highlighted programme, including showings, future episodes and episodes available to play on demand, press ![]() again.
again.
To set a recording for a programme, press ![]() . If the programme is part of a series, you will be given the choice to record the entire series or just that episode. For more information about recordings, please see "Recordings".
. If the programme is part of a series, you will be given the choice to record the entire series or just that episode. For more information about recordings, please see "Recordings".
Changing Channels
- Press P-UP or P-DOWN to go up or down a channel
- Use thenumber buttons to directly enter a channel number
- Press
![]() to return to the last channel viewed
to return to the last channel viewed
Live Pause
Press ![]() to pause live TV for up to two hours, or press
to pause live TV for up to two hours, or press ![]() to rewind to any point within the last two hours since you started viewing the channel. See "Live Pause" for more.
to rewind to any point within the last two hours since you started viewing the channel. See "Live Pause" for more.
TV Guide

Open the TV Guide from the Home Screen or by pressing GUIDE on your T4•R remote. You can browse what's on over the next week, or catch up on available programmes from the past week.
The top of the screen displays information and actions available for the highlighted programme. To watch a programme or set a reminder for a future programme, press OK. Programmes marked with  will offer the option to restart them in the channel's associated app. Programmes marked with
  are available on demand and can be watched immediately. Alternatively, you can add them to your Watchlist to watch later by pressing
  (see "Watchlist").
To set a recording for a programme, press ![]() . If it is part of a series, you will be given the choice to record the entire series or just that episode. See "Recordings" for more.
. If it is part of a series, you will be given the choice to record the entire series or just that episode. See "Recordings" for more.
Quickly Navigate
- Press
![]() or
or ![]() to jump a day backwards or forwards.
to jump a day backwards or forwards. - Use the number buttons to enter a channel number directly.
- Press P-UP or P-DOWN to scroll up or down a page at a time.
 to jump a day backwards or forwards.
Favourite Channels
Press ![]() to add or remove the highlighted channel from your Favourites.
to add or remove the highlighted channel from your Favourites.
Changing View
There are three different views you can choose from by pressing ![]() :
:
- Grid: Displays seven channels simultaneously
- Channel: Lists programmes on a single channel
- Genre: Lists programmes of a specific genre (e.g. movies or sport)
Filtering by Channel & Accessibility
Press ![]() to show filter options. You can filter channels by Favourites, TV, HD or Radio, and programmes by Subtitles, Audio Description or Sign Language. Programmes not matching your filter will appear dimmed in the Grid view and hidden in the Channel and Genre views.
to show filter options. You can filter channels by Favourites, TV, HD or Radio, and programmes by Subtitles, Audio Description or Sign Language. Programmes not matching your filter will appear dimmed in the Grid view and hidden in the Channel and Genre views.
More Info & Episodes
Press ![]() to get more information about a programme, including showings, future episodes and episodes available to play on demand.
to get more information about a programme, including showings, future episodes and episodes available to play on demand.
Programme Icons
Icons shown at the top of the screen indicate the features of the highlighted programme. When a guidance icon is shown, press ![]() to check for more details.
to check for more details.
![]()
*The recording icon will be grey ![]() for alternative broadcasts of the same programme and green
for alternative broadcasts of the same programme and green ![]() when the programme has already been recorded. †For the complete list of recording and guidance icons, open Help from the Home Screen.
when the programme has already been recorded. †For the complete list of recording and guidance icons, open Help from the Home Screen.
Recordings

Your T4•R can record two programmes at the same time as you watch a third channel with live pause. If you try to record more than two programmes at once, the T4•R will alert you and provide options to resolve the clash, including alternative broadcasts if available.
To view and manage your recordings, scheduled recordings and reminders, open Recordings from the Home Screen or press RECS on your T4•R remote. The menu is divided into categories displayed as tabs across your screen. The Scheduled category is always shown, while others appear when they contain recordings. To get around, use the directional pad to navigate between categories and recordings.
The main categories are:
- Scheduled: Your planned recordings and reminders.
- All: A complete list of all your recordings.
- Continue: Recordings or series you're in the middle of watching.
- Series: Recordings that are part of a series.
- Kept: Recordings you've chosen to keep, that won't be deleted automatically.
- Recently Deleted: Deleted recordings that can be recovered.
Additionally, genres like Movies, Sport and Kids will appear as categories when there are one or more recordings in that genre.
Recordings from a series or programmes split into multiple parts are automatically organised into folders. To play a recording or open a folder, press OK. If you've previously started watching, you'll have the option to resume or restart playback.
Watched Status
The solid circle  before a recording in the list means you haven't watched it yet. An empty circle O means you've started but not finished it. When a partially watched recording is highlighted, a blue bar indicates your progress.
Organising Recordings
Press ![]() to show options for organising the highlighted recording or folder.
to show options for organising the highlighted recording or folder.
Change Genre
Recordings are grouped into categories based on their genre. Changing a recording's genre lets you customise its placement within the menu, and this change applies to all episodes in a series and parts of a split recording.
Mark as Watched/Unwatched
Manually mark a recording or entire folder as watched or unwatched using this option. This can be particularly useful when combined with the filtering options.
Keep/Don't Keep
When the hard drive is full, the T4•R auto-deletes older recordings to make space for new ones. Select Keep to protect a recording from removal.
Deleting & Recovering Recordings
Press ![]() to delete a recording or folder. By default, there's no warning when deleting a recording, but a warning appears for folders. You can change this in: Settings > Recording. If you accidentally delete something, you can recover it from the Recently Deleted tab for up to 30 days or until space is needed.
to delete a recording or folder. By default, there's no warning when deleting a recording, but a warning appears for folders. You can change this in: Settings > Recording. If you accidentally delete something, you can recover it from the Recently Deleted tab for up to 30 days or until space is needed.
Filtering Recordings
Press ![]() to show filter options. You can filter recordings by watched status, as well as the availability of Subtitles, Audio Description or Sign Language. Recordings, categories and folders that don't match the filter will be hidden. Please note that the Scheduled and Recently Deleted categories cannot be filtered.
to show filter options. You can filter recordings by watched status, as well as the availability of Subtitles, Audio Description or Sign Language. Recordings, categories and folders that don't match the filter will be hidden. Please note that the Scheduled and Recently Deleted categories cannot be filtered.
During recording, a white LED on the front of the T4•R will be visible. You can disable this in standby by going to: Settings > Recording.
Sorting
Press ![]() to change to the next sort option for your recordings:
to change to the next sort option for your recordings:
- Most categories are sorted New to Old by default, with the newest recordings at the top. You can reverse this order or change it to A-Z for alphabetical sorting.
- The Scheduled category is sorted by Upcoming, with what's coming up next by default. You can change this to A-Z for alphabetical sorting.
- Inside series folders, the order is Old to New by default, with the oldest recordings at the top. You can reverse this order.
- The Continue category can't be sorted and always displays your most recently played recordings at the top.
Your sort choices are remembered for future browsing.
The Scheduled Category
This is where you'll find all your upcoming recordings and reminders, with series episodes from the next seven days grouped into a folder. Press OK to open a folder or view options for scheduled items, including cancelling recordings or series, adding/removing reminders, resolving clashes and skipping episodes. To change the genre of a scheduled recording or series, press ![]() .
.
Future episodes in a series may clash with other scheduled recordings. When a clash occurs, a yellow warning icon ![]() will appear on the Scheduled tab to alert you.
will appear on the Scheduled tab to alert you.
Episodes that won't be recorded due to the clash can be identified by the Series Recording Clash icon ![]() next to them. To resolve a clash, select it and press OK.
next to them. To resolve a clash, select it and press OK.
Playback
To pause or resume playback, press either ![]() or OK. There are multiple ways to control and navigate your recordings:
or OK. There are multiple ways to control and navigate your recordings:
- Seeking: Press
![]() or
or ![]() to rewind or fast forward, increasing the speed with each press. Press the opposite button to decrease the speed.
to rewind or fast forward, increasing the speed with each press. Press the opposite button to decrease the speed. - Short Skips: Press
![]() to skip back 10 seconds or
to skip back 10 seconds or ![]() to skip forward 30 seconds. To change the intervals, go to: Settings > Playback.
to skip forward 30 seconds. To change the intervals, go to: Settings > Playback. - Large Leaps: Hold
![]() or
or ![]() to jump in increments of 10% of the recording.
to jump in increments of 10% of the recording. - Go To Specific Time: Press
![]() to open the Go To menu. Use the number buttons to enter a specific time, or press
to open the Go To menu. Use the number buttons to enter a specific time, or press ![]() again to restart playback.
again to restart playback.
 or
or  to rewind or fast forward, increasing the speed with each press. Press the opposite button to decrease the speed.
 to skip back 10 seconds or
 To stop playback and return to Recordings, press or EXIT. By default, recordings in folders will play continuously through, but this can be changed by going to:
Settings > Playback > Autoplay Next Recording.
Live Pause

Take control of live TV with Live Pause on the T4•R:
- Press
![]() to pause the current channel for up to two hours.
to pause the current channel for up to two hours. - Press
![]() to go back to any point within the last two hours since you started watching the channel.
to go back to any point within the last two hours since you started watching the channel.
In either case, you'll enter Live Pause and the Playback Bar will be shown. You can use seeking, short skipping and large leaps as you would during recording playback (see "Playback"). While in Live Pause, pressing ![]() will show the Playback Bar instead of the Channel Browser (see "Watching TV" section).
will show the Playback Bar instead of the Channel Browser (see "Watching TV" section).
The T4•R continuously records and stores up to the last two hours of the channel you're watching in a buffer. This means that if you've been watching a channel for a while, the buffer may contain multiple programmes. The Playback Bar indicates the current programme and channel you're watching. If you rewind past the start of a programme, the Playback Bar will update to show the previous programme.
To record the programme you're watching, press ![]() . This will include any of the programme that is already in the buffer.
. This will include any of the programme that is already in the buffer.
Keep in mind that when you change channel, the buffer is cleared, and recording to the buffer starts again for the new channel.
To return to live TV, simply press ![]() or EXIT.
or EXIT.
Featured & On Demand

Open Featured from the Home Screen to explore top on-demand programmes from all your favourite broadcasters, arranged into categories like Comedy, Movies and Sport. Use the directional pad to browse through the categories and programmes, or press  to display the complete list of categories for selection.
On-demand programmes are marked with the Guide, Search Results and More Info. Press OK to play them in their associated player app, or ![]() to add them to your Watchlist for later viewing.
to add them to your Watchlist for later viewing.
Watchlist
Open Watchlist from the Home Screen to browse your collection of on- demand programmes. When a programme is highlighted, its availability is shown at the top of the screen. After expiring, it will move to the Recently Expired section for 14 days before removal. To remove a programme from your Watchlist, press ![]() .
.
In Featured, Watchlist and all content menus, press  to filter the programmes shown, or press
  for more info and episodes for a programme.
Search
To find broadcast and on demand programmes, open Search from the Home Screen or by pressing SEARCH on your T4•R remote.
Enter a programme's name using the on-screen keyboard and suggestions will appear as you type. To view the results, highlight a suggestion or your search term and press OK.
Recent Searches
When you open Search, your recent searches will be displayed for quick selection. To clear all recent searches, press ![]() before entering a search term. Alternatively, to remove only a specific search, highlight it and press
before entering a search term. Alternatively, to remove only a specific search, highlight it and press ![]() .
.
Reminders

To add a reminder for an upcoming programme, highlight it and press OK. To cancel the reminder, press OK again while the programme is highlighted. You can find all your reminders in the Scheduled section of Recordings.
Reminders alert you shortly before a programme begins. By default, reminders are shown only when the T4•R is active and not in standby. To watch the programme, select Watch before the reminder countdown ends. If not selected in time, the reminder will be cancelled and the channel will not change.
There's a setting called Reminder Auto Watch that you can change by pressing HOME and going to Settings > System. When enabled, the T4•R will automatically switch on from standby for the reminder and change to the appropriate channel. If the T4•R is already active, reminders will appear as normal, with the channel changing automatically once the countdown ends.
Controlling Your TV
Using HDMI-Control
HDMI Control allows your T4•R to communicate with your TV. The Activation Sync feature is turned on when you first set up, providing the following benefits:
- Turning on your T4•R will also power on your TV and switch to the correct input.
- Turning off your TV will automatically switch off your T4•R.
To turn off Activation Sync, press HOME and go to: Settings > System > HDMI Control.
Additionally, you can enable the Turn Off Devices feature under HDMI Control to have your TV and any connected devices enter standby when your T4•R goes into standby.
Note: HDMI Control (also called HDMI-CEC) must be supported by your TV and enabled for these features to operate Manufacturers may label it differently, such as Anynet+ (Samsung), Viera Link (Panasonic), Simplink (LG), BRAVIA Link and BRAVIA Sync (Sony), or Aquos Link (Sharp).
Using the Unit's Learning Remote

You can teach the five highlighted buttons on the T4•R remote to control your TV:
- TV
![]() (TV power)
(TV power) - TV/AV (input selection)
- Volume +
- Volume -
- Mute
Initially, the Volume and Mute buttons control your T4•R's sound. However, for the best sound quality and consistent volume across your TV's sources, you can teach these buttons to control your TV's volume directly instead.
The TV ![]() and TV/AV buttons will remain inactive until you teach them to control the corresponding functions on your TV.
and TV/AV buttons will remain inactive until you teach them to control the corresponding functions on your TV.
Learning Steps
Before Starting
- Set your T4•R's volume to maximum to ensure the correct volume level from your TV after learning is complete.
- Put your T4•R in standby to avoid it responding to the T4•R remote during the learning steps.
- Place your T4•R and TV remotes on a flat surface, facing each other, a small distance apart.


- Press the S/AD and ZOOM buttons on the T4•R remote for 3 seconds to enter learning mode.
- The
![]() button on the T4•R remote will glow blue.
button on the T4•R remote will glow blue.
- The
- Press the button on the T4•R remote you want to teach: Volume +, Volume –, Mute, TV/AV or TV
![]() .
. - The
![]() button on the T4•R remote will start blinking.
button on the T4•R remote will start blinking.
- The
- Press and hold the corresponding button on the TV remote.
- If successfully learnt, the light from the
![]() button on the T4•R remote will turn off for a second, then turn solid blue.
button on the T4•R remote will turn off for a second, then turn solid blue. - If it fails to be learnt, the light from the T4•R remote's
![]() button will flash 4 times, and you will need to repeat Step 2.
button will flash 4 times, and you will need to repeat Step 2.
- If successfully learnt, the light from the
- Repeat steps 2 and 3 for all the buttons to teach.
- Press OK on your T4•R remote to exit learning mode.
- The light from the T4•R remote's
![]() button will turn off.
button will turn off.
- The light from the T4•R remote's
Test each button with your TV. If a button does not work, repeat the steps to teach it again. Please note that some TVs use non-standard remote signals and may not be compatible with the T4•R remote.
Resetting Your Remote
To reset all programmed buttons and return them to their original state, press and hold the S/AD and RED buttons for 3 seconds until the ![]() button blinks blue.
button blinks blue.
Troubleshooting
| PROBLEM | POSSIBLE CAUSE | ACTION |
No picture or sound from the unit | The HDMI cable may be disconnected. | Check the HDMI connections between the T4•R and your TV. |
| The input the T4•R is connected to may not be selected on your TV. | Select the correct HDMI input (see your TV's manual for guidance). | |
| Your TV may not correctly communicate the resolutions it is capable of and an incompatible resolution may be selected. |
| |
| The picture and sound keep breaking up or there is no signal | Weak signal from your aerial. | Check your signal by pressing HOME and selecting Information. If it's weak or not present, get a professional to check your installation – your aerial may provide a better signal if it is realigned or moved somewhere else. We don't recommend using an indoor aerial. As a last resort, try using a signal amplifier or booster to improve reception. |
| Some TV aerials installed with a signal amplifier need a power supply from the TV box. | Activate the T4•R's +5V DC supply by going to: Settings > System > 5V Antenna Power. | |
No signal after moving home | The new home is in a different transmission area. | Select: Settings > Channels > Auto Retune > Retune & Clear Preferences |
The unit switches off after 3 hours | By default the T4•R is set to go to standby after 3 hours without interaction. | Turn Auto Standby off or select a different duration in: Settings > System > Standby Options. |
You've forgotten your PIN | You've forgotten it or someone has changed it. | Your PIN can be reset with the master PIN. Please contact us. |
Loop Out doesn't work in Standby | The Loop Out in Standby setting is not turned on. | Turn it on in: Settings > System > Standby Options. |
Video in apps buffers/stutters or stops altogether | Your broadband is not fast enough. A minimum of 3Mbps is recommended for internet video. Faster broadband may still be affected by usage from other devices, reducing the speed available for the T4•R. | Check your broadband speed with your internet provider and try running an online speed test on a computer or mobile device. If the speed you are getting is less than expected there may be other devices on your network using bandwidth. Try disconnecting them. |
| Your T4•R is using your Wi-Fi at the same time as too many other devices. | Disconnect other devices from your Wi-Fi or connect your T4•R to your internet router with an Ethernet cable. | |
| The Wi-Fi signal from your internet router is poor. You can check the Wi-Fi signal by going to: Settings > Internet. | Try adjusting the location of your Wi-Fi router and/or its antenna(s). Also try moving the T4•R itself. Alternatively, connect your T4•R to your internet router with an Ethernet cable. | |
The unit does not respond to the unit remote | The front of the T4•R is obstructed. | Ensure the front of the T4•R is not obstructed. |
| Batteries are weak. | Replace batteries in the T4•R remote. | |
| The volume & mute buttons on the T4•R remote do nothing | They have been programmed to control the volume of another device. | Reset your T4•R remote by following the instructions in Resetting Your Remote. |
Clearing Recently Deleted recordings doesn't free up space | Recently Deleted recordings are already accounted for in the free space shown. | N/A |
| You can't watch a third channel while recording two others | Viewable channels depend on the two recording channels: two on the same multiplex allows any channel; two on different multiplexes limits you to channels from one of the two multiplexes. | For a visual indicator of when a channel is unavailable to watch, turn on Flag Available Channels in Settings > Menu Preferences. |
The start or end of recorded programmes is missing | The broadcaster is not signalling the start or end accurately. | Add manual padding by going to: Settings > Recording > Padding Options > Padding Type. |
Your Remote

Standby Button Blink
The standby button blinks blue when a button is pressed. To toggle this off or on, hold the 'S/AD' and '1' buttons for 3 seconds.
The details in this guide are correct at the time of going to print and are for guidance only. Product features outlined are subject to change at any time without notice.
For assistance, call us on 020 8450 0005 or visit manhattan-tv.com/help
Check Freeview coverage in your area by visiting freeview.co.uk/help
Documents / Resources
References
Manhattan TV: No monthly bills, no contracts, just TV… | Manhattan TV
Product Support | Manhattan TV
![freeview.co.uk]() Help | Freeview
Help | Freeview
Download manual
Here you can download full pdf version of manual, it may contain additional safety instructions, warranty information, FCC rules, etc.
Advertisement

Need help?
Do you have a question about the T4-R and is the answer not in the manual?
Questions and answers