Table of Contents
Advertisement
Advertisement
Table of Contents

Related Manuals for Rollei Rolleivision MSC 535 P

Summary of Contents for Rollei Rolleivision MSC 535 P
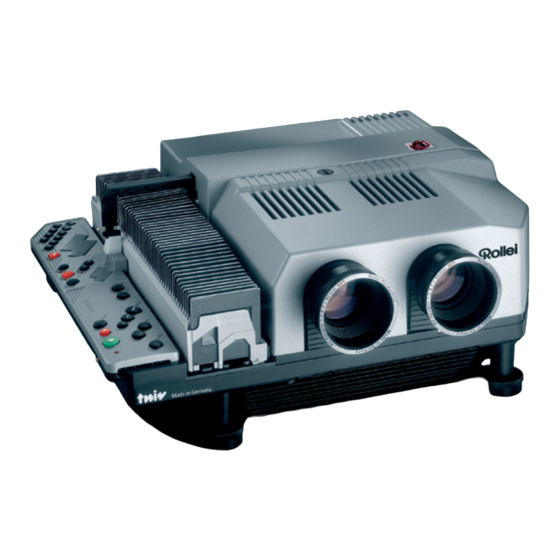
- Page 1 Rolleivision twin MSC 325 P / 535 P User’s manual...
-
Page 2: Table Of Contents
Selecting the memo function » “Enter mode 2” 27 Displays and warnings » Changing dissolve time with » 2.2.1 Changing magazines the IR remote control » » Dimming the lamps » 2.2.2 Rollei CM-55/50 magazine Stereo mode 2.2.3 Saving/reactivating projector 2.2.4... - Page 3 CO NT E NT S 3. Computer control » “DiaEdit Win” program » Sync-pulse control Helpful hints on slide projection » Standby/pause » The screen » Changing lenses » Sophisticated slide shows » Stereoscopic projection » In case of malfunction »...
-
Page 5: Components And Controls
COM PON ENTS A ND CONTR OLS 38 »autofocus off« button with LED Slide magazine 39 Red »enter« button with LED Feed heel on slide changer, adjustable 40 Numerical keyboard for onboard for different magazine types Slide changer programming 41 Screen-time/dissolve-time/slide/program Cover retaining screw IR sensor no. - Page 6 I NTR O D U CTION The Rolleivision Twin MSC 325 P and Rollei- projectors. At the end of the instructions, you vision MSC 535 P are highly precise opto- will find practical hints as well as troubles- electronic projectors designed for dissolve hooting help.
- Page 7 B R IEF IN STR U C TION S This section is intended for the hurried reader. It describes the most important steps for first- time use of the projector. Before using the projector for the first time » Loosen cover retaining screw 4, lift off cover and remove the transit locks 52.
-
Page 8: Brief Instructions
No. 1. NOTE: The following description refers to projection with DIN 108 standard magazines or the Rollei CM- 55/50 magazine supplied with the projector. Fitting the lenses »... - Page 9 B R IEF IN STR U C TION S Inserting the standard magazine » Check position of feed heel on slide changer. To do this, first press »stop/go« button 16, then green button 19. The slide changer moves out. » Use knurled screw to make feed heel horizontal for cardboard or thin plastic slide mounts.
- Page 10 BR I EF I NSTRUCTIONS Adjusting the image on the screen » Center the image on the screen and adjust it horizontally using the projector feet. » To eliminate lateral misalignment, shift projector or screen in relation to each other. Adjusting image registration With a 90mm lens, the screen should be at least 1.5 m away from the projector.
- Page 11 B R IEF IN STR U C TION S Loading the transmitter battery » Lift off the integral remote control 11. Open battery cover. Align battery connector with terminals of 9V battery and press down. Replace cover. » When using the remote control, make sure to point its transmitter diodes in the direction of the projector sensor.
- Page 12 BR I EF I NSTRUCTIONS Slide changing Forward and reverse: » Press green forward button or red reverse button 20. With timer: » Insert magazine. Activate screen time pressing »timer« button 13; to change the setting, press »+/-«. Upon depression of the »timer«...
- Page 13 B R IEF IN STR U C TION S Note displays and warnings » The red LED on the remote control blinks each time a command is input. » The timer LED signals the status of automatic timer-controlled slide changing: LED blinking = Screen time entered or timer cycle or dissolve interrupted.
- Page 14 BR I EF I NSTRUCTIONS Removing the magazine » After projection of the last slide, remove the magazine in forward direction. » To remove a partly run magazine, press »end« button 12. The projector completes the last command received, and the slide changer returns the loaded slides to their slots.
- Page 15 OPER AT ION Before using the projector for the first time » Loosen cover retaining screw 4, lift off cover and remove the transit locks 52. » Replace the cover and secure. NOTE: Keep transit locks for later use, for example, if the projector has to be shipped for servicing! Connecting the power cable The projector is designed for operation on...
-
Page 16: Loading Slides
To aid in this, maga- zine extension tracks are available as optional accessories, which are simply hooked into the projector. Rollei CM-55/50 magazines can also be used with most other commercially availab- le projectors. - Page 17 Other types of mount cannot be used. CS magazines are commercially available in sizes for 40 or 100 slides (not from Rollei). Fitting the lenses Screw the two lenses into their mounts, taking care not to leave any fingerprints on...
-
Page 18: Inserting The Magazine
OP ER ATI ON Inserting the magazine » 16 19 When using a standard magazine, always turn the feed heel to its horizontal position for cardboard-mounted slides or thin plastic mounts. » 90° To do this press »stop/go« button after switching on the projector. »... -
Page 19: Selecting A Specific Slide
OPER AT ION Selecting a specific slide If projection is to begin with a specific slide other than No. 1, the magazine may be advanced to the desired position. » To do this, keep front »focus« button depressed until the corresponding magazine slot is in the desired position. -
Page 20: Setting Up The Projector And Screen
OP ER ATI ON Setting up the projector and screen » Set up the projector properly: its front parallel to the screen, the lenses centered on the screen, with adequate space for cables and magazine travel. A stable horizontal posi- tion is very important. -
Page 21: Focusing
OPER AT ION Focusing » Focus slide 1 by turning the correspon- ding lens 8. » Then press the green button focus the second slide by turning the other lens. This basic manual focusing is required only once at the beginning of the show. Thereafter, the autofocus system will take over and auto- matically focus the two lenses. -
Page 22: Adjusting Image Registration
OP ER ATI ON Adjusting image registration » Press green forward button 19. » Watch the dissolve and check whether the two images register perfectly. » It is advisable to make this adjustment during a slow dissolve or after freezing the dissolve with the »stop/go«... -
Page 23: Remote Control
OPER AT ION Remote control » Leave the IR control in its tray on the projector if you wish to control the show directly from the projector. » For remote-control operation, remove the handset from its tray and open its cover. »... -
Page 24: Setting Dissolve Duration
OPERATION Setting dissolve duration The default dissolve time of the projector is two seconds. This setting is activated when the projector is switched on. » To change the dissolve time, press one of the three buttons marked »dissolve«. Available settings are 0.1, 3 and 6 seconds. The dissolve time entered is displayed on 41. -
Page 25: Laser Pointer
OPER AT ION Laser pointer » Press button on the side of the remo- te control to switch on the laser pointer built into the handset. The pointer is supplied with power by the 9V battery in the handset. CAUTION: Note that laser beams can harm your eyesight! Therefore:... -
Page 26: Timer-Controlled Slide Changing
OPERATION Timer-controlled slide changing » Activate the automatic screen time by briefly pressing the »timer« button 13. » Start the cycle by pressing the green for- ward button 19. To vary the screen time, proceed as follows: Screen time after depression of button 8 s. -
Page 27: Selecting The Memo Function
OPER AT ION Selecting the memo function With the »memo« button 21, up to 16 slides in a magazine can be electronically flagged for repetition after the run. » To do this, briefly press the »memo« button 21 each time a slide to be repeated appears on the screen. -
Page 28: Displays And Warnings
OPERATION Displays and warnings » on the remote control lights up for each input command. » The »timer« LED signals the status of automatic timer-controlled slide changing: LED blinking = Screen time set or timer cycle or dissolve interrupted. LED steady = Timer operating. -
Page 29: Changing Magazines
OPER AT ION Changing magazines The magazine has completed its forward or reverse run: » Pull magazine out from front or rear of projector. Insert new magazine. » Continue show pressing green forward button 19. Changing a magazine before the end of its run: »... -
Page 30: Rollei Cm-55/50 Magazine
OPERATION Using Rollei CM-55/50 magazines To ensure smooth attachment and removal of Rollei CM 55/50 magazines during projection, observe the following: » Push the first magazine forward as far as it will go and start magazine advance. Attach the second magazine not later than during projection of slide 45 of the first maga- zine. -
Page 32: Logging A Manually Controlled Slide Show
PROGRA MM IN G 1.1 Logging a manually controlled slide show Unnoticed by the user, the projector will automatically log the slide data in its working memory during a normal slide show. These include: Slide number as well as dissolve and screen time, which are logged under a com- mon program number. -
Page 33: Running A Test
P R OGR A M MI NG 1.2 Running a test Making corrections during a test run It is often necessary to change the dissolve or A manually controlled slide show can imme- screen time of a slide. diately be repeated automatically for testing »... -
Page 34: Chip Modules
PROGRA MM IN G 1.3 Chip modules A slide show logged in the program storage of the projector can be permanently saved in an interchangeable chip module 44. The slot for this module is located underneath the control panel. Modules are available with a capacity of approx. -
Page 35: Saving In The Chip Module
P R OGR A M MI NG 1.3.1 Saving in the chip module 1.3.2 Playing back a show saved in the module When saving a show in the module, the data logged in the working memory of the projec- To play back a show saved in a module it is tor are transferred to the module. -
Page 36: Miscellaneous
PROGRA MM IN G 1.3.3 Miscellaneous The »test« and »auto« modes are similar. The only difference is that corrections can be made in the »test« mode and that module data can be loaded down from the module in the »auto« mode. -
Page 37: Direct Access
» An uninterrupted show of over 100 slides can 2. By accessing a slide slot using the be assembled only with type CM 55/50 Rollei »focus« buttons and then pressing the hook-up magazines. If such a show is to start green forward button 19. -
Page 38: Program Number
P R OG RA MMING 2.1 Programming a slide show with the 2.1.1 Program number aid of “enter mode 1” »program« blinks in the display 41, promp- Input via the keyboard offers a much greater ting you to enter the program number via the number of possibilities for assembling a slide keyboard 40. -
Page 39: Slide Number
P R OGR A M MI NG 2.1.2 Slide number 2.1.3 Dissolve time After transfer of the program number, »posi- After transfer of the program number, »posi- tion« will now blink in display 41. The digit tion« will now blink in display 41. The digit field shows the slide (slot) number previously field shows the dissolve time previously ente- entered under this program number. -
Page 40: Screen Time (Timer)
P R OG RA MMING 2.1.4 Screen time (timer) Upon transfer of the dissolve time, »timer« NOTE: will blink in display 41. The digit field shows The display will always show the timer inter- the screen time previously entered under val in full seconds. -
Page 41: Special Functions
P R OGR A M MI NG 2.1.5 Special functions 2.1.6 Next program line After transfer of the screen time, »SF« will After all the parameters (slide slot number, now blink in display 41. dissolve time, screen time and special func- tion) have been entered for a slide, »positi- The digit field shows the program number of on«... -
Page 42: Enter Mode 1" Details
P R OG RA MMING 2.1.7 “Enter mode 1” details 2.1.8 Additional corrections during test With the aid of the timer-correction buttons the program may be checked line by line, In the »test« mode, the “enter mode 1” may with the green forward and the red reverse be used to make changes in a current show button2 19/20... -
Page 43: Description Of Special Functions
P R OGR A M MI NG 2.1.9 Description of special functions The term “special function” covers all func- tions other than standard dissolve of one slide onto another. It always refers to the slide under which the function is entered. There are special light functions and special mecha- nical functions. -
Page 44: Special Light Functions
P R OG RA MMING 2.1.9.1 Special light functions Fade-in/sandwich Flashing In the »test« and »auto« modes, a slide with –> Blinking – reduced duration. the „fade-in“ special function entered in its program line will be faded into the slide Toggling already being projected in the other projector In the »test«... -
Page 45: Special Mechanical Functions
PC terminal. With a Rollei adapter cable connected to the remote-control terminal (RC terminal) of ano- ther MSC 325 P, MSC 535 P, MSC 300 MSC 300 P, MSC 320 S or MSC 330 P, this may be used to trigger a forward pulse in a slave. - Page 46 P R OG RA MMING Sample program Program-No .Slide-No. Dissolve Timer Special Comments function 000 need not be entered if »enter« is pressed. Flash slide 7 three times into slide 6. Brief flash duration of 0.5 s. Dissolve time screen time of slide 6 after end of flashing.
- Page 47 P R OGR A M MI NG Entering an example: » » Use »mode« button to select »test« » -> overwrite with slide no 7 » enter -> accepted, -> Program No. 1 is enter dissolve time is prompted » prompted »...
- Page 48 P R OG RA MMING » timer interval is prompted » enter -> accepted, -> overwrite with 16 seconds » » special function is prompted enter -> accepted, 0-2-8 -> overwrite with “Free- » special function is prompted ze” special function (8 s) »...
- Page 49 P R OGR A M MI NG » » » 1-0 -> overwrite with 1.0 second end -> End of program enter -> accepted, » timer interval is prompted The programmed slide show can now be » -> overwrite with 5 seconds started by pressing the green forward button.
- Page 50 P R OG RA MMING 2.1.10 Several slide shows in one module shows might look as follows: 2.1.10.1 Slide shows in several magazi- If a show is started with a slide (slot) number Program No. Slide No. Show 1: of 1, 101, 151, 201, 251, 301, 351, 401 ... 951, it will always begin with the first slide of the corresponding magazine.
- Page 51 P R OGR A M MI NG 2.1.10.2 Several shows in one magazine It should be noted that every show has to There may also be several shows in one end with a »0« slide number. In the case of magazine.
-
Page 52: Enter Mode
P R OG RA MMING 2.2 Enter mode 2 (varying projector 2.2.1 Varying dissolve time with the IR parameters) remote control “Enter mode 2” permits factory settings to The medium and long dissolve times can be be varied. These include the dissolve times of varied over a range of 1 –... - Page 53 P R OGR A M MI NG 2.2.2 Adjusting basic projection-lamp brilliance MSC 325 P: MSC 535 P: Basic lamp brilliance can be reduced. The MSC 535 P has an additional boost mode » allowing basic brilliance to be increased, if Entering the figure 1 on the numerical necessary.
-
Page 54: Stereo Mode
P R OG RA MMING 2.2.3 Stereo mode 2.2.4 Saving/reactivating projector para- meters To switch the projector to stereo mode, » enter the figures 5-0-1 To save the selected projector parameters for » later use (beyond switching the projector off), and press the »enter«... -
Page 55: Sync-Pulse Control
Tascam and Yamaha. of “DiaEdit Win”. These units use an external sync-pulse gene- rator, such as the Rollei RCP Slide Synchroni- zer 62 656. Be sure to follow the instructions supplied with these units. NOTE:... -
Page 56: Helpful Hints On Slide Projection Standby/Pause
H EL PF U L HINTS ON SLIDE P ROJ EC TIO N The screen Standby/Pause is a decisive factor in determining the quality At the start of a show, the first two slides of your projected images. A tensioning device have to be moved into the projector from the taking creases out of the screen is very desi- magazine before the first fade-in. -
Page 57: Changing Lenses
» Allow for pauses in the show to keep up Rollei AV-Apogon and Schneider-Kreuznach the interest of viewers. » AV-Xenotar lenses meet the most stringent Terminate your show with a particularly demands for edge sharpness, uniform illumi- evocative slide. -
Page 58: Stereoscopic Projection
» Insert the original Rollei polarizing-filter set (Cat. No. 38 130) behind the projection lenses. No adjustment is required. Other pola- rizing filters should be adjusted to suit the spectacles used. -
Page 59: In Case Of Malfunction
M AL FU NC T ION S In case of malfunction In the case of a malfunction, the projector automatically switches off the lamps, and the pause light blinks. Do not switch off the projector! » Press »end« button. The projector will try to correct the problem on its own and will eject the magazine. -
Page 60: Changing Lamps
Only 24V/150W halogen lamps are suitable for use in the MSC 325 P. These are available from Rollei under Cat. No. 66 380. The MSC 535 P comes with 24V/ 250W halogen lamps. These are avai- lable from Rollei under Cat. No. 85... -
Page 61: Care And Maintenance
CARE AN D MA IN TEN AN C E To avoid accidents, always take the follo- wing precautions: Before all maintenance work » Remove the magazine and leave the fan running for a few minutes to cool down the inside of the projector. »... - Page 62 CARE AN D MA IN T E N A N CE Magazine track » Regularly remove dust and other foreign particles with a soft brush, paying special attention to the optical magazine-scanning aperture (see illustration). Optical system » Use a long, soft camel-hair brush to dust all glass surfaces in the two slide stages.
- Page 63 Rollei Service. NOTE: Spare fuses are available from photo or elec- tronics dealers. Rollei Service has experts to service your Rollei projector and advise you on all aspects of photography and projection with Rollei equipment. Please call Technical support: + 49 531 68 00-2 77...
-
Page 64: Dedicated Accessories
D EDIC ATED ACCESSORIES The MSC System 38 152 Rolleivision MSC 535 P projector body 38 112 Rolleivision MSC 325 P projector body 36 985 Rollei AV Apogon 35 mm f/2.8 83880 83 891 AV-Xenotar 60 mm f/2.8 HFT 83881 83 887 Rollei S-Heidosmat 90 mm f/2.8 MC... - Page 65 DEDICATED AC C E SSOR IES 36985 83891 83887 3813166393 38152/38112 85147 26750 83893 62094 63401 85149 83889 66383 85137...
-
Page 66: Troubleshooting
T R OU BL E SHOOTING Problem Cause Image blurred Lenses dirty or fogged. Slide inserted the wrong way. Faulty focusing after change of lenses. Autofocus switched off. Image shows keystone distortion Projector or screen too high, too low or not at right angles to each other. - Page 67 TR O UB L ESH OOTI NG Remedy » Clean lenses, allow condensation to evaporate. » Insert slide with emulsion side facing the screen. » Repeat basic manual focusing. » Switch autofocus on or focus manually. » Align screen so that it is vertical to and parallel with front of projector;...
- Page 68 S C R EEN SI ZES AND PROJECT ION D ISTAN C ES Format Focal length 24 x 36 mm 35 mm 60 mm 70 mm 85 mm 90 mm 120 mm 150 mm 250 mm...
- Page 69 SCREEN S IZE S AND P ROJE C TI ON DIS TA N C ES Screen size in m 1 x 1 1.25 x 1.25 1.5 x 1.5 1.8 x 1.8 2 x 2 2.4 x 2.4 3 x 3 Projection distance 1.0 m 1.2 m...
- Page 70 External memory Standard DIN-108 magazine for 36 or 50 Program chips (modules) store program data 5x5cm slides, LKM, CS and Rollei CM-5/50 for up to 120 slides (type 100 module) or 400 hook-up magazines for continuous projection. slides (type 300 module).
- Page 71 »record« and »auto« modes, autofocus off, Schneider AV-Xenotar 60 mm f/2.8 HFT reading in and out of module, and interval Rollei S-Heidosmat MC 90 mm f/2.8 timer. Green seven-segment LEDs for timer Schneider AV-Xenotar 90 mm f/2.4 HFT and dissolve times, slide number and numeri- Rollei AV-Apogon 90 mm f/2.4...
- Page 72 A D A PTE R CABLE Rolleivision twin MSC 535 P / MSC 325 P Solder side Solder side Reverse External Forward sync-pulse generator Projector sync- pulse terminal +5 V Plug DIN 45328 Connector DIN 45322 Cat. No. 83 880 e.g.
Need help?
Do you have a question about the Rolleivision MSC 535 P and is the answer not in the manual?
Questions and answers