Gemini GSP Series, GSP-L2200, GSP-2200, GSP-L2200PK Manual
- User manual (20 pages) ,
- User manual (20 pages)
Advertisement
Preparing For First Use
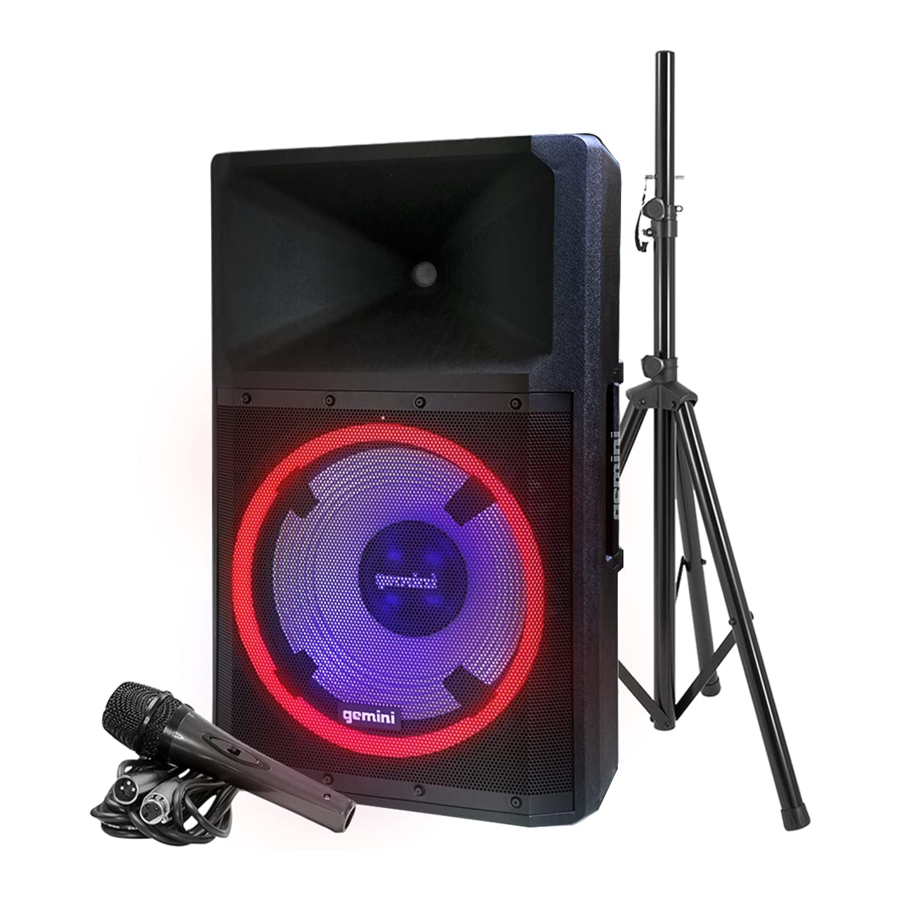
Please ensure that you find these accessories included with your GSP Series speaker:
GSP-L2200
(1) Speaker Stand
(1) Wired Microphone
(1) Power Cord
(1) Operating Instructions
GSP-2200
(1) Wired Microphone
(1) Power Cord
(1) Operating Instructions
GSP-2200 Features

- LCD: Displays the Media Panel modes for Bluetooth, USB, SD and Aux.
- USB Port: Connect your USB flash drive to play music.
- SD Card Slot: Insert your SD card here.
- BT Link: Allows user to link another GSP speaker via Bluetooth to create a stereo pair,
- Mode: switches modes from Bluetooth, SD, USB.and FM Radio.
- Play/Pause: Play/Pause the USB, SD, or Bluetooth source.
- Repeat: Repeat the current playing USB or SD track (ONE), repeat all the tracks (ALL), or shuffle the track order (Pd()).
- Back: Navigates through USB and SD tracks. Plays the previous USB, SD, or Bluetooth track.
- Forward: Plays the next USB, SD, or Bluetooth track.
- Channel 1 Volume: Adjusts the loudness of the source connected to CH1.
- Channel 2 Volume: Adjusts the loudness of the source connected to CH2.
- Channel 3 Volume: Adjusts the loudness of the source connected to CH3.
- Treble EQ: Controls the treble (high) frequencies of the speaker at a range between -12dB to + 12dB.
- Bass EQ: Controls the bass (low) frequencies of the speaker at a range between -12dB to + 12dB.
- /16. Mic Input: Connect a microphone to this 1/4"TRS input.
- AUX Input (TRS): Connect a digital media player, etc. to this 1/8" stereo input.
- EQ Settings Guide: Reference for EQ settings for common music types. 1
- /20. Mic Input: Connect a microphone to this XLR input.
- AUX Input (RCA): Connect a CD player, mixer, or other media source to this line level RCA input.
- Channel 4 Volume: Adjusts the loudness of the internal BT/ FM/ USB/ SD Media Player.
- Mix Out: Use this XLR output to create a wired connection to another powered speaker, etc.
- Ground button
- Line Input: Connect a line level source to this XLR input.
- Power LED: Indicates a connection to Mains power.
- Clip LED: Indicates audio clipping.
- AC Pass-Thru Outlet: Connect an additional AC powered device here (supplies the same voltage as the Mains power outlet the GSP speaker is connected to).
- Power ON/OFF Switch: Turns unit on or off.
- AC Power Input: Mains power supply (supplied with speaker) plugs in here.
GSP-L 2200 Features

- LCD: Displays the Media Panel modes for Bluetooth, USB, SD and Aux.
- USB Port: Connect your USB flash drive to play music.
- SD Card Slot: Insert your SD card here.
- BT Link: Allows user to link another GSP speaker via Bluetooth to create a stereo pair,
- Mode: switches modes from Bluetooth, SD, USB.and FM Radio.
- Play/Pause: Play/Pause the USB, SD, or Bluetooth source.
- Repeat: Repeat the current playing USB or SD track (ONE), repeat all the tracks (ALL), or shuffle the track order (Pd0).
- Back: Navigates through USB and SD tracks. Plays the previous USB, SD, or Bluetooth track.
- Forward: Plays the next USB, SD, or Bluetooth track.
- Channel 1 Volume: Adjusts the loudness of the source connected to CH1.
- Channel 2 Volume: Adjusts the loudness of the source connected to CH2.
- Channel 3 Volume: Adjusts the loudness of the source connected to CH3.
- Treble EQ: Controls the treble (high) frequencies of the speaker at a range between -12dB to + 12dB.
- Bass EQ: Controls the bass (low) frequencies of the speaker at a range between -12dB to + 12dB. 15/16. Mic Input: Connect a microphone to this 1/4"TRS input.
- /16. Mic Input: Connect a microphone to this 1/4"TRS input.
- AUX Input (TRS): Connect a digital media player, etc. to this 1/8" stereo input.
- EQ Settings Guide: Reference for EQ settings for common music types.
- /20. Mic Input: Connect a microphone to this XLR input.
- AUX Input (RCA): Connect a CD player, mixer, or other media source to this line level RCA input.
- Channel 4 Volume: Adjusts the loudness of the internal BT FM/ USB/ SD Media Player.
- Mix Out: Use this XLR output to create a wired connection to another powered speaker, etc.
- Light Mode: Changes the lighting modes for the front mounted speaker lighting.
- Light Color: Cycles the color of the front mounted speaker lighting.
- Ground button
- Line Input: Connect a line level source to this XLR input.
- Power LED: Indicates a connection to Mains power.
- Clip LED: Indicates audio clipping.
- AC Pass-Thru Outlet: Connect an additional AC powered device here (supplies the same voltage as the Mains power outlet the GSP speaker is connected to).
- Power ON/OFF Switch: Turns unit on or off.
- AC Power Input: Mains power supply (supplied with speaker) plugs in here.
Bluetooth
BT Pairing—Pairing your portable device to the GSP Series is easy. First, make sure your device has Bluetooth turned on, and that the GSP Series is connected to Mains power and turned on.
On the back of the GSP Series, you'll find a button labeled "MODE " (4). Press this button and the speaker will enter search mode and begin looking for your portable device. You will hear a tone to indicate the GSP Series is in pairing mode.
On your portable device, look for a new Bluetooth speaker named "Gemini GSP Series "and connect to it. No PIN code will be necessary. Once connected, the GSP Series will emit a high-pitched tone, You are now able to stream music to your GSP Series speaker.
If you would like to disconnect your portable device from the GSP Series, simply press the MODE button again. You will hear a low-pitched tone.
BT Linking — If you purchased 2 GSP Series speakers, you can connect them wirelessly using Bluetooth to create a stereo pair. This is done via the BT LINK feature. Please note that BT LINK will ONLY work if you have 2 GSP Series speakers.
To link 2 GSP Series speakers, first make sure that both speakers are connected to Mains power and turned on.
On the speaker you intend to use as your "master" speaker, press the button labeled "BT LINK" (5).
Now, go to the other speaker and press the BT LINK button. The 2 GSP Series speakers will find each other and you'll hear a tone to indicate the speakers are now linked.
If you accidentally hit the BT LINK button, don't worry. The GSP Series will exit search mode automatically in 60 seconds.
Lighting
The GSP-L2200 has a spectacular, built-in light show on the front of the speaker, capable of dancing in time to the music with multi-colored patterns and flashes, turning any room into a nightclub.
Mode —The Mode button (26) allows you to cycle through the following 6 lighting modes...
Mode 1 — Demo: This pattern animates the light ring and flashes the speaker at 80 beats per minute.
Mode 2 —Dance: This sound reactive mode is like DEMO mode, except it dances in time with the music.
Mode 3 — Pulse: It is a sound reactive mode that pulses the lighting along with the music.
Mode 4 — Flash: It flashes the outer ring and speaker light at 60 beats per minute.
Mode 5 —Solid: This mode turns the lights on solid. Mode
6 — All Off: Turns all lighting off.
Color —The Color button (27) allows you to cycle the colors of the lights on the GSP-L2200 through all the available options. There are usually 13 options for solid colors, plus a "random" mode that lights the ring and speaker in different colors.
If you would like to return from a selected color to the default random mode, just press and hold the Color button for 2 seconds.
Return/ Repair
If you experience problems with this unit, please call our helpful Customer Service Representatives at 732-346-0061, and they will be happy to give you a Return Authorization Number (RMA) and the address of an authorized service center closest to you.
SAFETY
- The device is not intended for use by people (including children) with reduced physical, sensory or mental capacity.
- People who have not read the manual, unless they have received an explanation by someone responsible for their safety, should not use this unit.
- Children should be monitored to ensure that they do not play with the device.
- The device should always be readily accessible. The device should not be exposed to water.
- No objects filled with liquids, such as vases, shall be placed on the device.
- Always leave a minimum distance of 10 cm around the unit to ensure sufficient ventilation.
- Open flames, such as candles, should not be placed on top of the device source.
- The device is intended for use only in a temperate climate.
- At full volume, prolonged listening may damage your hearing and cause temporary or permanent deafness, hearing drone, tinnitus, or hyperacusis. Listening at high volume is not recommended.
- One hour per day is not recommend either.
- Switch the device off where the use of the device is not allowed or where there is a risk of causing interference or danger - for examples: on an aircraft, or near medical equipment, fuel, chemicals or blasting sites.
- Check the current laws and regulations regarding the use of this device in the areas where you drive. Do not handle the device when driving. Concentrate fully on driving.
- All wireless devices are susceptible to interference which may affect their performance.
- All our devices conform to international/national standards and regulations, and we aim to limit user exposure to electromagnetic fields.
- These standards and regulations were adopted after the completion of extensive scientific research. This research established no link between the use of the mobile headset and any adverse effects on health if the device is used in accordance with standard practices.
- Only qualified people are authorized to install or repair this product.
- Only use batteries, chargers and other accessory which are compatible with this equipment.
- Do not connect incompatible products.
- This equipment is not waterproof.
- Keep it dry.
- Keep your device in a safe place, out of the reach of young children. The device contains small parts which may present a choking hazard to kids.
Precautions

- All operating instructions should be read before using this equipment.
- To reduce the risk of electrical shock, do not open the unit. There are no user replaceable parts inside. Please refer servicing to a qualified GEMINI service technician. Do not attempt to return this equipment to your dealer.
- Do not expose this unit to direct sunlight or to a heat source such as a radiator or stove.
- This unit should be cleaned only with a damp cloth. Avoid solvents or other cleaning detergents.
- When moving this equipment, it should be placed in its original carton and packaging. This will reduce the risk of damage during transit.
- Do not expose this unit to water or heat.
- Do not use cleaning products or lubricants on the controls or switches.
 Please read carefully before proceeding
Always follow the basic precautions listed below to avoid the possibility of serious injury or even death from electrical shock, short-circuiting, damages, fire, or other hazards.
- Read Instructions: All the safety and operating instructions should be read before the product is operated.
- Retain Instructions: The safety and operating instructions should be retained for future reference. All the safety and operating instructions should be read before the product is operated.
- Heed Warnings: All warnings on the product and in the operating instructions should be adhered to.
- Follow Instructions: All operating and use instructions should be followed.
- Cleaning: The product should be cleaned only with a polishing cloth or a soft dry cloth. Never clean with furniture wax, benzene, insecticides or other volatile liquids since they may corrode the cabinet.
- Water And Moisture: Do not use this product near water, for example, near a bathtub, wash bowl, kitchen sink, or Laundry tub; in a wet basement; or near a swimming pool; and the like.
- Do Not Open: Do not open the device or attempt to disassemble the internal parts or modify them in any way. The device contains no user-serviceable parts. If it should appear to be malfunctioning, discontinue use immediately and have it inspected by qualified GEMINI service personnel.
- Replacement Parts: When replacement parts are required, be sure the service technician has used replacement parts specified by the manufacturer or have the same characteristics a s the original part. Unauthorized substitutions may result in fire, electric shock, or other hazards.
- Location: If you use a stand, check the stand's specifications and make sure that it is sturdy enough to support the weight of the speaker. You may need to limit the number of people around the placed stand, to avoid toppling the device or causing damage to the internal components. Also, be sure to keep the following cautions.
- Use the speaker stands with their legs fully opened.
- Mount only one speaker on each speaker stand.
- Tighten fastening screws securely.
- Remove the speakers from the stands before moving the stands or adjusting their height.
- Add weight such as sand bags around the stand legs to prevent them from falling over.
- Use the stand at a maximum height of 140cm (55").
- If you use the socket of a subwoofer to allow mounting of a satellite speaker, use a pole 100cm max. with an outer diameter of 35mm (1-3/8").
- When transporting the device, always use two or more people.
- Before moving the device, remove all connected cables.
- Do not use the speaker's handles for suspended installation. Doing so can result in damage or injury.
- Do not expose the device to excessive dust or vibrations, or extreme cold or heat (such as in direct sunlight, near a heater to prevent the possibility of panel disfiguration or damage to the internal components.
- Do not place the device in an unstable position where it may accidentally fall over.
- Rigging Safety: The GEMINI Rigging System's provisions for use require that it be installed in accordance with the following specifications.
Before you begin installation:- Ensure that points where you have chosen to mount (for example a chain hoist) on the stage roof or venues ceiling comply with accident prevention and that the safety standards authority has certified them for the full load.
- Inspect all components to ensure they are in good working order, taking care that all tracks, trusses and connecting components (cables, fittings) are undamaged.
- Use only the parts specified in this operating manual! Be sure to protect cabinets against rain and moisture when they are deployed outdoors.
- If parts of the load-bearing equipment have been deformed, it is up to the manufacturer to determine if they are repairable.
The principle requirement for safe handling and trouble-free operation of this rigging system is a thorough understanding of fundamental operating safety and safety regulations. This operating manual contains the most vital instructions concerning the safe operation of the enclosures
- Connections: Before connecting the device to other devices, turn off the power for all devices. Before turning the power on or off for all devices, set all volume levels to minimum.
Documents / Resources
References
Download manual
Here you can download full pdf version of manual, it may contain additional safety instructions, warranty information, FCC rules, etc.
Download Gemini GSP Series, GSP-L2200, GSP-2200, GSP-L2200PK Manual
Advertisement


Need help?
Do you have a question about the GSP Series and is the answer not in the manual?
Questions and answers