Advertisement
- 1 Welcome
- 2 About the Ukulele
- 3 How to Change Strings
- 4 How to Tune Your Ukulele
- 5 Using a Tuner to Tune Your Ukulele
- 6 How to Hold Your Ukulele
- 7 Your First Ukulele Chords
- 8 Your First Strumming Pattern
- 9 Your First Song
- 10 10 More Really Important Chords to Know
- 11 More Advanced Strumming Patterns
- 12 Where Do I Go from Here?
- 13 Ukulele Maintenance
- 14 Easy Ukulele Songs for Beginners
- 15 Documents / Resources
Welcome
Welcome to the world of Ulumac ukulele! Whether you're a beginner or have strummed a bit, our lessons will equip you with strumming skills and the joy of playing your favorite songs. No musical background required. Join us and strum your way to ukulele success!
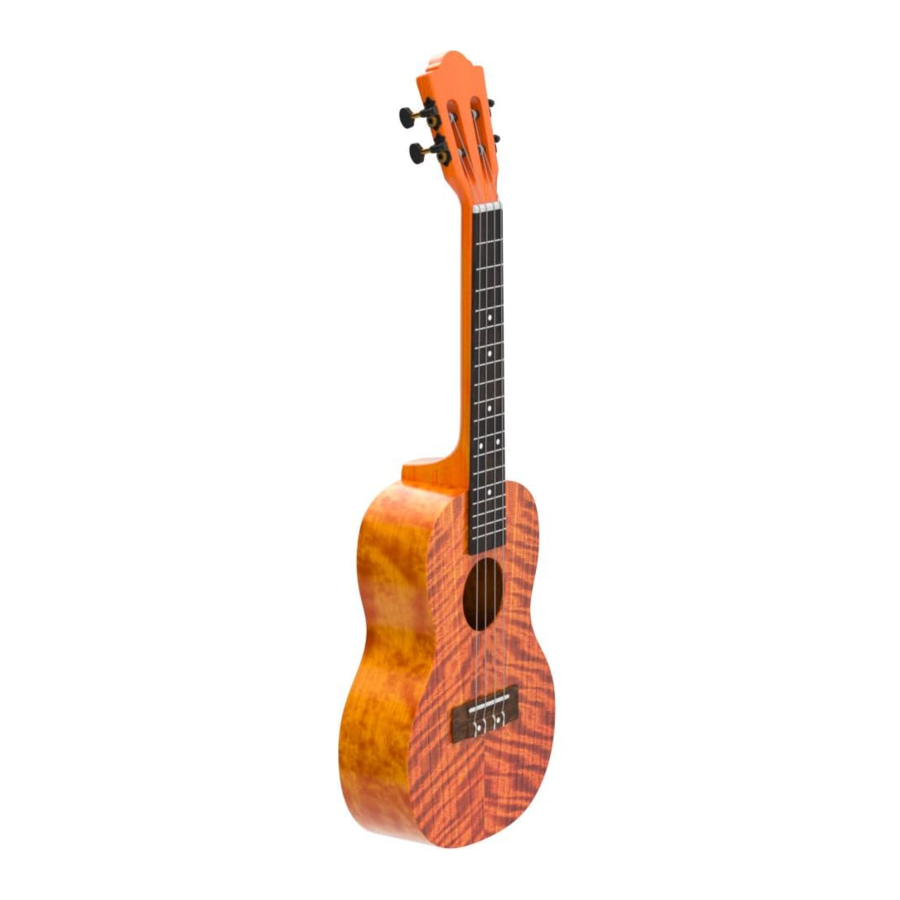
About the Ukulele
Introducing the ukulele, a charming four-stringed plucked instrument originating from 19th-century Hawaii. This versatile instrument comes in various sizes: soprano, concert (alto), tenor, and baritone.

Creating the enchanting sound of the ukulele is a simple process. Plucking a string causes it to vibrate against the saddle, a piece of white plastic or bone, which is supported by the bridge at the top of the ukulele. The resulting energy resonates within the instrument's body and is projected through the sound hole. With its four strings and straightforward chord structures, it effortlessly spans various musical genres, from folk and pop to rock and even classical music.


The strings may take time to settle. This can make the ukulele de-tune more frequently when new. This does not mean there is a problem with your ukulele.
The most important thing you need to know for the purposes of this lesson is how to identify the neck, fretboard, and frets. Frets are the vertical pieces of metal that lay across the fretboard. You press your fingers between the frets and pluck a string to produce a sound. The higher you go up the fretboard the higher the pitch.

The ukulele's rich history, accessibility, versatility, and capacity to spread happiness make it an exceptional instrument, perfect for both beginners and seasoned musicians.
How to Change Strings
New ukuleles usually come with pre-installed strings. If you want to replace your instrument with new strings, please follow these instructions. Safety first! Always ask an adult to help you change strings. Strings should be replaced when they become dirty or dull sounding. Change one string at a time, keeping the other strings in place. This is better for the uke's neck.
Follow these steps to change strings:
- Unwind each string from its tuning peg at the top of the ukulele

- Undo the knot at the bridge to slide the string out of the bridge hole.

- Tie a knot at the end of each string if you have bridge pegs. Knot the end of the string around the bridge if you have a tie bar bridge.


- Feed the other endof the string through its tuning peg hole.

- Repeat the same process with each of the other 3 strings.

- Tighten each string up and tune it to pitch


How to Tune Your Ukulele
The most common type of tuning is standard tuning. Soprano, concert, and tenor ukuleles are typically tuned this way. As you can see, the top string or fourth string of the ukulele is tuned to a G. The third string is tuned to a C. The second string is tuned to an E, and the first string or bottom string is tuned to an A.

You can see how the ukulele is tuned on the music staff:

and on the piano keys:

The ukulele can be tuned into various keys but the most popular tuning is: G C E A
 TIP
TIP
Unlike many string instruments, these strings are not tuned in order of pitch. The C will be a lower pitch than the G, but E will be a higher pitch then both G and C. If you get stuck, a good idea is to visit www.youtube.com and type "Ukulele Tuning' into the search bar for help with pitch differences.
There are a number of ways you can tune each string to the correct note. From using the G, C, E, A keys on a piano, to pitch pipes and a tuning fork but we advise using an electronic tuner. These small devices pick up the sound when you pluck a string and tell you what note you are playing. Tightening the strings by tuning the relevant tuning peg will increase the pitch. For example, if you're tuning the 4th string to G and the electronic tuner shows F on the display when you pluck the string, turn the tuning peg a small amount and then pluck the string again. Repeat these steps until the tuner display reads G. Once it does, that string is ready and it's time to move onto the next one.
DON'T HAVE A TUNER?
There are many helpful tuning videos available on YouTube. Visit www.youtube.com and search "Ukulele Tuning."
Using a Tuner to Tune Your Ukulele
The easiest way to tune your ukulele is by using a tuner, which will be originally included in the box. As you pluck each individual string on your ukulele, this little device will detect the pitch and display it back to you. It will indicate if you are sharp or flat (above or below the pitch), so you can get an accurate tuning. Every ukulele player should have a tuner.
Before Turing:
- The tuner will turn green and display the following pattern when successfully tuned.
![warning]() NOTE: If you tune in the chromatic tuner, the four numbers 4, 3, 2, 1 will not appear on the screen, but only the G, C, E, A.
NOTE: If you tune in the chromatic tuner, the four numbers 4, 3, 2, 1 will not appear on the screen, but only the G, C, E, A.

- The direction of the tuning pegs This is a diagram showing the directions for loosening and tightening the strings, so please familiarize yourself with it first! Twisting the G and C string tuning pegs up will tighten them, twisting them down will loosen them. Twisting the E and A string tuning peg up will loosen them, twisting them down will tighten them.


Turing Step:
- After installing the battery, long press the ON/OFF Key to turn on the tuner.

- Short press the ON/OFF Key and select the Ukulele mode (U/Uke)
Indicates Ukulele mode is selected.

- Place the digital tuner on the headstock of your ukulele.

- Start tuning.
- Tuning the G string. Pluck the strings one at a time, starting with the G string (the 4th string). If it feels too tight, start by loosening the 4th string tuning peg until it feels moderately tensioned. Conversely, if it feels too loose, tighten it gradually by turning the tuning peg. You can turn it in small increments; there's no need to be overly cautious (starting from a neutral tension helps beginners avoid over-tightening the string, which can lead to breakage). While plucking the 4th string, continue to turn the tuning peg until your tuner displays the letter "G." Then, make a slight adjustment to center the tuner's pointer on the letter "G" (if the pointer is to the left of "G," it means the pitch is too low and needs tightening; if it's to the right of "G," the pitch is too high and needs loosening).

- Pluck the C string. Pluck the C string (the 3rd string) with your right hand. Using the same method as in step 1, adjust the tension of the 3rd string until its pitch is tuned to "C" (the tuner displays the letter "C").

- Pluck the E string. Pluck the E string (the 2nd string) with your right hand, adjust the tension of the 2nd string until its pitch is tuned to "E" (the tuner displays the letter "E")

- Pluck the A string. Pluck the A string (the 1st string) with your right hand, adjust the tension of the 1st string until its pitch is tuned to "A" (the tuner displays the letter "A")

- Tuning the G string. Pluck the strings one at a time, starting with the G string (the 4th string). If it feels too tight, start by loosening the 4th string tuning peg until it feels moderately tensioned. Conversely, if it feels too loose, tighten it gradually by turning the tuning peg. You can turn it in small increments; there's no need to be overly cautious (starting from a neutral tension helps beginners avoid over-tightening the string, which can lead to breakage). While plucking the 4th string, continue to turn the tuning peg until your tuner displays the letter "G." Then, make a slight adjustment to center the tuner's pointer on the letter "G" (if the pointer is to the left of "G," it means the pitch is too low and needs tightening; if it's to the right of "G," the pitch is too high and needs loosening).


What if the letter shown on the tuner does not correspond to the letter of the string?
First, adjust the strings to the state of not loosening or tightening, and then follow the cyclic order of the letters G A B C D E F G to adjust the strings, for example, the 4th string is G, the tuner shows F, F is on the left side of the G, so it is lower than the G, you need to tighten it a little bit in order to reach the high pitch of the G; the tuner shows A, A is on the right side of the G, so it is higher than the G, and you need to loosen the strings in order to go back to the high pitch of the G, and adjust the others as well. Follow this method to adjust.

NOTES:
- Be careful not to mix up the four strings! After holding the ukulele, the string closest to your heart is the 4th string.
- When you receive the tuner, remember to install the battery (if a CR2032 button cell is required, make sure the shiny side of the battery is facing up).
- Why does the new ukulele go out of tune after tuning?
A newly bought ukulele tends to go out of tune due to the initial stretching of new strings and the ukulele "settling in." This is normal and is not a defect in the product. It is recommended that you play and tune your new ukulele more often within the first week or two of receiving it, after which it will usually stabilize.
How to Hold Your Ukulele
How you hold your ukulele can vary depending on what size of ukulele you have. Typically, though, you want to cradle the body of the ukulele in your right arm, while the part of your forearm, closest to the elbow, applies a little pressure to the top of the ukulele, so it is held snug against your body. Then, you support the neck of the ukulele in the crevice of your left hand where your thumb meets your index finger.

Your strumming hand should be loose and relaxed with the fingers perpendicular to the 12th to 14th fret of the ukulele. Most of the time you'll want to strum in this area and not directly over the sound hole. The closer you get to the bridge and sound hole the brighter the sound becomes (sometimes this is desirable though). Some people might also strum with their index finger, so the nail of their finger strums across the strings on their down strum, and the bottom of the finger strums across the strings on their up strum. However you choose to strum, the most important thing to remember is to keep your hand and wrist loose and relaxed.

C URVE your hand - like you are holding a golf ball
L OOSE GRIP - Shoulders, arms, and hands
E YE TO EYE - with top of the guitar neck
F LAT angle - between wrist and forearm
If you are slouching while you practice or play your ukulele, or anything else for that matter, YOUR BACK WILL BE SORE. So stretch out and sit on up.
Your First Ukulele Chords
It's time to actually learn how to play something. We'll be learning three chords to start off: C major, G major, and F major.


Below each frame is the name of the chord played.
Press the tip of your ring finger onto the third fret of the first string (the A string). Experiment using different pressures to learn exactly how much to apply. You need to press hard enough that the string makes a clear tone, while being careful not to have your fingers come in contact with other strings
C Major
To play a C major chord, place your ring finger on the 3rd fret of the bottom string. The remaining strings ring completely open.

G Major
To play a G major chord, place your middle finger on the 2nd fret of the bottom string, your ring finger on the 3rd fret of the second string, and your index finger on the 2nd fret of the third string. The top string rings completely open.

F Major
To play an F major chord, place your index finger on the 1st fret of the second string and your middle finger on the 2nd fret of the top string or the fourth string. Let the first and third string ring completely open.

How to Practice These Chords
Practice the fingering for each of these chords and practice changing between chords. At first, it's difficult and frustrating to get your fingers to go where you want them. Through time and practice, you'll build muscle memory where changing chords becomes second nature. You might also notice that the ends of your fingers start to feel sore after a while. This is very normal. Eventually, your fingers will build callouses on the ends of them, which will prevent the tips of your fingers from hurting. After a week of dedicated practice, you should start to notice this to get better. Amazingly enough, you can play hundreds of songs with just these three chords. Before we learn a song though, let's take a look at some strumming patterns.
Your First Strumming Pattern
Strumming can feel very awkward at first and a bit of a juggling act. Not only are you trying to switch chords but you're also trying to keep the strumming pattern going while you're doing this. This can be really hard. I've noticed the tendency might be to jump right in and start learning a strumming pattern. Before we do this, we really need to cover some important thinking that goes behind strumming. If we understand this, strumming becomes easier.
The Basis of Strumming
Strumming is a form of rhythm. Rhythm depends completely upon good timing and consistency. Strumming is not about how complicated or how fast you can play. If you're not keeping good time and consistency, you've completely defeated the purpose of strumming. This is why as we learn our first strumming pattern, we need to be very intentional about counting out loud. Eventually, we will build an internal "clock" of sorts where it becomes easier to keep time without thinking much about it.
Strumming Pattern #1: Down, Down, Down, Down
For this first strumming pattern, we're going to take our C major chord that we learned and strum all down strums. We're going to do this to a count of four, which means we will count out loud "1, 2, 3, 4" and repeat this at a very consistent, but not too fast pace. We will strum down on each count. A count of four (4/4) is a very common time signature in most popular music.

Practice counting out loud and strumming all down strums at a consistent and moderate tempo. It might seem boring to count out loud and just do down strums, but it's important to develop this sense of time. As you start to feel comfortable with this, try adding a chord change. Here's where it gets a bit harder. Let's change from a C major chord to a G major chord while keeping the same tempo.

Practice this until you can switch between the two chords without hesitating between the chord changes. The count should remain consistent and steady through the chord change.
Your First Song
After you've practiced keeping a steady tempo and changing chords with all down strums, you're pretty well equipped to play a lot of songs with just those three chords and that strumming pattern, but let's first take a look at an easy song--an oldie but a goodie: U Twinkle, Twinkle Little Star." Again, keep going with the down strums. The changes in this song are pretty quick, so start off slow and think about anticipating the next chord.

Practice this till you can sing and play it at a steady tempo without having to hesitate between your chord changes. If you are having trou ble, slow it down. Practice counting out loud and just going through the chord changes without singing. As you get more comfortable, start humming under your breath in combination with your counting. And then, as this becomes more comfortable sing it out, and sing it strong! Again, we're not trying to be "fancy" here ( "fancier" stuff will come in the next part). Right now, we want to focus on being steady and consistent. Once you're ready, let's move on and learn some more important chords.
10 More Really Important Chords to Know
By now, you should feel pretty comfortable changing between your C, F, and G chords. Your fingers should feel used to switching and changing chords. It's time to learn some other really important and common chords. If you know these like the back of your hand, you'll be half way to learning about every song out there.
Major Chords
Here are some other common major chords you should know.
A Major
To play an A major chord, place your index finger on 1st fret of the third string, and place your middle finger on the 2nd fret of the fourth or top string. The bottom two strings ring completely open.

D Major
There are a couple ways you can play this chord. The first way is to place your pinky on the 2nd fret of the second string, your ring finger on the 2nd fret of the third string, and your middle finger on the 2nd fret of the fourth or top string. For people with smaller fingers, this might work well. However, those of us with large fingers, the other common and recom mended way to play this chord is to barre the top three strings on the 2nd fret with your ring finger. This means your ring finger lays across the three strings while bending enough to allow the bottom string to ring open. Sometimes I will even use my index finger to do this. This is hard to do and takes some practice, so experiment with both ways to see which one comes easier.

E Major
This chord is a bit of a stretch. Place your middle finger on the 2nd fret of the first or bottom string. Place your pinky on the 4th fret of the third string. Place your index finger on the 1st fret of the fourth or top string.

Minor Chords
The next set of chords we're going to learn are minor chords. Minor chords are like major chords, except you change one note of the chord to make it minor. Minor chords tend to have a "sadder" sound to them.
A Minor (Am)
This chord is really easy to play. Simply place your middle finger on the 2nd fret of the fourth or top string and let the bottom three strings ring completely open.
")
D Minor (Dm)
To play a Dm chord, place your index finger on the 1st fret of the second string, your ring finger on the 2nd fret of the third string, and your middle finger on the 2nd fret of the fourth or top string. Let the bottom string ring completely open.
")
E Minor (Em)
To play an Em chord, place your index finger on the 2nd fret of the first or bottom string and your ring finger on the 4th fret of the third string. Let the second and top string ring completely open.
")
Dominant 7th Chords
Major and minor chords only have three notes that make up the sound of the chord. Seventh chords are essentially major or minor chords with an added note called the "Seventh," which refers to the seventh or last note of a scale. You find seventh chords a lot in blues and jazz styles. There are different types of seventh chords (major 7th, minor 7th, dominant 7th, diminished 7th), however, we're just going to learn some dominant seventh chords, which tend to show up a lot.
C7
To play a C7 chord, simply place your index finger on the 1st fret of the first or bottom string. Let the other three strings ring completely open.

G7
To play a G7 chord, place your ring finger on the 2nd fret of the first or bottom string. Place your index finger on the 1st fret of the second string. Place your middle finger on the 2nd fret of the third string. Let the top string ring completely open.

D7
This is another chord you want to barre. To play a D7 chord, lay your index finger across all four strings on the 2nd fret. While these strings are barred, place your middle finger on the 3rd fret of the first or bottom string.

E7
To play an E7 chord, place your ring finger on the 2nd fret of the first or bottom string, your middle finger on the 2nd fret of the third string, and your index finger on the 1st fret of the fourth or top string. Let the second-string ring completely open. Be sure to check out my video of "11 Must-Know Chords for Beginners" to see how many of these chords are played.

More Advanced Strumming Patterns
I'll admit down strums are a little bit boring, but they are extremely flexible, and if you can do this well with good timing and consistency (that's key, remember) you can easily add some interesting elements into your strumming pattern. Let's take a look.
Strumming Pattern #2: Down, Down, Up, Down, Down, Up
For this pattern, we're still going to strum to a count of four. However, this time we're going to add an up strum between beats 2 and 3 and beats 4 and 1. This gives us a strumming pattern of down, down, up, down, down, up.
We can count this by adding an "and" between these beats. We're simply splitting these beats in half or subdividing them. So our strumming pattern would look like this:

It's important to note that our count is not getting longer or shorter with these added notes. If this is not making sense, watch this video as I show you this strumming pattern.

As you get more comfortable with this strumming pattern, add a chord change. Again, practice this until you can change chords seamlessly. Start out slow first and gradually increase your speed. Remember, it's all about keeping that solid and consistent rhythm.
Strumming Pattern #3: Down, Down, Up, Down, Up, Down, Up
This strumming pattern goes even a step farther and adds another up strum. This is the strumming pattern I used in my cover of "Somewhere Over the Rainbow."

Another you can try to add a different feel to these strumming patterns is to accent certain beats. When we accent a beat, we are just strumming a little bit harder, or we are strumming the unaccented beats a little softer. For this third strumming pattern, I typically strum the 1st and 2nd beat a little bit harder than the other beats. However, I encourage you to experiment with these three strumming patterns and see what you come up with. There is not always a hard and fast right or wrong way to strum a song.

Once you're feeling comfortable, you can try adding a chord change for this third strumming pattern.
TIPS:Want to take your rhythm to another level? One really great way to practice your strumming is to use a metronome. A metronome does not lie so it will force you to practice developing a solid and consistent sense of rhythm.
Where Do I Go from Here?
While I've given you quite a bit to work on and practice, eventually you'll become a master of all this. The beginning stages of something can always be the most difficult, but I know for a fact through your hard work and discipline you'll hit your stride in no time. Here are some ways you can "speed" this process up.
Develop a Practice Plan
When you create a plan for practice, you're creating a plan to get to the place where you want to be. What songs do you want to be able to play on the ukulele? What techniques do you want to master? Answering these questions can provide you a direction for how you want to structure your practice times and what things you work on. Setting up a practice plan also forces you to carve out time in your usy schedule. Even if you can only spare 1 5 minutes a day towards practice, doing this consistently. is better than spending a couple hours once every couple weeks. Right now, it would be a perfect time to jot down a couple goals and find a regular time in your schedule to practice the ukulele. The goals don't have to be extensive. It could be something as simple as "I want to be able to play the song titled by next month."
Seek Out Inspiration
I've noticed in my own life that I'm most motivated to push forward in my growth as a musician if I'm surrounding myself in ways I can be inspired. Sometimes these are totally unrelated to ukulele, but there are a few things that can help.
First, listen to ukulele players that you really enjoy on a consistent basis. This might be a CD of an artist or someone you subscribe to and watch on YouTube. I know for myself listening and watching to someone play is really helpful. Over time, you'll notice yourself picking up different parts of their style that you really dig, even unintentionally.
This goes a little bit with the first point, but secondly, go see some live concerts. There is something inspiring about seeing someone play who has a mastery of the ukulele. One guy that really inspires me whenever I watch him is Jake Shimabukuro.
Lastly, surround yourself with other ukulele players and musicians that can support and speak into your passion. One great way to do this is to try to find a ukulele group in your local area that meets. If you can't find anything like this, start one up.
Ukulele Maintenance
Hold securely when playing
Dropping a uke from a sitting position is seldom fatal but the bodies can crack. Prevention is much better than a cure. Fixing a cracked uke should be done by an experienced luthier but you might want to carry out a bit of a cost / benefit exercise here. Luthiers aren't cheap. Your uke might not be worth it.
Be careful with your plectrum and capo
When you are using a pick, make sure that it does abrade your uke's body, especially when strumming that little bit harder. That may cause ugly crutches and ukes seldom have the scratch resistant panels found on a lot of guitars. If you use a capo, be gentle. Improper placement and removal of a capo can cause neck dents.
Watch out for the build-up of dirt
Ukuleles are prone to grease buildup from natural dirt and the oil from your hands. The result is a sticky instrument that is unpleasant to play. To prevent this from happening, make cleaning your uke after every playing session a habit. Very carefully rub the ukulele with the cleaning cloth to remove dirt and oil. If your uke is painted or has a shiny finish, you can use polish products to keep its gloss.
Storage
Never leave your uke by a fireplace, heater, oven, radiator, in a car or in a place with direct sunlight. The heat can warp your uke's wood and make it brittle and much more prone to cracking and breaking. Avoid placing your uke (even in its case or bag) in a place where it might drop. Keep your uke away from places where it might get wet from spilled liquids.
Changing your strings
From time to time, run your fingers along the strings in search for nicks or grooves cut into them. These notches or cuts are caused by the pressure from the frets or the natural stretching of the strings. These can affect your uke's tuning and intonation and any nick is a sign of imminent breaking. Brand new strings tend to go out of tune often because they are still stretching.
Humidity
Too high and too low humidity can both harm your ukulele. Keeping the right amount of moisture in your ukulele's wood in relation to the humidity is a must to keep it in top condition. Your ukulele should be stored in a place with 40% - 60% relative humidity.
Bags versus Cases
If you travel for shows or gigs, it is smart to buy a hard-shell case with a latch that locks to protect your uke from possible accidents. Bags are always going to be cheaper but they don't compare favorably against a good case. Take care of your uke.
Easy Ukulele Songs for Beginners
#1 Are You Sleeping

#2 Row Row Row Your Boat

#3 Three Blind Mice

#4: Mary Had a Little Lamb

#5: Happy Birthday

#6: Can't Help Falling In Love With You

#7: I've Been Working On The Railroad

#8: Can't Take My Eyes Off You

#9: You Are My Sunshine

#10:Soul Sister


Documents / Resources
References
Download manual
Here you can download full pdf version of manual, it may contain additional safety instructions, warranty information, FCC rules, etc.
Advertisement
Need help?
Do you have a question about the SOPRANO and is the answer not in the manual?
Questions and answers