Pioneer VSX-920-K Operating Instructions Manual
Audio/video multi-channel receiver
Hide thumbs
Also See for VSX-920-K:
- Service manual (72 pages) ,
- Specifications (2 pages) ,
- Operating instructions for the user (404 pages)
Table of Contents
Advertisement
Available languages
Available languages
Quick Links
AUDIO/VIDEO MULTI-CHANNEL RECEIVER
RECEPTOR MULTICANAL DE AUDIO/VÍDEO
VSX-920
Register your product on
http://www.pioneerelectronics.com (US)
http://www.pioneerelectronics.ca (Canada)
· Protect your new investment
The details of your purchase will be on file for reference in the event of an
insurance claim such as loss or theft.
· Receive free tips, updates and service bulletins on
your new product
· Improve product development
Your input helps us continue to design products that meet your needs.
· Receive a free Pioneer newsletter
Registered customers can opt in to receive a monthly newsletter.
Operating Instructions
Manual de instrucciones
Advertisement
Chapters
Table of Contents

Related Manuals for Pioneer VSX-920-K


Summary of Contents for Pioneer VSX-920-K
- Page 1 · Improve product development Your input helps us continue to design products that meet your needs. · Receive a free Pioneer newsletter Registered customers can opt in to receive a monthly newsletter. Operating Instructions Manual de instrucciones...
- Page 2 (2) this device must accept any interference received, including interference that may cause undesired operation. Product Name: AUDIO/VIDEO MULTI-CHANNEL RECEIVER Model Number: VSX-920 Responsible Party Name: PIONEER ELECTRONICS (USA) INC. SERVICE SUPPORT DIVISION Address: 1925 E. DOMINGUEZ ST. LONG BEACH, CA 90810-1003, U.S.A. Phone: 1-800-421-1404 URL: http://www.pioneerelectronics.com...
-
Page 3: Operating Environment
IMPORTANT CAUTION RISK OF ELECTRIC SHOCK DO NOT OPEN CAUTION: The lightning flash with arrowhead symbol, The exclamation point within an equilateral within an equilateral triangle, is intended to TO PREVENT THE RISK OF ELECTRIC triangle is intended to alert the user to the alert the user to the presence of uninsulated SHOCK, DO NOT REMOVE COVER (OR presence of important operating and... -
Page 4: Table Of Contents
Thank you for buying this Pioneer product. Please read through these operating instructions so you will know how to operate your model properly. After you have finished reading the instructions, put them away in a safe place for future reference. - Page 5 08 Making recordings Manufactured under license from Dolby Making an audio or a video recording ..54 Laboratories. Dolby, Pro Logic, Surround EX and the double-D symbol are trademarks of 09 Controlling the rest of your system Dolby Laboratories.
- Page 6 Flow of settings on the receiver The unit is a full-fledged AV receiver equipped The colors of the steps indicate the following: with an abundance of functions and terminals. Required setting item It can be used easily after following the procedure below to make the connections and settings.
-
Page 7: Before You Start
Before you start Chapter 1: Before you start • Batteries with the same shape may have different voltages. Do not use different Checking what’s in the box batteries together. Please check that you’ve received the following • When disposing of used batteries, please supplied accessories: comply with governmental regulations or •... -
Page 8: Ventilation
Before you start Ventilation When installing this unit, make sure to leave space around the unit for ventilation to improve heat dispersal (at least 40 cm (16 in.) at the top). If not enough space is provided between the unit and walls or other equipment, heat will build up inside, interfering with performance and/or causing malfunctions. -
Page 9: Controls And Displays
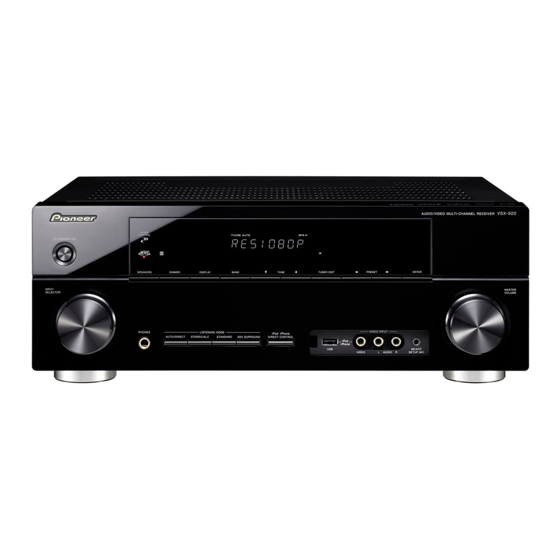
Controls and displays Chapter 2: Controls and displays Front panel VSX-920 AUDIO/ VIDEO MULTI- CHANNEL RECEIVER PHASE CONTROL STANDBY/ON SPEAKERS DIMMER DISPLAY BAND TUNE TUNER EDIT PRESET ENTER INPUT MASTER SELECTOR VOLUME PHONES LISTENING MODE VIDEO INPUT iPod iPhone AUTO/DIRECT STEREO/ALC STANDARD ADV SURROUND... -
Page 10: Operating Range Of Remote Control
Controls and displays PRESET / 14 MCACC SETUP MIC jack Use to select preset radio stations Use to connect a microphone when (page 53) and to select SIRIUS Radio performing Auto MCACC setup. channels (page 70). Operating range of remote control MASTER VOLUME dial The remote control may not work properly if: PHONES jack... -
Page 11: Display
Controls and displays Display PHASE Character display Lights when the Phase Control is switched on Displays various system information. (page 38). 10 DTS indicators AUTO Lights when the Auto Surround feature is Lights when a source with DTS encoded switched on (see Auto playback on page 35). audio signals is detected. - Page 12 Controls and displays Lights when a source with Dolby TrueHD encoded audio signals is detected. Lights to indicate Dolby Digital EX decoding. 2PLll(x) Lights to indicate 2 Pro Logic II / 2 Pro Logic IIx decoding. Light will go off during 2 Pro Logic IIz decoding.
-
Page 13: Remote Control
Controls and displays RECEIVER Switches the receiver between standby and on. Remote control RECEIVER Switches the remote to control the receiver (used to select the white commands above the RECEIVER SLEEP SOURCE CONTROL number buttons (S.RETRIEVER, etc)). Also use RECEIVER INPUT SELECT this button to set up surround sound (page 44) - Page 14 DTV/TV Press TUNER or SIRIUS first to access: Switches between the DTV and analog TV input modes for Pioneer flat panel TVs. TUNER EDIT Memorizes stations for recall (page 52 and 11 Number buttons and other component 71). When TUNER is pressed, also used to controls change the name (page 53).
- Page 15 Controls and displays S.RETRIEVER 13 TV CONTROL buttons Press to restore CD quality sound to These buttons are dedicated to control the TV assigned to the TV button. Thus if you only compressed audio sources (page 38). have one TV to hook up to this system assign it SB CH to the TV button (see page 57 for more on Press to select ON, AUTO, OFF the...
-
Page 16: Connecting Your Equipment
Connecting your equipment Chapter 3: Connecting your equipment • It is also possible to only connect one of the surround back speaker (SB) or neither. Determining the speakers’ application [B] 7.1 channel surround system (Front height or Surround back) This unit permits you to build various surround •... -
Page 17: Other Speaker Connection
Connecting your equipment Other speaker connection Some tips for improving sound quality • Your favorite speaker connections can be Where you put your speakers in the room has selected even if you have fewer than 5.1 a big effect on the quality of the sound. The speakers. - Page 18 Connecting your equipment • Try not to place the surround speakers farther away from the listening position than the front and center speakers. Doing so can weaken the surround sound effect. CAUTION • Make sure that all speakers are securely installed.
-
Page 19: Connecting The Speakers
Connecting your equipment Connecting the speakers The receiver will work with just two stereo You can use the speakers connected to the speakers (the front speakers in the diagram) front height (B speaker) terminals to listen to but using at least three speakers is stereo playback in another room. -
Page 20: Switching The Speaker Terminal
Connecting your equipment Bare wire connections Switching the speaker terminal If you selected Surr.Back in The Speaker A-Speaker terminals: System setting on page 49, you can switch Twist exposed wire strands together. between speakers using the SPEAKERS button. If you selected Height, the button will Loosen terminal and insert exposed wire. -
Page 21: Making Cable Connections
Connecting your equipment Be careful to connect the terminal in the proper direction. Making cable connections Make sure not to bend the cables over the top About HDMI of this unit (as shown in the illustration). If this The HDMI connection transfers happens, the magnetic field produced by the uncompressed digital video, as well as almost transformers in this unit may cause a... -
Page 22: Analog Audio Cables
Connecting your equipment HDMI, the HDMI logo and High-Definition Video cables Multimedia Interface are trademarks or Standard RCA video cables registered trademarks of HDMI Licensing, LLC. These cables are the most common type of “x.v.Color” and x.v.Color logo are trademarks of video connection and are used to connect to Sony Corporation. -
Page 23: About The Video Converter
Connecting your equipment About the video converter The video converter ensures that all video sources are output from HDMI OUT terminal. The only exception is HDMI: since this resolution cannot be downsampled, you must connect your monitor/TV to the receiver’s HDMI video outputs when connecting this video source. -
Page 24: Connecting A Tv And Playback Components
Connecting your equipment Connecting a TV and playback components Connecting using HDMI If you have an HDMI or DVI (with HDCP) equipped component (Blu-ray disc player, etc.), you can connect it to this receiver using a commercially available HDMI cable. IN BD SPEAKERS FRONT... -
Page 25: Connecting Your Dvd Player With No Hdmi Output
Connecting your equipment Connecting your DVD player with no HDMI output This diagram shows connections of a TV (with HDMI input) and DVD player (or other playback component with no HDMI output) to the receiver. IN BD SPEAKERS FRONT CENTER CD-R/TAPE DVR/VCR ADAPTER PORT... -
Page 26: Connecting Your Tv With No Hdmi Input
Connecting your equipment Connecting your TV with no HDMI input This diagram shows connections of a TV (with no HDMI input) and DVD player (or other playback component) to the receiver. • With these connections, the picture is not output to the TV even if the DVD player is connected with an HDMI cable. -
Page 27: Connecting A Satellite Receiver Or Other Digital Set-Top Box
Connecting your equipment Connecting a satellite receiver Connecting an HDD/DVD or other digital set-top box recorder, VCR and other video sources Satellite and cable receivers, and terrestrial digital TV tuners are all examples of so-called This receiver has audio/video inputs and ‘set-top boxes’. -
Page 28: Using The Component Video Jacks
Connecting your equipment Important Using the component video • If you connect any source component to jacks the receiver using a component video Component video should deliver superior input, you must also have your TV picture quality when compared to composite connected to this receiver’s COMPONENT video. -
Page 29: Connecting Antennas
Connecting your equipment Using external antennas Connecting antennas To improve FM reception Connect the AM loop antenna and the FM wire Use an F connector (not supplied) to connect antenna as shown below. To improve reception an external FM antenna. and sound quality, connect external antennas (see Using external antennas below). -
Page 30: Connecting To The Front Panel Video Terminal
This receiver shock. Check the power cord once in a while. If you find it damaged, ask your nearest Pioneer authorized independent service company for a replacement. VIDEO AUDIO/VIDEO OUTPUT • The receiver should be disconnected by... -
Page 31: Basic Setup
Basic Setup Chapter 4: Basic Setup AUDIO TUNER EDIT MASTER PARAMETER VOLUME TOOLS MENU Automatically setting up for MENU RECEIVER SLEEP SOURCE CONTROL surround sound (MCACC) ENTER RECEIVER INPUT SELECT The Auto Multi-Channel Acoustic Calibration INPUT HOME MENU (MCACC) setup measures the acoustic SETUP BAND iPod CTRL... - Page 32 Basic Setup Press RECEIVER on the remote control, Wait for the test tones to finish. then press the SETUP button. A progress report is displayed on-screen while An on-screen display (OSD) appears on your the receiver outputs test tones to determine the TV.
-
Page 33: Other Problems When Using The Auto Mcacc Setup
Basic Setup Make sure ‘OK’ is selected, then press Other problems when using the ENTER. Auto MCACC Setup If the screen in step 7 is left untouched for 10 If the room environment is not optimal for the seconds and the ENTER button is not pressed Auto MCACC Setup (too much background in step 8, the Auto MCACC setup will start noise, echo off the walls, obstacles blocking... -
Page 34: Listening To Your System
Listening to your system Chapter 5: Listening to your system It is possible to check on the front panel display Important whether or not surround sound playback is being performed properly. • The listening modes and many features described in this section may not be When using a surround back speaker, available depending on the current source, 2D+PLIIx is displayed when playing Dolby... -
Page 35: Auto Playback
Listening to your system • While listening to a source, press STANDARD. Auto playback If the source is Dolby Digital, DTS, or Dolby The simplest, most direct listening option is the Surround encoded, the proper decoding Auto Surround feature. With this, the receiver format will automatically be selected and automatically detects what kind of source shows in the display. -
Page 36: Using The Advanced Surround Effects
Listening to your system With multichannel sources, you can select • DOLBY DIGITAL EX – Creates surround from: back channel sound for 5.1 channel sources and provides pure decoding for • DOLBY PLIIz HEIGHT – Up to 7.1 channel 6.1 channel sources (like Dolby Digital sound Surround EX) •... -
Page 37: Listening In Stereo
Listening to your system Listening in stereo Using Front Stage Surround When you select STEREO you will hear the Advance source through just the front left and right The Front Stage Surround Advance function speakers (and possibly your subwoofer allows you to create natural surround sound depending on your speaker settings). -
Page 38: Using Stream Direct
Listening to your system Using Stream Direct Better sound using Phase Control Use the Stream Direct modes when you want This receiver’s Phase Control feature uses phase correction measures to make sure your to hear the truest possible reproduction of a sound source arrives at the listening position in source. -
Page 39: Listening With Acoustic Calibration Eq
Listening to your system Phase Control technology provides coherent sound reproduction through the use of phase Using surround back channel matching for an optimal sound image at your processing listening position. The default setting is on and we recommend leaving Phase Control You can have the receiver automatically use switched on for all sound sources. -
Page 40: Setting The Up Mix Function
Listening to your system • SB AUTO – Matrix decoding processing for While holding down the PRESET + on the generating the surround back component front panel, and hold the STANDBY/ON from the surround component is switched for about two seconds. automatically. - Page 41 Listening to your system Setting What it does Option(s) Switches on/off the effect of Acoustic Calibration EQ. (Acoustic Calibration S.DELAY Some monitors have a slight delay when showing video, so 0.0 to 9.0 (frames) (Sound Delay) the soundtrack will be slightly out of sync with the picture. 1 second = 30 frames By adding a bit of delay, you can adjust the sound to match (NTSC)
- Page 42 Listening to your system Setting What it does Option(s) A.DLY This feature automatically corrects the audio-to-video delay (Auto Delay) between components connected with an HDMI cable. The audio delay time is set depending on the operational status of the display connected with an HDMI cable. The video delay time is automatically adjusted according to the audio delay time.
-
Page 43: Choosing The Input Signal
Listening to your system Choosing the input signal Using the headphone On this receiver, it is possible to switch the • Insert the headphone into the PHONES input signals for the different inputs as jack. described below. The sound is heard from the headphone and no sound is heard from the speakers RECEIVER Press... -
Page 44: The System Setup Menu
The System Setup menu Chapter 6: The System Setup menu Select the setting you want to adjust. Using the System Setup menu System Setup The following section shows you how to make 1.Auto MCACC detailed settings to specify how you’re using 2.Manual SP Setup 3.Input Assign the receiver, and also explains how to fine-tune... -
Page 45: Manual Speaker Setup
The System Setup menu • Speaker Setting – Specify the size and number of speakers you’ve connected (see Manual speaker setup below). This receiver allows you to make detailed • Crossover Network – Specify which settings to optimize the surround sound frequencies will be sent to the subwoofer performance. - Page 46 The System Setup menu • Center – Select LARGE if your center • Subwoofer – LFE signals and bass speaker reproduces bass frequencies frequencies of channels set to SMALL are effectively, or select SMALL to send bass output from the subwoofer when YES is frequencies to the other speakers or selected (see notes below).
-
Page 47: Crossover Network
The System Setup menu Crossover Network Select a setup option. • Manual – Move the test tone manually • Default setting: 100Hz from speaker to speaker and adjust This setting decides the cutoff between bass individual channel levels. sounds playing back from the speakers •... -
Page 48: Speaker Distance
The System Setup menu The Input Assign menu • You can change the channel levels at any You only need to make settings in the Input RECEIVER time by press , then press CH Assign menu if you didn’t hook up your SELECT and LEV +/–... -
Page 49: The Speaker System Setting
The System Setup menu Select ‘Input Assign’ from the System Setup menu. The Speaker System setting Specify either using the surround back System Setup speaker (or the speaker B), or the front height 1.Auto MCACC 2.Manual SP Setup speaker connection with the B-speaker 3.Input Assign 4.Speaker System 5.Video Parameter... -
Page 50: The Video Parameter Setting
The System Setup menu Video Converter The Video Parameter setting This setting specifies valid/invalid for the function that converts the input video signal This receiver can up-convert the video signal from each composite/component video input from the composite/component video terminal. When OFF is selected, Resolution terminals;... -
Page 51: Aspect
The System Setup menu Select output resolution. • AUTO – The resolution is selected automatically according to the capacity of the TV (monitor) connected by HDMI. • PURE – The signals are output with the same resolution as when input. •... -
Page 52: Using The Tuner
Using the tuner Chapter 7: Using the tuner High speed tuning Press and hold TUNE / for high speed Listening to the radio tuning. Release the button at the frequency The following steps show you how to tune in to you want. -
Page 53: Listening To Station Presets
Using the tuner Tune to a station you want to memorize. See Listening to the radio on page 52 for more on this. • To erase a station name, follow steps 1 and 2, and press ENTER while the display is Press TUNER EDIT. -
Page 54: Making Recordings
Making recordings Chapter 8: Making recordings Select the source you want to record. Use the MULTI CONTROL buttons (or INPUT Making an audio or a video SELECT). recording Select the input signal (if necessary). You can make an audio or a video recording RECEIVER Press the button then press... -
Page 55: Controlling The Rest Of Your System
Controlling the rest of your system Chapter 9: Controlling the rest of your system Setting the remote to control Selecting preset codes directly other components RECEIVER INPUT SELECT MEMORY INPUT Most components can be assigned to one of the MULTI CONTROL buttons using the DISP S.RETRIEVER SB CH... -
Page 56: Clearing All The Remote Control Settings
Controlling the rest of your system Clearing all the remote control settings You can clear all presets and restore the factory default settings. • While pressing the RECEIVER button, press and hold the ‘0’ button for three seconds. Default preset codes MULTI CONTROL Preset code button... -
Page 57: Controls For Tvs
Cable TV/Satellite TV/TV/DTV button on or off. DTV/TV Switches between the DTV and analog TV input modes TV/DTV for Pioneer flat panel TVs. HOME MENU Use as the GUIDE button for navigating. Cable TV/Satellite TV/TV/DTV RETURN Use to select closed captioning with DTV. -
Page 58: Controls For Other Components
Controlling the rest of your system Controls for other components This remote control can control these components (BD, DVD, CD, DVR (BDR), VCR, CD-R) after entering the proper codes or teaching the receiver the commands (see Controlling the rest of your system on page 55 for more on this). -
Page 59: Preset Code List
CineVision 2087 Mitsubishi 2020 Coby 2029 Manufacturer Code Nesa 2080 Manufacturer Code Curtis Mathes 2089 Next Base 2093 Pioneer 2255, 2192, 2281 Pioneer 0291, 0113, 0294, CyberHome 2000, 2088 Nexxtech 2056 0296 Denon 2310, 2311, 2312 Cytron 2039 Onkyo 2076... - Page 60 1016, 1020, 1022, 1023, 1024 JVC 0007, 0010, 0044 Manufacturer Code RCA 0000, 0003, 0004, 0005, Humax 1016, 1020 Kawasho 0002, 0004, 0006 Pioneer 2257, 2193, 2258, 0006, 0013, 0024, 0035 Hush 1017 KEC 0104 2259, 2260, 2261, 2264, Realistic 0100, 0104...
- Page 61 MEI 1004 Videoway 6112 Touch 1017 Memorex 1001, 1002, 1003, Manufacturer Code Zenith 6112 1004, 1005, 1018, 1019 UltimateTV 1031 Pioneer 6029, 6028, 6095, MGN Technology 1002 Unitech 1002 Cable Set Top Box 6099, 0297 Microsoft 1017 Vector Research 1000 (Cable/PVR...
-
Page 62: Other Connections
• Features such as the equalizer cannot be controlled using this receiver, and we recommend switching the equalizer off before connecting. • Pioneer cannot under any circumstances accept responsibility for any direct or indirect loss arising from any inconvenience or loss of recorded material resulting from the iPod failure. -
Page 63: Ipod Playback
Note 1 The controls of your iPod (excluding the iPod touch and iPhone) will be inoperable when connected to this receiver (Pioneer shows in the iPod display). 2 • Note that non-roman characters in the title are displayed as *. -
Page 64: Watching Photos And Video Content
Other connections About iPod Button What it does / When browsing, press to move to previous/next levels. / During Audiobook playback, press to switch the playback speed: Faster Normal Slower TOP MENU Press to return to the iPod Top menu screen. -
Page 65: Connecting A Usb Device
(MP3 players) of format FAT16/32. It is not possible to connect this receiver to a personal computer for USB playback. • Pioneer cannot guarantee compatibility (operation and/or bus power) with all USB mass storage devices and assumes no responsibility for any loss of data that may occur when connected to this receiver. -
Page 66: Compressed Audio Compatibility
Other connections About MPEG-4 AAC Important Advanced Audio Coding (AAC) is at the core of If a USB Error message lights in the display, try the MPEG-4 AAC standard, which incorporates following the points below: MPEG-2 AAC, forming the basis of the MPEG-4 audio compression technology. -
Page 67: Bluetooth® Adapter For Wireless Enjoyment Of Music
Note 1 • It must be necessary that the Bluetooth wireless technology enabled device supports A2DP profiles. • Pioneer does not guarantee proper connection and operation of this unit with all Bluetooth wireless technology enabled devices. 2 • It must be necessary that the Bluetooth wireless technology enabled device supports AVRCP profiles. -
Page 68: Pairing Bluetooth Adapter And Bluetooth Wireless Technology Device
Other connections Switch the receiver into standby and Switch on the Bluetooth wireless Bluetooth connect ADAPTER to the technology device that you want to make ADAPTER PORT located in the rear panel. pairing, place it near the system and set it into the pairing mode. -
Page 69: Listening To Satellite Radio
Bluetooth programming, local traffic and weather and SIG, Inc. and any use of such marks by Pioneer news from your most trusted sources. Corporation is under license. Other trademarks and trade names are those of their Once you’ve purchased a SIRIUS tuner you’ll... -
Page 70: Connecting Your Siriusconnect Tm Tuner
Other connections • If after pressing SIRIUS the display shows Connecting your SiriusConnect Tuner ANTENNA ERROR, try disconnecting the To receive SIRIUS Satellite Radio broadcasts, antenna and reconnecting. If the display you will need to activate your SiriusConnect shows CHECK SIRIUS TUNER, check the tuner. -
Page 71: Saving Channel Presets
Other connections Saving channel presets Using the SIRIUS Menu This receiver can memorize up to 30 channels, The SIRIUS Menu provides additional SIRIUS stored. Radio features. Select the channel you want to Press TOP MENU. memorize. Use / to select a menu item then See Selecting channels and browsing by genre press ENTER. -
Page 72: Additional Information
Take a look at the other components and electrical appliances being used, because sometimes the problem may lie there. If the trouble isn’t sorted out even after going through the checks below, ask your nearest Pioneer authorized independent service company to carry out repair work. - Page 73 Additional information Problem Remedy No sound from subwoofer. • Make sure the subwoofer is switched on. • If the subwoofer has a volume knob, make sure it’s turned up. • The Dolby Digital or DTS source you are listening to may not have an LFE channel.
- Page 74 Additional information Problem Remedy During a playback search, • This is not a malfunction, but be sure to turn the volume down to noise is output from a DTS prevent the output of loud noise from your speakers. compatible CD player. Everything seems to be set •...
-
Page 75: Hdmi
Additional information HDMI Symptom Remedy No picture or sound. • If the problem still persists when connecting your HDMI component directly to your monitor, please consult the component or monitor manual or contact the manufacturer for support. No picture. • Depending in the output settings of the source component, it may be outputting a video format that can’t be displayed. -
Page 76: Important Information Regarding The Hdmi Connection
Additional information Important information regarding Configuration the HDMI connection Connect your HDMI-equipped component There are cases where you may not be able to directly to the display using an HDMI cable. route HDMI signals through this receiver (this Then use the most convenient connection depends on the HDMI equipped component (digital is recommended) for sending audio to you are connecting-check with the... -
Page 77: Usb Messages
Additional information USB messages Symptom Cause Action iPod/USB Error 1 There is a problem with the signal path Switch off the receiver and reconnect (I/U ERR1) from the USB to the receiver. the USB to the receiver. iPod/USB Error 3 When there is no response from the USB. -
Page 78: Resetting The Main Unit
Additional information Tuner Section Resetting the main unit Frequency Range (FM) . . . 87.5 MHz to 108 MHz Antenna Input (FM) ..75 Ω unbalanced Use this procedure to reset all the receiver’s Frequency Range (AM) . -
Page 79: Cleaning The Unit
After all, we want you listening for a lifetime. S001_A1_En Published by Pioneer Corporation. Copyright © 2010 Pioneer Corporation. Cleaning the unit All rights reserved. • Use a polishing cloth or dry cloth to wipe off dust and dirt. - Page 80 ADVERTENCIA PRECAUCIÓN PARA LA VENTILACIÓN Este aparato no es impermeable. Para evitar el riesgo Cuando instale este aparato, asegúrese de dejar de incendio y de descargas eléctricas, no ponga ningún espacio en torno al mismo para la ventilación con el fin recipiente lleno de líquido (como pueda ser un vaso o de mejorar la disipación de calor (por lo menos 40 cm un florero) cerca del aparato ni lo exponga a goteo,...
- Page 81 IMPORTANTE CAUTION RISK OF ELECTRIC SHOCK DO NOT OPEN ATENCIÓN: La luz intermitente con el símbolo de punta El punto exclamativo dentro un triángulo PARA PREVENIR EL PELIGRO DE CHOQUE de flecha dentro un triángulo equilátero. equilátero convenido para avisar el usuário ELÉCTRICO NO REMOVER LA TAPA NI LAS Está...
- Page 82 Enhorabuena por la adquisición de este producto Pioneer. Lea completamente este manual de instrucciones para aprender a operar correctamente el aparato. Después de haber terminado la lectura de las instrucciones, guarde el manual en un lugar seguro para poderlo consultar en el futuro.
- Page 83 07 Uso del sintonizador 11 Información adicional Recepción de radio ....52 Solución de problemas ....72 Cómo mejorar el sonido estéreo en FM.
- Page 84 Organigrama de ajustes del receptor Este equipo es un receptor AV completo Los colores de los pasos indican lo siguiente: equipado con numerosas funciones y Elemento de ajuste necesario terminales. Se puede usar fácilmente tras seguir el procedimiento indicado a continuación para la realización de para Ajuste que debe realizarse si es necesario realizar las conexiones y ajustes.
-
Page 85: Antes De Comenzar
Capítulo 1: Antes de comenzar • Aunque distintas pilas tengan la misma forma, pueden tener tensiones diferentes. Comprobación del contenido de No mezcle pilas de distinto tipo. la caja • Cuando se deshaga de las pilas usadas, Compruebe que ha recibido todos los asegúrese de respetar las disposiciones accesorios siguientes: gubernamentales o las normas de las... -
Page 86: Ventilación
Ventilación Al instalar este equipo, asegúrese de que deja suficiente espacio alrededor del mismo a fin de que la ventilación mejore la dispersión del calor (al menos 40 cm en la parte superior). Si no deja suficiente espacio entre esta unidad y las paredes u otros equipos, la acumulación de calor en su interior podría alterar el funcionamiento o provocar fallos. -
Page 87: Controles E Indicadores
Capítulo 2: Controles e indicadores Panel frontal VSX-920 AUDIO/ VIDEO MULTI- CHANNEL RECEIVER PHASE CONTROL STANDBY/ON SPEAKERS DIMMER DISPLAY BAND TUNE TUNER EDIT PRESET ENTER INPUT MASTER SELECTOR VOLUME PHONES LISTENING MODE iPod iPhone VIDEO INPUT AUTO/DIRECT STEREO/ALC STANDARD ADV SURROUND DIRECT CONTROL iPod iPhone... -
Page 88: Alcance Operativo Del Mando A Distancia
PRESET / Alcance operativo del mando a Se utiliza para seleccionar estaciones de distancia radio preseleccionadas (página 53) y para El mando a distancia puede que no funcione seleccionar canales de SIRIUS Radio correctamente si: (página 70). • Hay obstáculos entre el mando a distancia Dial MASTER VOLUME y el sensor del mando a distancia del receptor. -
Page 89: Pantalla
Pantalla PHASE Información de presintonía o indicador de señal de entrada Se ilumina cuando se enciende Phase Control (página 38). Muestra el número de presintonía del sintonizador o el tipo de señal de entrada, etc. AUTO Pantalla de visualización de caracteres Se ilumina cuando la función Auto Surround está... - Page 90 11 Indicadores Dolby Digital 15 DIR. Se ilumina cuando se activa el modo DIRECT o PURE DIRECT (página 38). Se ilumina cuando se detecta una señal codificada en Dolby Digital. Se ilumina cuando se detecta una fuente con señales de sonido codificadas en Dolby Digital Plus.
-
Page 91: Mando A Distancia
SLEEP Púlselo para cambiar el tiempo que debe Mando a distancia transcurrir antes de que el receptor se apague (30 min – 60 min – 90 min – Off). Puede comprobar el tiempo de desconexión restante RECEIVER SLEEP SOURCE CONTROL en cualquier momento pulsando SLEEP una vez. - Page 92 Blu-ray. Alterna entre los modos de entrada de TV Pulse TUNER o SIRIUS primero para acceder a: analógica y DTV para los televisores de pantalla plana Pioneer. TUNER EDIT Memoriza estaciones para su recuperación (páginas 52 y 71). Cuando se pulsa TUNER, también permite cambiar el...
- Page 93 11 Botones numéricos y otros controles de Pulse SIRIUS primero para acceder a: componentes D.ACCESS Utilice los botones numéricos para seleccionar Después de pulsar este botón, puede directamente una frecuencia de radio acceder directamente a una emisora de (página 52) o las pistas de un CD, etc. Se radio utilizando los botones numéricos puede acceder a otros botones después de (página 71).
-
Page 94: Conexión Del Equipo
Capítulo 3: Conexión del equipo Con estas conexiones puede disfrutar simultáneamente del sonido envolvente de 5.1 Determinación de la aplicación canales en la zona principal con reproducción de los altavoces estéreo del mismo sonido en los altavoces B. Esta unidad le permite diseñar varios sistemas No se emite sonido alguno desde el altavoz de sonido envolvente, según el número de trasero de sonido envolvente. -
Page 95: Conexión De Otros Altavoces
• El sonido saldrá, bien por el altavoz • Si prevé conectar sólo un altavoz de sonido delantero con efectos de altura o por el envolvente trasero, colóquelo justo detrás altavoz trasero envolvente, según el altavoz de usted. que se haya seleccionado en la •... - Page 96 • Los altavoces de sonido envolvente y de sonido envolvente trasero se deben colocar a una altura de de entre 60 y 90 cm por encima de los oídos y ligeramente inclinados hacia abajo. Asegúrese de que los altavoces no queden frente a frente. Para DVD-Audio, los altavoces deben situarse más directamente detrás del oyente que para la reproducción de cine en...
-
Page 97: Conexión De Los Altavoces
Conexión de los altavoces El receptor puede funcionar con sólo dos Puede utilizar los altavoces conectados a los altavoces estéreo (los altavoces frontales en el terminales delanteros con efectos de altura diagrama), pero se recomienda utilizar al (altavoz B) para escuchar una reproducción menos tres altavoces, o una configuración en estéreo en otra sala. -
Page 98: Activación Del Terminal De Altavoces
Conexiones de cables desnudos Activación del terminal de altavoces A-Terminales de altavoces: Si ha seleccionado Surr.Back en El ajuste de Speaker System en la página 49, puede Trence los hilos expuestos del cable. cambiar de altavoz con el botón SPEAKERS. Si ha seleccionado Height, el botón simplemente Afloje el terminal e inserte el hilo activará... -
Page 99: Conexiones De Los Cables
Asegúrese de conectar el terminal en la dirección correcta. Conexiones de los cables Asegúrese de no doblar los cables por encima Acerca de HDMI del equipo (como se muestra en la ilustración). La conexión HDMI transfiere vídeo digital sin Si esto sucede, el campo magnético producido comprimir, así... -
Page 100: Cables De Audio Analógico
Cables de vídeo “x.v.Color” y el logotipo x.v.Color son marcas de fábrica de Sony Corporation. Cables de vídeo RCA estándar Estos cables son el tipo de conexión de vídeo Cables de audio analógico más común y deben utilizarse para las Utilice cables fonográficos RCA estéreo para conexiones a los terminales de vídeo conectar componentes de audio analógico. -
Page 101: Acerca Del Convertidor De Vídeo
Acerca del convertidor de vídeo El convertidor de vídeo garantiza que todas las fuentes de vídeo se emitan desde el terminal HDMI OUT. La única excepción es HDMI: dado que esta resolución no se puede remuestrear, debe conectar el monitor/ televisor a las salidas de vídeo HDMI del receptor cuando conecte estas fuentes de vídeo. -
Page 102: Conexión De Componentes De Reproducción
Conexión de componentes de reproducción y de un TV Conexión mediante HDMI Si dispone de un componente (reproductor de discos Blu-ray, etc.) equipado con HDMI o DVI (con HDCP), puede conectarlo a este receptor con un cable HDMI disponible en el mercado. IN BD SPEAKERS FRONT... -
Page 103: Conexión De Su Reproductor Dvd Sin Salida De Hdmi
Conexión de su reproductor DVD sin salida de HDMI Este diagrama muestra conexiones de un televisor (con entrada HDMI) y de un reproductor DVD (u otro componente de reproducción sin salida HDMI) al receptor. IN BD SPEAKERS FRONT CENTER CD-R/TAPE DVR/VCR ADAPTER PORT ( OUTPUT 5 V... -
Page 104: Conexión A Su Televisor Sin Entrada
Conexión a su televisor sin entrada HDMI Este diagrama muestra conexiones de un televisor (sin entrada HDMI) y de un reproductor DVD (u otro componente de reproducción) al receptor. • Con estas conexiones, la imagen no se genera al televisor aunque el reproductor DVD esté conectado con un cable HDMI. -
Page 105: Conexión De Un Receptor De Satélite U Otro Módulo De Conexión Digital
Conexión de un receptor de Conexión a una grabadora HDD/ satélite u otro módulo de DVD, grabadora de vídeo y otras conexión digital fuentes de vídeo Los receptores de satélite o de cable y los Este receptor tiene entradas y salidas de sintonizadores de televisor digital terrestre son audio/vídeo adecuadas para conectar ejemplos de los llamados ‘módulos de... -
Page 106: Uso De Conectores De Vídeo De Componentes
Importante Uso de conectores de vídeo de • Si ha conectado algún componente fuente componentes al receptor mediante una entrada de vídeo El vídeo de componentes debería ofrecerle una de componentes, también deberá conectar calidad de imagen superior que el vídeo su televisor a los conectores COMPONENT compuesto. -
Page 107: Conexión De Antenas
Uso de antenas exteriores Conexión de antenas Para mejorar la recepción en FM Conecte la antena de cuadro de AM y la antena Utilice un conector F (no suministrado) para de hilo de FM como se indica a continuación. conectar una antena FM externa. Para mejorar la recepción y la calidad de sonido, conecte antenas exteriores (consulte más abajo Uso de antenas exteriores). -
Page 108: Conexión Al Terminal De Vídeo Del Panel Frontal
Si encuentra que está dañado, pida un VIDEO AUDIO/VIDEO OUTPUT cable de recambio al representante Videocámara autorizado de Pioneer más cercano. (etc.) • Cuando no utilice el receptor de forma continuada (por ejemplo, durante las vacaciones), desenchúfelo de la toma de... -
Page 109: Configuración Básica
Capítulo 4: Configuración básica AUDIO TUNER EDIT MASTER PARAMETER VOLUME TOOLS MENU Configuración automática para MENU RECEIVER SLEEP SOURCE CONTROL sonido envolvente (MCACC) ENTER RECEIVER INPUT SELECT La configuración automática de calibración INPUT HOME MENU acústica multicanal (MCACC) mide las SETUP BAND iPod CTRL... - Page 110 Pulse RECEIVER en el mando a distancia • Para conseguir unos ajustes de altavoz y, a continuación, pulse el botón SETUP. correctos, no modifique el volumen Aparecerá una pantalla (OSD) en su televisor. durante los tonos de prueba. Utilice /// y ENTER en el mando a Confirme la configuración del altavoz.
-
Page 111: Otros Problemas Al Utilizar La Configuración Auto Mcacc Setup
Se muestra un informe de progreso en la pantalla mientras el receptor emite más tonos de prueba para determinar los ajustes óptimos del receptor para el nivel de canal, la distancia de los altavoces y la EC de calibración acústica. 1.Auto MCACC Now Analyzing Surround Analyzing... -
Page 112: Uso Del Sistema
Capítulo 5: Uso del sistema Puede comprobar en la pantalla del panel Importante frontal si la reproducción de sonido envolvente se está llevando a cabo de forma correcta. • Los modos de escucha y muchas funciones descritas en esta sección Cuando se usa un altavoz de sonido envolvente pueden no estar disponibles dependiendo trasero, 2D+PLIIx se visualiza cuando se... -
Page 113: Reproducción Automática
• Mientras escucha una fuente, pulse STANDARD. Reproducción automática Si la fuente es Dolby Digital, DTS o Dolby La opción de escucha más simple y directa es Surround codificado, el formato de la función Auto Surround. Con esta función, el descodificación apropiado será... -
Page 114: Uso De Los Efectos De Sonido Envolvente Avanzados
• DOLBY DIGITAL EX – Crea un sonido Con fuentes multicanal, puede seleccionar entre: envolvente en el canal trasero para fuentes de 5.1 canales y ofrece descodificación • DOLBY PLIIz HEIGHT – Sonido de hasta pura para fuentes de 6.1 canales (tales 7.1 canales como Dolby Digital Surround EX) •... -
Page 115: Reproducción Estéreo
Reproducción estéreo Uso de Front Stage Surround Al seleccionar STEREO, oirá la fuente Advance únicamente a través de los altavoces frontales La función Front Stage Surround Advance le izquierdo y derecho (y, posiblemente, del permite crear efectos de sonido envolvente subwoofer, según la configuración de los naturales utilizando sólo los altavoces altavoces). -
Page 116: Uso De Stream Direct
Uso de Stream Direct Sonido mejorado con Phase Control Utilice los modos de Stream Direct cuando desee escuchar la reproducción más fiel La función Phase Control de este receptor posible de una fuente. Se omiten todos los utiliza medidas de corrección de fase para procesamientos de señales innecesarios. -
Page 117: Reproducción Con El Ecualizador De Calibración Acústica
La tecnología Phase Control ofrece una reproducción de sonido uniforme mediante el Uso del procesamiento del canal uso de la equiparación de fases para una envolvente trasero imagen de sonido óptima desde su posición de Puede hacer que el receptor utilice escucha. -
Page 118: Ajuste De La Función Up Mix
• SB ON – El proceso de descodificación de UP MIX OFF UP MIX ON matriz para generar el componente de sonido envolvente trasero del componente de sonido envolvente se activa. • SB AUTO – Se activa automáticamente el procesamiento de descodificación de matriz para la generación del componente de sonido envolvente trasero del componente de sonido envolvente. - Page 119 Utilice / para seleccionar el ajuste que Utilice / para realizar el ajuste desea modificar. necesario. Según el estado/modo del receptor, es posible Consulte la tabla siguiente para conocer las que algunas opciones no estén disponibles. En opciones disponibles de cada ajuste. la siguiente tabla se facilitan algunas Pulse RETURN para confirmar la observaciones al respecto.
- Page 120 Ajuste Qué hace Opciones HDMI Especifica la dirección de la señal de audio HDMI que emite este receptor (amp) o pasa por él hasta llegar a un (Sonido HDMI) THRU televisor de pantalla plana. Cuando se selecciona THRU, el receptor no emite ningún sonido. A.DLY Esta función corrige automáticamente el retardo de sonido a vídeo entre componentes conectados con un...
-
Page 121: Selección De La Señal De Entrada
Selección de la señal de entrada Uso de los auriculares En este receptor se pueden cambiar las • Inserte los auriculares en el conector señales de entrada para las distintas entradas, PHONES. tal como se describe más abajo. El sonido saldrá por los auriculares y los altavoces conectados al receptor no emitirán Pulse RECEIVER... -
Page 122: El Menú System Setup
Capítulo 6: El menú System Setup Seleccione la opción que desea ajustar. Uso del menú System Setup System Setup En la siguiente sección se explica de qué modo 1.Auto MCACC realizar ajustes detallados para especificar 2.Manual SP Setup 3.Input Assign cómo se está... -
Page 123: Configuración Manual De Los Altavoces
• Speaker Setting – Especifique el tamaño y el número de altavoces que ha conectado Configuración manual de los (véase más abajo). altavoces • Crossover Network – Para especificar Este receptor permite hacer ajustes detallados qué frecuencias se enviarán al subwoofer para optimizar el sonido envolvente. - Page 124 • Center – Seleccione LARGE si el altavoz • Subwoofer – Las señales LFE y las central reproduce las frecuencias bajas de frecuencias bajas de canales ajustados a manera efectiva; seleccione SMALL para SMALL son emitidas desde el subwoofer enviar las frecuencias bajas a otros cuando se selecciona la opción YES (vea altavoces o al subwoofer.
-
Page 125: Red Divisora De Frecuencias
Red divisora de frecuencias Seleccione una opción de configuración. • Ajuste por defecto: 100Hz • Manual – Para mover el tono de prueba Esta opción determina el corte entre los manualmente de altavoz en altavoz y sonidos graves reproducidos desde los ajustar los niveles de canales individuales. -
Page 126: Distancia De Los Altavoces
Sugerencia El menú Input Assign • Puede cambiar los niveles de canal en Sólo es necesario que realice ajustes en el RECEIVER cualquier momento pulsando menú Input Assign si no conectó su equipo a continuación, CH SELECT y LEV +/– en el según la configuración predeterminada para mando a distancia. -
Page 127: El Ajuste De Speaker System
Seleccione ‘Input Assign’ en el menú System Setup. El ajuste de Speaker System Especificar usando el altavoz trasero System Setup envolvente (o el altavoz B), o la conexión del 1.Auto MCACC 2.Manual SP Setup altavoz delantero con efectos de altura con los 3.Input Assign 4.Speaker System 5.Video Parameter... -
Page 128: El Ajuste Video Parameter
Convertidor de vídeo El ajuste Video Parameter Este ajuste especifica la validez/invalidez para la función que convierte la señal de entrada de Este convertidor puede elevar la frecuencia de vídeo desde cada terminal de vídeo de la señal de entrada de los terminales de vídeo componentes/compuesto. -
Page 129: Resolución
Resolución Seleccione la relación de aspecto de salida que desee. Especifica la resolución de salida de la señal • THROUGH – La señal de vídeo de entrada de vídeo (cuando las señales de entrada de se emite sin modificaciones. vídeo se emiten al terminal HDMI OUT, seleccione este ajuste según la resolución de •... -
Page 130: Uso Del Sintonizador
Capítulo 7: Uso del sintonizador Sintonización rápida Pulse y mantenga pulsado TUNE / Recepción de radio para que la operación de sintonización se El siguiente procedimiento describe cómo realice a alta velocidad. Suelte el botón en sintonizar emisiones de radio de FM o AM la frecuencia que desea sintonizar. -
Page 131: Cómo Sintonizar Emisoras Memorizadas
Sintonice la emisora que desea • El nombre se almacena cuando se pulsa memorizar. ENTER. Para más detalles, consulte Recepción de radio en la página 52. Sugerencia Pulse TUNER EDIT. • Para borrar el nombre de una estación, La pantalla muestra PRESET, luego MEM siga los pasos 1 y 2, y pulse ENTER parpadeante y una presintonía. -
Page 132: Grabación
Capítulo 8: Grabación Seleccione la fuente que desea grabar. Utilice los botones MULTI CONTROL (o INPUT Cómo hacer una grabación de SELECT). audio o vídeo Seleccione la señal de entrada (si es Puede hacer una grabación de audio o vídeo necesario). -
Page 133: Control De Otros Componentes Del Sistema
Capítulo 9: Control de otros componentes del sistema Uso del mando a distancia para Selección directa de códigos de controlar otros componentes preajuste La mayoría de los componentes pueden RECEIVER INPUT SELECT MEMORY asignarse a uno de los botones MULTI INPUT CONTROL utilizando el código de preajuste del DISP... -
Page 134: Borrado De Todos Los Ajustes Del Mando A Distancia
Borrado de todos los ajustes del mando a distancia Puede borrar todos los ajustes y restaurar los ajustes de fábrica. • Mientras mantiene pulsado el botón RECEIVER , pulse el botón ‘0’ durante 3 segundos. Códigos de preajuste predeterminados Botones MULTI Código de CONTROL preajuste... -
Page 135: Controles Para Televisores
TV por cable/TV satélite/TV/ botón TV de encendido o apagado. DTV/TV Alterna entre los modos de entrada de TV analógica y TV/DTV DTV para los televisores de pantalla plana Pioneer. HOME MENU Utilícelo como botón GUIDE para navegar. TV por cable/TV satélite/TV/ RETURN Úselo para seleccionar los subtítulos ocultos en el... -
Page 136: Controles Para Otros Componentes
Controles para otros componentes Este mando a distancia puede controlar componentes (BD, DVD, CD, DVR (BDR), VCR, CD-R) una vez que se han introducido los códigos apropiados o después de programar comandos en el receptor (para más detalles, consulte Control de otros componentes del sistema en la página 55). Utilice los botones MULTI CONTROL para seleccionar el componente. -
Page 137: Lista De Códigos De Preajuste
Regent 2074 Televisor Disney 2022 Rio 2087 Fabricante Código Fabricante Código Durabrand 2090 Rowa 2071 Pioneer 2255, 2192, 2281 Pioneer 0291, 0113, 0294, Emerson 2067, 2082, 2091 Samsung 2009, 2011, 2015, 0296 Denon 2310, 2311, 2312 Enterprise 2082 2031, 2044, 2068... - Page 138 Dynatech 1005 Proton 0004, 0006, 0007 Hitachi 0004, 0006, 0007 Fabricante Código Protron 0055 Echostar 1029 Hyundai 0098 Pioneer 2257, 2193, 2258, Proview 0068 Electrohome 1003 Ilo 0089, 0091 2259, 2260, 2261, 2264, Pulsar 0004, 0011, 0099 Electrophonic 1003 IMA 0008...
- Page 139 Receptor de cable Teac 1005 Pioneer 6029 Technics 1004 Fabricante Código Amino 6078 Teknika 1003, 1004, 1005 Pioneer 6029, 6028, 6095, Bright House 6074, 6029 Tivo 1016, 1020, 1021, 1022, 6099, 0297 Cable One 6074, 6029 1025 ABC 6122 Cablevision 6074, 6029...
-
Page 140: Otras Conexiones
• Pioneer no se hace responsable, bajo ninguna circunstancia, de ninguna pérdida directa o indirecta como consecuencia de cualquier percance o pérdida de material grabado como resultado de un fallo del iPod. -
Page 141: Reproducción Del Ipod
Reproducción del iPod Sugerencia Puede aprovechar la pantalla de un televisor • Para reproducir todas las canciones de conectado a este receptor para desplazarse una categoría específica, seleccione All en por las canciones del iPod. También se la parte superior de cada categoría. Por pueden controlar todas las operaciones ejemplo, puede reproducir todas las relacionadas con la música desde el panel... -
Page 142: Visionado De Fotos Y Vídeos
Acerca de iPod Botón Qué hace / Durante la reproducción de un audiolibro, púlselo para cambiar la velocidad de reproducción: Rápido Normal Lento TOP MENU Púlselo para volver a la pantalla del menú iPod Top. RETURN Púlselo para volver al nivel anterior. “Made for iPod”... -
Page 143: Conexión De Un Dispositivo Usb
USB. • Pioneer no puede garantizar la compatibilidad (funcionamiento y/o potencia de bus) con todos los dispositivos de almacenamiento de datos USB y no asume ninguna responsabilidad por cualquier pérdida de datos que pueda producirse cuando los conecte a este receptor. -
Page 144: Controles De Reproducción Básica
Controles de reproducción básica Para obtener más información sobre los mensajes de error, consulte Mensajes USB en La siguiente tabla muestra los controles la página 77. básicos del mando a distancia para la reproducción USB. Pulse iPod USB para pasar Si el problema persiste, es probable que su el mando a distancia al modo de dispositivo USB sea incompatible. -
Page 145: Adaptador Bluetooth® Para El Disfrute Inalámbrico De Música
Bluetooth, puede Nota 1 • Es imprescindible que el dispositivo habilitado con tecnología inalámbrica Bluetooth soporte perfiles A2DP. • Pioneer no garantiza un funcionamiento y conexión correctos de esta unidad con todos los dispositivos que dispongan de tecnología inalámbrica Bluetooth. -
Page 146: Conexión Del Adaptador Bluetooth Opcional
Cómo emparejar el ADAPTADOR escuchar música en un dispositivo no equipado con tecnología inalámbrica Bluetooth y el aparato de tecnología Bluetooth. El modelo AS-BT100 es compatible inalámbrica Bluetooth con la protección de contenidos SCMS-T, de El “emparejamiento” debe realizarse antes de modo que la música también puede que comience la reproducción del contenido disfrutarse en dispositivos equipados con... -
Page 147: Escucha De Contenidos Musicales De Un Dispositivo Con Tecnología Inalámbrica Bluetooth Con Su Sistema
Aparecerá NODEVICE en la pantalla del SIG, Inc., y cualquier uso de dichas marcas receptor. En este caso, lleve a cabo la por Pioneer Corporation se hace bajo licencia. operación de conexión desde el lado del Otras marcas y nombres comerciales son dispositivo con tecnología inalámbrica... -
Page 148: Conexión Del Sintonizador
Conecte un sintonizador SiriusConnect a También dispone de paquetes especiales para familias que permiten restringir los contenidos la toma SIRIUS IN de la parte trasera del receptor. no aptos para niños. También deberá conectar la antena y Para suscribirse a SIRIUS, los clientes de adaptador de CA al sintonizador EE.UU. -
Page 149: Memorización De Canales
Uso de SIRIUS Menu Sugerencia SIRIUS Menu proporciona funciones • Para seleccionar canales directamente, adicionales de SIRIUS Radio. pulse D.ACCESS y, a continuación, los tres Pulse TOP MENU. dígitos del número del canal. Utilice / para seleccionar un • Puede pulsar DISP (DISPLAY) para elemento del menú... -
Page 150: Información Adicional
Si no puede solucionar el problema después de realizar las comprobaciones que se indican a continuación, diríjase al centro de servicio técnico Pioneer autorizado más cercano para que lleve a cabo las reparaciones necesarias. - Page 151 Problema Solución El subwoofer no emite • Asegúrese de que el subwoofer está conectado. sonido. • Si el subwoofer dispone de un mando de volumen, asegúrese de que está ajustado de forma adecuada. • Es posible que la fuente Dolby Digital o DTS que escucha no tenga un canal LFE.
- Page 152 Problema Solución Durante una búsqueda de • Esto no indica un mal funcionamiento; asegúrese de disminuir el reproducción, se emite volumen para evitar que los altavoces emitan un ruido fuerte. sonido desde un reproductor de CD compatible con DTS. Todo parece estar •...
-
Page 153: Hdmi
HDMI Síntoma Solución No hay imagen ni sonido. • Si el problema todavía persiste cuando conecte su componente HDMI directamente al monitor, consulte el manual del componente o del monitor, o bien póngase en contacto con el fabricante para obtener asistencia. -
Page 154: Información Importante Relativa A La Conexión Hdmi
Información importante relativa a la Configuración conexión HDMI Conecte el componente compatible con HDMI Habrá casos en los que no podrá encaminar directamente a la pantalla mediante un cable señales HDMI a través de este receptor HDMI. Después utilice la conexión más (depende del componente que está... -
Page 155: Mensajes Usb
Mensajes USB Síntoma Causa Acción iPod/USB Error 1 Existe un problema con la ruta de la Desconecte el receptor y vuelva a (I/U ERR1) señal entre el USB y el receptor. conectar el USB al receptor. iPod/USB Error 3 Cuando no hay respuesta del USB. Desconecte el receptor y vuelva a (I/U ERR3) conectar el USB al receptor. -
Page 156: Restablecimiento De Los Ajustes Por Defecto
Sección del sintonizador Restablecimiento de los ajustes Intervalo de frecuencia (FM) ..... de 87,5 MHz a 108 MHz por defecto del equipo Entrada de antena (FM). -
Page 157: Limpieza Del Equipo
Publicado por Pioneer Corporation. Limpieza del equipo Copyright © 2010 Pioneer Corporation. • Utilice un paño de pulir o un paño seco Reservados todos los derechos. para quitar el polvo y la suciedad. • Cuando la superficie esté muy sucia, límpiela con un paño suave humedecido... - Page 159 Within 40 days of receiving your complaint, Pioneer will investigate the dispute and will either: (1) respond to your complaint in writing informing you what action Pioneer will take, and in what time period, to resolve the dispute; or (2) respond to your complaint in writing informing you why it will not take any action.
- Page 160 253 Alexandra Road, #04-01, Singapore 159936 TEL: 65-6472-7555 PIONEER ELECTRONICS AUSTRALIA PTY. LTD. 178-184 Boundary Road, Braeside, Victoria 3195, Australia, TEL: (03) 9586-6300 PIONEER ELECTRONICS DE MEXICO S.A. DE C.V. Blvd.Manuel Avila Camacho 138 10 piso Col.Lomas de Chapultepec, Mexico, D.F. 11000 TEL: 55-9178-4270 K002_B1_En Printed in China <5707000003260S>...
Need help?
Do you have a question about the VSX-920-K and is the answer not in the manual?
Questions and answers