Advertisement
ABOUT BOOM ARM
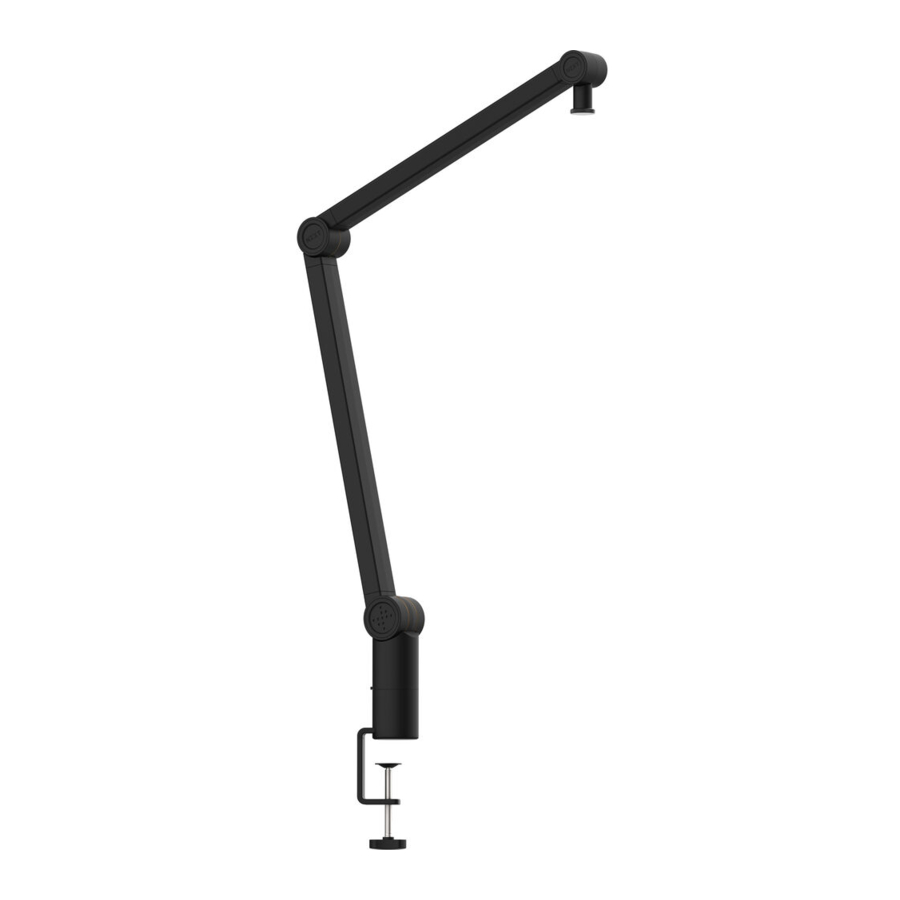
The Boom Arm fits into any battle station seamlessly. Smooth moving arms make adjusting simple while hidden cable management neatly organizes USB and XLR cables. Game uninterrupted with hidden springs providing quiet operation.
PACKAGE CONTENTS & DESCRIPTION

- Cable Channel Covers
- TOP Hinge
- Microphone Connection Point
- Female 3/8" to Male 5/8" Adapter
- Middle Hinge
- Bottom Hinge
- Desk-clamp Connection Point
DESK-CLAMP MOUNTING SYSTEM

- Boom Arm Connection Point
- Desk Clamp Mechanism
- Rotate Counter-clockwise to tighten
SETTING UP BOOM ARM
STEP 1: ATTACH DESK TOP MOUNTING SYSTEM TO DESK

Boom Arm comes with a desk-top mounting system for easy installation.
- Loosen the clamping mechanism by turning the handle clockwise.
- Place the mechanism on its desired location on your desk. Make sure the Boom Arm connection point is laying flat on the top of the desk.
- Tighten the clamping mechanism by turning the handle counterclockwise. The bottom of the mechanism should be lying flat against the underside of your desk.
STEP 2: ATTACHING BOOM ARM TO DESK-TOP MOUNTING SYSTEM

Insert the male end of Boom Arm's desk-top mounting pole into the female end of the desk-top clamp.
 NOTE
NOTE
- The maximum desktop thickness for the desk-top mounting system is 5cm.
STEP 3-1:
Boom Arm is threaded for male 3/8" connections.

- If using NZXT Capsule USB Microphone, insert included male 1 / 4" to female 3/8" adapter into bottom of microphone, then attach the microphone with adapter onto Boom Arm's male 3/8" connection.
STEP 3-2:

- If your microphone is threaded to US standard female 5/8", attach the female 3/8"to male 5/8" adapter included with Boom Arm.
STEP 3-3:

- Remove the cable channel covers.
- Insert USB cable and headset cable or XLR cable into microphone.
STEP 3-4:

- Place the cables inside of the exposed cable channels.
- Carefully re-insert the cable channel covers in the cable channels.
STEP 4: POSITION MICROPHONE

- After the microphone is securely attached to Boom Arm, position the microphone to its desired location.
- If necessary or desired, tighten the hinge points.
BASIC TROUBLESHOOTING
IF YOUR BOOM ARM FEELS LOOSE IN THE DESK CLAMP...
- Make sure the clamping mechanism is securely tightened and flat against both top side and under side your desk.
IF YOUR MICROPHONE IS DROOPING...
- Tighten hinge points slightly more, especially the bottom and middle hinge.
SUPPORT
- If you have an issue and you need further help to resolve, please contact us via email at: support@nzxt.com
SUPPORT AND SERVICE
If you have any questions or problems with the NZXT product you purchased, please don't hesitate to contact us using our support system. nzxt.com/customer-support
Please include a detailed explanation of your problem and your proof of purchase. For comments and suggestions, you can e-mail our design team, designer@nzxt.com. Lastly, we would like to thank you for your support by purchasing this product.
For more information about NZXT, please visit us online. NZXT Website: NZXT.com
Documents / Resources
References
Download manual
Here you can download full pdf version of manual, it may contain additional safety instructions, warranty information, FCC rules, etc.
Advertisement


Need help?
Do you have a question about the Boom Arm and is the answer not in the manual?
Questions and answers