
Related Manuals for aerauliqa CTRL-H0

Summary of Contents for aerauliqa CTRL-H0
- Page 1 CTRL-HO Manuale d’uso Operation Manual Manual d’utilisation Gebrauchsanweisung Manual de usuario...
-
Page 2: Table Of Contents
• Il collegamento elettrico non corretto può recare danno al ventilatore e interferire con altri dispositivi elettronici. 2 INSTALLAZIONE Fare riferimento al manuale d’installazione fornito nell’imballo del pannello di controllo oppure consultare il sito www.aerauliqa.it 3 COLLEGAMENTO ELETTRICO Fare riferimento al manuale d’installazione fornito nell’imballo del pannello di controllo oppure consultare il sito www.aerauliqa.it ATTENZIONE: Il pannello di controllo deve essere alimentato 24 VAC 50/60Hz con massimo carico 4VA oppure 12÷30VDC con massimo carico 2W. - Page 3 Modbus come segue: • Pannello di controllo: fare riferimento al manuale d’installazione fornito nell’imballo oppure consultare il sito www.aerauliqa.it • Ultima unità ventilante: la resistenza di terminazione è attivabile tramite Dip Switch 4 posizionato sul circuito elettronico della...
-
Page 4: Funzionalità
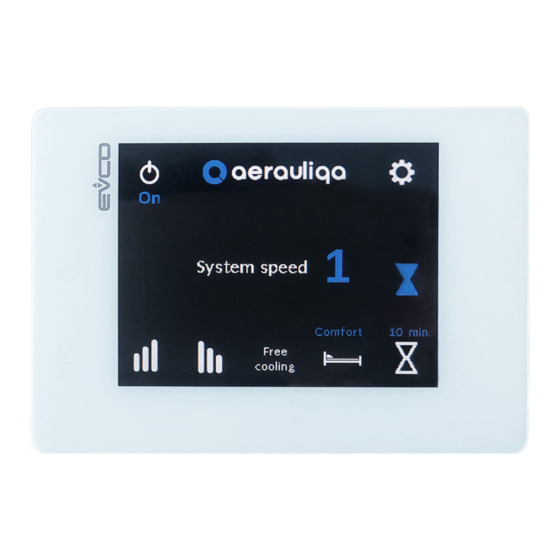
4 FUNZIONALITÀ 4.1 HOME PAGE Attenzione: Il CTRL-HO è il pannello di controllo remoto (master) che permette di comandare contemporaneamente tutte le unità ORION (slave) collegate. Non comanda le unità singolarmente. Auto Free cooling Velocità di sistema Modbus Comfort 10 min Free cooling Tasto... -
Page 5: Impostazione Lingua E Numero Unità Del Sistema
Icona Descrizione Allarme Filtro: il simbolo appare quando è necessario eseguire la manutenzione dei filtri (paragrafo 4.3) Controllo smart umidità: il simbolo appare se il sensore di umidità è attivo (paragrafo 4.3) Antigelo: il simbolo appare se la funzione antigelo è attiva (paragrafo 4.3) Allarme Modbus: il simbolo appare se una o più... - Page 6 Toccando il tasto Ok si accede alla seguente schermata: Unit 1 Unit 2 Unit 3 Unit 4 Unit 5 Unit 6 Unit 7 Unit 8 Tasto Descrizione Ritorno alla schermata precedente Ritorno alla schermata Home page Selezione dell’unità collegata Toccando il numero si accede alla seguente schermata: Nome: Unit 1 Direzione:...
-
Page 7: Descrizione Funzionalità
4.3 DESCRIZIONE FUNZIONALITÀ Tasto Icona/scritta Funzionalità Descrizione comando su display Le unità massimizzano il comfort termico e acustico. Il tempo di inversione varia automaticamente tra 40÷120 secondi, grazie alla sonda di temperatura integrata. Il primo ciclo temporale Comfort Comfort è di 70 secondi, poi varia automaticamente a seconda delle condizioni rilevate. -
Page 8: Stato Unità
4.4 CONFIGURAZIONE Toccando il tasto si accede alla seguente schermata: Numero di Impostazioni Reset unità unità filtro Stato Impostazioni Impostazioni unità di sistema controllo Tasto Descrizione Ritorno alla schermata precedente Ritorno alla schermata Home page Numero Impostazione numero di unità collegate (paragrafo 4.2) di unità... - Page 9 4.4.1 RESET FILTRO Eliminare l’allarme filtro e ripristinare la temporizzazione. Tasto Descrizione Ritorno alla schermata precedente Ritorno alla schermata Home page Ripristino allarme/temporizzazione e ritorno alla schermata precedente 4.4.2 STATO UNITÀ Comunicazione Modbus con indirizzo 1: Unit 1 nessun errore In caso di errore, verificare comunicazione, alimentazione e l’indirizzo Modbus sull’unità...
-
Page 10: Impostazioni Di Sistema
4.4.3 IMPOSTAZIONI DI SISTEMA Firmware: 02.01.01.AA.00 Lingua: Italiano Buzzer: Backlight: sempre acceso Password: disabilitata Tasto Descrizione Ritorno alla schermata precedente Ritorno alla schermata Home page Firmware Riferimento del firmware caricato sul pannello di controllo Lingua Selezione della lingua (italiano, inglese, francese, spagnolo o tedesco) Buzzer Impostazione segnale acustico: possibilità... -
Page 11: Imposta Password
4.4.4 PASSWORD Imposta Password Ambito Password Ambito password Disabilita Password Tasto Descrizione Ritorno alla schermata precedente Imposta Impostazione della password (inserire solo numeri, da 1 a 9999) Ambito Scegli se proteggere “Tutte le pagine” oppure solo “Pagine di configurazione”. Disabilita Disabilita la password Toccando il tasto “Imposta Password”, viene visualizzata la seguente schermata: Inserire Password (1-9999) - Page 12 Toccando il tasto “Ambito Password”, viene visualizzata la seguente schermata: Pagine protette da Password Modalità selezionata: Pagine di configurazione Conferma Tasto Descrizione Ritorno alla schermata precedente Selezione delle pagine da proteggere tra “Tutte le pagine” o “Pagine di configurazione” Conferma Toccare per confermare Se la password è...
- Page 13 Toccando il tasto “Disabilita Password”, viene visualizzata la seguente schermata: Inserire Password Conferma Tasto Descrizione Ritorno alla schermata precedente Inserire la password Conferma Toccare per disabilitare la password...
- Page 14 4.4.5 IMPOSTAZIONI CONTROLLO Toccare per regolare l’ora 29/05/2024 10:06:50 Free cooling: auto Night mode: disabilitato Umidostato: abilitato Tasto Descrizione Ritorno alla schermata precedente Ritorno alla schermata Home page Free cooling Selezione Free Cooling “manuale” oppure “auto” (paragrafo 4.3) Night mode Abilitazione/Disabilitazione Night mode (paragrafo 4.3) Umidostato Abilitazione/Disabilitazione controllo smart umidità...
-
Page 15: Installation
• A wrong electrical wiring can cause damage to the fan and interfere with other electronic devices. 2 INSTALLATION Refer to the manual supplied in the control panel box or consult the website www.aerauliqa.com 3 WIRING DIAGRAM Refer to the manual supplied in the control panel box or consult the website www.aerauliqa.com ATTENTION: The control panel must be powered 24 VAC 50/60Hz with maximum load 4VA or 12÷30VDC with maximum load 2W. - Page 16 Modbus line as follows: • Control panel: refer to the installation manual supplied in the box or consult www.aerauliqa.com. • Last ventilation unit: the termination resistor can be activated via Dip Switch 4 located on the electronic circuit of the support...
-
Page 17: Operation
4 OPERATION 4.1 HOME PAGE Attention: The CTRL-HO is the remote control panel (master) which allows all connected ORION units (slaves) to be controlled simultaneously. It does not control the units individually. Auto Free cooling System speed Modbus Comfort 10 min Free cooling Button... - Page 18 Icon Description Filter Alarm: the symbol is displayed when filter maintenance is required (paragraph 4.3) Smart humidity control: the symbol is displayed if the humidity sensor is active (paragraph 4.3) Antifrost: the symbol is displayed if the antifrost function is active (paragraph 4.3) Modbus alarm: the symbol is displayed if one or more units fail to communicate on the Modbus network.
- Page 19 Touching the OK button the following screen is displayed: Unit 1 Unit 2 Unit 3 Unit 4 Unit 5 Unit 6 Unit 7 Unit 8 Button Description Back to the previous screen Back to the Home Page Selection of the connected unit Touching the number the following screen is displayed: Name: Unit 1...
-
Page 20: Operation Description
4.3 OPERATION DESCRIPTION Icon/text Operation Description Button on display The units maximise the thermal and acoustic comfort. The inversion time varies automatically between 40÷120 seconds, thanks to the integrated temperature sensor. The first time cycle Comfort Comfort is 70 seconds, then it varies automatically depending on the detected conditions. - Page 21 4.4 CONFIGURATION Touching the button the following screen is displayed: Number of Unit Filter units settings reset Unit System Controller status settings settings Button Description Back to the previous screen Back to the Home Page Number Setting the number of wired units (paragraph 4.2) of units Unit setting Setting the airflow direction of each unit (paragraph 4.2)
-
Page 22: Filter Reset
4.4.1 FILTER RESET Clear the filter alarm and restore the timer. Button Description Back to the previous screen Back to the Home Page Alarm/Timer reset and return to previous screen 4.4.2 UNIT STATUS Modbus communication with address 1: Unit 1 no error If error, check the communication, the power supply and the Modbus address set on the unit... -
Page 23: System Settings
4.4.3 SYSTEM SETTINGS Firmware: 02.01.01.AA.00 Language: English Buzzer: Backlight: always on Password: disabled Button Description Back to the previous screen Back to the Home Page Firmware Firmware reference loaded on the control panel Language Language selection (Italian, English, French, Spanish or German) Buzzer Beep setting: choose between “On”... -
Page 24: Set Password
4.4.4 PASSWORD Set Password Ambito password Password scope Disable Password Button Description Back to the previous screen Password setting (enter numbers only, from 1 to 9999) Scope Choose whether to protect “All pages” or only “Setting pages”. Disable Touch to disable the password Touching the “Set Password button”, the following screen is displayed: Enter Password (1-9999) Confirm Password... - Page 25 Touching the “Password Scope” button, the following screen is displayed: Password protected pages Selected mode: Setting pages Confirm Button Description Back to previous screen Selection of pages to be protected between “All pages” or “Setting pages”. Confirm Touch to confirm If the password is enabled, when needed, the following screen is displayed.
- Page 26 Touching the “Disable Password” button, the following screen is displayed: Enter Password Confirm Button Description Back to the previous screen Enter password Confirm Touch to disable password...
-
Page 27: Controller Setting
4.4.5 CONTROLLER SETTING Touch to adjust the time 29/05/2024 10:06:50 Free cooling: auto Night mode: disabled Humidistat: enabled Button Description Back to the previous screen Back to the Home Page Free cooling Choose between Free Cooling “manual” or “auto” (paragraph 4.3) Night mode Enabling/Disabling of the Night mode (paragraph 4.3) -
Page 28: Installation
• Un mauvais branchement électrique peut endommager le ventilateur et interférer avec d’autres appareils électroniques. 2 INSTALLATION Veuillez consulter le manuel d’installation fourni dans l’emballage du panneau de contrôle ou visitez le site www.aerauliqa.com. 3 CONNEXION ÉLECTRIQUE Veuillez consulter le manuel d’installation fourni dans l’emballage du panneau de contrôle ou visitez le site www.aerauliqa.com. - Page 29 à la ligne Modbus de la manière suivante : • Panneau de contrôle : se référer au manuel d’installation fourni dans l’emballage ou consulter le site www.aerauliqa.com • Dernière unité de ventilation : la résistance de terminaison peut être activée via le Dip Switch 4 situé sur le circuit électronique de la base de support de la manière suivante :...
-
Page 30: Page D'accueil
4 FONCTIONNALITÉ 4.1 PAGE D’ACCUEIL Attention : Le CTRL-HO est le panneau de contrôle à distance (master) qui permet de commander simultanément tous les appareils ORION connectés (slave). Il ne contrôle pas les appareils individuellement. Auto Free cooling Vitesse du système Modbus Comfort 10 min... - Page 31 Touche Description Alarme filtre : le symbole apparaît lorsque l’entretien du filtre est nécessaire (section 4.3) Contrôle intelligent de l’humidité : le symbole apparaît si le capteur d’humidité est actif (section 4.3) Antigel : le symbole apparaît si la fonction antigel est activée (section 4.3) Alarme Modbus : le symbole apparaît si un ou plusieurs appareils ne parviennent pas à...
- Page 32 En appuyant sur le bouton OK, vous accédez à l’écran suivant : Unit 1 Unit 2 Unit 3 Unit 4 Unit 5 Unit 6 Unit 7 Unit 8 Touche Description Retourner à l’écran précédent Retourner à l’écran d’accueil Sélection de l’appareil connecté En appuyant sur la touche numérique, vous accédez à...
-
Page 33: Description Des Caractéristiques
4.3 DESCRIPTION DES CARACTÉRISTIQUES Icône/texte Fonctionalité Description Commande sur l’écran Les unités maximisent le confort thermique et acoustique. Le temps d’inversion varie automatiquement entre 40 et 120 secondes, grâce à la sonde de température intégrée. Le premier cycle de temps est de 70 secondes, puis il varie Comfort Comfort automatiquement en fonction des conditions détectées. - Page 34 4.4 CONFIGURATION En appuyant sur la touche vous accédez à l’écran suivant : Nombre Paramètres Réinitialiser d’unités des unités filtre Statut Paramètres Paramètres unité du système contrôleur Touche Description Retourner à l’écran précédent Retourner à l’écran d’accueil Nombre Réglage du nombre d’unités connectées (section 4.2) d’unités Paramètres Réglage de la direction du flux d’air de chaque unité...
- Page 35 4.4.1 RÉINITIALISER FILTRE Effacer l’alarme de filtre et réinitialiser le timer. Touche Description Retourner à l’écran précédent Retourner à l’écran d’accueil Effacer l’alarme de filtre, réinitialiser le timer et revenir à l’écran précédent 4.4.2 STATUT DE L’UNITÉ Communication Modbus avec adresse 1 : Unit 1 pas d’erreur En cas d’erreur, vérifier la communication, l’alimentation et l’adresse Modbus...
-
Page 36: Paramètres Du Système
4.4.3 PARAMÈTRES DU SYSTÈME Firmware : 02.01.01.AA.00 Langue : Français Sonnerie : Rétroéclairage : toujours allumé Mot de passe : désactivé Touche Description Retourner à l’écran précédent Retourner à l’écran d’accueil Firmware Référence du Firmware chargé sur le panneau de contrôle Langues Sélection de la langue (Italien, Anglais, Français, Espagnol ou Allemand) Sonnerie... -
Page 37: Réglage Du Mot De Passe
4.4.4 MOT DE PASSE Réglage du mot de passe Champ d’application Ambito password Désactiver le mot de passe Touche Description Retourner à l’écran précédent Réglage Réglage du mot de passe (saisie de chiffres uniquement de 1 à 9999) Champ Choisir si protéger “toutes les pages” ou seulement “les pages de configuration” Désactiver Désactiver le mot de passe En appuyant sur le bouton “Réglage du mot de passe”, l’écran suivant s’affiche :... - Page 38 L’écran suivant s’affiche lorsque l’on appuie sur le bouton “Champ d’application” du mot de passe : Pages protégées par un mot de passe Mode sélectionné : Toutes les pages Confirmer Touche Description Retour à l’écran précédent Sélection des pages à protéger : “Toutes les pages” ou “Pages de configuration” Confirmer Appuyer pour confirmer Si le mot de passe est activé, l’écran suivant s’affiche lorsque cela est nécessaire.
- Page 39 En appuyant sur le bouton “Désactiver le mot de passe”, l’écran suivant s’affiche : Entrer le mot de passe Confirmer Touche Description Retour à l’écran précédent Entrer le mot de passe Confirmer Appuyer pour désactiver le mot de passe...
- Page 40 4.4.5 PARAMÈTRES DU CONTRÔLEUR Toucher pour régler l’heure 29/05/2024 10:06:50 Free cooling : auto Night mode : désactivé Hygrostat : activé Touche Description Retourner à l’écran précédent Retourner à l’écran d’accueil Free cooling Sélection “manuell” ou “automatique” du Free Cooling (section 4.3) Night mode Activation/désactivation du Night mode (section 4.3)
- Page 41 • Eine falsche elektrische Verdrahtung kann zu Schäden am Ventilator führen und andere elektronische Geräte stören. 2 INSTALLATION Siehen Sie die in der Verpackung des Bedienfelds enthaltene Anleitung oder die Website www.aerauliqa.com 3 SCHALTPLAN Siehen Sie die in der Verpackung des Bedienfelds enthaltene Anleitung oder die Website www.aerauliqa.com ACHTUNG: Das Bedienfeld muß...
- Page 42 Es wird empfohlen, den Abschlußwiderstand am Bedienfeld und am letzten an die Modbus-Leitung angeschlossenen Gerät wie folgt zu aktivieren. • Bedienfeld: Siehen Sie die in der Verpackung enthaltene Installationsanleitung oder wenden Sie sich an www.aerauliqa.com. • Letzte Lüftungsgerät: der Abschlußwiderstand kann über den Dip-Schalter 4 aktiviert werden, der sich auf der elektronischen...
-
Page 43: Betrieb
4 BETRIEB 4.1 HOME PAGE Achtung: Das CTRL-HO ist das Fernbedienungspanel (Master), mit dem alle angeschlossenen ORION-Geräte (Slaves) gleichzeitig gesteuert werden können. Es steuert die Geräte nicht einzeln. Auto Free cooling Systemgeschwindigkeit Modbus Comfort 10 min Free cooling Taste Beschreibung Moduswahl “On”... - Page 44 Symbol Beschreibung Filteralarm: das Symbol erscheint, wenn eine Filterwartung erforderlich ist (Abschnitt 4.3) Intelligente Feuchtigkeitskontrolle: das Symbol erscheint, wenn der Feuchtigkeitssensor aktiv ist (Abschnitt 4.3) Antifrost: das Symbol erscheint, wenn die Frostschutzfunktion aktiv ist (Abschnitt 4.3) Modbus Alarm: the symbol erscheint, wenn ein oder mehrere Geräte nicht über das Modbus-Netzwerk Modbus kommunizieren können.
- Page 45 Wenn Sie auf die Taste OK tippen, wird der folgende Bildschirm angezeigt: Unit 1 Unit 2 Unit 3 Unit 4 Unit 5 Unit 6 Unit 7 Unit 8 Taste Beschreibung Zurück zum vorherigen Bildschirm Zurück zur Home Page Auswahl der angeschlossenen Einheit Wenn Sie die Zifferntaste berühren, wird der folgende Bildschirm angezeigt: Name: Unit 1...
- Page 46 4.3 FUNKTIONALITÄTSBESCHREIBUNG Symbol/Text Funktionalität Beschreibung Taste auf dem Display Die Geräte sorgen für maximalen thermischen und akustischen Komfort. Die Inversionszeit variiert automatisch zwischen 40÷120 Sekunden, dank des integrierten Temperatursensors. Der erste Zeitzyklus beträgt 70 Comfort Comfort Sekunden, danach variiert er automatisch in Abhängigkeit von den festgestellten Bedingungen.
- Page 47 4.4 KONFIGURATION Wenn Sie die Taste berühren, wird der folgende Bildschirm angezeigt: Anzahl der Einstellungen Filter Einheiten der Einheit Reset Einheit System- Bedienfeld- Status Einstellung Einstellungen Taste Beschreibung Zurück zum vorherigen Bildschirm Zurück zur Home Page Anzahl Einstellung der Anzahl der angeschlossenen Geräte (Abschnitt 4.2) der Einheiten Einstellung Einstellung der Luftstromrichtung der einzelnen Geräte (Abschnitt 4.2)
- Page 48 4.4.1 FILTER RESET Löschen Sie den Filteralarm und setzen Sie den Timer züruck. Taste Beschreibung Zurück zum vorherigen Bildschirm Zurück zur Home Page Alarm löschen, Timer zurücksetzen und zum vorherigen Bildschirm zurückkehren 4.4.2 STATUS DER LÜFTUNGSEINHEIT Modbus-Kommunikation mit Adresse 1: Unit 1 kein Fehler Im Fehlerfall überprüfen die Kommunikation, Stro- manschlüß...
- Page 49 4.4.3 SYSTEMEINSTELLUNGEN Firmware: 02.01.01.AA.00 Sprache: Deutsch Buzzer: Beleuchtung: immer aktiviert Passwort: aktiviert Taste Beschreibung Zurück zum vorherigen Bildschirm Zurück zur Home Page Firmware Firmware-Referenz auf das Bedienfeld geladen Sprache Sprachauswahl (Italienisch, Englisch, Französisch, Spanisch oder Deutsch) Buzzer Einstellung des Signaltons: Wählen Sie “On” oder “Off” Beleuchtung Einstellung der Hintergrundbeleuchtung: Wählen Sie “immer aktiviert”...
-
Page 50: Passwort Eingeben
4.4.4 PASSWORT Passwort festlegen Ambito password Passwortbereich Passwort deaktivieren Taste Beschreibung Zurück zum vorherigen Bildschirm Festlegen Passwortinstellung (nur Zahlen eingeben, 1 bis 9999) Bereich Wählen Sie, ob Sie “Alle Seiten” oder nur “Einstellungsseiten” schützen möchten Deaktivieren Passwort deaktivieren Wenn Sie auf die Taste “Passwort festlegen” tippen, wird der folgende Bildschirm angezeigt: Passwort eingeben (1-9999) Passwortbestätigung Bestätigen... - Page 51 Wenn Sie auf die Taste “Passwortbereich” tippen, wird der folgende Bildschirm angezeigt: Passwortgeschützte Seiten Ausgewählter Modus: Einstellungsseiten Bestätigen Schaltfläche Beschreibung Zurück zum vorherigen Bildschirm Auswahl der zu schützenden Seiten zwischen “Alle Seiten” oder “Einstellungsseiten”. Bestätigen Bestätigung Wenn das Passwort aktiviert ist, wird der folgende Bildschirm angezeigt. Geben Sie das richtige Passwort ein, um fortzufahren.
- Page 52 Wenn Sie die Taste “Passwort deaktivieren” berühren, wird der folgende Bildschirm angezeigt: Passwort eingeben Bestätigen Schaltfläche Beschreibung Zurück zum vorherigen Bildschirm Passwort eingeben Bestätigen Tippen Sie auf, um das Passwort zu deaktivieren...
- Page 53 4.4.5 BEDIENFELDEINSTELLUNGEN Berühren Sie, um die Zeit einzustellen 29/05/2024 10:06:50 Free cooling: auto Night mode: aktiviert Hygrostat: aktiviert Schaltfläche Beschreibung Zurück zum vorherigen Bildschirm Zurück zur Home Page Free cooling Auswahl des “manuellen” oder “automatischen” Free Cooling (Abschnitt 4.2) Night mode Aktivieren/Deaktivieren des Nachtmodus (Abschnitt 4.2) Hygrostat Aktivieren/Deaktivieren der intelligenten Feuchtigkeitskontrolle (Abschnitt 4.2)
-
Page 54: Instalación
• Una conexión eléctrica incorrecta puede dañar el ventilador e interferir con otros dispositivos electrónicos. 2 INSTALACIÓN Consulte el manual de instalación suministrado en el paquete del panel de control o consulte el sitio web www.aerauliqa.com 3 CONEXIÓN ELÉCTRICA Consulte el manual de instalación suministrado en el paquete del panel de control o consulte el sitio web www.aerauliqa.com ATENCIÓN: el panel de control debe alimentarse a 24 VAC 50/60Hz con una carga máxima de 4VA o... - Page 55 Modbus de la siguiente manera: • Panel de control: consulte el manual de instalación suministrado en el embalaje o consulte el sitio web www.aerauliqa.com • Última unidad de ventilación: La resistencia de terminación se puede activar a través del Dip Switch 4 situado en el circuito electrónico de la base de apoyo de la siguiente manera:...
-
Page 56: Funcionalidad
4 FUNCIONALIDAD 4.1 PÁGINA DE INICIO Atención: El CTRL-HO es el panel de control remoto (maestro) que permite controlar simultáneamente todas las unidades ORION conectadas (esclavas). No controla las unidades individualmente. Auto Free cooling Velocidad del sistema Modbus Comfort 10 min Free cooling Botón... - Page 57 Icono Descripción Alarma filtro: el símbolo aparece cuando es necesario realizar el mantenimiento del filtro (sección 4.3) Control inteligente de humedad: el símbolo aparece si el sensor de humedad está activo (sección 4.3) Anticongelante: el símbolo aparece si la función anticongelante está activa (sección 4.3) Alarma Modbus: el símbolo aparece si una o varias unidades no se comunican en la red Modbus.
- Page 58 Al pulsar el botón OK se accede a la siguiente pantalla: Unit 1 Unit 2 Unit 3 Unit 4 Unit 5 Unit 6 Unit 7 Unit 8 Botón Descripción Volver a la pantalla anterior Volver a la pantalla de inicio Selección de la unidad conectada Al pulsar la tecla numérica se accede a la siguiente pantalla: Nombre:...
-
Page 59: Descripción De Funciones
4.3 DESCRIPCIÓN DE FUNCIONES Botón Icono/texto Funciones Descripción comando en la pantalla Las unidades maximizan el confort térmico y acústico. El tiempo de inversión varía automáticamente entre 40÷120 segundos, gracias a la sonda de temperatura integrada. El primer ciclo de Comfort Comfort tiempo es de 70 segundos, después varía automáticamente en... -
Page 60: Configuración
4.4 CONFIGURACIÓN Al pulsar el botón se accede a la siguiente pantalla: Numero de Config. Reset unidades unidad filtro Estado Ajustes Config. unidad de sistema controlador Botón Descripción Volver a la pantalla anterior Volver a la pantalla de inicio Numero de Ajuste del número de unidades conectadas (sección 4.2) unidades Config. - Page 61 4.4.1 RESET FILTRO Cancelar alarma filtro y restablecer temporizador. Botón Descripción Volver a la pantalla anterior Volver a la pantalla de inicio Restablecer la alarma y el temporizador y volver a la pantalla anterior 4.4.2 ESTADO UNIDAD Comunicación Modbus con dirección 1: Unit 1 no errores En caso de error averiguar la comunicación, alimentación...
-
Page 62: Ajustes Del Sistema
4.4.3 AJUSTES DEL SISTEMA Firmware: 02.01.01.AA.00 Idioma: Español Zumbador: Luz de fondo: activa Contraseña: deshabilitada Botón Descripción Volver a la pantalla anterior Volver a la pantalla de inicio Firmware Referencia de firmware cargado en el panel de control Idioma Selección de idioma (Italiano, Inglés, Francés, Español o Alemán) Zumbador Configuración de la señal acústica: "On"... -
Page 63: Contraseña
4.4.4 CONTRASEÑA Establecer contraseña Ámbito de contraseña Ambito password Deshabilitar contraseña Botón Descripción Volver a la pantalla anterior Establecer Establecimiento de contraseña (introduzca sólo números, del 1 al 9999) Ámbito Elegir si desea proteger “Todas las pantallas” o sólo “Pantallas de configuración”. Deshabilitar Deshabilitar la contraseña Al pulsar el botón “Establecer contraseña”, aparece la siguiente pantalla: Insertar contraseña (1-9999) - Page 64 Al pulsar el botón “Ámbito de contraseña” aparece la siguiente pantalla: Pantallas protegidas con contraseña Modalidad seleccionada: Pantalla de configuración Confirmar Botón Descripción Volver a la pantalla anterior Selección de las páginas a proteger entre “Todas las pantallas” o “Pantalla de configuración” Confirmar Pulsar para confirmar Si la contraseña está...
- Page 65 Al pulsar el botón “Desactivar Contraseña” aparece la siguiente pantalla: Insertar contraseña Confirmar Botón Descripción Volver a la pantalla anterior Introducir la contraseña Confirmar Pulsar para desactivar la contraseña...
-
Page 66: Configuración Controlador
4.4.5 CONFIGURACIÓN CONTROLADOR Pulsar para ajustar la hora 29/05/2024 10:06:50 Free cooling: auto Night mode: desactivado Humidistato: activado Botón Descripción Volver a la pantalla anterior Volver a la pantalla de inicio Free cooling Selección “manuales” o “auto” de Free Cooling (sección 4.3) Night mode Activación/desactivación del modo nocturno (sección 4.3) - Page 67 NOTE...
- Page 68 Aerauliqa srl reserves the right to modify/make improvements to products and/or this instruction manual at any time and without prior notice. Aerauliqa srl se réserve le droit de modifier / améliorer les produits et / ou les instructions contenus dans ce manuel à tout moment et sans préavis.
Need help?
Do you have a question about the CTRL-H0 and is the answer not in the manual?
Questions and answers