Table of Contents
Advertisement
Quick Links
Operator's Manual
21" Rear-Discharge
Lawn Mower
Model Series
440 Thru E459
IMPORTANT: Read safety rules and instructions carefully before operating equipment.
Warning:
This unit is equipped with an internal combustion engine and should not be used on or near any unimproved forest-
covered, brush-covered or grass-covered land unless the engine's exhaust system is equipped with a spark arrester meeting
applicable local or state laws (if any). If a spark arrester is used, it should be maintained in effective working order by the operator.
In the State of California the above is required by law (Section 4442 of the California Public Resources Code). Other states may have
similar laws. Federal laws apply on federal lands. A spark arrester for the muffler is available through your nearest engine authorized
service dealer or contact the service department, P.O. Box 361131 Cleveland, Ohio 44136-0019.
MTD LLC, P.O. BOX 361131 CLEVELAND, OHIO 44136-0019
FORM NO. 770-10134C.fm
PRINTED IN U.S.A.
(11/2001)
Advertisement
Table of Contents

Related Manuals for MTD E459 Series


Summary of Contents for MTD E459 Series
- Page 1 Federal laws apply on federal lands. A spark arrester for the muffler is available through your nearest engine authorized service dealer or contact the service department, P.O. Box 361131 Cleveland, Ohio 44136-0019. MTD LLC, P.O. BOX 361131 CLEVELAND, OHIO 44136-0019 FORM NO. 770-10134C.fm PRINTED IN U.S.A.
-
Page 2: Table Of Contents
(Model Number) (Serial Number) Copy the model number here: Copy the serial number here: MTD LLC P. O. BOX 361131 CLEVELAND,OH 44136 330-220-4683 www.mtdproducts.com 800-800-7310... -
Page 3: Section 1: Important Safe Operation Practices
SECTION 1: IMPORTANT SAFE OPERATION PRACTICES WARNING: This symbol points out important safety instructions which, if not followed, could endanger the personal safety and/or property of yourself and others. Read and follow all instructions in this manual before attempting to operate this machine. Failure to comply with these instructions may result in personal injury. -
Page 4: Slope Operation
Do Not: 8. Never operate the mower in wet grass. Always be sure of your footing. A slip and fall can cause 1. Do not mow near drop-offs, ditches or serious personal injury. If you feel you are losing embankments, you could lose your footing or your footing, release the blade control handle balance. -
Page 5: Your Responsibility
7. Extinguish all cigarettes, cigars, pipes and other lead to improper performance and compromise sources of ignition. safety!” 8. Never fuel machine indoors because flammable 4. Mower blades are sharp and can cut. Wrap the vapors will accumulate in the area. blade or wear gloves, and use extra caution when 9. -
Page 6: Section 2: Slope Gauge
SECTION 2: SLOPE GAUGE... -
Page 7: Section 3: Assembling Your Lawn Mower
SECTION 3: ASSEMBLING YOUR LAWN MOWER Removing Unit From Carton • Remove staples, break glue on top flaps or cut tape Lift lower handle Lower Handle at carton end and peel top flap to open carton. Grass Bag • Remove loose parts if included with unit. Upper Handle •... -
Page 8: Grass Catcher Assembly
• Insert post of cable ties that are on lower handle • Place the bag over the frame (black plastic side is into the holes provided on the lower handle. The the bottom of bag). Slip the openings in the side of holes may be on the inside or outside. - Page 9 from the black plastic bottom of the bag. Push the two frames together until the cross piece on the Phillips Head front frame contacts the rear frame. Screw • Slip the openings in the side of the plastic channel on the bag over hooks on the grass catcher frame. See Figure 9 B.
-
Page 10: Removing Grass Catcher
Removing Grass Catcher • Slide the push nut onto the right side of the rod to secure. • Lift the rear discharge door on the mower. Attaching Chute Deflector • Lift the grass catcher up, out of the slots in the •... -
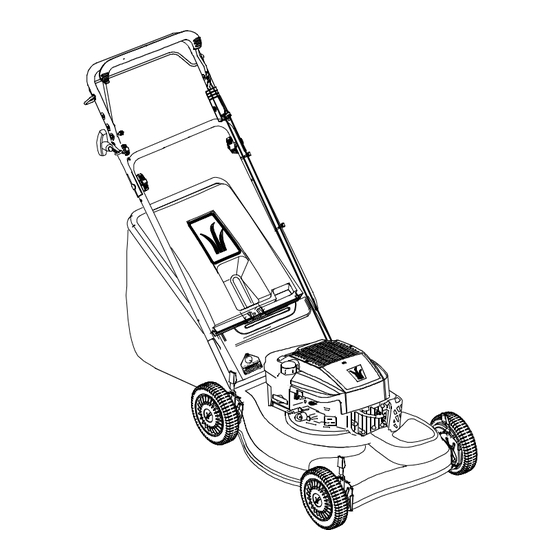
Page 11: Section 4: Know Your Lawn Mower
SECTION 4: KNOW YOUR LAWN MOWER Read this owner’s manual and safety rules before operating your lawn mower. Compare the illustrations in Figure 16 with your lawn mower to familiarize yourself with the location of various controls and adjustments. Blade Control Handle Chute Deflector (Optional) Lower Bail Handle... -
Page 12: Section 5: Operating Your Lawn Mower
SECTION 5: OPERATING YOUR LAWN MOWER Gas and Oil Fill-Up WARNING: Do not remove the battery pack from the handle panel for any reason other WARNING: Never fill fuel tank indoors, or than replacement. When replacing the battery when engine is running or hot. Do not smoke pack, refer to instructions on page 16. -
Page 13: Section 6: Maintaining Your Lawn Mower
Bagging Grass Clippings by the mower in any direction and cause serious personal injury to the operator and others. You can use the grass catcher bag to collect clippings • For best results, do not cut wet grass because it while you are operating the mower. -
Page 14: Section 7: Servicing Your Mower
Lubrication (See Figure 18 ) Wheels • Lubricate the wheels and bearings, if so equipped, Lubricate at least once a season with light oil or engine oil. Also, if the wheels are removed for any reason, lubricate the surface of the axle bolt and the inner surface of the wheel with light oil. -
Page 15: Replacing Drive Belt
• Install the blade adapter on the pulley with the “star” • Push the transmission up a little and slide the belt away from the pulley. See Figure 19 . off the transmission pulley. • Place the new blade on the blade adapter with the •... -
Page 16: Replacing Battery
Replacing Battery by turning the end of the fuse holder and removing (Electric Start Units Only) from the battery cover. Replace with standard • Remove the battery pack from the handle panel for automotive 7-1/2 amp fuse. replacement only. Do not separate the batteries for any reason. -
Page 17: Adjusting Carburetor
Adjusting Carburetor • Simply depress the lever towards the wheel and move the lever assembly to desired position. See Figure 24 . NOTE: A dirty air cleaner may cause an engine to run rough too. Make sure that the air cleaner is clean and attached to the carburetor before deciding to adjust the carburetor. -
Page 18: Section 10: Trouble-Shooting Guide
SECTION 10: TROUBLE-SHOOTING GUIDE Problem Possible Cause Corrective Action Engine fails to start Blade control handle disengaged Engage blade control handle Spark plug wire disconnected Connect wire to spark plug Fuel tank empty, or stale fuel Fill up tank with fresh gasoline Blocked fuel line Clean fuel line Faulty spark plug... -
Page 19: Section 11: Parts List For Model Series 440 Through E459
SECTION 11: PARTS LIST FOR MODEL SERIES 440 THROUGH E459 IMPORTANT: For a proper working machine, use Factory Approved Parts. V-BELTS are specially designed to engage and disengage safely. A substitute (non OEM) V-Belt can be dangerous by not disengaging completely.
Need help?
Do you have a question about the E459 Series and is the answer not in the manual?
Questions and answers