
Related Manuals for Panasonic HDC-TM350


Summary of Contents for Panasonic HDC-TM350
-
Page 1: Operating Instructions
Operating Instructions High Definition Video Camera HDC-TM350 Model No. Before use, please read these instructions completely. VQT2H62... - Page 2 IMPORTANT We would like to take this opportunity to thank you for The wires in this mains lead are coloured in accordance purchasing this Panasonic High Definition Video Camera. with the following code: Please read these Operating Instructions carefully and Blue: Neutral, Brown: Live.
-
Page 3: Information For Your Safety
Information for Your Safety WARNING: The socket outlet shall be installed near the equipment and easily accessible. TO REDUCE THE RISK OF FIRE, The mains plug of the power supply cord shall ELECTRIC SHOCK OR PRODUCT remain readily operable. DAMAGE, ≥... - Page 4 ∫ Information for Users on ∫ Indemnity concerning recording Collection and Disposal of Old content Equipment and used Batteries The manufacturer shall in no event be liable for the loss of recordings due to malfunction or These symbols on the products, defect of this unit, its accessories or recordable packaging, and/or accompanying media.
- Page 5 (i) encode ≥ “AVCHD” and the “AVCHD” Logo are video in compliance with the AVC Standard trademarks of Panasonic Corporation and (“AVC Video”) and/or (ii) decode AVC Video that Sony Corporation. was encoded by a consumer engaged in a ≥...
-
Page 6: Table Of Contents
Contents Information for Your Safety ......2 Recording Accessories............ 7 Features............8 Recording (Basic) Preparation [1] Before recording ....... 35 Intelligent auto mode......36 Before using Quick start ........... 38 [1] Handling of Built-in Memory....9 Quick power on ........38 [2] Parts identification and handling .. - Page 7 Playback Backup Playback With other products [1] Motion picture playback ....74 [1] Connecting a DVD burner to copy Creating still picture from motion to/play back a disc ......102 picture..........77 Preparing for copying/playing back ... 102 Highlight&Time frame index....77 Copying to discs........
-
Page 8: Accessories
Accessories Check the accessories before using this unit. Product numbers correct as of July 2009. These may be subject to change. Optional accessories Battery pack VW-VBG130 Some optional accessories may not be available in some countries. AC adaptor AC adaptor (VW-AD21E-K) VSK0698 Battery pack (li hium/VW-VBG130) Battery pack (li hium/VW-VBG260) -
Page 9: Features
Features ∫ Very clear high definition pictures This unit can record detailed high definition images. High definition images (1920k1080) Standard images (720k576) A Number of available scan lines 1080 B Number of available scan lines 576 * If the recording mode is HA/HG/HX. What is the AVCHD? This is a format for recording and playing back highly detailed high definition images. -
Page 10: Preparation
Indemnity about recorded content Panasonic does not accept any responsibility for damages directly or indirectly due to any type of problems that result in loss of recording or edited content, and does not guarantee any content if recording or editing does not work properly. Likewise, the above also applies in a case where any type of repair is made to the unit (including any other non-built-in memory related component). -
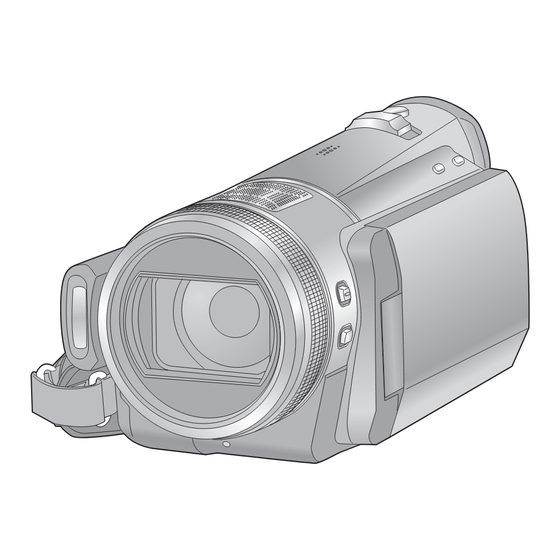
Page 11: Parts Identification And Handling
Battery holder (l 15) DC input terminal [DC IN] (l 17) ≥ Always use the supplied AC adaptor or a genuine Panasonic AC adaptor (VW-AD21E-K; ≥ It can rotate up to 180o A towards the lens or optional). 90o B towards the viewfinder. - Page 12 Rotate the lens hood counter-clockwise A to 12 Adjust zoom buttons (l 50) remove it. In order to attach it, place into slot B, ≥ These buttons function in the same manner as and then rotate it clockwise C. the zoom lever. Changing the thumbnail display and adjusting the volume can be operated.
- Page 13 33 Mode dial (l 20) 42 Shoe adaptor release lever 34 Recording start/stop button (l 39) [SHOE ADAPTOR RELEASE] 35 Status indicator (l 20) The video DC light/VW-LDC103E (optional) etc. 36 Viewfinder (l 31) can be mounted on the shoe adaptor (supplied). Due to limitations in LCD production technology, there may be some tiny bright or dark spots on the viewfinder screen.
- Page 14 ≥ When removing the shoe adaptor, slide the 45 Grip belt SHOE ADAPTOR RELEASE lever, and Adjust the length of the grip belt so that it fits your remove the shoe adaptor while sliding the hand. lever. 43 Microphone terminal [MIC] ≥...
-
Page 15: Setup
Please be advised that we are not liable for any accident or failure occurring as a result of use of a counterfeit battery pack. To ensure that safe products are used we would recommend that a genuine Panasonic battery pack is used. Charging the battery When this unit is purchased, the battery is not charged. -
Page 16: Inserting/Removing The Battery
≥ We recommend using Panasonic batteries (l 7, 16). ≥ If you use other batteries, we cannot guarantee the quality of this product. ≥ Do not heat or expose to flame. ≥ Do not leave the battery(ies) in an automobile exposed to direct sunlight for a long period of time with doors and windows closed. -
Page 17: Charging And Recording Time
( ) will flash. ≥ The remaining battery capacity is displayed when using the Panasonic battery that you can use for this unit. It may take time to display the remaining battery capacity. The actual time can vary depending on your actual use. -
Page 18: Connecting To The Ac Outlet
Connecting to the AC outlet The unit is in the standby condition when the AC adaptor is connected. The primary circuit is always “live” as long as the AC adaptor is connected to an electrical outlet. Important: While the DC cable is connected to the AC adaptor, the battery will not charge. ≥... -
Page 19: Preparation Of Sd Cards
Use SD cards conforming to Class 4 or higher of the SD Speed Class Rating for motion picture recording. Motion picture recording Still picture Card type Capacity The following models of Panasonic SD cards can be recording used. 8 MB Cannot be used. Can be used. 16 MB 32 MB Cannot be guaranteed in operation. -
Page 20: Inserting/Removing An Sd Card
Inserting/removing an SD card When using an SD card not from Panasonic, or one previously used on other equipment, for the first time on this unit, format the SD card. (l 93) When the SD card is formatted, all of the recorded data is deleted. -
Page 21: Selecting A Mode (Turning The Unit On/Off)
Preparation Selecting a mode Setup (Turning the unit on/off) Change the mode to recording, playback or power OFF. Turn on the power by changing the mode to while pressing the lock release button A. ≥ Rotate the mode dial while at the same time pressing in the lock release button if changing from OFF to another mode. -
Page 22: How To Use The Touch Screen
Preparation How to use the touch screen Setup You can operate by directly touching the LCD monitor (touch screen) with your finger. It is easier to use the stylus pen (supplied) for detailed operation or if it is hard to operate with your fingers. ∫... -
Page 23: Using The Menu Screen
Preparation Using the menu screen Setup MENU A It is recommended to hold the LCD monitor with your thumb and index finger when pressing the buttons on the LCD monitor. Press the MENU button. Touch the desired item to enter MENU the setting. -
Page 24: Using The Quick Menu
Using the quick menu This allows quick setting of some of the menus. Press the Q.MENU button. Icon Function Page Q MENU Picture size Touch the desired item. l 44, 10.6 Display l 25 POWER LCD l 30 Touch the desired item to enter Guide line the setting. -
Page 25: Language Selection
Language selection You can select the language on the screen display and the menu screen. Press the MENU button, then touch [SETUP] > [LANGUAGE]. Touch [English]. Menu list Part of the menu will not be used depending on the used functions. (l 130) Motion picture recording mode *1 It is not displayed when the Intelligent auto mode is on. -
Page 26: Media Select
PICTURE SETUP [PICTURE SIZE] (l 44) [DISPLAY] The screen indications are selected as [QUALITY] (l 45) shown in the illustration below. [HI-SPEED BURST] (l 66) [OFF] [ON] [SELF TIMER] (l 56) 1h30m [FLASH] (l 56) R 1h20m [FLASH LEVEL] (l 56) [RED EYE] (l 57) [SHTR SOUND]... -
Page 27: Record Setup
[DEMO MODE] [ALERT SOUND] This item is used to start the unit Touch screen operation, start and stop of demonstration. recording and power on/off can be (Only when the mode is at the confirmed with this sound. position) 2 Beeps for 4 times If [DEMO MODE] is switched [ON] when When an error occurs. -
Page 28: Playback Mode
Playback mode *1 When the disc playback is selected while a DVD burner (optional) is connected, or when [INTEL. SCENE] (l 78) is selected, this does not appear. *2 Only when the disc playback is selected while a DVD burner (optional) is connected, this appears. *3 This appears only when the [VIDEO/SD CARD] or [PICTURE/SD CARD] is selected. -
Page 29: Setting Date And Time
Preparation Setting date and time Setup When the unit is turned on for the first time, a message asking you to set the date and time will appear. Select [YES] and perform steps 2 to 3 below to set the date and time. ¬... -
Page 30: World Time Setting (Displaying The Time Of The Travel Destination)
World time setting (Displaying the time of the travel destination) It is possible to display and record the time at the travel destination by selecting your home region and the travel destination. Select the menu. (l 22) already been set once, execute the menu operation for Step 1. -
Page 31: Adjusting Lcd Monitor/ Viewfinder
Preparation Adjusting LCD monitor/ Setup viewfinder ≥ These settings will not affect the images actually recorded. ∫ Adjusting the brightness and LCD monitor adjustment colour level of the LCD monitor ∫ POWER LCD It adjusts brightness and colour density on the LCD monitor. -
Page 32: Touch Screen Calibration
Touch screen calibration Changing the picture quality on the LCD monitor Perform the touch screen calibration if a different object to the one touched is selected. ≥ The Intelligent auto mode is set to off. Select the menu. (l 22) (l 36) Select the menu. -
Page 33: Recording Showing The Contents To A Partner
∫ Adjusting the brightness of the Recording showing the viewfinder contents to a partner Extend the viewfinder and open the LCD monitor. ¬ Change the mode to Extend the viewfinder and rotate the LCD monitor towards the lens side. Select the menu. (l 22) ≥... -
Page 34: Using With The Remote Control
Preparation Using with the remote Setup control Select the menu. (l 22) Date/time button [DATE/TIME] (l 28) 10 Menu button [MENU] [SETUP] # [REMOTE CONTROL] # [ON] 11 OK button [OK] * means that these buttons function in the same ≥... -
Page 35: Operation Of Direction Buttons/Ok Button
Operation of direction Warning buttons/OK button Keep the Button-Type battery out of the reach of children. Never put Button-Type battery in Press a direction button. mouth. If swallowed call your doctor. PAUSE STILL ADV STILL ADV ∫ Remote control usable range SKIP STOP SKIP... -
Page 36: Recording
Recording Before recording Recording (Basic) ∫ Basic camera positioning ≥ When you are outdoors, record pictures with the sunlight behind you. If the subject is backlit, it will become dark in the recording. ≥ When recording, make sure your footing is stable and there is no danger of colliding with another person or object. -
Page 37: Intelligent Auto Mode
Intelligent auto mode The following modes appropriate for the condition are set just by pointing the unit to what you want to record. ≥ When this unit is purchased, the Intelligent auto mode is set to on. Intelligent auto button Press this button to switch on/off the intelligent auto mode. -
Page 38: Automatic White Balance
Automatic white balance ≥ Modes are selected automatically by the unit, White balance adjustment recognises the colour so it may not choose desired mode depending of light and adjusts so the white colour will on the recording conditions. become a purer white. The unit determines the ≥... -
Page 39: Quick Start
Auto focus does not work correctly in the following situations. Record pictures in the Open the LCD monitor or extend manual focus mode. the viewfinder. jRecording distant and close-up objects at the same time jRecording a subject behind dirty or dusty window jRecording a subject that is surrounded by objects with glossy surfaces or by highly... -
Page 40: Recording Motion Pictures
Recording Recording motion pictures Recording (Basic) This unit records high definition images that are compatible with the AVCHD format. Sound is recorded with the Do by Digital 5.1 Creator. ∫ When selecting media Select the menu. (l 22) [MEDIA SELECT] # [Built-in Memory] or [SD CARD] ≥... -
Page 41: Recording Mode
About the compatibility of the recorded motion pictures ≥ They are not compatible with devices other than those that support AVCHD. Images cannot be played with equipment that does not support AVCHD (ordinary DVD recorders). Confirm that your equipment supports AVCHD by referring to the operating instructions. ≥... -
Page 42: Recording Modes/Approximate Recordable Time
Recording modes/approximate recordable time Switch the picture quality of the motion pictures to be recorded. Select the menu. (l 22) [RECORD SETUP] # [REC MODE] # desired setting ≥ It is possible to set from the quick menu. (l 23) 1 GB 7 min 9 min... -
Page 43: Pre-Rec
PRE-REC Shooting guide This prevents you missing a shot. Message is displayed when this unit is moved rapidly. This allows recording of the pictures and sound Select the menu. (l 22) to start approximately 3 seconds before the recording start/stop button is pressed. [RECORD SETUP] # [SHOOTING GUIDE] Press the PRE-REC button. -
Page 44: Recording Still Pictures
Recording Recording still pictures Recording (Basic) ≥ Rotate the mode dial while at the same time pressing in the lock release button A if changing from OFF to another mode. ≥ Align with the mark B. Change the mode to Focus indication: Open the LCD monitor or extend the viewfinder. -
Page 45: Aspect Ratio/Picture Size
∫ About the screen indications in ∫ About the focusing area still picture recording When there is a contrasting object ahead or behind the subject in the focus area, the subject may not be focused. If so, move the contrasting MEGA object out of the focus area. -
Page 46: Picture Quality
∫ Picture size and Maximum zoom Picture quality ratio Selecting the picture quality. Extra Select the menu. (l 22) Aspect Picture size optical ratio zoom [PICTURE] # [QUALITY] # desired setting 3520k2640 – Still pictures with a high picture quality are recorded. -
Page 47: Recording Still Pictures In Motion Picture Recording Mode
∫ Simultaneous recording Recording still pictures in (recording still pictures while motion picture recording recording motion pictures) mode You can record still pictures even while recording motion pictures. You can record still pictures even in motion ¬ Change the mode to picture recording mode. -
Page 48: Number Of Recordable Pictures
Number of recordable pictures (In still picture recording mode) Aspect ratio Picture size 3520k2640 3264k2448 2560k1920 640k480 Picture quality 8 MB 16 MB 32 MB 64 MB 128 MB 1010 256 MB 1380 2150 512 MB 2760 4300 SD card 1 GB 5550 8660... - Page 49 Aspect ratio 10.6 Picture size 3984k2656 3264k2176 2592k1728 Picture quality 8 MB 16 MB 32 MB 64 MB 128 MB 256 MB 512 MB SD card 1 GB 2 GB 1210 4 GB 1010 1510 1520 2390 6 GB 1540 1460 2290 2310...
- Page 50 (In motion picture recording mode) Aspect ratio 16:9 Picture size 3840k2160 1920k1080 Picture quality 8 MB 16 MB 32 MB 64 MB 128 MB 256 MB 512 MB SD card 1 GB 1290 2 GB 1670 2630 4 GB 1290 3290 5160 6 GB...
-
Page 51: Zoom In/Out Function
Recording Zoom in/out function Recording (Basic) The maximum optical zoom ratio is 12k. Zoom mode ¬ Change the mode to / VOL Set the maximum zoom ratio for the motion picture recording mode. If the zoom magnification exceeds 12k, then the digital zoom function will be activated. -
Page 52: Ring Zoom
Ring zoom Zoom operation can be done using the multi manual ring. Zoom by rotating the ring. A side: Close-up recording (zoom in) B side: Wide-angle recording (zoom out) ≥ The zoom speed varies depending on the speed to rotate the ring. Extra optical zoom If the number of the recording pixels is set to anything other than the maximum number of... -
Page 53: Optical Image Stabilizer Function
Recording Optical image stabilizer Recording (Basic) function Optical image stabilizer can stabilize the image without decreasing the image quality as much. ¬ Change the mode to O I S Optical image stabilizer button Pressing the button changes the optical image stabilizer setting. (Motion picture recording mode) # OFF (Still picture recording mode) -
Page 54: Af Tracking
Recording AF tracking Recording (Basic) It is possible to set the focus and exposure to the subject specified on the touch screen. The focus and exposure will keep following the subject automatically even if it moves. (Dynamic tracking) ¬ Change the mode to Touch ∫... -
Page 55: Recording (Advanced)
Recording Recording functions of Recording (Advanced) operation icons Select the operation icons to add different effects to the images to be recorded. ¬ Change the mode to Touch to display the operation icons on the screen. (e.g. Backlight compensation) Select an operation icon. ≥... - Page 56 *1 It is not displayed in still picture recording mode. *2 It is not displayed when the intelligent auto mode is on. *3 It is not displayed in motion picture recording mode. *4 It is displayed only when a headphone is connected to the headphone output terminal. ≥...
- Page 57 Function Effect Colour night view This function allows you to record colour images in very low light situations. (Minimum required illumination: approx. 1 lx) Self-timer This is for recording still pictures using the timer. Each time the icon is selected, the indication changes by one setting in the following order: Ø10 # Ø2 # setting cancelled Ø10:...
-
Page 58: Red Eye Reduction
Function Effect Red eye reduction Reduces the phenomena where human eyes become red from flashes. ≥ In motion picture recording mode, set this function from the menu. Headphone volume Adjusts the volume of the headphone while recording. Increases the volume adjustment Decreases the volume ≥... -
Page 59: Recording Functions Of Menus
Recording Recording functions of Recording (Advanced) menus Function Effect/Setting method Scene mode When you record images in different situations, this mode automatically sets optimum shutter speeds and apertures. ≥ Change the mode to Select the menu. (l 22) [RECORD SETUP] # [SCENE MODE] # desired setting ≥... -
Page 60: Function
Function Effect/Setting method Guide line You can check if the image is level while recording or playing back motion pictures and still pictures. The function can also be used to estimate the balance of the composition. ≥ Change the mode to ≥... - Page 61 Function Effect/Setting method Digital cinema Use this function to record an image with vivid colour, like an image on a movie film. ≥ Change the mode to ≥ The intelligent auto mode is set to off. (l 36) ≥ Set the recording mode to HA or HG. (l 41) Select the menu.
-
Page 62: Auto Slow Shutter
Function Effect/Setting method Anti-Ground- If the unit continues to be tilted upside down from the normal horizontal position while recording motion pictures, it is Shooting (AGS) automatically put into recording pause. ≥ Change the mode to Select the menu. (l 22) [RECORD SETUP] # [AGS] # [ON] Auto slow shutter You can record bright pictures even in dark places by slowing... -
Page 63: Wind Noise Reduction
Function Effect/Setting method Digital cinema colour Recording motion pictures with more vivid colours, using ™ x.v.Colour technology. ≥ Change the mode to ≥ The intelligent auto mode is set to off. (l 36) Select the menu. (l 22) [RECORD SETUP] # [Digital Cinema Colour] # [ON] ≥... -
Page 64: Microphone Level
Function Effect/Setting method Microphone level When recording, the input level from the built-in microphones and the external microphone terminal can be adjusted. [AUTO]: ≥ Change the mode to AGC is activated, and the ≥ The intelligent auto mode is set to off. (l 36) recording level is adjusted Select the menu. -
Page 65: Zebra L
Function Effect/Setting method Bass setting Change the lower setting of the built-in microphone according to your choice. ≥ Change the mode to ≥ The intelligent auto mode is set to off. (l 36) Select the menu. (l 22) [RECORD SETUP] # [BASS SETTING] # desired setting [0dB]/[+3dB]/[+6dB]/[LOWCUT] ≥... -
Page 66: Histogram L
Function Effect/Setting method Histogram A graph with brightness as horizontal axis and number of pixels at that brightness as vertical axis is displayed. It is possible to determine the exposure of the whole image by [OFF]: looking at the distribution in the graph. Not display Adjust the brightness using [IRIS]. - Page 67 Function Effect/Setting method Hi-speed burst Recording is done continuously at the rate of 25 or 50 still pictures per second. shooting Use this function to record an object with fast movement. It is recorded in Motion picture recording mode, since still [25 Frames/sec]: pictures are generated from motion picture.
-
Page 68: Af Assist Lamp
Function Effect/Setting method AF assist lamp Illuminating the subject makes it easier for the camera to focus when recording in low light conditions that make focusing difficult. ≥ Change the mode to ≥ The intelligent auto mode is set to off. (l 36) Select the menu. - Page 69 Relay recording Microphone level ≥ It does not allow the relay recording of still ≥ When the Intelligent auto mode is on, the pictures. However, even still pictures are setting is fixed to [AUTO] and cannot be recorded to the SD card after relay recording. changed.
-
Page 70: Recording Manually By Setting White Balance, Shutter Speed Or Iris Adjustment
Recording Recording manually by setting white Recording (Advanced) balance, shutter speed or iris adjustment The operation sequence differs for the LCD monitor and viewfinder. ¬ Change the mode to Press the FUNCTION button. ≥ appears on the screen. FUNCTION SHTR IRIS White balance (l 70) Manual shutter speed (l 71) -
Page 71: White Balance
White balance The automatic white balance function may not reproduce natural colours depending on the scenes or lighting conditions. If so, you can adjust the white balance manually. The unit can record pictures in a natural hue if it can recognise the reference colour white. ≥... -
Page 72: Manual Shutter Speed/Iris Adjustment
Manual shutter speed/iris adjustment Shutter Speed: Adjust it when recording fast-moving subjects. Iris: Adjust it when the screen is too bright or too dark. ≥ Press the FUNCTION button. (l 69) Touch [SHTR] or [IRIS]. Manual shutter speed adjustment ≥ When using the viewfinder, press the ≥... -
Page 73: Recording With Manual Focus
Recording Recording with manual focus Recording (Advanced) Perform focus adjustments using the multi manual ring. If auto focusing is difficult due to the conditions, then use manual focus. ¬ Change the mode to Press the FOCUS button. ≥ MF appears on the screen. FOCUS A Rotate the multi manual ring to adjust the focus. -
Page 74: Recording Manually By Setting The Menu
Recording Recording manually by Recording (Advanced) setting the menu ¬ Change the mode to Press the FUNCTION button. ≥ appears on the screen. FUNCTION Picture adjustment Adjust the quality of the image while recording. Adjust by outputting to a TV while adjusting the quality of the image. Select the menu. -
Page 75: Playback
Playback Motion picture playback Playback ≥ Rotate the mode dial while at the same time pressing in the lock release button A if changing from OFF to another mode. ≥ Align with the mark B. Change the mode to Select the playback operation by Touch the play mode select icon touching the operation icon. - Page 76 ∫ Change the thumbnail display ∫ Fast forward/rewind playback Touch 5 during playback to fast forward. During step 3, the thumbnail display changes in (Touch 6 to rewind.) the following order if the zoom lever or the adjust zoom buttons is operated to side or side.
-
Page 77: Motion Picture Compatibility
∫ Frame-by-frame playback Motion picture compatibility The motion picture is advanced one frame at a ≥ This unit is based on the AVCHD format. time. ≥ The video signal that can be played back on Pause the playback. this unit is 1920k1080/50i or 1440k1080/ ≥... -
Page 78: Creating Still Picture From Motion Picture
Creating still picture from Highlight&Time frame index motion picture An image of one scene is displayed as a thumbnail at set time interval. Scene can be A single frame from the recorded motion picture played back from any midway point of the scene can be saved as a still picture. -
Page 79: Playing Back Motion Pictures By Date
Playing back motion Intelligent scene selection pictures by date Play back the scenes excluding a portion of the scene judged to have failed to shoot due to fast Scenes recorded on the same day can be played movement of this unit, camera shake, or focus back in succession. -
Page 80: Highlight Playback
∫ Scene setting Highlight playback 1) Touch [SELECT SCENES] or [SELECT DATE]. Part that was recognised as clearly recorded is extracted from a long recording, and it can be played back in short time with music added. Touch 2) (When [SELECT SCENES] is selected) Touch the scene to be played back. -
Page 81: Repeat Playback
∫ Playback time setting Repeat playback Touch the playback time to set. Playback of the first scene starts after playback of the last scene finishes. Select the menu. (l 22) [VIDEO SETUP] # [REPEAT PLAY] # [ON] indication appears on the full screen views. -
Page 82: Still Picture Playback
Playback Still picture playback Playback ≥ Rotate the mode dial while at the same time pressing in the lock release button A if changing from OFF to another mode. ≥ Align with the mark B. Change the mode to Touch the still picture to be played back. - Page 83 ∫ Changing the playback settings for the slide show Select the playback operation by touching the operation icon. 1) Touch 2) Touch the interval of playback for the slide 1/;: Slide show (playback of the still pictures show. in numerical order) start/pause. Plays back the previous picture.
-
Page 84: Playing Back Still Pictures By Date
Playing back still pictures Still picture compatibility ≥ This unit is compliant with the unified by date standard DCF (Design rule for Camera File system) established by JEITA (Japan Still pictures recorded on the same day can be Electronics and Information Technology played back in succession. -
Page 85: Editing
Playback Deleting scenes/still pictures Editing Deleted scenes/still pictures cannot be restored, so perform appropriate confirmation of the contents before proceeding with deletion. ¬ Change the mode to To delete by confirming images being played back Press the button while scenes or still pictures to be deleted are being played back. - Page 86 (Only when [SELECT] is selected in step 2) To continue deleting other scenes Repeat steps 3-4. When you stop deleting halfway Touch [CANCEL] or press the MENU button while deleting. ≥ The scenes or still pictures that have already been deleted when the deletion is cancelled cannot be restored.
-
Page 87: Dividing A Scene To Delete
Playback Dividing a scene to delete Editing To delete an unnecessary portion of a scene, first divide the scene and then delete the unnecessary portion. ¬ Change the mode to Touch the play mode select icon Press the MENU button to to select desired media to divide complete dividing. -
Page 88: Protecting Scenes/Still Pictures
Playback Protecting scenes/still Editing pictures Scenes/still pictures can be protected so that they are not deleted by mistake. (Even if you protect some scenes/still pictures, formatting the media will delete them.) ¬ Change the mode to Select the menu. (l 22) [VIDEO SETUP] or [PHOTO SETUP] # [SCENE PROTECT] # [YES] Touch the scene/still picture to... -
Page 89: Dpof Setting
Playback DPOF setting Editing You can write the data selecting still pictures to be printed and the number of prints (DPOF data) onto the SD card. ¬ Change the mode to and touch the play mode select icon to select [PICTURE/ SD CARD]. -
Page 90: Copying Between Sd Card And Built-In Memory
Playback Copying between SD card and Built-in Editing Memory Motion pictures or still pictures recorded with this unit can be copied between an SD card inserted in this unit and a built-in memory. Confirming remaining capacity on the copy destination ≥... -
Page 91: Copying
Copying ≥ If there is not much remaining capacity in the SD card, a confirmation message asking to copy after deleting all data on the SD card is displayed. Be aware that deleted data cannot be restored. ≥ Refer to page 91 for Approximate time for copying. Change the mode to ≥... - Page 92 (Only when [SELECT DATE] is selected in If you will delete the motion pictures or still step 4) pictures after copying is complete, be sure Touch the date to be copied. to play back the motion pictures or still pictures to check that they have been copied to correctly before deleting.
-
Page 93: Relay Scene Combining
Playback Relay scene combining Editing You can combine the relayed scene (l 60) in the built-in memory and the continued scene in the SD card to be one into the SD card. Relay recorded scene Relay scene combining A Built-in memory B SD card C Range of relay recording ≥... -
Page 94: Formatting
Playback Formatting Editing Please be aware that if a medium is formatted, then all the data recorded on the medium will be erased and cannot be restored. Back up important data on a PC, DVD disc etc. (l 102, 113) ¬... -
Page 95: With A Tv
2 HDMI terminal 3 Component terminal 4 Video terminal ≥ Use the supplied component cable and AV cable. Use of the following Panasonic HDMI mini cables is recommended to connect the unit to the HDMI terminal. Connect this unit to a TV. - Page 96 ≥ Check that the plugs are inserted as far as they go. ≥ Do not use any other cables except a genuine Panasonic HDMI mini cable (RP-CDHM15, RP-CDHM30; optional). ≥ Do not use any other component cables except the supplied one.
- Page 97 AV cable. Refer to the following support site for information about the Panasonic TVs that you can directly insert an SD card into the SD card slot on the TV and then play it back.
-
Page 98: Connecting With A Hdmi Mini Cable
TV and then play back the recorded high definition images, you can enjoy them in high resolution with high quality sound. If you connect this unit to a Panasonic TV compatible with VIERA Link, linked operations (VIERA Link) are possible. (l 99) Select the desired method of HDMI output. -
Page 99: Listening In 5.1 Channel Sound
Please read the AV amplifier and TV operating instructions for how to connect this unit to the AV amplifier and TV. ≥ If you connect this unit to a Panasonic AV amplifier and Panasonic TV that are compatible with VIERA Link, linked operations (VIERA Link) become poss ble. (l 99) ≥... -
Page 100: Playback Using Viera Link (Hdavi Control ™ )
(HDAVI Control What is the VIERA Link? ≥ This function allows you to use your remote control for the Panasonic TV for easy operations when this unit has been connected to a VIERA Link compatible device using a HDMI mini cable (optional) for automatic linked operations. - Page 101 Operate with the remote control for the TV. 1) Press the button up, down, left or right to select a scene or still picture to be played back, and then press the button in the centre to set it. 2) Activate the operation icons that are displayed on TV screen with the remote control for the TV. A Operation icons B Display operation icons C Cancel operation icons...
- Page 102 VIERA Link, read the operating instructions for the devices. ≥ Available linked operations between this unit and a Panasonic TV is different depending on the types of Panasonic TVs even if they are compatible with VIERA Link. Refer to the operating instructions of the TV for the operations that support on the TV.
-
Page 103: Backup
The copied DVD disc can also be played back. ≥ Please read the operating instructions of the DVD burner for how to use it. Preparing for copying/playing back We recommend using Panasonic DVD burner VW-BN1/VW-BN2. ∫ About discs that can be used for copying Disc type*... - Page 104 Connect the AC adaptor (supplied with DVD burner) to the DVD burner. ≥ You cannot supply power to the DVD burner from this unit. Connect this unit to the AC adaptor and change the mode to Connect this unit to the DVD burner with the Mini AB USB Connection Cable (supplied with DVD burner).
-
Page 105: Copying To Discs
Copying to discs ≥ You cannot copy from multiple SD cards to 1 disc. (You can additionally copy only to a DVD-RAM.) ≥ Motion pictures and still pictures cannot both be copied to a single disc. ≥ Confirm that auto protection is [ON] before copying data. (l 108) ≥... - Page 106 (Only when [SELECT DATE] is selected in step 5) (Only when [VIDEO]/[PICTURE] is selected Touch the date you want to copy. in step 3) Touch the desired item. ≥ When touched, the date is selected and [ALL SCENES]: surrounded by red. Touch the date again to All motion pictures or still pictures are copied.
-
Page 107: Important Notice
Important Notice ≥ When connecting an optional DVD burner and this unit for copying a disc, do not insert a disc with recorded motion pictures in high definition picture quality into devices that do not support the AVCHD format. In some cases the disc may get stuck in the device. The disc will not play back on devices that do not support the AVCHD format. -
Page 108: Playing Back The Copied Disc
Playing back the copied disc ≥ Only discs that have been copied by connecting this unit to the DVD burner or created with HD Writer AE 1.5 can be played back. It may not be possible to play back discs copied/played back on other devices or software. -
Page 109: Formatting Discs
Managing the copied disc (Formatting, Auto protect, Displaying disc information) ≥ Connect this unit to the DVD burner and then touch [PLAY DISC]. (l 102) ∫ Formatting discs ∫ Auto protect This is for initializing DVD-RAM and DVD-RW You can protect (write protect) a DVD-RAM or discs. -
Page 110: Dubbing Images Onto Other Video Device
Backup Dubbing images onto other With other products video device Images played back on this unit can be dubbed onto a DVD recorder or video device. ≥ Images are dubbed in standard quality. ≥ Use the AC adaptor to free you from worrying about the battery running down. Change the video input on the video device and TV that this unit is connected to. -
Page 111: With A Printer (Pictbridge)
Backup With a printer (PictBridge) With other products To print pictures by directly connecting this unit to the printer, use a printer compatible with PictBridge. (Read the operating instructions for the printer.) PictBridge is an industry standard from the Camera & Imaging Products Association (CIPA) for direct printing. - Page 112 Touch a still picture to be printed. Touch [DATE PRINT] to select the date print setting. ≥ If the printer is not capable of date printing, this Touch to set the number of setting is unavailable. prints. Touch [PAPER SIZE] to select the paper size setting.
- Page 113 When you stop printing halfway Touch [PAGE LAYOUT] to select Touch [CANCEL]. the desired layout setting. ≥ A confirmation message appears. If [YES] is selected, the number of prints set is cancelled and the screen returns to step 4. If [NO] is selected, all the settings are kept and the screen returns to step 4.
-
Page 114: With A Pc
With a PC What you can do with a PC Before using HD Writer AE 1.5 You can copy the motion/still picture data to the HDD of PCs or write to media l ke Blu-ray discs (BD) DVD discs or SD card using HD Writer AE 1.5, the software installed in the supplied CD-ROM. Refer to the operating instructions of HD Writer AE 1.5 (PDF file) for details on how to use it. - Page 115 ≥ Motion pictures that have been recorded on another device cannot be written to the software supplied with this unit. To write motion picture data recorded with the Panasonic High Definition Video Camera sold previously, use the HD Writer supplied with the unit.
-
Page 116: End User License Agreement
Software will Article 2 Use by a Third Party be uninterrupted or error free. Panasonic or any Licensee may not use, copy, modify, transfer or of its distributors will not be liable for any damage... -
Page 117: Operating Environment
With a PC Operating environment Before using ≥ Even if the system requirements mentioned in these operating instructions are fulfilled, some PCs cannot be used. ≥ A CD-ROM drive is necessary to install the supplied software applications. (A compat ble BD/DVD writer drive and media are necessary for writing to a BD/DVD.) ≥... - Page 118 Sound DirectSound Support Interface USB port [Hi-Speed USB (USB 2.0)] Other requirements Mouse or equivalent pointing device Internet connection ≥ Supplied CD-ROM is available for Windows only. ≥ Input is not supported in languages other than English, German, French and Simplified Chinese. ≥...
-
Page 119: Setup
With a PC Installation Setup When installing the software, log on to your computer as the Administrator or with a user name with equivalent authorization. (If you do not have authorization to do this, consult your manager.) ≥ Before starting the installation, close all applications that are running. ≥... -
Page 120: Control Panel
∫ Uninstalling HD Writer AE 1.5 When installation is complete, some notes Follow the steps below to uninstall any software will appear. applications that you no longer require. Check the contents, then close Select [start] # ([Settings] #) the window. [Control Panel] # [Add or Remove Programs Select [Yes, I want to restart my... -
Page 121: Connecting To A Pc
With a PC Connecting to a PC Setup ≥ Connect this unit to the PC after the software applications are installed. ≥ Remove the supplied CD-ROM from your PC. A USB cable (supplied) Connect this unit to the AC adaptor. Touch [PC]. -
Page 122: To Disconnect Usb Cable Safely
PC. ≥ Depending on your PC’s settings, this icon may not be displayed. Select [USB Mass Storage Device] and click [Stop]. Verify [MATSHITA HDC-TM350/SD USB Device] or [MATSHITA HDC-TM350/MEM USB Device] is selected and click [OK]. VQT2H62... -
Page 123: About The Pc Display
About the PC display When the unit is connected to a PC, it is recognised as an external drive. ≥ Removable disk (Example: ) is displayed in [My Computer (Computer)]. The following data will be recorded. We recommend using HD Writer AE 1.5 to 1 Up to 999 still pictures in JPEG format copy motion picture data. -
Page 124: Using With A Pc
(On the PC) Select [start] # [All Programs (Programs)] # [Panasonic] # [HD Writer AE 1.5] # [HD Writer AE]. ≥ For details on how to use the software applications, read the PDF operating instructions of the software. -
Page 125: If Using Mac
With a PC If using Mac Using with a PC ≥ HD Writer AE 1.5 is not available for Mac. ≥ iMovie’09 supported. For details about iMovie’09, please contact Apple Inc. ∫ Operating environment for the card reader function (mass storage) Mac OS X 10.5.6 Intel Core Duo Intel Core 2 Duo... -
Page 126: Others
Others Indications Indications ∫ Recording indications Built-in memory recording possible status Motion picture recording mode (White) Card recording possible status 0h00m00s 1h30m (Green) Recognising the card R 1h20m 1920 ¥/; (Red) Recording ; (Green) Recording pause 1/100 PRE-REC (l 42) OPEN PRE-REC Interval recording (l 59) - Page 127 ± (White) Focus indication (l 43) Scene mode (l 58) ¥ (Green) Sports mode Ø10/Ø2 Self-Timer recording (l 56) Portrait mode ß/ßA/ Flash (l 56) Spotlight mode ßi/ßj Flash level (l 56) Snow mode Red eye reduction (l 57) Beach mode Picture quality (l 45) Sunset mode Number of recording pixels for...
- Page 128 ∫ Playback indications ∫ PC connection indications Playback (l 74, 82) Accessing the card (When connected to a PC) (l 120) Pause (l 74, 82) Accessing the built-in memory Fast forward/rewind playback (When connected to a PC) (l 120) (l 75) ∫...
-
Page 129: Messages
≥ Use a battery that is compatible with this unit. (l 14) If using a Panasonic battery compatible with this unit, remove the battery and then insert it again. If the message appears even after repeating this several times, this unit needs repair. Detach the power and consult the dealer who you purchased this unit from. -
Page 130: About Recovery
About recovery If faulty management information is found, one of the following messages may appear. Be sure to follow the messages. (Repairing may take time depending on the error.) CONTROL DATA ERROR HAS BEEN DETECTED. (SD CARD) CONTROL DATA ERROR DETECTED IN THE BUILT-IN MEMORY. THUMBNAIL DATA ERROR IS DETECTED. -
Page 131: Helpful Hints
Others Functions that cannot be Helpful hints used simultaneously Some functions in this unit are disabled or cannot be selected due to the unit’s specifications. Functions Conditions which disable the functions ≥ When the hi-speed burst shooting mode is on Motion picture recording ≥... - Page 132 Functions Conditions which disable the functions ≥ When PRE-REC is used Fade ≥ When the hi-speed burst shooting mode is on ≥ When the interval recording mode is used ≥ When the hi-speed burst shooting mode is on ≥ When the hi-speed burst shooting mode is on Auto slow shutter ≥...
- Page 133 Functions Conditions which disable the functions ≥ When the interval recording mode is used Microphone level ≥ When the hi-speed burst shooting mode is on ≥ When the hi-speed burst shooting mode is on Bass setting ≥ When the interval recording mode is used ≥...
-
Page 134: Troubleshooting
Others Troubleshooting Helpful hints Problem Check points ≥ Charge the battery using the AC adaptor. (l 14) This unit cannot be ≥ The battery protection circuit may have operated. Attach turned on. the battery to the AC adaptor for 5 to 10 seconds. If the unit This unit does not stay still cannot be used, the battery is faulty. - Page 135 Problem Check points ≥ Turn on the power again. If normal conditions are not restored yet, This unit cannot be operated though it is remove the battery or AC adaptor, wait about 1 minute and then turned on. reconnect the battery or AC adaptor. Then about 1 minute later, turn on the power again.
- Page 136 Problem Check points ≥ Set to Intelligent auto mode to on or off. Auto focus function does ≥ If you are trying to record a scene which is hard to bring into not work. focus in auto focus mode, use the manual focus mode to adjust the focus.
- Page 137 Problem Check points Colour or brightness of (In motion picture recording mode) ≥ Colour or brightness of the image may change, or you may the image changes, or you may see horizontal see horizontal bars in the image when the object is bars in the image.
- Page 138 Problem Check points VIERA Link does not [Setting on this unit] ≥ Connect with a HDMI mini cable (optional). (l 99) work. ≥ Press the MENU button, then touch [SETUP] # [VIERA Link] # [ON]. (l 99) ≥ Turn the power to the unit off and then back on again. [Setting on other devices] ≥...
- Page 139 ∫ If scenes do not change smoothly when played back on another device The images may be still for several seconds at the joins between the scenes if the following operations are performed when multiple scenes have been continuously played back using another unit. ≥...
-
Page 140: When Deleting Scenes
∫ When the interval recording is used 1 Normal recording 2 Interval recording A The picture momentarily stops at the end of the last scene that was recorded normally before the interval recording and at the end of the last scene of interval recording. ∫... -
Page 141: Cautions For Use
Others Cautions for use Do not spray insecticides or volatile About this unit chemicals onto the unit. ≥ If the unit is sprayed with such chemicals, its The unit and the SD card become warm during body may be marred and the surface finish use. -
Page 142: About The Battery
≥ Please look after the data in your built-in terminals may rust and cause malfunctions. memory carefully. Panasonic will not be held ≥ To store the battery for a long period of time, responsible in the unlikely case that private we recommend you charge it once every year data is divulged. -
Page 143: About The Ac Adaptor
Prepare spare batteries when going out for About the AC adaptor recording. ≥ Prepare batteries appropriate to 3 to 4 times ≥ If the temperature of the battery is extremely the period you are planning to record for. Cold high or extremely low, charging may take time places such as a ski resort can shorten the or the battery may not be charged. -
Page 144: About Condensation
LCD monitor/viewfinder About condensation ≥ When the LCD monitor gets dirty, wipe it with a When condensation forms on the unit, the lens soft cloth, such as eye glass cleaner. will cloud up and the unit may not work properly. ≥... -
Page 145: Specifications
Others Specifications High Definition Video Camera Information for your safety Power source: DC 9.3 V (When using AC adaptor) DC 7.2 V (When using battery) Power consumption: Recording: 6.8 W Signal system 1080/50i Recording format AVCHD format compliant Image sensor 1/4.1z 3MOS image sensor Total: 9150 K (3050 Kk3) Effective pixels:... - Page 146 Microphone 5.1 channel surround microphone (with a zoom microphone/focus microphone function) Speaker 1 round speaker, dynamic type White balance Auto tracking white balance system adjustment Standard illumination 1,400 lx Minimum required Approx. 1.6 lx (1/25 in low light mode) illumination Approx.
- Page 147 Motion pictures Recording SD card SD Memory Card: media 1 GB, 2 GB (FAT12 and FAT16 system compliant) SDHC Memory Card: 4 GB, 6 GB, 8 GB, 12 GB, 16 GB, 32 GB (FAT32 system compliant) Built-in 64 GB memory Compression MPEG-4 AVC/H.264 Recording mode and...
- Page 148 Most major credit and debit cards accepted. All enquiries transactions and distribution facilities are provided directly by Panasonic UK Ltd. It couldn’t be simpler! Also available through our Internet is direct shopping for a wide range of finished products, take a browse on our website for further details.
- Page 149 Notes...
- Page 150 Notes...
- Page 151 Panasonic Corporation VQT2H62 Web site: http://panasonic.net F0709RN0 ( 000 Pursuant to at the directive 2004/108/EC, article 9(2) Panasonic Testing Centre Panasonic Marketing Europe GmbH Winsbergring 15, 22525 Hamburg, Germany © Panasonic Corporation 2009...
Need help?
Do you have a question about the HDC-TM350 and is the answer not in the manual?
Questions and answers