Table of Contents
Advertisement
Quick Links
Advertisement
Table of Contents
Troubleshooting

Summary of Contents for Nova N 5
- Page 1 WELDING UNIT N 5...
- Page 2 FOREWORD Your new Nowa Gruppe Sp. z o.o. Welding Unit stud welder is carefully constructed of the finest components and material available. Used properly, this equipment will give you years of efficient profitable service. This manual has been specifically prepared for use in familiarizing personnel with the design, installation, operation, maintenance and trouble-shooting of this equipment.
-
Page 3: Table Of Contents
Table of Contents Page Important Safety Notes Safety Symbols and Terms Used Functional principle of the stud welding unit Guarantee EU Declaration of conformity Scope of Supply, Installation Indicators and operating elements Weldability of typical combinations of stud and parent materials Welding processes (Contact –... -
Page 4: Important Safety Notes
1. Important Safety Notes These operating instructions apply to the power unit type N 5 with its welding gun (PSN 5 or PGN 5). These operating instructions are intended for qualified persons who in view of their technical training, knowhow, and experience knowledge of applicable regulations are able to access the work assigned to them and recognize potential hazards. - Page 5 Protective measures at the workplace: - Only weld in rooms that comply with national legal requirements and in accordance with the relevant standards. - Ensure the ambient temperature is above +5° C. - Set up the stud welding unit such that it is protected against shocks, vibrations and accidental falling over.
- Page 6 Consult the respective manufacturer in cases of doubt. The system operator must take suitable remedial measures. Warning: This stud welding unit must only be operated in an industrial environment. Employer The personnel must be instructed in accordance with the relevant standards. Untrained or unauthorised personnel may not use the power unit.
- Page 7 Personal protective equipment: Wear personal protective clothing, covering the whole body, including protective weld goggles with safety glass and ear protection (noise level of more than 107 dB(A) can occur), when working with the stud welding unit. Therefore the following protective equipment must be worn: - Fireproof protective clothing (Non-flammable clothing), covering the whole body - Safety goggles with sight glass in compliance with the applicable standards and do not look directly into the light arc.
-
Page 8: Safety Symbols And Terms Used
2. Safety Symbols and Terms Used Safety instructions and warnings serve your personal safety, the safety of others and the product safety. They are highlighted in these operating instructions by the following terms. These terms draw attention to potentially dangerous or dangerous situations. Danger: This additional term means that death, serious physical injury or considerable damage to property will occur, if suitable precautionary measures are not taken. -
Page 9: Guarantee
We do not warrant Welding Unit N 5 stud welders, parts, or accessories against failures resulting from misuse, abuse, improper installation, maladjustment or use not in accordance to the operating instructions furnished by the manufacturer. -
Page 10: Eu Declaration Of Conformity
Rokitno 5, 05-870 Błonie, Polska, declare that the products Stud welding power units welding nails GZON/GZONI/ pins/ insulations pins Nowa Gruppe Welding Unit N 5 mentioned in this declaration, complies with the following harmonized standards EN 60947-1:2012 Arc welding equipment - Part 1: Welding power sources... -
Page 11: Scope Of Supply, Installation
Report any transport damage or missing components immediately to the delivering shipping agent or the dealer. Scope of Supply The stud welding unit consists of a power unit (type N 5), a welding gun (type PGN 5 or PSN 5), Ground cable (single or double), Operating manual and chuck(s) PSN 5 Welding... -
Page 12: Positioning The Unit
Positioning the unit Place the stud welding unit on a horizontal, vibration-free and non-slip surface. The bearing strength of the surface should be at least twice the weight of the stud welding unit. Due to the design and power of the stud welding unit, thermal stresses occur in the housing. -
Page 13: Troubleshooting
See Troubleshooting chapter. Other descriptions Ignitions tip. The power unit welding unit N 5 and connected stud welding gun work by the capacitor discharge stud welding with tip ignition welding method. In order to ignite an arc and therefore to generate a weld pool, every stud must have an ignition tip. -
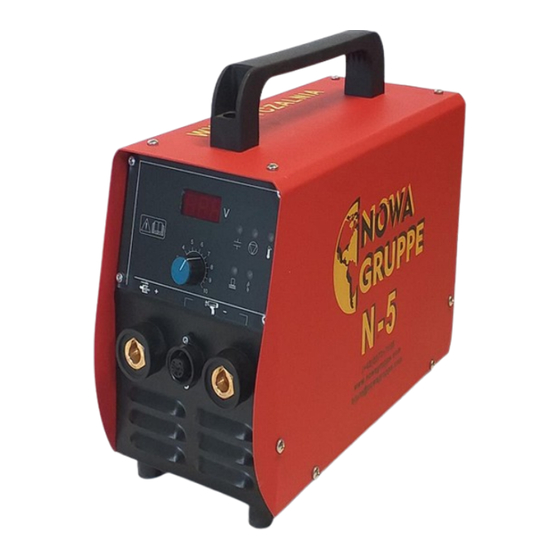
Page 14: Indicators And Operating Elements
Welding Voltage Digital Display capacitors voltage display or error codes in case of troubles Available only for N 5 S : select 66.000 µF or Capacitors bank 132.000 µF capacitors bank selector “READY” Indicates that the capacitor bank is charged to the preselected value. -
Page 15: Weldability Of Typical Combinations Of Stud And Parent Materials
8. Weldability of typical combinations of stud and parent materials Tab: 8.1 — Weldability of typical combinations of stud and parent materials for capacitor discharge stud welding with tip ignition Note: In the case of material combinations not listed in this table, please seek the advice of your local technical representative. -
Page 16: Welding Processes (Contact - Gap)
9. Welding processes (Contact – Gap) The two techniques for capacitor discharge stud welding with tip ignition are with contact or with gap. Table 9.1 – characteristics for capacitor discharge stud welding with tip ignition... -
Page 17: Preparing Workplace And Welding Process
10. Preparing Workplace and Welding Process Danger for unauthorised operating personnel: Work with the stud welding unit only when you are appropriately trained, instructed, authorised to do so, and you have read and completely understood this operating manual. Warning: Protect yourself and others! Use of the equipment must be limited to authorised personnel only who must be suitably trained and must have read and understood this manual. -
Page 18: Connecting The Welding Gun
Plug the ground cable plug into the connection socket. Secure the connectors with a clockwise turn until they lock. Failure to do this will result in damage to the connectors during welding. Connecting the welding gun The power unit is designed for exclusively connection of the welding gun PSN 5 or PGN 5. Caution: No guarantee concerning safety and functionality of the stud welding unit is accepted when welding guns of other manufacturers are connected. -
Page 19: Setting Of Welding Guns
11. Setting of welding guns 11.1 Settings of Welding guns PSN 5 Field of application of PSN 5 The PSN 5 gun is a contact welding gun for welding studs by capacitor discharge with tip ignition. The welding elements should preferably made of steel and stainless steel. Brass or Aluminium studs can also be welded with limitations. -
Page 20: Chuck Preparation
Chuck preparation The chuck is selected depending on the welding element (welding stud). The suitable chuck has to be adjusted to the length of the stud welding element. Note: Chucks are wearing parts and should therefore always be kept in stock and ordered on time. Procedure 1. - Page 21 85 120 150 Aluminium 95 120 Tab: 11.3 Recommended charge voltage [V] in the power unit N 5 * Aluminium joints can only be welded with the contact welding gun with limits. Note: The figures in these tables are indicative values and must be checked by means of a test welding on the original material with the same properties as the original workpiece.
- Page 22 Work procedure for PSN 5 gun Work procedure: 1. If not already done, insert a welding element in the chuck. Position the welding gun on the welding spot vertically. The contact LED lights up. 2. Press the welding gun vertically (90°) against the workpiece surface with both hands.
-
Page 23: Psn 5 : Contact Welding Gun With Iso Kit
11.2 Setting of PSN 5 welding gun with ISO Kit (For long Insulation pins) 1. Adjust Chuck back stop screw. There is a depth stop inside of the chuck (Chuck back stop screw) The depth stop should be adjusted so that you are retaining a good portion of the stud you are setting up to weld. -
Page 24: Psn 5 : Welding Gun For Cup Head Pins Gzon/Gzoni
11.3 Cup Head Pins welding gun PGN 5 The PGN 5 gun is a special stud welding gun (welding method: capacitor discharge stud welding (contact)) to weld cupped head pins. Cupped head pins (isolated nails with clip) are used to fix isolated mats. - Page 25 Chuck preparation for welding gun PGN 5 The chuck is selected depending on size and material. Note: Chucks are wearing parts and should therefore always be kept in stock and ordered on time. Procedure 1. Select a Chuck fitting the CHP material and size Caution: The chuck locking nut may not be tightened when there is no Chuck in the welding gun.
- Page 26 Mild steel Galvan. Steel(<25 µm) 1.4301 Recommended charge voltage of Welding Unit N 5 Note: The figures in these tables are indicative values and must be checked by means of a test welding on the original material with the same properties as the original...
- Page 27 Work procedure for PGN 5 gun Work procedure: 1. If not already done, insert a CHP on the chuck. Push the pin through the insulation until contact is done with the workpiece. The contact LED lights up. 2. Apply firm and vertically with both hands, even pressure to the gun (compress the gun spring of about 1.5 to 3 mm).
-
Page 28: Visual Inspection
12. Checking the Weld Quality Weld assessment and recommended corrective actions for capacitor discharge stud welding with tip ignition Every welded welding element must be checked visually. 4.7.1 Visual inspection Besides assessing the weld collar for form, size and appearance, you should also check the nominal length of the welded stud. - Page 29 The impact bending test is one of the most common test methods to check welding parameters and to identify defective welds. The test serves as a simple bench test for approximate checking of the chosen welding data. In the test, the weld is subjected to bending in an undefined manner.
-
Page 30: Effect Of Arc Blow And Some Possible Remedies
13. Effect of arc blow and some possible remedies... -
Page 31: Troubleshooting, Malfunctions, Corrective Actions, Fuses
Then switch off the stud welding unit and after some seconds switch it on. Malfunction • Switch N 5 off, then after some DEFAULT Fault in power unit seconds switch on; if the stud welder Led does light up... -
Page 32: Maintenance And Care, Fuse
(*) Errors numbers displayed on the “Welding Voltage Digital display” 15. Maintenance and Care Danger from insufficiently qualified operating personnel Carry out only the work described here on your stud welding unit or stud welding gun. Repairs may only be carried out by appropriately qualified personnel. Warning ... -
Page 33: Fuse Elements
Always switch off the stud welding unit before starting maintenance and care work. Pull out the mains plug. Maintenance work requiring the power unit N 5 to be opened may only be carried out by appropriately qualified electricians! Danger from insufficiently qualified operating personnel: Maintenance may only be carried out by appropriately qualified personnel. -
Page 34: Technical Specifications & Explosion View
16. Technical specifications & Explosion view 16.1 Stud Welding unit : N 5 Welding method Capacitor discharge stud welding with tip ignition according to current standards Primary voltage / Frequency 230V(±10%) / 50Hz-60Hz Mains fuse external N 5 : T 6,3 A N 5 : 66.000 µF... -
Page 35: Psn 5 Gun
16.2 PSN 5 Gun Technical specifications Type Contact stud welding gun C0 M3 – M8 (M 10) Welding range Weight 0,6 kg (without cable) Noise level > 107 dB(A) may occur during welding Protection class IP 20 Welding & control cable length: 3 m Weld cable cross section: 25 mm2 Fig. - Page 36 Explosion view of PSN 5 Gun Spare parts for PSN 5 gun Fig. 16 – 8 PSN 5 Gun Explosion view Your PSN 5 welding gun may differ in some details. This has no effect on the operation of the welding gun. Part Number PSN 5 Tripod and legs (see C0 welding accessories chapter)
-
Page 37: Pgn 5 Gun
16.3 Welding Gun PGN 5 Technical specifications Type Contact welding gun PGN 5 CHP Ø 2 - 4 mm Welding range Weight 0,9 kg (without cable) Noise level > 107 dB(A) may occur during welding Protection class IP 20 Welding cable length: 8 m Control cable length: 8,20 m... - Page 38 View of PGN 5 Gun Spare parts for PGN 5 gun Fig. 16.24 PGN 5 Welding Gun view Your PGN 5 welding gun may differ in some details. This has no effect on the operation of the welding gun. Part Number PGN 5 Front face plate (see C0 welding accessories chapter) 005.102.108...
-
Page 39: Cd Accessories For
17. CD Accessories 17.1 Accessories for PSN 5 / C1 / G1 1. CHUCK Chuck CD Ø 2 mm 005.190.100 Chuck CD Ø 2.5mm 005.190.101 Chuck CD Ø 3 mm 005.190.104 Chuck CD Ø 4 mm 005.190.108 Chuck CD Ø 5 mm 005.190.112 Chuck CD Ø... -
Page 40: Psn 5 Gun
Tool Ø 30 mm for template The support tube allows stud welding with templates and positioning on curved surfaces (L: 79 mm) 005.190.068 : PSN 5 Gun Longer Support Tube tool (+11 mm) => (L: 90 mm) 005.190.009 : C1 / G1 Gun 005.190.069 : PSN 5 Gun Tool for reducing noise (Ø... - Page 41 Screw-in nose cone assembly 005.190.35x Complete Assembly: 005.190.311 1. Face plate 005.190.315 2. Spacer ( x 3 ) 005.190.320 3. Screw-in ring 005.190.325 4. Centring rod 005.190.045 7. Longer Back stop Chuck Screw 005.190.33x 8. Nose cone 005.190.34x 9. Centring cup x = 1 for Ø...
-
Page 42: Iso Kit
17.2 ISO Kit Accessories 1. Chuck Chuck CD Ø 2 mm 005.190.100 Chuck CD Ø 2,5 mm 005.190.101 Chuck CD Ø 3 mm 005.190.104 Chuck CD Ø 4 mm 005.190.108 2. Foot plate Assembly 005.190.201 Leg : 170 mm 005.190.202 Leg : 220 mm 005.190.203 Leg : 300 mm... -
Page 43: Pgn 5 Gun
For chuck 190.162 (with 3 magnets) 18. D Grounding clamps Crocodile type Complete cable with Twin Ground clamp 005.102.165 (By default, supplied with N 5 with PSN 5 gun) Complete cable with Single Ground clamp 005.102.164 (Recommended for PGN 5 gun) 005.102.160...
Need help?
Do you have a question about the N 5 and is the answer not in the manual?
Questions and answers