Advertisement
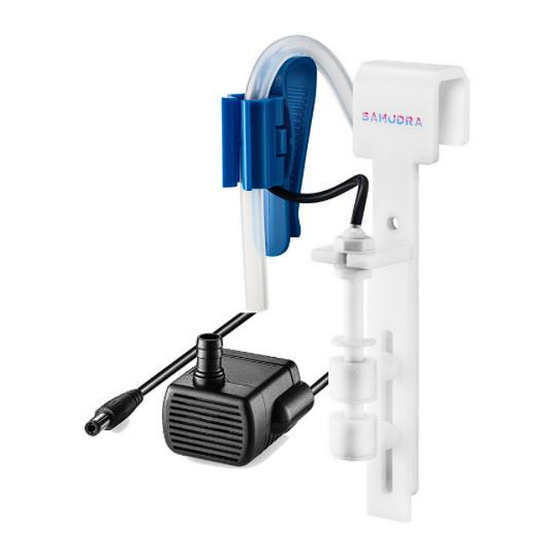
SAMUDRA Level Control
Instructions for use of
automatic refill kits
This symbol on the product or its packaging indicates that the product must not be treated as
household waste, but should be taken to an appropriate collection point for the recycling of electrical
and electronic equipment. Proper disposal of the used product prevents potential negative impacts
on the environment and human health that could occur if the waste is not properly managed.
Recycling materials helps to protect the environment. For more detailed information about recycling
this product, please contact your local council, waste management service or the shop where you
purchased this product.
1
Advertisement
Table of Contents

Related Manuals for SAMUDRA Level Control

Summary of Contents for SAMUDRA Level Control
- Page 1 SAMUDRA Level Control Instructions for use of automatic refill kits This symbol on the product or its packaging indicates that the product must not be treated as household waste, but should be taken to an appropriate collection point for the recycling of electrical and electronic equipment.
-
Page 2: Table Of Contents
Attention To begin using the ATO1/ATO2 automatic refill kit, the following instructions must be read with understanding. Table of contents 1. How to use the instruction manual 2. Introduction 3. Operating principle 4. Installation 5. Electrical connection 6. Maintenance 7. Precautions 8. -
Page 3: Operating Principle
SAMUDRA Level Control DS sets are recommended for operation in aquaria without a sump. Version description: Level Control SP version - Operation in the sump, dual integrated water level sensor, DC pump. Level Control SS version - Operation in the sump, dual integrated water level sensor, DC solenoid valve. -
Page 4: Installation
Activation of the emergency sensor will also trigger an acoustic and visual alarm on the main panel of the SAMUDRA DoserX dispenser. The automatic top-up function implemented by the DoserX dispenser with connected Level Control kit is equipped with a hysteresis, i.e. a mechanism that prevents the top-up from frequently switching on, e.g. - Page 5 Installation of Level Control SP version Fig. 1. General diagram of the installation of the Level Control SP in the catfish. The combined water level sensor should be hung on the edge of the glass and the hanging height adjusted with the adjustable handle. The lower sensor buoy "lower sensor" should mark the expected water level.
- Page 6 The outlet of the clean water supply hose should ALWAYS be installed above the water table of the clean water tank and the water table of the sumpa. Important The clean water tank must not stand higher than the tank in which the water is topped up. Installation of Level Control SS version...
- Page 7 Fig. 2. General diagram of the installation of the Level Control SS in the catfish. The combined water level sensor should be hung on the edge of the glass and the hanging height adjusted with the adjustable handle. The lower sensor buoy "lower sensor" should mark the expected water level.
- Page 8 20 cm. Important The liquid level sensor should be protected against the possibility of it being blocked by animals, plants, and technical infrastructure and decoration elements. Installation of Level Control DP version...
- Page 9 Fig. 3. General diagram of the Level Control DP installation in the aquarium. The sensors should be hung on the edge of the aquarium glass and the suspension height adjusted by means of adjustable brackets. The buoy of the "Lower sensor" activation sensor should determine the expected aquarium water level, while the buoy of the "Emergency top sensor"...
- Page 10 The clean water supply hose outlet should be installed above the water table of the clean water tank and the water table of the sumpa. Important The clean water tank must not stand higher than the tank in which the water is topped up. Installation of the Level Control DS version...
- Page 11 Fig. 4. General diagram of the installation of the Level Control DS in an aquarium. The sensors should be hung on the edge of the aquarium glass and the suspension height adjusted by means of adjustable brackets. The buoy of the "Lower sensor" activation sensor should determine the expected aquarium water level, while the buoy of the "Emergency top sensor"...
-
Page 12: Electrical Connection
The liquid level sensor should be protected against the possibility of it being blocked by animals, plants, and technical infrastructure and decoration elements. 5. Electrical connection Regardless of which version of the SAMUDRA Level Control kit you have, the procedure for connecting the kit to the SAMUDRA DoserX dispenser is the same. -
Page 13: Maintenance
Install all components of the kit in accordance with para. 4 of these instructions. b. Disconnect the power supply to the SAMUDRA DoserX dispenser. c. Connect the pump/electrovalve plug to the connector on the lower panel of the DoserX marked "PUMP/SOLENOID". -
Page 14: Technical Data
90 days of purchase). An additional warranty period of 6 months applies to the water level sensors in all Level Control kits, for the pump and electro-valve the warranty period is always 12 months . - Page 15 (3) Warranty service is provided only on the basis of a valid proof of purchase (receipt, invoice, or other document confirming the date of sale). In the event of a claim for a product which was registered in the Aqua-Trend service system after purchase, the e-mail address used during registration is sufficient for the claim.
Need help?
Do you have a question about the Level Control and is the answer not in the manual?
Questions and answers