Table of Contents
Advertisement
Quick Links
Advertisement
Table of Contents

Subscribe to Our Youtube Channel
Related Manuals for Owandy Radiology I-MAX PRO


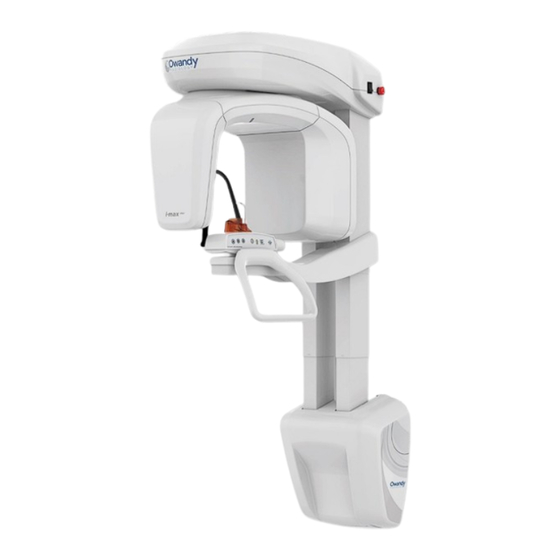
Summary of Contents for Owandy Radiology I-MAX PRO
- Page 1 EN • SERVICE MANUAL NIMXEN050H • January 2024...
- Page 2 The manufacturer, OWANDY RADIOLOGY, reserves the right to make modifications to its products or to their specifications in order to improve the performance, quality, or ease of production. Specifications of products or accessories may be modified without prior notice. No part of this manual may be reproduced without the prior consent of the manufacturer, OWANDY RADIOLOGY.
- Page 3 - replaced name and path directory at point 1 and figure of the par. 7.11.1 (copy from CEPH version) - Updated par. 7.11.2.2 (copy from CEPH version) - Updated par. 8 (copy from CEPH version) and second figure Owandy Radiology SAS...
- Page 4 - Added alternative x-ray generator at the table - Added the alternative x-ray generator curves - Added a warning advice 28.04.23 Updated images, cover image for I-MAX PRO Update spare parts codes for I-MAX PRO 08.11.23 Fixed data at chapter 5 Technical Characteristics...
- Page 5 Service Manual - Revision history NIMXEN050H THIS PAGE IS INTENTIONALLY LEFT BLANK Owandy Radiology SAS...
-
Page 7: Table Of Contents
Tube loading curves, anode heating and cooling curves ........36 5.7. Note on constant magnification for dental arch and TMJ (mouth open/closed) exams ..........................40 5.8. Dimensions ......................41 PRE-INSTALLATION 6.1. Electrical setting up ....................47 6.2. Packaging ....................... 49 6.3. Space requirements ....................50 INSTALLATION Owandy Radiology SAS... - Page 8 Errors with code from E750 to E770 ............. 127 9.2.7. Errors with code E850 and E852 ............135 9.2.8. Error with code from E1201 to E1205 ........... 137 9.2.9. Errors from 1401 to 1406 ..............138 9.3. User Interface (G.U.I.) messages ................. 141 Owandy Radiology SAS...
- Page 9 11.3.7. Chin support replacement ..............208 11.3.8. Disassemble upper chin support ............213 11.3.9. Patient handle replacement instruction ..........218 12. SCHEMATICS AND DRAWINGS 13. SPARE PARTS 14. APPENDIX 14.1. Appendix A: Setup parameters table ..............211 Owandy Radiology SAS...
- Page 10 Service Manual - Contents NIMXEN050H THIS PAGE IS INTENTIONALLY LEFT BLANK Owandy Radiology SAS...
-
Page 11: Introduction
Service engineers who install and maintain the device need knowledge of radiation protection and must read the Service Manual prior to use the X-ray equipment. They must be qualified and authorized by Owandy Radiology SAS. 1.1. Icons appearing in the manual This icon indicates a “NOTE”: please read the items marked by this icon thoroughly. - Page 12 Service Manual - Introduction NIMXEN050H Note The present manual is for I-MAX with black power switch. If your device has a white power switch, refer to service manual NIMXEN050D Owandy Radiology SAS...
-
Page 13: How To Contact Technical Service
Telephone number +33(0)1 64 11 18 40 • Fax number +33(0)1 64 11 18 10 • E-mail: export@owandy.com If a technical service intervention is required it is mandatory to provide Owandy Radiology Technical Service the following information: • Unit Serial Number •... -
Page 14: Safety Information
SAFETY INFORMATION Warning Please read this chapter thoroughly. Owandy Radiology SAS designs and manufactures its devices in compliance with safety requirements; furthermore it supplies all information necessary for correct use, and warnings related to dangers associated with X-ray generating units. -
Page 15: Warnings
To avoid permanent damage to the unit, never try to rotate the moving arm manually when the unit is switched on. In the case of Error 362 or Error 760, movement is possible to let the patient exit. Note When the unit is switched on, do not move the rotating arm. Owandy Radiology SAS... -
Page 16: Precautions While Using Laser Centring Devices
Do not clean the openings of laser centring devices with tools that could modify the optics. Any cleaning must only be performed by authorized technicians. • Operations other than those indicated could cause the emission of dangerous non- ionizing radiation. Owandy Radiology SAS... -
Page 17: Protection Against Radiation
2 m both from the X-ray source and from the patient, as shown in the following figure. Minimum distance from X-ray source 2 m Protected area Figure 1 Owandy Radiology SAS... -
Page 18: Electromagnetic Information
I-MAX has to be observed to verify if it operates in a normal way. Interference may occur in the vicinity of equipment marked with the symbol Warning Portable and mobile RF communications equipment should be used no closer to any part of I-MAX, including cables. Minimum distance 30 cm. Owandy Radiology SAS... -
Page 19: Electromagnetic Emissions
I-MAX is suitable for use in all establishments other than domestic and those directly connected to the public low voltage power supply network that supplies buildings used for domestic purposes. Harmonics emissions Class A IEC 61000-3-2 Voltage fluctuations/ Complies flicker emissions IEC 61000-3-3 Owandy Radiology SAS... -
Page 20: Electromagnetic Immunity
Power frequency magnetic fields Power frequency should be at levels characteristics (50/60 Hz) IEC 60601-1-2 30 A/m of a typical location in a typical magnetic field Test level commercial hospital IEC 61000-4-8 environment Owandy Radiology SAS... -
Page 21: Cybersecurity Measures
• Keep the Windows operating system up to date by installing all security patches • Make regular copies (backup) of all your valuable data and store them in a safe place, separately from the host PC Owandy Radiology SAS... -
Page 22: Environmental Risks And Disposal
The CER code for the device is 160213 - Equipment containing different hazardous components (complete radiographs and radiographs only) Illegal disposal of the product by the owner of the equipment will result in administrative sanctions, as provided for by applicable regulations. Owandy Radiology SAS... -
Page 23: Symbols Used
Functional grounding OFF; device not connected to the mains ON; device connected to the mains Laser Dangerous voltage Product identification code Serial number Manufacturing date (year and month) Name and address of the manufacturer Filtration Tube-head X-Ray tube Owandy Radiology SAS... - Page 24 Conformity to the Directive 93/42/EEC and its revised version and all 0051 other applicable Directives Exposure enabled status (the corresponding green LED is on) X-Ray emission (the corresponding yellow LED is on) Electronic instructions for use symbol for medical devices, according to EN ISO 15223-1: 2016 Owandy Radiology SAS...
- Page 25 Service Manual – Safety information NIMXEN050H THIS PAGE IS INTENTIONALLY LEFT BLANK Owandy Radiology SAS...
-
Page 26: Cleaning And Disinfection
2% glutaraldehyde. Note To ensure a greater level of hygiene the handles of the equipment are covered with a special antibacterial paint which, thanks to the emission of silver ions, prevents the development of micro-organisms. Owandy Radiology SAS... - Page 27 Service Manual – Cleaning and disinfection NIMXEN050H THIS PAGE IS INTENTIONALLY LEFT BLANK Owandy Radiology SAS...
-
Page 28: Description
DESCRIPTION 4.1. Functions, models and versions I-MAX, manufactured by Owandy Radiology SAS, is a complete panoramic X-ray system. Here following the list of the type of exams: • Panoramic adult or child exams, with 3 sizes and 3 types of biting for a total of 18 combinations with automatic selection;... -
Page 29: Block Diagram
Main power supply is also provided to the Generator Board A2 used to generate High voltage to the tube head. The unit does not include a voltage selector circuit for the mains voltage. Therefore, the unit is manufactured in different versions, depending on the line voltage of the installation place. Owandy Radiology SAS... -
Page 30: Mcu Board (A1)
CANBus messages. MCU includes also the configuration and calibration data and the HW key including the data of XP exams. EEprom memory includes the programming data. Hardware key board includes the XP data. Figure 2 Owandy Radiology SAS... - Page 31 0°, 90° and 180° positions by pressing >0<. MCU bootloader forced by DIP switches * It is possible to see this code by keeping the MCU SD card log (see paragraph 11.2.1.3) Figure 3 Owandy Radiology SAS...
-
Page 32: Generator Board (A2) And Tubehead
The Generator board controls the X-ray emission parameters feedbacks, generated by the tubehead. Any anomalies are then communicated to the MCU board (A1) which generates error codes to alert the operator. Owandy Radiology SAS... -
Page 33: Keyboard - Description And Functions
X-ray emission will start • Green blinking slowly, indicates that by pressing >0< button, axis reset will start • Green blinking fast, indicates the equipment cooling status. Light indicator "X-Ray Emission" status. It indicates the emission of X-rays. Owandy Radiology SAS... - Page 34 GUI for error description. The "Centring/Patient Entrance" key is used to: • Start/Stop the exam procedures • Put the rotation arm in the patient entrance position at the end of the exam. Temple clOSP/VSPs closing/release knob. Owandy Radiology SAS...
-
Page 35: Technical Characteristics
Service Manual – Technical characteristics NIMXEN050H TECHNICAL CHARACTERISTICS General features Type I-MAX Manufacturer OWANDY RADIOLOGY SAS 2 rue des Vieilles Vignes 77183 Croissy-Beaubourg - FRANCE Class Class I with type B applied parts according to IEC 60601-1 classification. Protection degree... - Page 36 1 : 1 (*) dentition part) TMJ open/closed mouth 1 : 1.20 (nominal) 1 : 1 (*) Sinus 1 : 1.22 (nominal) 1 : 1 (*) (*) Warning The declared image magnification value is valid after proper software calibration. Owandy Radiology SAS...
- Page 37 Service Manual – Technical characteristics NIMXEN050H Tube-head characteristics Model MP05 or MPV05 OWANDY RADIOLOGY SAS Manufacturer 2 rue des Vieilles Vignes 77183 Croissy-Beaubourg - FRANCE Maximum tube voltage 70 kV kVp accuracy ± 8 % Maximum anodic current 7.1 mA Anodic current accuracy ±...
- Page 38 Class 1 laser product according to IEC Laser class standard 60825-1:2014 03015L Wave length 650 nm Divergence < 2.0 mRad Optical power on the working surface < 1 mW Laser class Class 1 laser product according to IEC standard 60825-1:2014 Owandy Radiology SAS...
- Page 39 Monitor characteristics: the PC and the monitor are not supplied with the equipment. In order to properly view images taken with I-MAX, the PC monitor must have the following minimum characteristics: • Resolution: 1600 x 1024 pixels • Colour depth: 16M of colour • Contrast: 500:1 • Luminosity: 200cd/m^2 Owandy Radiology SAS...
- Page 40 Service Manual - Technical characteristics NIMXEN050H Note The handles of the equipment are covered with a special antibacterial paint which, thanks to the emission of silver ions, prevents the development of micro-organisms. Owandy Radiology SAS...
-
Page 41: Pc Requirements
Operating system windows 10 – 64 bit • Mother board with at least one free express slot (min. X4) to be dedicated to the Gbps network interface card intel I210 single port (NIC provided with the equipment) Owandy Radiology SAS... -
Page 42: Software
CE marked as medical device of class IIa and integrate the equipment SDK according to what stated in the document PANOW3D API programmer's guide Vn (n is the document revision), contact Owandy Radiology to have the latest revision of the programmer's document. -
Page 43: Separate Parts Supplied With I-Max
60601-1, 3rd edition. Some of these parts do not carry identification codes due to their small size. The use of these parts on other devices is not possible, since they are parts designed specifically for the I-MAX. Owandy Radiology SAS... -
Page 44: Reference Standards
Medical devices software – Software life-cycle processes. IEC 60825-1:1993 (1nd ed.) Safety of laser product – Part 1: equipment classification and requirements. IEC 60825-1:2007 (2nd ed.) Safety of laser product – Part 1: equipment classification and requirements. Owandy Radiology SAS... - Page 45 According to 93/42/EEC Medical Devices Directive, the equipment is classified as class II B. According to Canadian MDR, the equipment belongs to class II. According to FDA 21 CFR, the equipment belongs to class II. Owandy Radiology SAS...
-
Page 46: Tube Loading Curves, Anode Heating And Cooling Curves
Service Manual - Technical characteristics NIMXEN050H 5.6. Tube loading curves, anode heating and cooling curves Tube "Canon D-058" (0.5 IEC 336) Tube loading curves Anode heating and cooling curves Owandy Radiology SAS... - Page 47 Service Manual – Technical characteristics NIMXEN050H Tube "Canon D-058" (0.5 IEC 336) Tube loading curves Anode heating and cooling curves Owandy Radiology SAS...
- Page 48 Service Manual - Technical characteristics NIMXEN050H Tube "CEI OX 80-0.5" (0.5 IEC 336) Tube loading curves Anode heating and cooling curves Tube head cooling curve Owandy Radiology SAS...
- Page 49 Service Manual – Technical characteristics NIMXEN050H Owandy Radiology SAS...
-
Page 50: Note On Constant Magnification For Dental Arch And Tmj (Mouth Open/Closed) Exams
Based on experience and competence, the user has to judge this variation. In any case, TMJ radiography cannot be used to perform calculations of distances, angles etc. on the film. Owandy Radiology SAS... -
Page 51: Dimensions
Service Manual – Technical characteristics NIMXEN050H 5.8. Dimensions Figure 6: I-MAX dimensions - Wall mounted version Owandy Radiology SAS... - Page 52 Service Manual - Technical characteristics NIMXEN050H Figure 7: I-MAX dimensions - Wall mounted with floor support version Owandy Radiology SAS...
- Page 53 Service Manual – Technical characteristics NIMXEN050H Figure 8: I-MAX dimensions - Floor mounted version Owandy Radiology SAS...
- Page 54 Service Manual - Technical characteristics NIMXEN050H THIS PAGE IS INTENTIONALLY LEFT BLANK Owandy Radiology SAS...
-
Page 55: Pre-Installation
Fixing to the wall must be done using the 4 holes indicated in the figure. (14.96") Ø9.5 Ø9.5 (7.48") (7.48") Ø9.5 Ø9.5 (6.38") (6.38") (12.76") Standard version Double stud version (16") Owandy Radiology SAS... - Page 56 In case of full bricks: drill Ø14 + chemical Anchors FIS V-BOND 300T + Steel Insert FIS E 11X85 M6. This solution permit to avoid the use of threated bars. Owandy Radiology SAS...
-
Page 57: Electrical Setting Up
The general grounding must comply with the rules in force; a wrong quality of the grounding could be dangerous for the operator’s safety and cause a bad function of the electrical devices. Note Power supply cable is already connected inside the I-MAX. Owandy Radiology SAS... - Page 58 X11-3/X11-4 contact closed during X-ray emission Warning It is installer’s responsibility to check the characteristics of the remote X-ray button. No current or voltage must pass through remote control hand switch. Wrong connections may damage the MCU. Owandy Radiology SAS...
-
Page 59: Packaging
At the receiving and before install the unit, verify that those sensors have not been activated. Warning Owandy Radiology will not bear any responsibility for damages caused to the equipment due to improper unpackaging procedure, and for the relevant costs. Owandy Radiology SAS... -
Page 60: Space Requirements
Service Manual – Pre-installation NIMXEN050H 6.3. Space requirements Figure 9 Owandy Radiology SAS... -
Page 61: Installation
Fixing to the wall must be done using the 4 holes indicated in the Figure 10. (14.96") Ø9.5 Ø9.5 (7.48") (7.48") Ø9.5 Ø9.5 (6.38") (6.38") (12.76") Standard version Double stud version (16") Figure 10 Owandy Radiology SAS... - Page 62 In case of full bricks: drill Ø14 + chemical Anchors FIS V-BOND 300T + Steel Insert FIS E 11X85 M6. This solution permit to avoid the use of threated bars. Owandy Radiology SAS...
-
Page 63: Mechanical Installation
Service Manual – Installation NIMXEN050H 7.1. Mechanical installation Remove the carton box and the higher polystyrene section. Figure 11 Remove the front polystyrene section. Figure 12 Owandy Radiology SAS... - Page 64 Push the packaging until the wall plate is against the wall. Figure 13 Verify with an air bubble lever that the plate is horizontal. Put the air bubble level in this position over the wall plate Figure 14 Owandy Radiology SAS...
- Page 65 It is responsibility of the installer to verify type and solidity of the wall and identify the correct type of fixing method (metallic dowels, plastic dowels or chemical fixing anchors etc…). Remove the plastic protection between plate and rotating part. Figure 15 Owandy Radiology SAS...
- Page 66 Service Manual - Installation NIMXEN050H Once fixed the plate to the wall, remove the tilting plate locking screws, and their nuts, locking the wall plate. Remove Remove Figure 16 Owandy Radiology SAS...
- Page 67 10. Grab the packaging and lift until the insertion of the pin-lock is in its seat. Note The force necessary to lift the I-MAX is about 20kg, so that a single technician can be enough to install the unit. Figure 17 Owandy Radiology SAS...
- Page 68 Service Manual - Installation NIMXEN050H 11. Once the unit reaches the final position, be sure that the safety pin is properly locked before to leave the package. Figure 18 Owandy Radiology SAS...
- Page 69 Service Manual – Installation NIMXEN050H 12. Reinsert immediately the tilting plate locking screws, and their nuts and lock the tilting plate at the wall plate. Reinsert Reinsert Figure 19 Owandy Radiology SAS...
- Page 70 13. Tighten the nuts of the eyebolts of the rotation pins. Tighten Tighten Figure 20 Warning In case of dismountling the unit (i.e. after exhibition), it is necessary to loosen these nuts in order to avoid damages to the hinge during rotation. Owandy Radiology SAS...
- Page 71 15. Remove the upper cover releasing the two screws present in the back side (wall direction); front side of the cover is fixed without screw (locking pins). Remove the safety plate used do keep the rotating arm fixed during transportation. Figure 22 Owandy Radiology SAS...
-
Page 72: Electrical Connections
Warning It is installer’s responsibility to check the characteristics of the remote X-ray button. No current or voltage must pass through remote control hand switch. Wrong connections may damage the MCU. Owandy Radiology SAS... - Page 73 Power voltages for the relevant devices have to be provide from outside, making sure not to exceed the indicated ratings. Warning Never connect the Ethernet cable coming from the computer to other connectors in the unit (i.e. column movement control rack). Owandy Radiology SAS...
- Page 74 Never switch ON the unit if one of the two columns is disconnected Always verify that the columns are connected to the corresponding port in the control rack. Column 1 Column 2 CONTROL RACK Column 1 control Column 2 control Owandy Radiology SAS...
-
Page 75: How To Mount The Covers
Service Manual – Installation NIMXEN050H 7.3. How to mount the covers Note Cover mounting is easier with the unit powered ON, mainly to move lift. 7.3.1. Wall plate cover Figure 24 Owandy Radiology SAS... - Page 76 2. With the help of a box cutter, cut along the two lines of the smaller hole highlighted in the figure. 3. Push the newly cut piece inwards to detach it completely from the cover, thus creating the hole. Owandy Radiology SAS...
- Page 77 4. With the help of a piece of sandpaper, carefully file the edges of the newly created hole. Note Be sure to remove any sharp edges or defect present also on the inside- side of the newly created hole Owandy Radiology SAS...
- Page 78 If the issue persists, please refer to the next steps 6. If there should still be interference issue between cables and wall plate, then, with the help of a box cutter, proceed to cut along the two lines of the bigger hole highlighted in the figure. Owandy Radiology SAS...
- Page 79 7. Use a cutter to cut the plastic parts on the top edge and, if necessary, also use it for the side edges. 8. Remove imperfections with the cutter. 9. With the help of a piece of sandpaper, carefully file the edges of the newly created hole. Owandy Radiology SAS...
- Page 80 Service Manual - Installation NIMXEN050H 10. Remove any residuals of sandpaper and then mount the cover on the wall plate verifying if the issue has been solved. Owandy Radiology SAS...
-
Page 81: Upper Cover
Service Manual – Installation NIMXEN050H 7.3.2. Upper cover Screws Push to lock Figure 25 7.3.3. Temple supports Figure 26 Owandy Radiology SAS... -
Page 82: How To Position The Cables
Service Manual - Installation NIMXEN050H 7.4. How to position the cables The cables output are from lower side of the I-MAX so that it’s possible to position them in a single cable channel on the wall. Owandy Radiology SAS... -
Page 83: Network Interface Board Configuration
Switch on the unit. The network adapter connected to unit will become active. Right click on it and select "Properties". Select the item "Internet Protocol Version 4" and click on "Properties". Configure the IP address as follows: • IP address: 192.168.0.16 • Subnet Mask: 255.255.255.0 and then click "OK". Owandy Radiology SAS... - Page 84 "ping 192.168.0.211". Press Enter and verify that the unit replies to the ping as shown in the figure below. If the ping does not reply, unflag the items "GigE Vision Filter Driver" and "Internet Protocol Version 6" from the properties of all the network adapters. Owandy Radiology SAS...
- Page 85 Service Manual – Installation NIMXEN050H 7. On the Ethernet board property window click on “Configure…”: 8. Select the “Advanced” sheet on the network board configuration window. 9. Set the following network settings (see Figures below): • Interrupt Moderation = Disabled Owandy Radiology SAS...
- Page 86 Service Manual - Installation NIMXEN050H • Jumbo Packet = 9014 Bytes • Maximum Number of RSS Queues = 2 Queues Owandy Radiology SAS...
- Page 87 Service Manual – Installation NIMXEN050H • Packet Priority &VLAN = Packet Priority Enabled • Performance Options→Properties→Received Buffers = 2048 Owandy Radiology SAS...
- Page 88 Service Manual - Installation NIMXEN050H • Performance Options→Properties→Interrupt Moderation Rate = Extreme Owandy Radiology SAS...
- Page 89 Go to C: \ Program Files (x86) \ Teledyne DALSA \ Network Interface \ Bin and double click on “Cor-NetConfigApp.exe” (Network Configuration Tool); Under NIC IP Configuration for the card connected to the LAN, they must NOT be flagged: • "Sapera Network Imaging Driver Enabled" • "Included in the Discovery process" Owandy Radiology SAS...
-
Page 90: Sapera Service Settings
First failure: Restart the Service • Second failure: Restart the Service • Subsequent failures: Restart the Service • Restart fail count at: 0 days • Restart service after: 0 minutes Click “Apply” button and then click “Ok” button. Owandy Radiology SAS... -
Page 91: Quickvision Software Installation
In case of CD/DVD, the Installation wizard starts automatically, if this does not happen, double click on "Autorun.exe" at the root of the disc. In both cases, the window below opens: Click on "QuickVision" icon. The installation program starts; go through the installation procedure. Owandy Radiology SAS... - Page 92 “Black power switch” to start drivers and utility software installation. Confirm until the installation is completed. To check that the installation is correctly completed, open QuickVision, click on "Mouth" symbol (see arrow) and then on keyboard symbol (see circle) to open Virtual Keyboard of the unit. Owandy Radiology SAS...
- Page 93 Service Manual – Installation NIMXEN050H Owandy Radiology SAS...
-
Page 94: Detector Calibration Files Installation
C:\ProgramData\OWANDY\PANORAMIC PHD_C\Calibration (create the directory "Calibration" if not present). In case of CD/DVD, copy all the files contained in the media support and paste them in the directory C:\ProgramData\OWANDY\PANORAMIC PHD_C\Calibration (create the directory "Calibration" if not present). Owandy Radiology SAS... -
Page 95: Verification Of The Panoramic Function
Open QuickVision software and open the patient "Quality Test". If not present, create a new patient (Last Name: "Quality"; First Name: "Test"). Select the "Mouth" icon. From the "ACQ" toolbar, select the GUI icon to open the virtual keyboard. Owandy Radiology SAS... - Page 96 Figure 27: Support plate and centering tool positioning On the virtual keyboard, select Panoramic QC – and make an exposure at 66kV, 6.3mA. Select the "Ruler" icon and measure the distance between the two external spheres; this value must be 169mm ± 2mm. Owandy Radiology SAS...
- Page 97 10. If distance is outside the tolerance range, visually check that the rotation offset is properly configured. This can be done by checking the laser alignment with the support plate as described in the User Manual, paragraph "Laser Alignment check". Repeat the exposure. Owandy Radiology SAS...
-
Page 98: Verification Of Exposure Parameters
Phisician to verify periodically the unit In order to make easier the exposure parameters measurements, I-MAX has a dedicated modality that allows X-ray exposure without rotating the arm and without exposure parameters modulation that typically occurs in a standard exam. Owandy Radiology SAS... -
Page 99: Verification Of Exposure Parameters With Invasive Method
The exposure parameters can be checked with the following procedure: Turn OFF the system. Remove the cover on the back of the generator and remove the protection grid of the HF board. Identify the test point XJ8. X31 N X31 L Figure 28 Owandy Radiology SAS... - Page 100 PIN 3 → mA feedback Warning Beware that the probes do not interfere with columns during the rotation of the arm. Switch ON the system and as soon as the green led starts blinking, press >0< for initialization. Owandy Radiology SAS...
- Page 101 Table at point 10. 10. Take a second exposure setting the following parameters: 70kV, 6mA, 3s and verify that the measured values are in the acceptance limits listed in the following table. Owandy Radiology SAS...
- Page 102 • kV out of range: follow the instructions described at paragraph 9.2.6.2 • mA out of range: follow the instructions described at paragraph 9.2.6.3 • time out of range: replace the generator board. Owandy Radiology SAS...
-
Page 103: Verification Of Exposure Parameters With Non Invasive Method
In the same panel set the following exposure parameters: 60kV, 3mA, 3s. Press the X-ray button to take an exposure and verify that the measured values are in the acceptance limits listed in the Table at point 6. Owandy Radiology SAS... - Page 104 In case the test fails (result do not match the indicated values), proceed with the following actions: • Check the probe position and repeat the test • If the values are still out of range, perform the test using the invasive method as described in paragraph 7.8.1. Owandy Radiology SAS...
-
Page 105: Storing Of Automatic Exposure Parameters
The preset exposure parameters of each specific exam can be modified according to the user’s needs. In order to modify the default exposure parameters, from the Main Menu select the symbol GEAR (configuration). The following window will be displayed: Select the button "Exam parameter customization". Owandy Radiology SAS... - Page 106 At any time, it is possible to restore the factory preset for all the exams, clicking on the button on the bottom of the window "Reset all exams to factory values". Owandy Radiology SAS...
-
Page 107: Table Of Pre-Set Anatomic Parameters
Adult Patient Child Patient (9,7 seconds) (9,7 seconds) Small Medium Large Note The exam parameters set as the default are values to be taken as the starting point. Users can optimise the parameters according to their needs. Owandy Radiology SAS... - Page 108 Service Manual - Installation NIMXEN050H Note The type of biting does not affect the kV and mA values, but it affects the position of the focus layer, by adapting rotation movement to the patient’s anatomy. Owandy Radiology SAS...
-
Page 109: Data Backup
At the end of installation process, make sure that the following information and data are safely archived: • IP address of the I-MAX unit • Setup Parameter Table containing the factory configuration • Detector calibration files / Software installation CDs or USB pen drive media. Owandy Radiology SAS... -
Page 110: Exhibition Mode Setup
Note In order to restore the normal functioning of the unit interface: close the G.U.I., open "PhD_Conf.exe" program and select "Demo mode" as "Disabled"; confirm with "OK" to restore the normal functioning of the interface. Owandy Radiology SAS... -
Page 111: Unit Movements Demo (Without Pc Connection)
Press the >0< button and wait the end of the movements. Press the X-ray button until the end of the panoramic rotation. At the end of the rotation press the >0< button and the unit come back to the start position ready for another panoramic exam simulation. Owandy Radiology SAS... - Page 112 To stop the columns movements, press the red emergency button located on the upper part of the unit, near the power switch. Note Single exam simulation and automatic continuous movements are only available for single sensor I-MAX. Owandy Radiology SAS...
-
Page 113: Unit And G.u.i. Full Demonstration (X-Ray Emission Permanently Disabled)
Check "Disable permanently X-ray emission" box. Click on the gear and save the new configuration in the EEPROM memory. Wait the unit reboot and use the G.U.I. and unit normally; the system will perform the exam without the X-ray emission. Owandy Radiology SAS... - Page 114 Service Manual - Installation NIMXEN050H THIS PAGE IS INTENTIONALLY LEFT BLANK Owandy Radiology SAS...
-
Page 115: Service Program Descriptions
In order to access Service programs, from Main Menu select the symbol "GEAR" (configuration). The first page show the SW versions present in the unit. This is useful in case it is required to know the actual versions. This page doesn't require any password. Owandy Radiology SAS... - Page 116 Exposition: allows to disable the x-ray emission permanently (see paragraph 8.2) • Logs: this page displays the exam counters (see paragraph 8.3) Each time a parameter is modified, or a different sub menu is selected, the unit will provide a confirmation window: Owandy Radiology SAS...
-
Page 117: Network Setting
Selecting "Network Setting" it is possible to modify the IP address used to communicate with the I-MAX (see paragraph 7.5). If necessary, change the IP Address according with the one present on the PC (same IP, but last 3 digits different; same Subnet mask). Owandy Radiology SAS... -
Page 118: Exposition
Service Manual – Service program descriptions NIMXEN050H 8.2. Exposition This function allows: • to disable X-ray emission permanently checking the box to disable X-rays; • to set a corrective factor – in % - on the displayed DAP dose per area value. Owandy Radiology SAS... -
Page 119: Logs
Service Manual – Service program descriptions NIMXEN050H 8.3. Logs In this page it is possible to see the exam counters and access the machine logs folder In order to keep the unit logs, refer to paragraph 11.2.1. Owandy Radiology SAS... -
Page 120: Machine Configuration And Setup
Click on the SET-UP button and in the windows that will open type the password PhdAccess. • In the View menu select Unit Setting configuration • The following window will open; there are several different tabs for different system settings Owandy Radiology SAS... - Page 121 Service Manual – Service program descriptions NIMXEN050H Owandy Radiology SAS...
- Page 122 Service Manual – Service program descriptions NIMXEN050H Owandy Radiology SAS...
-
Page 123: Troubleshooting
Steady OFF Green The three LEDs indicates the programming status Green OFF=X-ray OFF=X-ray button X-ray button See Errors button not pressed activation E360 and E760 pressed (paragraphs 9.2.4.1 ON=X-ray button and 9.2.6.9) ON=X-ray not pressed button pressed Owandy Radiology SAS... -
Page 124: Generator Board A2 Leds
X-ray emission stand-by active OFF during X-ray Green Auxiliary power See Error E750 supply (paragraph 9.2.6.1) X-ray exposure too See Error E755 long (backup timer (paragraph 9.2.6.5) intervention) Green Main power supply See Error E750 (paragraph 9.2.6.1) Owandy Radiology SAS... -
Page 125: Displayed Messages
9.2.3.1 activated Zero position optical sensor never activated 9.2.3.1 202 / 203 Zero position optical sensor of rotation still active after 9.2.3.1 exiting from zero sensor Unexpected activation of rotation optical sensor 9.2.3.2 Timeout on rotation 9.2.3.1 Owandy Radiology SAS... - Page 126 Alarm "Brown OUT" 9.2.6.6 Alarm "NO X-ray" 9.2.6.7 Alarm "unexpected emission" 9.2.6.8 Alarm "NO RX button command" 9.2.6.9 Alarm "NO X-ray emission" 9.2.6.7 Bad unit status: emission flag detected unexpectedly 9.2.6.10 kV analog feedback out of range 9.2.6.11 Owandy Radiology SAS...
- Page 127 Sensor connection lost during exam 9.2.9.1 Sensor communication failure 9.2.9.2 1402 1403 Software watchdog error 9.2.9.3 1404 Sensor does not detect X-rays during exam 9.2.9.4 1405 Sensor frame lost during exam 9.2.9.1 Error in sensor in frame rate 9.2.9.1 1406 Owandy Radiology SAS...
-
Page 128: Errors With Code E000 And E001
(see paragraph 14.1) following the procedures present on chapter 8. If the error persists, replace MCU board complete of EEPROM (see paragraph 11.3.2). Manually restoring of the unit configuration data will be requested. Technical Service additional information required: MCU SD card log (see paragraph 11.2.1.3). Owandy Radiology SAS... - Page 129 MCU board with a correct one (see paragraph 11.3.2). Contact Owandy Radiology Technical Service to verify that the MCU firmware version is compatible with the unit configuration. If it is not, upload the MCU firmware with a compatible one (see paragraph 11.1.1).
-
Page 130: Errors With Code From E200 To E299
MCU board A1. Technical Service additional information required: Audio / Video with the global view of the unit movement Audio / Video of the view of the rotation motor group movement (with unit top cover removed) Owandy Radiology SAS... - Page 131 If the interference is not external to the unit (point 1.): remove the unit top cover, perform a panoramic Test exam and verify if there are interferences in the motor work spaces: remove the objects and repeat the test. If the issue was not solved, refer to the Error E200 ÷ E205 troubleshooting. Owandy Radiology SAS...
- Page 132 MCU board (see paragraph 11.3.2). Technical Service additional information required: Audio / Video with the global view of the unit movement Audio / Video of the view of the translation motor group movement (with unit top cover removed) Owandy Radiology SAS...
- Page 133 To request a new hardware key, report to OWANDY the S/N of the equipment and / or the U.I.C code listed on the equipment parameters table (supplied as paper copy with the unit documentation – see paragraph 14.1). Owandy Radiology SAS...
-
Page 134: Errors With Code From E300 To E399
Verify if the X-ray button has been intentionally / unintentionally released during the exam: If it was intentionally released, press button >0< to reset the error on the unit and close the error window displayed on the GUI. If it was unintentionally released, refer to Error E360. Owandy Radiology SAS... - Page 135 50% of preheating time is allowed; if in the end, however, the sensor always tells that it’s in the configuration phase, this error comes out. It can be a sensor problem and its connections to the PC (sensor power supply is definitely OK). Owandy Radiology SAS...
-
Page 136: Error With Code From E500 To E505
OSP/VSP versions: update/downgrade the FW-SW to a released/compatible configuration. Note Contact Technical Service to verify that the firmware and software versions are compatible with the unit configuration. Technical Service additional information required: Software logs MCU SD card log (see paragraph 11.2.1). Owandy Radiology SAS... -
Page 137: Errors With Code From E750 To E770
Before accessing the Generator board, it is mandatory to switch OFF the unit, disconnect it from the mains and wait up to 4 minutes in order to allow the discharge of the capacitor (LED H10 on the Generator board steady OFF). Owandy Radiology SAS... - Page 138 Line filter Z1 and Generator board; fix or replace the faulty component if the LED H8 is BLINKING, replace the Generator board if the LED H8 is ON, replace the Generator board and then the MCU board (see paragraph 11.3.2). Owandy Radiology SAS...
- Page 139 IF values measured at point 2 are incorrect, while values measured at point 3 are correct, replace the Generator board. IF values measured at point 2 and 3 are correct, the X57 connector is well inserted and its connections to the tubehead are OK, replace the Generator board and then the tubehead. Owandy Radiology SAS...
- Page 140 IF value measured at point 3. is incorrect and value measured at point 2. is correct, replace the tubehead. IF the tests listed at point 1., 2. and 3. do not solve the error, replace the Generator board and then the tubehead. Owandy Radiology SAS...
- Page 141 In any case it is mandatory to contact Owandy Radiology Technical Service and not use or switch ON the system anymore. Owandy Radiology SAS...
- Page 142 E769: Generator board reset due to a stack overflow These messages are displayed when the Generator board microcontroller is reset due to the displayed issue. If the error is displayed, contact Owandy Radiology Technical Service. 9.2.6.7. E758: Alarm "No X-ray" / E761: Alarm "No X-ray emission"...
- Page 143 IF the test is NOT OK, replace the tubehead (see paragraph 11.3.5). IF the test is OK, replace the Generator Board. If the error is still present, it is mandatory NOT use or switch ON the system anymore and contact Owandy Radiology Technical Service. 9.2.6.9. E760: Alarm "NO RX button command"...
- Page 144 E762: "Bad Generator board unit status, emission flag detected unexpectedly This message is displayed when the MCU detect a wrong status of the Generator board. If the error is displayed, contact Owandy Radiology Technical Service. 9.2.6.11. E763: kV channel analog feedback out of range /...
-
Page 145: Errors With Code E850 And E852
If the error is still present, replace the MCU board (see paragraph 11.3.2) If the error is no more displayed, verify integrity of the cable X12: replace the cable and verify if the error is still present If the above tests are OK, replace the keyboard membrane. Owandy Radiology SAS... - Page 146 Check that the >0< button is not stuck: replace the keyboard membrane if the >0< button is faulty. If the tests are OK, refer to error E850 (see paragraph 9.2.7.1). Owandy Radiology SAS...
-
Page 147: Error With Code From E1201 To E1205
E1203: Error detected in software allocation These messages are displayed when a software error has been detected. If the error is displayed, contact Owandy Radiology Technical Service. Technical Service additional information required: Condition/unit state/sequence in which the error occurs/can be reproduced Software logs (see paragraph 11.2.1). -
Page 148: Errors From 1401 To 1406
3. Verify if the tubehead connector X56 is well inserted and then perform the tests of the Error E761 (see paragraph 9.2.6.7). Contact Technical Service providing the following additional information: Software logs Last RAW files folder stored (see paragraph 11.2.2) Owandy Radiology SAS... - Page 149 Check the Ethernet connections (cables, junctions, PC network board): replace the faulty components (see Error E1401 – paragraph 9.2.9.1). Contact Technical Service providing the following additional information: Software logs Sensor logs (see paragraph 11.2.1) Last RAW files folder stored (see paragraph 11.2.2) Owandy Radiology SAS...
- Page 150 (the narrower collimator window is in front of the X-ray exit). Contact Technical Service providing the following additional information: Software logs (see paragraph 11.2.1.1) Last RAW files folder stored (see paragraph 11.2.2) Owandy Radiology SAS...
-
Page 151: User Interface (G.u.i.) Messages
Can happen if the KV or mA parameters are modified from the G.U.I. to fast (only in OSP/VSP ≤ 1.04.05 and QuickVision installer ≤ 5.03C). The message may be displayed while the G.U.I. is closing the Service Menu. If the problem persist contact Owandy Radiology Technical Service. 9.3.2. "Sensor not ready"... -
Page 152: System Anomalies
PHD_C\Calibration and that all the calibration options in the image processing menu of the in PhD_C_Test.exe are checked (see paragraph 10.3). 2. Perform tests of Error E760 (paragraph 9.2.6.9). 3. Verify the integrity of tubehead X57 connector, pin 5 and 6. Owandy Radiology SAS... -
Page 153: Panoramic Acquisition With Less Frames
2. If the error is still present, send the acquired RAW file (see paragraph 11.2.2) to Owandy Radiology Technical Service. 9.4.3. Asymmetries on the panoramic images 1. Check the orthogonality of the unit lasers (se User Manual - paragraph 7.3). 2. Perform the verification of the panoramic function (see paragraph 7.7). Owandy Radiology SAS... -
Page 154: Unit/Mcu Connection Problems
If the problem is still present, try to connect the MCU Ethernet cable to another network interface port (setting the right IP address on the network interfaces see paragraph – see paragraph 7.5). If the problem is solved, it can be related to the network interface board. Owandy Radiology SAS... -
Page 155: The Columns Do Not Move
If only the green LED blinking on the keyboard, it means that the button has not been recognized as pressed by the MCU board (see paragraph 9.2.7.1) If the problem is still present, contact Owandy Radiology Technical Service. Owandy Radiology SAS... -
Page 156: Periodic Maintenance
If the operator detects irregularities or failure, he must immediately call Owandy Radiology Technical Service. The appliance's performance is checked and, where necessary corrected, during the maintenance activities performed by the Owandy Radiology Technical Service Department, in accordance with the indications provided in the following chapters. Owandy Radiology SAS... - Page 157 Service Manual – Periodic maintenance NIMXEN050H The periodic maintenance performed by the Owandy Radiology Technical Service Department comprises the performance of the following additional inspection activities: Frequency Type of check Method Annually General visual inspection Visual inspection Annually Grounding of all the accessible conductive parts...
-
Page 158: 10.1.1. Tensioning Of R And Y Motor Belt
If the belts should be loose, tighten them more by unscrewing slightly the screw, then adjust the excursion (highlighted in blue) 2. After that, perform the panoramic centring verification (reference to chapter Errore. L 'origine riferimento non è stata trovata.) Owandy Radiology SAS... -
Page 159: 10.1.2. Shaft - Pulley Alignment
If they are not aligned, replace R and Y motors by ordering them as spare parts (Y motor cod. 6604040200 for 2D and cod. 6604041200 for 3D; R motor cod. 6604040100 for 2D and cod. 6604041100 for 3D) After replacement, perform the panoramic centring verification (reference to chapter Errore. L'origine riferimento non è stata trovata.) Owandy Radiology SAS... -
Page 160: Service Tools
In order to perform a correct system calibration, is necessary the use of the following tools: Image Description Function Laser centering tool Laser alignment check Support plate Support for panoramic centering tool Centering tool Panoramic function adjustment 1.5mm copper filter Sensor calibration Owandy Radiology SAS... -
Page 161: 10.3. Sensor Calibration
X-ray field and irradiate completely the acquisition area for the first 3 acquisition. The last acquisition requires and verifies the correct presence of the collimator closed and fixed in the operation position. For this reason a collimator with an hinge has been implemented. Figure 31 Owandy Radiology SAS... - Page 162 1. Remove the collimator by unscrewing the screw circled in red Warning Do not unscrew the red coloured screws Figure 32 2. Place the 1.5 mm copper filter in place of the collimator using its magnetic extremities as shown in the picture. Figure 33 Owandy Radiology SAS...
- Page 163 5. In the "User" field type in capital letter "SU". In the "Password" field type the password (see password generation on paragraph 10.3.1). 6. Select in “Exam parameters”: • ID: Centring emission • Format: No collimator • kV: 70 • mA: 5.0 7. Open the "Calibration" panel and select "PRNU- Live". Owandy Radiology SAS...
- Page 164 Service Manual – Periodic maintenance NIMXEN050H 8. Press the button "Calibrate". 9. Make sure that no objects are present in the X-ray field and that the collimator is in the opened position. If so, press “Ok” Owandy Radiology SAS...
- Page 165 10. Press the X-ray button and wait for the end of the acquisition. Note During the calibration, when one of the following windows is displayed, verify that the values reported are within the tolerances: Pix min: > 0.20 Owandy Radiology SAS...
- Page 166 12. Between two exposures, wait for the tube head to complete the cooling progress Figure 34 13. For the last exposition, remove the copper filter and placed the collimator in its closed position. MAKE SURE THAT THE FIXING SCEWS IS WELL TIGHTENED Owandy Radiology SAS...
- Page 167 Press “Ok” and then repeat the calibration process 14. The calibration is finished and the calibration file is saved in the folder “2_KASxxxxx” in C:\ProgramData\OWANDY\PANORAMIC PHD_C\Calibration: 15. PRNU_2B_PANO_2X2.FMP 16. In the “Image Processing” menu select: • Dark signal correction Owandy Radiology SAS...
- Page 168 Collimator correction if possible Figure 36 17. Make an exposure without objects in the X-ray field with the same parameters as before. 18. Verify that there are no defect lines or inhomogeneous bands on the panoramic image: Owandy Radiology SAS...
- Page 169 Verify the presence of the calibration file in the calibration folder Verify that all the calibration options are checked in image processing menu (see point 16 above) If the acquisitions are still not OK, redo the calibration. Owandy Radiology SAS...
-
Page 170: Password Generation
22 you have do digit "16" if month is April you have to digit "d" if year is 2016 you have to digit "p" Password for this date will be "16dp" but will be displayed "****". Owandy Radiology SAS... - Page 171 Service Manual – Periodic maintenance NIMXEN050H THIS PAGE IS INTENTIONALLY LEFT BLANK Owandy Radiology SAS...
-
Page 172: Corrective Maintenance
3. Click on SETUP button and in the Login windows that will open insert the password PhdAccess and click OK 4. From the menu Settings select Firmware update>Automatic mode>MCU 5. in the Login window that will open insert the password EthUpload and click OK Owandy Radiology SAS... - Page 173 7. The firmware upload will start and the progress will be indicated by the message window. The upgrade progress might take up to two minutes. 8. When the upload process has been completed, the following window is displayed. Click on OK button. Owandy Radiology SAS...
- Page 174 Insert the password (same of point 5. of the service procedure) Select the new firmware MCUet-xxxx.hex file Skip the following steps by pressing OK ( no need to open the unit covers and set dip switches) Wait the end of the uploading process Owandy Radiology SAS...
- Page 175 Service Manual – Corrective maintenance NIMXEN050H Switch off the unit, switch On the unit and click OK to the following window (skip step 2 and 3) Owandy Radiology SAS...
-
Page 176: Checks, Settings And Adjustment
The I-MAX firmware and software record some of the events that occurs during the unit functioning, stored in files called "Logs". These files have to be provided to the Owandy Radiology Technical Service as required by the different error descriptions. - Page 177 Note If the issue is rare open logview.exe, select the menu Options -> View GUI settings and set 50000 in Maximum messages shown box. 3. In addition in the folder C:\Windows\SysWOW64 retrieve the file logs.dat. Owandy Radiology SAS...
- Page 178 MCU Firmware (SW) version MCU DIP-Switches position (see paragraph 4.2.2.1) DIP switch code 0 = Normal mode MCU hardware key number (U.I.C.) XP-PACK option XP exam option ENABLED or DISABLED XCU version numbers Generator board Firmware (SW) version Owandy Radiology SAS...
-
Page 179: Raw Files Recovery
Before replacing, a burned fuse or any other parts verify that there are no short-circuit on motors (M3, M4) and theirs cables as described in the troubleshooting of the Errors E200 ÷ E205 (paragraph 9.2.3.1) and E240 ÷ E243 (paragraph 9.2.3.3). Verify also that there are no short-circuits on cables X8-J8. Owandy Radiology SAS... -
Page 180: Eeprom Memory Values Verification And Modification
Switch ON the unit and when the green keyboard LED blinks slow press the >0< button. Open the "PhD_test.exe" (folder path: C:\Program Files (x86)\OWANDY\OSP-PHD PANORAMIC) and wait the unit connection. Click on the menu Settings→Setup→Generic: In the "Setup" window select the field needed value: 0x#### - [name of the EEPROM variabiles]: Owandy Radiology SAS... - Page 181 In case of remote technical session: the BLU LED blinking state it signaled also in the "MCU diagnostic" window through the loop-variation between the bold "LED" text and the "LED communication" text in the field indicated by the red arrow in the Figure below: Owandy Radiology SAS...
- Page 182 Service Manual – Corrective maintenance NIMXEN050H Press "Save& exit" button and wait the unit reboot (green LED blink slow). Switch OFF the unit. Owandy Radiology SAS...
-
Page 183: Parts Replacement
MCU board (A1) fuse The MCU board fuse F1, in case of overcurrent, cuts the 24V supplied to the motors (M3, M4) Fuse type: 2 A FF (125V) Refer to chapter 12 – drawing 2 - for fuse position. Owandy Radiology SAS... -
Page 184: Mcu Board Replacement
(see paragraph 14.1), following the procedure present on chapter 8. Note At the end of the replacement, restore the metallic cover and the ground connection. Both parts has to be recovered from failed board. Owandy Radiology SAS... - Page 185 Service Manual – Corrective maintenance NIMXEN050H Owandy Radiology SAS...
-
Page 186: Sensor Replacement
*The logs MUST be record with the Network board set as described by paragraph 11.2.1.2 Switch OFF the unit. Remove the sensor’s covers. Disconnect cables: • X100-Pwr • X102-Sync • Ground • Ethernet cable Hold the sensor and unscrews the 4 screws indicated by the red circles in the image: Owandy Radiology SAS... -
Page 187: X-Ray Beam Alignment
Place the new sensor on the unit and tighten the four screws removed before. Connect the cables removed in point 1. Verify the X-ray beam alignment (see paragraph 11.3.4). Perform sensor calibration (see paragraph 10.3). Verify the panoramic function (see paragraph 7.7). 11.3.4. X-ray beam alignment Owandy Radiology SAS... - Page 188 The sensor is mounted on a control plate. To align it, first remove the four screws located on the back. Then it is possible to adjust its position to the left or the right with log screws Owandy Radiology SAS...
-
Page 189: Tube Head Replacement
Remove the tubehead external and internal cover. Remove the Generator board metallic cover: Figure 37 Unscrew the cables fixing clamps "A" and then disconnect X57 and X56 connectors from Generator board. Unscrew the 4 generator board support screws "B": Owandy Radiology SAS... - Page 190 Service Manual – Corrective maintenance NIMXEN050H Figure 38 Owandy Radiology SAS...
- Page 191 Pull up the generator board. Figure 39 Note The presence of a second operator is required during the following steps. While the first operator hold the tubehead with two hands, the second unscrew the generator board screws "C". Figure 40 Owandy Radiology SAS...
- Page 192 11. Insert the preheating values reported on the label of spare tubehead in the EEPROM memory (see paragraph 8.4). Warning Wrong settings of preheating parameters may damage X-ray tube. 12. Perform the X-ray beam centering verification (see paragraph 8.4). Owandy Radiology SAS...
- Page 193 Screw "D" to move the X-ray beam on the left (on the image) Screw D Screw E Figure 42 Note In order to act on a screw (D or E) on one side, loosen the other screw on the opposite side. Figure 43 Owandy Radiology SAS...
- Page 194 14. Tighten screws "C" and repeat the static acquisition. 15. In case the sensor is not completely exposed in the upper or lower part (Figure 44) Figure 44 Warning Don’t move the primary collimator to adjust the x-ray beam on vertical plane. Owandy Radiology SAS...
- Page 195 Loosen the screw C (Figure 43) insert a washer (supplied with the spare part) in the internal part to lower the x-ray beam (Figure 45) and in the external part to raise the x-ray beam (Figure 46). Then return to point 14 Figure 45 Figure 46 Owandy Radiology SAS...
- Page 196 18. Mount the tubehead external cover paying attention to insert first the lower pins of the cover in the guide present in the tube head internal cover and then fix the upper part of the covers. Figure 47 19. Perform a panoramic symmetry verification (see paragraph 7.7). Owandy Radiology SAS...
-
Page 197: Columns Replacement
Figure 48 Put adhesive tape between the extremities of the tool. Press >0< button on the keyboard until sagittal laser is parallel to chin support arm. On adhesive tape mark the laser position (using a pen). Figure 49 Owandy Radiology SAS... - Page 198 ON laser, press >0< button on the keyboard. Put adhesive tape on the floor corresponding to the laser position and mark laser position using a pen. Press >0< button on the keyboard until the laser is in 90° position and mark the other axes. Owandy Radiology SAS...
- Page 199 Rotate manually the rotating arm and fix it to the frame as shown in the image using the provided fixing plate. Figure 51 10. Cut strips and disconnect the cables X3, X10 and X13 from MCU Figure 52 Owandy Radiology SAS...
- Page 200 Service Manual – Corrective maintenance NIMXEN050H 11. Remove connector from cable X13 (it may include exposure button). Figure 53 12. Pass the cable out from the top side of the unit. Figure 54 Owandy Radiology SAS...
- Page 201 Service Manual – Corrective maintenance NIMXEN050H 13. Cut lower strip. Figure 55 14. Disconnect power cables and chin arm cables from top side of the unit. Figure 56 Owandy Radiology SAS...
- Page 202 15. Disconnect the exposure button in case it has been connected in the upper side. Figure 57 Note Two person are necessary to lift the head. Put the hands on front and back side. One person has to release screws and pass cables. Owandy Radiology SAS...
- Page 203 Service Manual – Corrective maintenance NIMXEN050H 16. Remove the 8 fixing screws. Figure 58 17. Pass the cables out of rotating head. Figure 59 Owandy Radiology SAS...
- Page 204 18. Position head on a protected surface in order to avoid damages. Figure 60 19. Take the reference of chin support arm before to remove it, measuring the distance between top of the column and chin support arm. Typical value is 40.9 cm. Figure 61 Owandy Radiology SAS...
- Page 205 NIMXEN050H 20. Disconnect lift motors control cables and power supply from fixing plate. Figure 62 21. In order to remove the columns plate, loosen the nuts of the hinges fixing the plate in both sides. Figure 63 Owandy Radiology SAS...
- Page 206 22. Move up the pin used to block the hinge pin in both sides. Slide out the hinge pin in both sides. Figure 64 23. Remove the safety pins. In this phase, support the assy. Figure 65 Owandy Radiology SAS...
- Page 207 Service Manual – Corrective maintenance NIMXEN050H 24. Release the fixing pin to remove the columns assembly. Figure 66 25. With the group on a desk, remove the adhesive plate and pass the cables out of the column. Figure 67 Owandy Radiology SAS...
- Page 208 Service Manual – Corrective maintenance NIMXEN050H 26. Remove the lower cover from chin support. Figure 68 27. Loosen the two nuts inside the chin support arm. Figure 69 Owandy Radiology SAS...
- Page 209 Service Manual – Corrective maintenance NIMXEN050H 28. Loosen the two screws in the back side of the arm. Figure 70 29. Slide the arm out of the column. Figure 71 Owandy Radiology SAS...
- Page 210 30. Remove the control box from the wall plate. Figure 72 31. Position the arm on right side of the spare column, measuring the distance between top side and arm. Fix it to the column. Figure 73 Owandy Radiology SAS...
- Page 211 Service Manual – Corrective maintenance NIMXEN050H 32. Close the arm lower cover. Figure 74 33. Mount the new control box. Figure 75 Owandy Radiology SAS...
- Page 212 34. Position the new group and pass the cables in the back side of the arm, without mounting the adhesive channel. Figure 76 35. Mount the hinge and push down the safety pin using a hammer. Figure 77 Owandy Radiology SAS...
- Page 213 36. In order to easily mount the cable, tilt the column group and fix the cable with the terminal strip. Figure 78 37. Once fixed the cable, insert and fix the safety pin; tighten the hinges. Figure 79 Owandy Radiology SAS...
- Page 214 Service Manual – Corrective maintenance NIMXEN050H 38. Insert the cables from new column in the head. Figure 80 39. Position the head on the columns. Figure 81 Owandy Radiology SAS...
- Page 215 40. Put the screws on the column top side and fix them without tightening completely. Figure 82 41. Insert the spiral cable on top side of the head and connect all the cables (see points 10, 14 and 16 above). Figure 83 Owandy Radiology SAS...
- Page 216 42. Connect motor cables to the control box: left side motor must be connected to port 1 (left side of control box), and right side motor to port 2 (right side of control box). Figure 84 43. Remove the rotating arm fixing plate. Figure 85 Owandy Radiology SAS...
- Page 217 "column down" button for a few seconds until the columns make a small down-up movement. 50. Make exposure and verify the image quality as described in paragraph 7.7. Owandy Radiology SAS...
-
Page 218: Chin Support Replacement
In service mode NEVER press up/down column keys as they change rotating position. Unplug the "broken" cable X12 and connect the X12 of the new chin support. Use its keyboard for the next step. Figure 86 Press the >0< button Position the panoramic tool on chin support. Owandy Radiology SAS... - Page 219 Figure 87 Put adhesive tape between the extremities of the tool. Press >0< button on the keyboard until sagittal laser is parallel to chin support arm. On adhesive tape mark the laser position (using a pen). Figure 88 Owandy Radiology SAS...
- Page 220 ON laser, press >0< button on the keyboard. Put adhesive tape on the floor corresponding to the laser position and mark laser position using a pen. Press >0< button on the keyboard until the laser is in 90° position and mark the other axes. Owandy Radiology SAS...
- Page 221 Service Manual – Corrective maintenance NIMXEN050H 10. Unplug the X12 cable and the ground. Figure 90 11. Open the wire-way positioned in the back side of the column as shown in the following images. Figure 91 Owandy Radiology SAS...
- Page 222 19. Turn OFF the unit. 20. Set DIP-switch 3 to OFF to set the unit in normal mode (see paragraph 4.2.2.1). 21. Turn ON the unit. 22. Make exposure and verify the image quality as described in paragraph 7.5. Owandy Radiology SAS...
-
Page 223: Disassemble Upper Chin Support
Use adhesive tape and mark the laser position (using a pen). Figure 94 Put adhesive tape between the extremities of the tool. Press >0< button on the keyboard until sagittal laser is parallel to chin support arm. On adhesive tape mark the laser position (using a pen). Owandy Radiology SAS... - Page 224 Rotation references are present on the tool and it has to be used as reference to position the unit in the same position. Figure 96 Turn OFF the unit. Take the wrench TORX T20 provided with the spare part (Figure 97) Owandy Radiology SAS...
- Page 225 107). At this point the first step is to lose the two internal screws (n.3 and n.4 in Figure 107) and then to remove them in a second step. Now you can remove the upper cover. Figure 98 Owandy Radiology SAS...
- Page 226 Service Manual – Corrective maintenance NIMXEN050H Figure 99 – Chin support assy 2D 11. Remount the upper cover and point the screws loosely. Owandy Radiology SAS...
- Page 227 5 and 7 and tighten the screws. Figure 101 14. Set the DIP switch in normal mode: ON – ON – ON and remount the metallic cover on the MCU board and the upper cover of the unit. Owandy Radiology SAS...
-
Page 228: Patient Handle Replacement Instruction
To remove a broken patient handle (Figure 103) you need a 7mm wrench (Figure 104) Figure 103 Figure 104 You don’t need to remove all chin support assy from the unit’s arm, but only to loosen the 5 screws between patient handle chin support (Figure 105 and Figure 106). Owandy Radiology SAS... - Page 229 Service Manual – Corrective maintenance NIMXEN050H Figure 105 Figure 106 Owandy Radiology SAS...
- Page 230 Service Manual – Corrective maintenance NIMXEN050H Now you can point the screws into the spare part and mount the new handle (Figure 107). Figure 107 Owandy Radiology SAS...
- Page 231 Service Manual – Corrective maintenance NIMXEN050H THIS PAGE IS INTENTIONALLY LEFT BLANK Owandy Radiology SAS...
-
Page 232: Schematics And Drawings
Service Manual – Schematics and drawings NIMXEN050H SCHEMATICS AND DRAWINGS 1 – General diagram 2 – Layout MCU PCB A1 3 – Layout Generator PCB A2 4 – Layout External signal PCB A8 5 –Pan sensor power supply board A14 Owandy Radiology SAS... - Page 233 Service Manual – Schematics and drawings NIMXEN050H THIS PAGE IS INTENTIONALLY LEFT BLANK Owandy Radiology SAS...
- Page 234 Service Manual – Schematics and drawings NIMXEN050H I-MAX General diagram Code 3904907000 - Rev. 2 Page 1 of 4 Owandy Radiology SAS...
- Page 235 Service Manual – Schematics and drawings NIMXEN050H I-MAX General diagram Code 3904907000 - Rev. 2 Page 2 of 4 Owandy Radiology SAS...
- Page 236 Service Manual – Schematics and drawings NIMXEN050H I-MAX General diagram Code 3904907000 - Rev. 2 Page 3 of 4 Owandy Radiology SAS...
- Page 237 Service Manual – Schematics and drawings NIMXEN050H I-MAX General diagram Code 3904907000 - Rev. 2 Page 4 of 4 Owandy Radiology SAS...
- Page 238 Service Manual – Schematics and drawings NIMXEN050H I-MAX Layout MCU ETH Code 58040700 - Rev. 2 Page 1 of 1 Owandy Radiology SAS...
- Page 239 Service Manual – Schematics and drawings NIMXEN050H R151 TP10 TP11 TP12 TP13 I-MAX Layout Generator PCB A2 Code 58074061 - Rev. 2 Page 1 of 1 Owandy Radiology SAS...
- Page 240 Service Manual – Schematics and drawings NIMXEN050H I-MAX Layout External signal PCB A8 Code 58593012 - Rev. 0 Page 1 of 1 Owandy Radiology SAS...
- Page 241 Service Manual – Schematics and drawings NIMXEN050H I-MAX Pan sensor power board A14 layout Code 58040704 - Rev. 0 Page 1 of 1 Owandy Radiology SAS...
-
Page 242: Spare Parts
Service Manual – Spare parts NIMXEN050H SPARE PARTS 1 – Top side of the unit 2 – Rotating arm 3 – Up/Down Column 4 - Cables 5 - Covers 4 - Accessories and Service tools Owandy Radiology SAS... - Page 243 For white switch ON/OFF Switch (old code: 4291420900) device 6692212200 Main filter (old code: 4192212200) 6604001300 For white switch (old code: 4695478800 DSPU board kit device 4695483100) 6604040100 Rotation motor assy 6690806900 Rotation belt (old code: 4990806900) Owandy Radiology SAS...
- Page 244 Service Manual – Spare parts NIMXEN050H Owandy Radiology SAS...
- Page 245 HF board (old code: 5807406100) 6695443500 For white switch Pan Sensor White Switch (S7199-01D2) (old code: 4695443500) device 6604071100 Pan Sensor Black Switch (Xineos 1501) 6604020000 Sagittal laser assy 6604020100 Frankfurt laser assy 6604010400 Chin support assy Owandy Radiology SAS...
- Page 246 Service Manual – Spare parts NIMXEN050H Owandy Radiology SAS...
- Page 248 3 – UP/DOWN Column Ref. Order code Description Note 6604102600 2D – 3D Grey Column Group 6692707700 Linak control board Note Kit includes both column adjusted and assembled to the support plate and the relevant control box. Owandy Radiology SAS...
- Page 249 6604040101 Generator board power supply cable (old code: 6204040100) 6604040201 Generator board signal cable (old code: 6204040200) 6604042000 MCU board power supply cable (old code: 6204042000) 6604040400 DSPU Board CAN Bus and signal cable (old code: 6204040400) Owandy Radiology SAS...
- Page 250 Note 6604022005 Rotating arm lower cover (old code: 5404020305) 6604022105 Sensor internal cover 6604023305 Sensor external cover 6604022405 Tube head internal cover 6604022121 Tube head external cover (old code: 5404020605) 6604042005 Upper cover 6604103121 Wall support cover Owandy Radiology SAS...
- Page 251 Service Manual – Spare Parts NIMXEN050H Owandy Radiology SAS...
- Page 252 Panoramic chin support (reduced height) 6604011608 Maxillary-Sinus chin support 6607099800 TMJ positioner (old code: 6604011800) 6607110800 TMJ positioner protective sleevers (60 pcs) (old code: 6107110800) 6695190000 (includes: 5207900900 Service tools kit 6195170100 6195170200) 6604090800 X-ray button (old code: 6104090800) Owandy Radiology SAS...
-
Page 253: 14. Appendix
The table also has columns with blank cells. These cells must be filled in when, during installation or during the life on the unit, any of the listed parameters will be modified (e.g. after replacing a motor or a positioning sensor). Owandy Radiology SAS... - Page 254 Service Manual – Spare parts NIMXEN050H I-MAX Unit code: Unit S/N: U.I.C.: Factory Parameter setting setting setting setting setting Date Rotation axis motor offset Y axis motor offset Bitewing Y offset Y Jaw type (mm) Tubehead pre-heating values Owandy Radiology SAS...
Need help?
Do you have a question about the I-MAX PRO and is the answer not in the manual?
Questions and answers