Table of Contents
Advertisement
Quick Links
Advertisement
Table of Contents

Summary of Contents for Dedicated Micros MI-SDAVHDA-002
- Page 1 Operation and Installation Guide MI-SDAVHDA-002...
-
Page 2: Table Of Contents
Table of Contents Important Safeguards..........................3 Unit Overview............................5 Basic Installation and Configuration....................6 Step 1 – Power the Unit........................8 Step 2 – Connect Monitor........................8 Step 3 – Connecting to the Network....................8 Step 4 – Set Time and Date......................9 Step 5 – Connecting Cameras......................9 Step 6 –... -
Page 3: Important Safeguards
Important Safeguards Read Instructions All the safety and operating instructions should be read before the unit is operated. Power Sources This unit should be operated only from the type of power source indicated on the manufacturer’s label. Servicing Do not attempt to service this unit yourself as opening or removing covers may expose you to dangerous voltage or other hazards. - Page 4 CE Mark If this product is marked with the CE symbol it indicates compliance with all applicable directives. Directive 89/336/EEC.,A ‘Declaration of Conformity’ is held at Dedicated Micros Ltd.,1200 Daresbury Park, Daresbury, Cheshire, WA4 4HS, UK. Page 4/21...
-
Page 5: Unit Overview
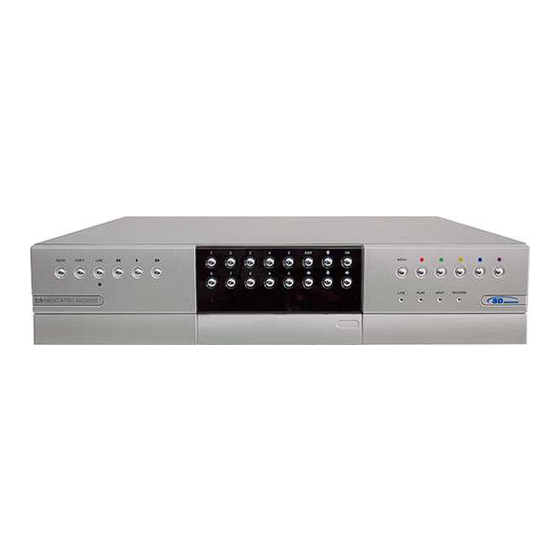
A powerful hybrid DVR/NVR with the ability to display HD analogue, Analogue and IP cameras. The SD Advanced combines the robust feature set of a Dedicated Micros unit with a high performance embedded NVR, offering MultiMode, Transcoding, Closed IPTV and more. -
Page 6: Basic Installation And Configuration
Quick Start Guide External DVD Drive If any of these items are missing please contact Dedicated Micros' Technical Support team. Note: Before installing the SD Advanced DVR, carefully read all Safety Instructions and the following information on where the unit should be located. - Page 7 Front Panel Connections High Power USB2.0 connector, for use with external DVD Drive Data LED Green – Unit working normally No LED – Power Failure Live – Unit is in Live mode when lit Play -Unit is in Playback mode when lit Spot –...
-
Page 8: Step 1 - Power The Unit
Step 1 – Power the Unit The SD Advanced has an internal power supply unit. Connect the mains lead to the unit and then to the wall socket, or to a fused spur connection. To be compliant with wiring regulations in some countries, an Alarm/Security device should be connected to a fused spur and not a wall outlet socket (check local regulations before installation) Step 2 –... -
Page 9: Step 4 - Set Time And Date
The SD Advanced can support up to 32 cameras. This is made up of either 8 or 16 (dependant on the model) analogue cameras, with the remaining made up of Dedicated Micros own SmartVu cameras. If third party IP cameras are used they replace an analogue channel, limiting the unit to either 8 or 16 cameras. -
Page 10: Step 6 - Unit Configuration
• ObserVer Manual Select to open an electronic version of the NetVu ObserVer User Guide. NetVu ObserVer is a free video management software package from Dedicated Micros that allows users to seamlessly view distributed images from any ‘NetVu Connected’ product. - Page 11 • NetVu ObserVer Select to download the NetVu ObserVer video management software. • Java (JRE) Select to download the Java (JRE) software (from the unit). This software is required to successfully view Configuration and Viewer menus remotely. IMPORTANT: By default, no Usernames and Passwords are required to access any of the various menus. Usernames and Passwords can however be added to regulate access to the Configuration and Viewer menus: refer to the ‘Display Settings->...
-
Page 12: Step 7 - Alarms And Relays
NetVu ObserVer NetVu ObserVer viewing and control software will detect all NetVu devices on the network when connected on the same VLAN network, by utilising ZeroConf technology. As the NetVu Observer application is opened, it searches for attached NetVu Connected devices, these can be found by clicking on the down arrow on the Enter IP address or Domain name box and selecting the appropriate serial reference. -
Page 13: Appendix A - Hd Analogue Camera Control
Appendix A – HD Analogue Camera Control Dedicated Micros' HD analogue cameras offer up the coax (UTC) configuration. This means the camera menus and settings can be powered from the DVR, and are accessible through either remote or local access. -
Page 14: Appendix B - Closed Iptv
Appendix B – Closed IPTV Dedicated Micros’ ground breaking Closed IPTV solution makes deploying an IP Video CCTV system safe, secure and simple. Combining patent-pending innovation with zeroconf networking technology, Closed IPTV automatically allocates IP addresses to IP cameras by physical port. This ground breaking solution provides a very simple and secure answer to IP Video, meaning no prior knowledge of IP networking is required. - Page 15 Security Actions This page sets what actions should be taken if a security breach is detected. Discover This page shows the currently connected switches and allows the option for force discovery of layer 3 switches. When a switch is connected the DVR will automatically discover it. The layer 3 enhanced CCTV switch supports zero-conf networking, which enables automatic discovery of cameras on the IP network.
-
Page 16: Appendix C - Operator Card
Appendix C – Operator Card To Navigate the onboard menu pages; ● Use the buttons on the front of the unit OR ● Use the provided Infra Red Remote Control OR ● Use the provided USB mouse, plugged into one of the USB ports on the DVR OR ●... - Page 17 To View an Event Events can include alarms, activity detection and system events (such as camera failure and DVR restarts). Events are stored in the Event List. ● Open the ‘Viewer’ on a local monitor or through the remote client. ●...
-
Page 18: Appendix D - Profile Record Settings
Appendix D – Profile Record Settings The record profiles are used to ensure each camera has a choice of record settings so each is recording at the right quality at the right time. There are four record profiles, High, Medium, Low and Very Low. They can all be used in different situations but generally Low and Very Low are used during transcoding for remote devices. -
Page 19: Appendix E - Activity And Multimode
Appendix E – Activity and MultiMode Multimode is Dedicated Micros unique storage mitigation technology that allows the camera resolution to instantaneously change on a pre-determined trigger. This feature is enabled by default and so any activity in the field of view of the camera will result in a change of camera resolution from normal to event. -
Page 20: Appendix F - Schedule
Appendix F – Schedule Setup This menu allows the Schedule function to be configured. This enables the unit to automatically be put into set/unset mode at specific times on specific days. This can help reduce unnecessary alarm triggers. Mode/Title enables a name to be entered for Unset, Set and Override mode, they default to Day, Night, Weekend. Any changes here will also affect other pages such as Image Profiles. - Page 21 For more information about Dedicated Micros' products or for details of your local Dedicated Micros office, please visit: www.dedicatedmicros.com/contact Page 21/21...
Need help?
Do you have a question about the MI-SDAVHDA-002 and is the answer not in the manual?
Questions and answers