
Related Manuals for Fox ESS G-MAX Series

Summary of Contents for Fox ESS G-MAX Series
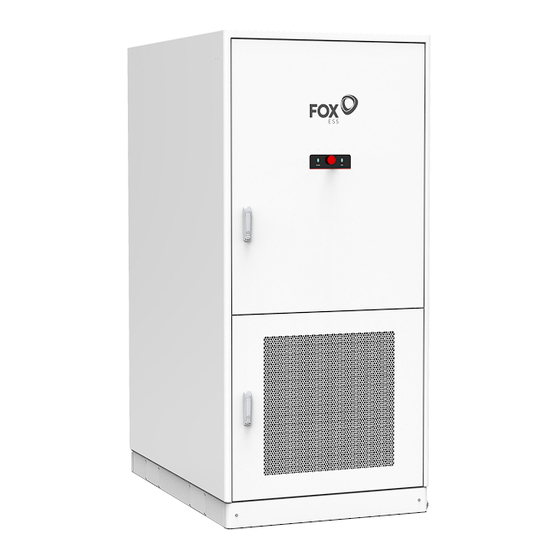
- Page 1 User Manual G-MAX SERIES In order to prevent improper operation before use, please carefully read this manual.
-
Page 2: Table Of Contents
Table of Contents 1. Manual Description ..........................1 1.1 Scope of application ........................1 1.2 Target audience ........................... 1 1.3 Symbol usage ..........................1 1.4 Explanation of symbols ........................1 2. Safety Instructions ..........................2 2.1 Fair Use ............................2 3. Product description ..........................3 3.1 Basic features .......................... - Page 3 5.2 Preparation before installation ....................14 5.2.1 Installation environment requirements ................14 5.2.2 Installation site requirements ..................15 5.3 Ground connection ........................18 6. Electrical installation ..........................19 6.1 Wiring preparation ........................19 6.1.1 Cable requirements ....................19 6.1.2 Crimp end AC terminal ....................19 6.1.3 AC input wiring .......................
-
Page 4: Manual Description
1. Manual Description 1.1 Scope of application This manual applies to the following types of industrial and commercial energy storage products for fixing, installation, commissioning, maintenance and troubleshooting methods. GM215kWh-100kW-2h 1.2 Target audience This manual is for use only by electricians with electrical operation certificates. The operations described in the manual must be performed by trained and experienced electricians in accordance with basic electrical safety protection requirements. -
Page 5: Safety Instructions
Maintenance and replacement After powering off equipment other than battery packs, you must wait 5 minutes to ensure that the equipment is out of power before operating the equipment. Please read the manual before performing any operation on G-MAX. Product should not be disposed of as household waste. PE protective ground terminal. -
Page 6: Product Description
connectors with water. • Warning: It is strictly prohibited to squeeze, puncture, or burn the energy storage battery to damage the system. • Warning: If you have any questions, please contact the system supplier. Unauthorized operation is prohibited. • Use extreme caution when this product is disconnected from the public power grid as some parts may maintain a voltage that could create a shock hazard. -
Page 7: Product Principle
3.2 Product Principle Main circuit diagram: 3.3 Operating mode The G-MAX liquid cooling system supports both grid-connected and off-grid operation modes. - Grid-connected operation mode The G-MAX liquid cooling system is connected to the power grid on the AC side and internally connected to lithium batteries on the DC side. -
Page 8: Energy Management Mode
3.5 Energy management mode 3.5.1 Constant power charge and discharge Through the power set by the local controller, combined with the set policy template, instructions are issued to the energy storage converter inside the energy storage integrated system to charge or discharge the battery. -
Page 9: Product Size
3.6 Product size Front Left Lifting holes, door opening radius and maximum door opening angle... -
Page 10: System Technical Parameters
3.7 System technical parameters Items Specification DC parameter Cell technology LiFePO4 3.2V/280Ah Battery pack configuration 53.76kWh System battery string configuration 1P240S Battery System Capacity 215kWh Battery rated voltage 768Vdc Rated Charge/Discharge Rate ≤0.5C Depth of discharge 0-95% DC protection FUSE Battery pack degree of protection IP65 Cooling type... -
Page 11: Component Description
3.8 Component Description Front Later Serial number Name Fire safety equipment Battery pack configuration Temperature controller AC Breaker DC Switch Hole for hoist Integrated distribution box Liquid cooling pipe Pressure Release Device... -
Page 12: Panel Introduction
3.9 Panel Introduction Serial No. Function ‘POWER’ indicator: the switch in the cabinet is closed and the system is energized. Emergency stop button: When the equipment is in abnormal state, press the button to stop the system operation. ‘RUN’ indicator: Lights up when the system is charging or discharging. ‘FAULT’... -
Page 13: Unpacking Precautions
4.2 Unpacking precautions ● It is not allowed to remove the packaging of G-MAX during storage, and it can only be removed when it is installed. ● When receiving goods from the transport company, be sure to carefully inspect the products and check each item received against the delivery note. -
Page 14: Crane Handling
4.4.2 Crane handling ● Carry out a test lifting to confirm that the straps can bear the weight of G-MAX and there is no tilt when lifting. ● After lifting, the swing angle must be less than 10°. ● Before moving, make sure that the cabinet door is locked to avoid injuries caused by sudden opening during transportation. - Page 15 Schematic diagram of lifting and handling with packaging Notice The hook should be at least 1m away from the top of the cabinet. The tilt of the cabinet should be less than 10°.
-
Page 16: Transportation After Unpacking
4.6 Transportation after unpacking 4.6.1 Forklift transportation Adjust the width of the forklift feet so that the center of gravity falls on the center of the forklift feet. front cross transport side transport Schematic diagram of forklift transportation without packaging 4.6.2 Crane handling When moving without packaging, use flexible slings or straps. -
Page 17: Engineering Installation
5. Engineering Installation 5.1 Installation Tips During installation, ignoring the following safety tips may result in equipment damage, personal injury or serious casualties. Please strictly follow the following safety tips. ● Installation must be performed by professionals who follow all warnings and correctly install the equipment. -
Page 18: Installation Site Requirements
The intrusion of moisture can easily damage G-MAX! To ensure the normal use of G-MAX: ● Do not open the cabinet door when the air humidity exceeds 95%. ● Avoid opening the cabinet door or performing maintenance or repair operations in rainy, thunderstorm or humid weather conditions. - Page 19 Installation hole diagram (unit: mm) Project Illustrate Communication inlet and outlet holes AC cable outlet Note ● The following foundation drawings cannot be used as final construction drawings and are for reference only. ● During construction, ensure that the bottom of the equipment is higher than the local historical highest water level.
- Page 20 Sectional view of mounting base (side) Sectional view of installation base (front) (3) Gutter requirements G-MAX adopts the bottom cable entry method. To prevent foreign objects from entering, there is no cable entry hole on the side of the G-MAX cabinet. The cables must be entered through the trench. Therefore, a trench must be preset on site.
-
Page 21: Ground Connection
● The trench needs to have necessary waterproof and moisture-proof design to prevent the cables from aging and short-circuiting, which will affect the normal operation of G-MAX. ● Since G-MAX has a large power, the required cables are thicker, so the cross-sectional area of the cables must be fully considered when designing the trench. -
Page 22: Electrical Installation
6. Electrical installation 6.1 Wiring preparation 6.1.1 Cable requirements The requirements for cables used within G-MAX ’s nearest installation distance of 100 meters are as follows: Name Type Recommended wire diameter (mm²) External Outdoor ground wires of 1000V 35mm² (yellow green) ground wire and above U/V/W three-phase is 70mm², OD:... - Page 23 Peel off the outer sheath of the cable. Put the nut and clamp coil onto the cable. Insert the conductor portion into the wire lug. Crimp the conductor portion of the cable into the lug as shown below. Push the clamp coil and nut to the plug and lock.
-
Page 24: Ac Input Wiring
6.1.3 AC input wiring (1) Cable requirements To prevent unexpected interruption of the connection between the converter and the grid caused by excessive AC cable impedance, be sure to select a reasonable AC side cable diameter according to Table 6-1; The cable is grounded, it is necessary to add identification (in any form) to the cable to avoid abnormal wiring;... - Page 25 Step 1: Ensure that the external AC circuit breaker is disconnected and will not accidentally close. Step 2: Remove the dust caps from the AC U, V, W, and N receptacles. Step 3: Strip the U, V, W and N cables to appropriate lengths with wire strippers, put them into the plug shell and the sealing sleeve;...
-
Page 26: G-Max Power On
6.2 G-MAX power on 6.2.1 Check before powering on Before powering on, please check the following items carefully to ensure they are correct. ● Check whether the positive and negative terminal connections of the battery PACK and the PCS power cable connections are correct. ●... -
Page 27: G-Max Shutdown
*The above pictures are for reference only, please refer to the actual product received! 6.3 G-MAX Shutdown Shutdown is usually divided into two situations: shutdown for normal maintenance or overhaul and shutdown for failure or crisis. According to the two different situations , perform the shutdown steps described in this section . - Page 28 - - Finish warn : ● The emergency stop button is only used when the machine fails or is in critical condition. During normal shutdown, the shutdown operation should be performed through the button shutdown command on the WEB interface. ●...
-
Page 29: Daily Care And Maintenance
7. Daily care and maintenance Due to the influence of environmental temperature, humidity, dust and vibration, the components inside the energy storage cabinet will age, which may cause potential failure of the energy storage cabinet or reduce the service life of the cabinet. Therefore, it is necessary to perform daily and regular maintenance on the energy storage cabinet . -
Page 30: Daily Inspection Items
7.1 Daily inspection items Daily inspection items are implemented according to the following points: Table 7-1 List of daily inspection items Serial Daily inspection items Confirm number The energy storage cabinet need to be monitored in real time, and designated personnel should be assigned to observe at designated locations. -
Page 31: Regular Inspection Items
7.2 Regular inspection items Regular inspections mainly focus on daily inspections and areas that are difficult to inspect during daily operation: Table 7–2 List of regular inspection items Serial Regular inspection items Confirm number Check that there is no damage or rust on the appearance of the □... - Page 32 Table 7-3 Liquid Cooler Maintenance : Maintenance Detection Maintenance Items Maintaining standards Approach cycle method After power off for 1 minute, use a brush The unit is clean and free Visual Appearance of the unit 6 months or cotton cloth to remove dust and dirt of dust and dirt inspection from the unit.
-
Page 33: Other Maintenance Projects
7.4 Other maintenance projects To ensure the normal operation of the energy storage cabinet, please refer to Table 7-4 to perform regular maintenance on the energy storage cabinet. Table 7-4 Other project maintenance: Maintenance Maintenance Project Maintenance methods cycle Check the following items and perform maintenance Internal electrical a. -
Page 34: System Cleaning
7.5 System cleaning Since the energy storage cabinet operates outdoors for a long time, regular cleaning is necessary. Regular cleaning can maintain the appearance of the equipment, reduce corrosion of the casing, improve the heat dissipation efficiency of the equipment, thereby extending the service life of the equipment and improving system operating efficiency. - Page 35 Dear Mr.___________/Company: Thank you for purchasing and using our company's products! Since the product you purchased is a technical product, you need to use it strictly in accordance with the operating instructions in the product user manual. Please read and understand the product user manual carefully before operating the product.
Need help?
Do you have a question about the G-MAX Series and is the answer not in the manual?
Questions and answers