
Related Manuals for Rowlett GM947

Summary of Contents for Rowlett GM947
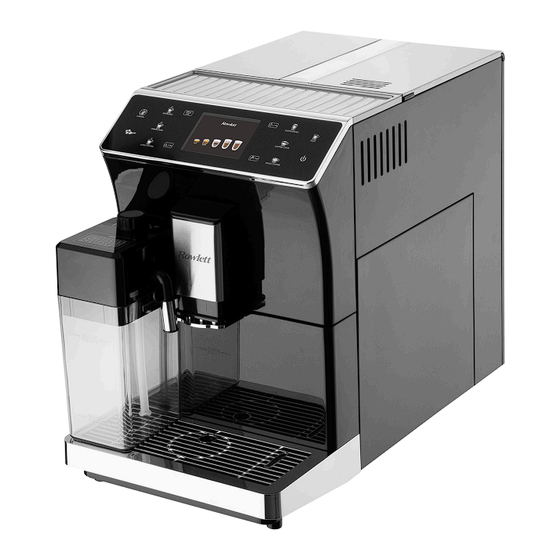
- Page 1 Bean to Cup Coffee Machine Instruction manual Model • Model • Modèle • Modell • Modello • Modelo GM947 GM947_EN_A5_v1_20240529.indb 1 GM947_EN_A5_v1_20240529.indb 1 2024/5/29 10:58 2024/5/29 10:58...
-
Page 2: Safety Instructions
Before use, please confirm that all installation, setup and trial operations have been completed. Rowlett is not liable for any personal injury or property damage due to improper use of the appliance. Follow all instructions, safety precautions and warnings. - Page 3 Prohibited • It is prohibited to make a modification in any way as it may cause fire, electric shock or malfunctions. • DO NOT use outdoors or under extremely cold conditions. Freezing up of the unit may pose a safety hazard. Ambient temperature: 5ºC~35ºC •...
- Page 4 • If the power cord is damaged, it must be replaced by a Rowlett agent or a recommended qualified technician in order to avoid a hazard. • Rowlett recommend that this appliance should be periodically tested (at least annually) by a Competent Person.
-
Page 5: Pack Contents
If the appliance is not to be used for a long period (more than 3 days), Rowlett recommends using up the coffee beans remaining in the machine to avoid dampness and possible blockage of the grinding system. -
Page 6: Control Panel
Knowing the appliance Coffee bean tank Water Tank Control panel Milk froth Power switch dial (on the back) Milk frother with milk tube Milk outlet Milk container Door Discharge outlets (Height adjustable) Drip tray Control panel: Menu / Escape Milk button Steam / page up Display Coffee buttons... -
Page 7: First Time Use
Tip: Before leaving the factory, the appliance will be tested so it is normal to have a little ground coffee in the machine. We guarantee the machine is brand new. Rowlett recommend that the appliance is cleaned out before using for the first time, or if the appliance has been sat unused for an extended period of time. - Page 8 7. The appliance will start to preheat, then Heating up Rinsing switch to rinsing automatically. • Tip: If coffee with milk has been made, the machine will remind you to clean the milk container. For details, refer to the section “Milk foam system quick rinse”. 8.
-
Page 9: Making Coffee
Making coffee When in homepage , press the desired beverage button to start. An example of making a cup of Espresso from coffee beans: 1. Place a cup under the discharge outlets. Light coffee 2. Press button repeatedly to set the coffee strength. Standard coffee 3. -
Page 10: Making Coffee With Milk
Making coffee with milk An example of making Cappuccino: Milk froth 1. Add milk into the milk container between the MIN dial and MAX line. 2. Attach the milk frother to the container then insert into the appliance. 3. Rotate the milk froth dial to position. -
Page 11: Menu Setup
Menu setup When in homepage, press on the control panel to enter the Menu page. Press go to the desired item and press to set up. To exit, press Menu Menu Coffee prebrewing Water hardness My coffee Coffee temperature Language Alarm Factory settings Brightness... - Page 12 9. Statistic information: If desired, while in “Menu” page, select “Information” to check the overview of beverages produced. Press to return to the homepage. 10. Maintenance setting: While in “Menu” page, select “Maintenance” to enter Maintenance Maintenance setting page. For details, please refer to section “Cleaning, Care &...
-
Page 13: Cleaning, Care And Maintenance
Cleaning, Care & Maintenance Warning: Before cleaning and maintenance, always turn off the appliance, disconnect it from the power supply, and let it cool sufficiently. Danger • The appliance should be cleaned regularly. • Use warm, soapy water and a damp cloth to clean the exterior of the appliance. •... - Page 14 Cleaning the brewing unit core • Before brewing unit cleaning, ensure to turn off the appliance first. • Manually clean the unit with water only! Never use a dishwasher or any detergent. Danger • The brewing unit core should be cleaned at least monthly. •...
- Page 15 Descaling the water tank After use for a period of time, the display will show “Descaling Required” indicating the coffee machine needs descaling. Before descaling, put a large container (at least 200ml capacity) under the discharge outlets. Descaling Required • Cleaning tablets and liquid descaler contain acidic materials irritating to eyes and skin.
- Page 16 Cleaning the brewing system with tablets After use for a period of time, there will be some coffee powder build up in the brewing unit so the display will show “Please Clean the Brewing Unit”, indicating the brewing unit needs cleaning. Cleaning tablets contain acidic materials irritating to eyes and skin.
- Page 17 Cleaning the milk foam system Warning: During cleaning, steam may come out from the outlets. Do not put your hand on the outlets to avoid burns. Danger 1. When in Maintenance page, select “Foam system clean” and press to enter the cleaning page.
- Page 18 Milk foam system quick rinse There are 2 ways to do the quick rinse of the milk foam system: 1. When the appliance is switched on: • After being switched on, the appliance will run preheating and rinsing stages. • After rinsing, the display will show “Clean the milk jug”...
-
Page 19: Troubleshooting
Troubleshooting A qualified technician must carry out repairs if required. Prompt message on display Probable Cause Solution Outlet Water After cleaning, the waste Put the waste water tray back Outlet Water Container Inserted Incorrectly Container water tray is not put into in to the machine Inserted the machine... - Page 20 Prompt message on display Probable Cause Solution Coffee Beans/ground Coffee Beans/ground 1. Please add coffee beans Coffee Beans/ground coffee empty coffee empty coffee Empty or ground coffee 1.Please add coffee 2. Press to change 1.Please add coffee beans beans 2.Press to change the mode the mode: press...
- Page 21 Prompt message on display Probable Cause Solution Drive System Drive System error 1. Open the brewing door, take error out the brewing unit core, and check for the presence of any foreign object thus causing the brewing core to stick 2.
- Page 22 Troubleshooting A qualified technician must carry out repairs if required. Fault Probable Cause Solution The appliance is not The unit is not switched on Check the unit is plugged in correctly and working switched on Plug or lead is damaged Replace plug or lead Fuse in the plug has blown Replace the fuse...
-
Page 23: Technical Specifications
All rights reserved. No part of these instructions may be produced or transmitted in any form or by any means, electronic, mechanical, photocopying, recording or otherwise, without the prior written permission of Rowlett. Every effort is made to ensure all details are correct at the time of going to press, however, Rowlett reserve the right to change specifications without notice. -
Page 24: Declaration Of Conformity
Model • Modèle • Modell • Modello • Tipo di apparecchiatura • Tipo de equipo • Modelo Bean to Cup Coffee Machine GM947 (-E) Application of Territory Legislation Low Voltage Directive (LVD) - 2014/35/EU Electrical Equipment (Safety) Regulations 2016 & Council Directives(s) - Page 25 +44 (0)845 146 2887 Eire 040 – 2628080 01 60 34 28 80 BE-NL 0800-29129 BE-FR 0800-29229 0800 – 1860806 901-100 133 GM947_EN_A5_v1_20240529.indb 25 GM947_EN_A5_v1_20240529.indb 25 2024/5/29 10:58 2024/5/29 10:58...
- Page 26 GM947_EN_A5_v1_20240529.indb 26 GM947_EN_A5_v1_20240529.indb 26 2024/5/29 10:58 2024/5/29 10:58...
- Page 27 GM947_EN_A5_v1_20240529.indb 27 GM947_EN_A5_v1_20240529.indb 27 2024/5/29 10:58 2024/5/29 10:58...
- Page 28 GM947_EN_A5_v1_2024/05/29 GM947_EN_A5_v1_20240529.indb 28 GM947_EN_A5_v1_20240529.indb 28 2024/5/29 10:58 2024/5/29 10:58...
Need help?
Do you have a question about the GM947 and is the answer not in the manual?
Questions and answers