Table of Contents
Advertisement
Quick Links
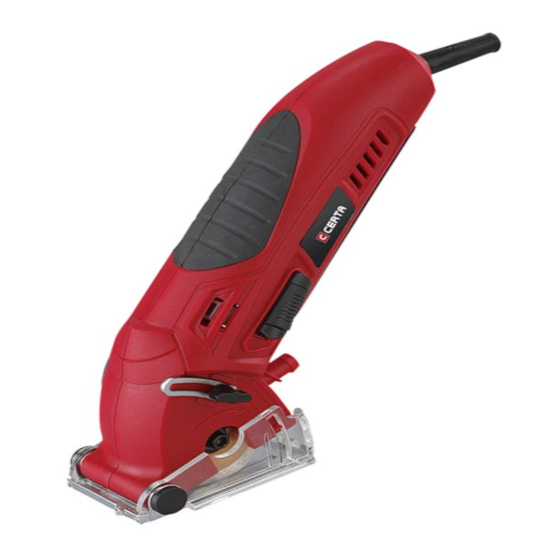
Compact Circular Saw Set
CTCIRCSWSTA
Quick Start Guide
Contents
Safety & Warnings .................................................................................................................................... 2
Overview ................................................................................................................................................... 5
Instructions ............................................................................................................................................... 6
Operation .................................................................................................................................................. 8
Cleaning & Care ....................................................................................................................................... 12
Specifications .......................................................................................................................................... 14
Troubleshooting ...................................................................................................................................... 15
In the Box ................................................................................................................................................ 16
1
Advertisement
Table of Contents

Summary of Contents for Certa CTCIRCSWSTA
-
Page 1: Table Of Contents
Compact Circular Saw Set CTCIRCSWSTA Quick Start Guide Contents Safety & Warnings ............................ 2 Overview ..............................5 Instructions ............................... 6 Operation ..............................8 Cleaning & Care ............................12 Specifications ............................14 Troubleshooting ............................15 In the Box ..............................16... -
Page 2: Safety & Warnings
Safety & Warnings Meanings of Symbols Used in This Manual Warning Wear hearing protection: Prolonged exposure to noise can cause hearing loss. • Wear a dust mask: Working with wood and other materials that generate dust can • be harmful to your health. Never work with materials that contain asbestos! Wear safety goggles: Working with this tool may produce sparks, chips, shavings •... - Page 3 use a residual-current device. Using a residual-current device will reduce the risk of electric shock. When working outdoors, only use extension leads designed for outdoor use. • Personal Safety Pay close attention to what you are doing, be careful and use common sense when •...
-
Page 4: Additional Safety Instructions
Additional Safety Instructions The grip should be clean and dry and should be kept away from oil and grease. • Do not stop the cutting tool by pushing the blade to the side. • Any defective switch, protective parts or other components should be replaced by •... -
Page 5: Overview
Overview Base plate Protective cover of internal hex head bolt (left) Blade guard Lever for releasing blade guard Cutting depth adjustment screw Hex bolt (right) ON/OFF switch Extraction hose Grip Hex wrench (5mm) Ventilation holes Hex socket wrench (3mm) Power cable with plug Diamond cutting blade Connector for dust-extraction High-speed steel cutting blade... -
Page 6: Instructions
Instructions Sawing Procedure Danger: Keep hands away from the cutting area and do not touch the blade. Place your • hand on the additional grip or the engine body. If you hold the saw with both hands, they cannot be hurt by the blade. Do not hold the work piece on the bottom. -
Page 7: Adjusting The Cutting Depth
Adjusting the Cutting Depth The cutting depth can be changed by adjusting the lever. • Loosen the adjustment screw (3) and move the depth lever until the front end of • the lever is on the mark of the depth scale you want (Figure 2). The even millimetre values on the depth scale are indicated with long lines and the odd values with short lines. -
Page 8: Operation
Notes: Make sure that the extractor can be used with a power tool. Most dry and wet • household vacuum cleaners can be used. Using a dust extractor is very practical when making several cuts one after another • because it reduces the need to stop as often to clean the tool and the work area. Always use a dust extractor when cutting materials that generate dust that can be •... - Page 9 surface and hold it in place with clamps or a vice. Place sufficient scrap material under the work piece so you do not make cuts in the support surface or break the blade due to contact with the hard support surface such as a concrete floor. Hold the power tool in your hand in a comfortable position .Your thumb or index •...
-
Page 10: Plunge Cutting
Plunge Cutting It is sometimes impossible to make plunge cuts in certain very hard materials. Adjust the cutting depth, connect the tool to the power source and place the base • plate on the work piece. Make sure the depth setting on the side is the same for all cuts. - Page 11 Drywall This tool can be used to cut sheets of drywall but with certain limitations. Use it only to make cuts and always connect it to a dust extraction device while you are working. The dust can affect how the blade guard works. Use &...
-
Page 12: Cleaning & Care
Cleaning & Care Warning Remove the plug from the wall outlet before cleaning or doing maintenance work on the tool. Cleaning Keep protectors, ventilation holes and the motor body free of dust and dirt as • possible. Wipe the tool with a clean cloth or use low-pressure compressed air. •... -
Page 13: Maintenance
right side of the body to block the internal shaft. c) Insert the 5mm hex wrench (15) into the internal hex head bolt and loosen it by turning the wrench clockwise. d) Remove the bolt and set it aside with the flange. e) Press down on the release lever (12) and hold it down. -
Page 14: Specifications
Specifications Power 230V/50Hz Output 400W No load speed 3,400min-1 Cutting depth Maximum 12mm Recommended blade 54.8mm diameter Arbour for cutting blade Ø11.1mm Protection level Weight 1.2kg Noise and Vibration Sound pressure level LpA 81.1dB (A) Uncertainty KpA Sound power level LwA 92.1dB (A) Uncertainty KwA Grip... -
Page 15: Troubleshooting
Troubleshooting Reasons for Recoil and Instructions for Preventing Recoil Recoil is a sudden reaction that occurs when, due to a jammed or misaligned blade, the device jerks, jumps away from the work piece without control and moves in the direction of the operator. 2. -
Page 16: In The Box
In the Box 1x High-Speed Steel Cutting Blade, 54.8mmø×11.1mmø With 60 Teeth for • Aluminium 1x Tungsten Carbide Cutting Blade, 54.8mmø×11.1mmø With 18 Teeth for Wood • 1x Diamond Cutting Blade, 54.8mmø×11.1mmø For Floor Tiles And Clinker • 1x Aspiration Hose, 1.65m Long •...


Need help?
Do you have a question about the CTCIRCSWSTA and is the answer not in the manual?
Questions and answers