Table of Contents
Advertisement
Quick Links
Advertisement
Table of Contents

Related Manuals for Dynavin 9


Summary of Contents for Dynavin 9
- Page 1 OWNER ’ S MANUAL www.dynavin.de...
-
Page 2: Table Of Contents
DYNAVIN navigation system Thank you for choosing DYNAVIN. Please read this operating manual before turning on your new DYNAVIN system. In this manual you will find important instructions and information for the safe operation of the DYNAVIN system and to help you make the most of its features. - Page 3 Head-up Display Menu ..........................................Troubleshooting ..................................Dynavin GmbH hereby confirms that this product complies with the essential requirements of all relevant directives and regulations in force in the European Community. The declaration of conformity can be downloaded from our website.
-
Page 4: General Information
If the electrical system of your vehicle suddenly shows irregular or faulty function, disconnect the product from the vehicle electronics and contact a specialist workshop for inspection. Dynavin is not liable for any direct or indirect consequential damage or loss, nor does Dynavin assume any possible installation and removal costs and/or diagnostic fees. -
Page 5: Instructions For The Intended Operation
Instructions for the Intended Operation Only use the device in the location intended for it. In case of improper use, improper installation or modifications, the operating permit and the warranty will become void. The instructions listed here apply to most, but not all products equally! If you have any questions about this, please contact your dealer. -
Page 6: Technical Features
Playback mode: random play / single song loop / all loop / folder loop Display Album / Artists / Songs / Size: 7" / 8'' / 9" or 10" Selection option: Display Format: 16:9 Podcast / Audiobook Touch Function: Yes, Capacitive Touch... -
Page 7: First Step
First Step If you have connected the device as indicated, turn on the ignition of the vehicle. The Dynavin will then boot-up. This may take about 30 seconds the first time. It will begin on the radio screen. Functionality of the Touch Screen Most functions are controlled via the touch screen. -
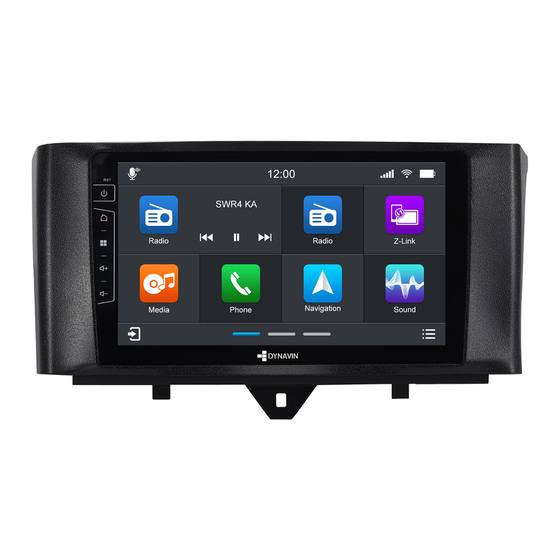
Page 8: Main Menu
Main Menu You can switch between the pages in the main menu as follows: 1. by pressing on the page navigation lines (in the lower middle area of the main menu) 2. by swiping with your finger (to the left or right) *The red line indicates which page you are currently on. -
Page 9: System Settings
System Settings Overview of the System Settings Time: In this menu you can set the time zone in which you are located. For example, Germany: winter time (UTC +1:00) and summer time (UTC +2:00). Android Auto HD: Adaptation to different styles and resolutions. Backup Camera Enable: If only one rear camera is installed and this option is deselected, nothing will happen when the reverse gear is engaged. -
Page 10: Extend Storage
This setting is activated only by the user and owner, and the latter therefore assumes all responsibility of activation. Extended Storage (Vary by version) For DYNAVIN models with an external SD card, the user can set it as multimedia file storage or as apps installation file storage. Android settings... -
Page 11: Radio Menu
Radio Menu To open the radio menu press the “Radio” button in the main menu Overview of the Buttons Select next available station Select previous available station Switch Band (DAB+, FM, AM) Station list Manual frequency search Setup Back to the main menu Memory - Switch pages 5 memory locations are displayed per page. -
Page 12: Save Radio Stations
Radio Menu Save Radio Stations If you want to save a radio station, press and hold the desired station for approx. 1-2 seconds. The station can then be stored via this memory location. Setup To activate or deactivate a function, click on the respective button. = deactivated = activated High-Cut (Reduce radio noise):... - Page 13 Radio Menu Save Radio Station Logos For saving radio station logos a USB device is required. The USB device must be connected to the Media USB cable to display them. In addition to logos, there can be other files on the USB device, such as music, videos, pictures, etc.
-
Page 14: Phone Menu
Phone Menu You can access the “Phone” menu from the main menu . Overview of the Buttons Delete digit Dial number End call The voice assistant of the connected smartphone Phone favorites list Call history (incoming and outgoing call list) View contacts Show and hide the keyboard... -
Page 15: Connect Phone
Activate Bluetooth on your smartphone and go to the Bluetooth settings. Start a search and connect to the Dynavin device. Bluetooth Name of the device: Dynavin 9 Once the smartphone is successfully paired with the device, this is visually shown on the display. -
Page 16: Setup
Phone Menu Setup BT Name: Search in the Bluetooth menu of the smartphone for: Dynavin 9 and connect to it. Select telephone: The Dynavin unit remembers the connected phones. Select one to connect. Search Mode: Changes how the phonebook contacts are displayed by either first name or last name. -
Page 17: Contacts
Phone Menu Contacts Use this menu option to bring up the contact list. As soon as you press a contact, a popup opens. The displayed contact with the stored phone number is called via the telephone key. Switches between the stored phone numbers of the contact Call contact... -
Page 18: Search Contact
Phone Menu Search Contact Press the Search button to open the search function Search for contact Search results... -
Page 19: Favorites
Phone Menu Favorites As soon as a contact has been saved as a favorite, it is transferred to the favorites list. To open the favorites list press the "Favorites" button in the menu bar. Switches between the stored phone numbers of the contact Call contact Remove contact from... -
Page 20: Sound Menu
After downloading the audio settings file from flex.dynavin.com, place the file in the root directory of the USB stick and plug it to the "MDI&CP" USB port of the DYNAVIN system. Then, click the button indicated below to import the downloaded file. -
Page 21: Fade - Balance - Delay - Gain
Sound Menu Fade - Balance - Delay - Gain Overview of the icons In this menu you can set the delay correction of the individual speakers: L/F = Front left R/F = Front right L/R = Rear left R/R = Rear right Adjust the specified area Control pad or fader for setting the acoustic center. -
Page 22: Crossover
Sound Menu Crossover In this menu you can define limit frequencies for your speakers. This ensures that the loudspeaker signals are reproduced without distortion for each area. Bass Boost In this menu, you can adjust the Bass Boost of your sound system. With the four controls shown, you can adjust the bass boost. -
Page 23: Equalizer
Sound Menu Equalizer In this menu, you can set the 16-band graphical equalizer. Press and hold the individual band level sliders to move it up or down for a level change. However, you can also select some preset values such as Flat, Pop, Classic, Rock, or if you select the User button, you can make your own personal settings. -
Page 24: Navigation
Navigation Navigation Software For all the functions and options of the navigation software, please refer to the manual for the navigation software. Change Media Source Press “BT Audio” on the top left to change the media source. A dropdown appears: Active source = highlighted in red (in the example above BT Audio) Grayed-out source = source not connected (i.e. -
Page 25: Bt Audio
BT Audio Media Overview - Current Title The image shows the Bluetooth Music Streaming menu. Play music Pause music Next song Previous song Change media source Back to the main menu Select the desired playback source in the dropdown. -
Page 26: Usb
Media Overview - Current Title The image shows the USB menu (the menus are identical in structure). Open library Repeat all Repeat current song Repeat folder Previous song Play music Pause music Next song Shuffle Change media source Back to the main menu... -
Page 27: Library
Library The above image shows the library overview which will display all of the file names in that source. As soon as you switch to the Library Overview, you will be shown all of the files on the selected playback source. Switch to the respective category to display e.g. -
Page 28: Songs
Songs The above image shows the song overview which will display all of the music files in that source. Once you select the “Songs” menu, you can sort by albums, artists, or tracks by press the corresponding icon. Tap the desired title to play it. Albums overview Artists overview Songs overview... -
Page 29: Albums
Albums The images show a closed folder structure on the left and an open folder structure on the right. Scroll to the desired album using either the arrow keys or your finger. After you have selected an album you will be shown all the tracks that are in this album. Tap the desired title to play it back. -
Page 30: Picture
Picture Tap an image to view it in a larger format. Here you can also save an image as the startup image (boot logo). This image will then be displayed when you start the device. Save as startup image Switch to the standard view Switch to full screen view... -
Page 31: Video
Video When the “Video” overview is selected, you will see all videos that are on the playback source. Scroll either with the arrow keys or finger to the video you want and tap the title to play it. While the video is playing, the following buttons will be available to you: Open library Next Repeat all... -
Page 32: Folder
Folder The folder overview shows the complete directory of the playback source displayed alphabetically. Using the search function, you can quickly access the file you are looking for. Press “ ” to hide the keyboard. -
Page 33: Z-Link (Car-Smartphone Connectivity)
After successful pairing, the device will automatically access the Apple CarPlay. Then you can control the smartphone via the Dynavin unit. Android Auto Connect your smartphone to the Dynavin unit via USB and click the “Z-Link” icon on the main menu to access the Android Auto menu. Wireless Mirroring You can display your smartphone’s screen on the Dynavin’s screen using the Wireless Mirroring function. - Page 34 Step1: Use your Android smartphone to scan the QR code on the menu to download the necessary app. Step2 : Pair your smartphone with Dynavin unit via Bluetooth(Operation see page 14), and turn on your phone’s hotspot on your Android phone.Click the “...
-
Page 35: Wired Mirroring
Click the “ ” button in the Wireless Mirroring menu to access the Wired Mirroring menu. For iPhone users, connect your iPhone to Dynavin unit via USB . The following message will appear on your phone, click "Trust" to start mirroring. -
Page 36: Apps Menu
Apps Menu Apps Menu Uninstall the App Long pressing the app will appear “ ” icon. Click the “ ” icon to go to the final confirmation uninstall window. Move the App to the Main Menu Long press the app icon and drag it outside the Apps window. This app icon will be moved to the last position in the main menu after you release your finger. -
Page 37: File Menu
File Menu File Menu Create new folder Search files More Options (Select file or folder, Hide files and Sort) Back to the main menu... -
Page 38: Transfer File
File Menu Transfer File You can copy or transfer files from a USB Drive to the Internal shared storage. Long press the file name from the USB Drive and you will see the “Copy” and “Cut” options (If you need to deselect a file, you can click the file name again or click the “... -
Page 39: Vehicle (Vary By Vehicle)
Dynavin’s homepage or by a Dynavin distributor to do so. Each update will be installed at your own risk. Dynavin is not responsible for errors which may occur during the update resulting in the malfunctioning of the unit. Please ensure that during a firmware install that you have constant power to the unit and there is no power failure or other voltage fluctuations. - Page 40 Firmware Update On the Dynavin homepage, follow the instructions for downloading the firmware. Download the available update firmware for your Dynavin onto a USB 2.0 drive. (Please make sure to begin with a blank USB drive.) You must extract the files and place them individually in the root directory of the USB drive (not in a folder).
-
Page 41: System Reset
Z-Link after this process. GNSS Status = Location status Accuracy = Position accuracy In View = Searched GPS signals In Use = Connected GPS signals For more information, please refer to the "Map updates" menu for DYNAVIN tips. -
Page 42: Speedcam Alert (Only Suitable For Europe)
Speedcam Alert (Only Suitable for Europe) Speedcam Alert Menu Map Updates For more information, please refer to the "Map updates" menu for DYNAVIN tips. Settings Speed Cameras Alert: Enable this option to activate Speed Cameras Alert. Speed Cameras Alert Volume:... -
Page 43: Head-Up Display
Select this option to activate head-up display to start and connect to the Dynavin radio. Navigation: If this option is activated, navigation information from the Dynavin radio is synchronized on the head-up display. Speed Limitation: If this option is activated, speed limitation information from the Dynavin radio is synchronized on the head-up display. -
Page 44: Troubleshooting
My smartphone no longer pairs with the device: Reset the Bluetooth settings on the device and remove the Dynavin from the Bluetooth list of your smartphone. Reboot the Dynavin and reboot your phone. Then pair the smartphone again. To reset the Bluetooth settings on the device, go to the “Phone” menu and press the settings at the bottom right of the menu bar. - Page 45 Copyrights The Bluetooth word mark and logos are owned by Bluetooth SIG Inc. Other trademarks and trade dress are owned by their respective owners. QR Code is a registered trademark of DENSO WAVE INCORPORATED in Japan and other countries. QR Code Generating Program Copyright ©...
- Page 46 GmbH Siemensstr. 7 76316 Malsch Germany © 2024 Dynavin GmbH All rights reserved. Reprinting and reproduction, even in part, is prohibited. The features of the products are correct at the time of creation of the print product. All display representations are simulated.
Need help?
Do you have a question about the 9 and is the answer not in the manual?
Questions and answers