
Related Manuals for STO N SHO SNS 267c


Summary of Contents for STO N SHO SNS 267c
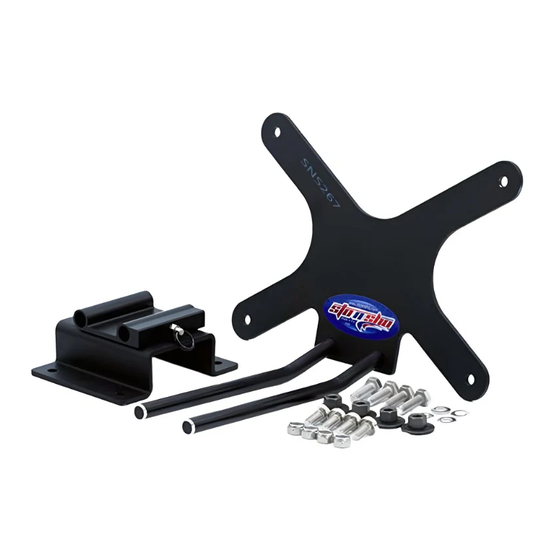
- Page 1 Installation Procedures 2020-2024 Porsche 911 Carrera/ 911 Carrera S/911 Targa with adaptive cruise With Sport Package SNS 267c WARNING: Must remove the front plate PRIOR to entering an automated car wash or DAMAGE will occur!
- Page 2 STO N SHO and vehicle. STO N SHO LLC is not responsible for any damages that may occur to the STO N SHO bracket or vehicle itself due to improper installation, road conditions, driving, or care.
- Page 3 Medium skill level required. If unsure, have bracket installed by your local Dealer or Body shop. Warranty only covers manufacture defects and STO N SHO LLC is not responsible for damages as a result of driving your vehicle. Exercise caution and avoid roadways that will cause damage to your vehicle.
- Page 4 STO N SHO LLC warrants to the original purchaser only that this product will be free of manufacturing defects in material and workmanship for the life of the product (Excluding pull- pin, see above) provided all maintenance is performed as required to the limitations and exclusions set forth below: Return product to any authorized dealer.
- Page 5 This warranty gives you specific legal rights, and you may also have other rights which vary from state to state. For the name of your nearest authorized STO N SHO dealer, contact: STO N SHO LLC at (408)776-4080 or go to www.stonsho.com.
- Page 6 Fig 2 Base plate will be centered on the 3 rib either left or right of center depend on which side of the vehicle you are mount the bracket. The second holes just left and right of center will be used to secure the base plate. Fig2a...
- Page 7 Fig 3 Fig 4 There are three screws. One center and 2 left and right.
- Page 8 Fig 5 Fig6...
Need help?
Do you have a question about the SNS 267c and is the answer not in the manual?
Questions and answers