Table of Contents
Advertisement
Quick Links
Advertisement
Table of Contents

Related Manuals for Zenty 154


Summary of Contents for Zenty 154
- Page 1 Zenty | Professional A/V Solution Provider User Manual [V1.0] FULL HD PTZ NDI CAMERA w/ 20x Zoom Zenty 154 | ZT-PTZH20-NDI ® ZENTY 9807 EMILY LANE STAFFORD, TX 77477 (844) 200-1945 SALES@ZENTY.COM (844) 200-1945 | sales@zenty.com Page 1 of 65...
-
Page 2: Electrical Safety
4. Magnetic Interference Electromagnetic fields at specific frequencies may affect the video image. This product is Class A. It may cause radio interference in household application. Appropriate measure is required (844) 200-1945 | sales@zenty.com Page 2 of 65 Copyright © Zenty AV... -
Page 3: Table Of Contents
3.2.2 – Applications ....................... 25 3.3 – Menu Settings ...................... 27 3.3.1 – Main Menu ........................ 27 3.3.2 – System Settings ......................27 3.3.3 – Camera Setting ......................28 (844) 200-1945 | sales@zenty.com Page 3 of 65 Copyright © Zenty AV... - Page 4 5.3 – PELCO-P Protocol Command List ................ 60 6. Camera Maintenance and Troubleshooting ......... 61 6.1 – Camera Maintenance ..................61 6.2 – Troubleshooting ....................61 7. Warranty .................... 62 8. Mail-In Service ..................63 (844) 200-1945 | sales@zenty.com Page 4 of 65 Copyright © Zenty AV...
-
Page 5: Camera Installation
9. Limited Warranty Limits and Exclusions ..........63 1. Camera Installation 1.1 – Camera Interface (844) 200-1945 | sales@zenty.com Page 5 of 65 Copyright © Zenty AV... - Page 6 (844) 200-1945 | sales@zenty.com Page 6 of 65 Copyright © Zenty AV...
- Page 7 (844) 200-1945 | sales@zenty.com Page 7 of 65 Copyright © Zenty AV...
-
Page 8: Power On Initial Configuration
HDMI video cable connection: ST models refer to No.11 in Figure 1.1. U2U3 models refer to No.9 in Figure 1.6. b. Connect the camera and the monitor via HDMI video cable. Video output is available after camera self-test. (844) 200-1945 | sales@zenty.com Page 8 of 65 Copyright © Zenty AV... - Page 9 Security Setting, and set the wireless network password, and the WIFI protected Set remains as the default. Click Save to save, and Reboot to restart. (844) 200-1945 | sales@zenty.com Page 9 of 65 Copyright © Zenty AV...
-
Page 10: Bracket Mount
1.4 – Bracket Mount *Note: Bracket can only be wall mounted or mounted upside down on template and concrete wall, but cannot be installed on plasterboard. (844) 200-1945 | sales@zenty.com Page 10 of 65 Copyright © Zenty AV... - Page 11 (844) 200-1945 | sales@zenty.com Page 11 of 65 Copyright © Zenty AV...
-
Page 12: Product Overview
2. Product Overview 2.1 – Product Introduction 2.1.1 Product Model There are four main series according to different video formats, lens optical zoom, output interfaces, and remote-control modes. (844) 200-1945 | sales@zenty.com Page 12 of 65 Copyright © Zenty AV... - Page 13 (844) 200-1945 | sales@zenty.com Page 13 of 65 Copyright © Zenty AV...
-
Page 14: Accessories
1920*1080 with frame rate up to 60fps. 2. Various Optical Zoom Lens: It has 5x/10x/12x/20x optical zoom lens for options. The 5x zoom lens is with 80.9” wide view angle without distortion. (844) 200-1945 | sales@zenty.com Page 14 of 65 Copyright © Zenty AV... -
Page 15: Network Performance
4. 5G WIFI Function: If the product contains 5F WIFI module, you can set up a wireless WIFI connection in a webpage, the specific configuration described in detail on the page of web configuration. (844) 200-1945 | sales@zenty.com Page 15 of 65 Copyright © Zenty AV... -
Page 16: Technical Specifications
2.3 – Technical Specifications (844) 200-1945 | sales@zenty.com Page 16 of 65 Copyright © Zenty AV... -
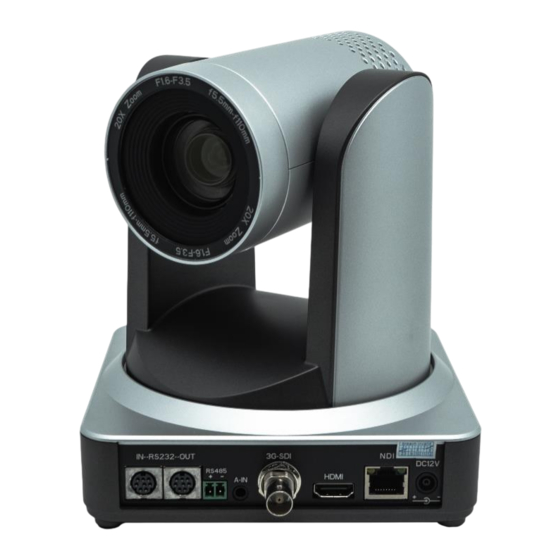
Page 17: Interface Instructions
2.4 – Interface Instructions 2.4.1 External Interface 1. External interface of ST models: RS232 Input/Output, RS485 Input, Audio Input, 3G-SDI Output, HDMI Output, LAN, DC12V, Power Interface. (844) 200-1945 | sales@zenty.com Page 17 of 65 Copyright © Zenty AV... - Page 18 2. External interface of U3 model: Audio Input, USB3.0 Output, LAN, DC12V Power Interface. (844) 200-1945 | sales@zenty.com Page 18 of 65 Copyright © Zenty AV...
- Page 19 3. External interface of U2 model: Audio Input, USB2.0 Output, LAN, DC12V, Power Interface. 4. External interface of HD model: Audio Input, HDBaseT Output, LAN, DC12V, Power Interface. (844) 200-1945 | sales@zenty.com Page 19 of 65 Copyright © Zenty AV...
-
Page 20: Bottom Dial Switch
ST/U2/HD Model: two DIP switches are to set to ON or OFF to select different modes of operation as shown in Table 2.2. U3, U2U3 model: two DIP switches are set to ON or OFF to select different modes of operation as shown in Table 2.3. (844) 200-1945 | sales@zenty.com Page 20 of 65 Copyright © Zenty AV... -
Page 21: Rs-232 Interface
2.4.3 RS-232 Interface 1. ST model RS-232C interface specifications as shown below: 2. RS-232 Mini-DIN 8-pin Port Definition: (844) 200-1945 | sales@zenty.com Page 21 of 65 Copyright © Zenty AV... - Page 22 3. RS-232 (DB9) Port Definition: 4. VISCA networking shown below: (844) 200-1945 | sales@zenty.com Page 22 of 65 Copyright © Zenty AV...
-
Page 23: Application Instruction
(black), open the Device Manager to see whether there is an image device and whether the Universal Serial Bus controller recognizes USB3.0 device. After properly identifying, open the software, choose the image device, and then it will output the image. (844) 200-1945 | sales@zenty.com Page 23 of 65 Copyright © Zenty AV... -
Page 24: Remote Control
3.2 – Remote Control 3.2.1 Keys Instructions (844) 200-1945 | sales@zenty.com Page 24 of 65 Copyright © Zenty AV... -
Page 25: Applications
3.2.1 Keys Instructions 3.2.2 Applications Finishing initialization, it can receive and execute the IR commands. Press the remote controller button, (844) 200-1945 | sales@zenty.com Page 25 of 65 Copyright © Zenty AV... - Page 26 2. When a key-combination is required, do it in sequence. For example, “【 *】+【#】【F1” means press “【*” first and then press “【#】” and last press “【F1】”. (844) 200-1945 | sales@zenty.com Page 26 of 65 Copyright © Zenty AV...
-
Page 27: Menu Settings
3.3 – Menu Settings (844) 200-1945 | sales@zenty.com Page 27 of 65 Copyright © Zenty AV... -
Page 28: Main Menu
[Home] OK: Press [Home] to Confirm 3.3.2 System Settings Move the pointer to the [Setup] in the Main Menu, click the [Home] key and enter into the (System Setting) as shown below: (844) 200-1945 | sales@zenty.com Page 28 of 65 Copyright © Zenty AV... -
Page 29: Camera Setting
Baud Rate: 2400/4800/9600/115200 VISCA Address Fix: On/Off 3.3.3 Camera Setting Move the pointer to the (Camera) in the Main Menu, click the [Home] key and enter the (Camera) as follow: (844) 200-1945 | sales@zenty.com Page 29 of 65 Copyright © Zenty AV... - Page 30 IRIS: OFF, F11.0, F9.6, F8.0, F6.8, F5.6, F4.8, F4.0, F3.4, F2.8, F2.4, F2.0, F1.8 (only available in Manual and Iris priority mode) Brightness: 0~23 (only available in Brightness priority mode) 2. Color Setting: (844) 200-1945 | sales@zenty.com Page 30 of 65 Copyright © Zenty AV...
- Page 31 Red Gain: 0~255 (only available in Manual mode) Blue Gain: 0~255 (only available in Manual mode) Saturation: 60%,70%,80%,90%,100%,110%,120%,130% Hue: 0~14 AWB Sensitivity: high/middle/low Color Style: Default, style 1~4. Color Temp: high/middle/low 3. Image: (844) 200-1945 | sales@zenty.com Page 31 of 65 Copyright © Zenty AV...
- Page 32 DZoom: digital zoom options: On/Off DCI: Dynamic Contrast: Off, 1~8 Low Light Mode: On/Off 4. Focus: Move the pointer to the (FOCUS) in the Menu, click the【HOME】and enter the (FOCUS) as follow: (844) 200-1945 | sales@zenty.com Page 32 of 65 Copyright © Zenty AV...
- Page 33 Move the pointer to the (NOISE REDUCTION) in the Menu, click the【HOME】and enter the (NOISE REDUCTION) as follow: 2D Noise Reduction: Auto, close, 1~7 3D Noise Reduction: Close, 1~8 Dynamic Hot Pixel: Close, 1~5 (844) 200-1945 | sales@zenty.com Page 33 of 65 Copyright © Zenty AV...
-
Page 34: P/T/Z
Image Freezing: On/Off Accelerating Curve: Fast/slow Preset Speed: 1-10 3.3.5 Video Format Move the pointer to the (Video Format) in the Menu, click the【HOME】and enter the (Video Format) as follow: (844) 200-1945 | sales@zenty.com Page 34 of 65 Copyright © Zenty AV... -
Page 35: Version
AF Version: Display the focus version information Lens: Display the lens zoom 3.3.7 Restore Default Move the pointer to the (RESTORE DEFAULT) in the Main Menu, click the【HOME】and enter the (RESTORE DEFAULT) (844) 200-1945 | sales@zenty.com Page 35 of 65 Copyright © Zenty AV... -
Page 36: Network Connection
Click the “Confirm” to finish the adding of IP segment. User can add the corresponding network segment according to the revised IP address of the camera. (844) 200-1945 | sales@zenty.com Page 36 of 65 Copyright © Zenty AV... - Page 37 (844) 200-1945 | sales@zenty.com Page 37 of 65 Copyright © Zenty AV...
- Page 38 IP address needs to be verified before adding. Click the “Start” and select “Operation” to input cmd as picture below to verify if the network segment has been successfully added. (844) 200-1945 | sales@zenty.com Page 38 of 65 Copyright © Zenty AV...
-
Page 39: Ie Log In
If the IP is default, open DOS command window and input 192.168.5.163, then press Enter. It will show message as below, which means network connection is normal. 4.2 – IE Log In (844) 200-1945 | sales@zenty.com Page 39 of 65 Copyright © Zenty AV... -
Page 40: Web Client Log In
PTZ control can be carried out, zoom, focus, video capture, sound, zoom, full screen and set the preset position, run, and delete; you can preview, playback and log off. NOTE: There is no configuration right for normal user login. 4.2.3 Playback 1. Playback video files: (844) 200-1945 | sales@zenty.com Page 40 of 65 Copyright © Zenty AV... -
Page 41: Configuration
Recording packing time (minutes): Set recording video packing time (default is 5, range from 1~12 minutes). Recording/Snapshot file storage route: Set local recording video/snapshot file storage route. (Default D:\MyIPCam\) Click the Save button to make settings effective. 2. Audio Config: (844) 200-1945 | sales@zenty.com Page 41 of 65 Copyright © Zenty AV... -
Page 42: Video Configuration
5-60F/S optional, secondary stream 5-30F / S optional). Key frame interval: Set the key frame interval (primary / secondary stream default 75F, primary / stream 1-300F optional. secondary stream 1-150F optional). (844) 200-1945 | sales@zenty.com Page 42 of 65 Copyright © Zenty AV... - Page 43 Focus: Focus mode, focus range, focus sensitivity can be set. Focus Mode: set the focus mode (Default automatic, manual optional, one-key focus) Focus range: set the focus range (the default middle, the upper, lower and all optional) (844) 200-1945 | sales@zenty.com Page 43 of 65 Copyright © Zenty AV...
- Page 44 Saturation: Set the saturation (default 80%,60%,70%,80%,90%,100%,110%,120%,130%, optional). Auto white balance Sensitivity: Sensitivity Auto white balance settings (default is low, high, medium optional) Chroma: Set the chrome (default 7,0-14 optional). (844) 200-1945 | sales@zenty.com Page 44 of 65 Copyright © Zenty AV...
- Page 45 Moving characters: Set the display position of moving date, time and title, click on the "up, down, left, right" buttons to move the corresponding Title Content: Set title content (default CAMERA-1). (844) 200-1945 | sales@zenty.com Page 45 of 65 Copyright © Zenty AV...
-
Page 46: Network Configuration
Click on the "Save" button, it will be valid when displayed "Save successful". RTMP access: RTMP: / / equipment IP address: 1935 / live/av0 (av0 main stream; av1 second stream). (844) 200-1945 | sales@zenty.com Page 46 of 65 Copyright © Zenty AV... - Page 47 Register User name: IPC Register Password: 12345678 Equipment ownership: Users can add their own Administrative regions: Users can add their own Alarm Zone: Users can add their own (844) 200-1945 | sales@zenty.com Page 47 of 65 Copyright © Zenty AV...
-
Page 48: System Configuration
System Language: Set the system language (default Simplified Chinese, English optional). Need to re- login after modify and save the setting. Click on the "Save" button, it will be valid when display "Save successful”. 2. System Time: (844) 200-1945 | sales@zenty.com Page 48 of 65 Copyright © Zenty AV... - Page 49 4. Version upgrade: MCU version V2.0.0.16 2015-12-18 Camera version V2.0.0.16 2015-12-18 Focus version V2.0.0.6 2015-12-11 (844) 200-1945 | sales@zenty.com Page 49 of 65 Copyright © Zenty AV...
-
Page 50: Logout
"Wireless Network" configuration page, the specific configuration is as follows: 1. Network settings: Wireless network configuration: Network interface enable: can check, to set the following items after checked. (844) 200-1945 | sales@zenty.com Page 50 of 65 Copyright © Zenty AV... -
Page 51: Radio Frequency
4.3 – Radio Frequency If the user equipment has a radio frequency module and the equipment has 4 antennas, the specific configuration method is as follows: 1. Device Connection: (844) 200-1945 | sales@zenty.com Page 51 of 65 Copyright © Zenty AV... - Page 52 Network cable connection: At this time, the computer network port should be connected to the router that sends out the WIFI hotspot; if it is a laptop, it can also connect to the WIFI hotspot of the router wirelessly. (844) 200-1945 | sales@zenty.com Page 52 of 65 Copyright © Zenty AV...
-
Page 53: Serial Communication Control
At this point, the user can control the camera by the serial commands. 5.1 – VISCA Protocol List 5.1.1 Camera Return Command: (844) 200-1945 | sales@zenty.com Page 53 of 65 Copyright © Zenty AV... -
Page 54: Camera Control Command
5.1.2 Camera Control Command (844) 200-1945 | sales@zenty.com Page 54 of 65 Copyright © Zenty AV... - Page 55 (844) 200-1945 | sales@zenty.com Page 55 of 65 Copyright © Zenty AV...
- Page 56 (844) 200-1945 | sales@zenty.com Page 56 of 65 Copyright © Zenty AV...
- Page 57 (844) 200-1945 | sales@zenty.com Page 57 of 65 Copyright © Zenty AV...
-
Page 58: Inquiry Command
5.1.3 Inquiry Command (844) 200-1945 | sales@zenty.com Page 58 of 65 Copyright © Zenty AV... - Page 59 (844) 200-1945 | sales@zenty.com Page 59 of 65 Copyright © Zenty AV...
-
Page 60: Pelco-D Protocol Command List
5.2 – PELCO-D Protocol Command List (844) 200-1945 | sales@zenty.com Page 60 of 65 Copyright © Zenty AV... -
Page 61: Pelco-P Protocol Command List
5.3 – PELCO-P Protocol Command List (844) 200-1945 | sales@zenty.com Page 61 of 65 Copyright © Zenty AV... -
Page 62: Camera Maintenance And Troubleshooting
30s later, then it can be controlled by remote control. 5. Serial port not working: a. Check whether the camera serial device protocol, baud-rate, and address are consistent (844) 200-1945 | sales@zenty.com Page 62 of 65 Copyright © Zenty AV... -
Page 63: Warranty
(b) replace it with a new or a refurbished product. The decision to repair or replace will be made by the warrantor. (844) 200-1945 | sales@zenty.com Page 63 of 65 Copyright © Zenty AV... -
Page 64: Mail-In Service
The items listed are not exclusive, but are for illustration only.) PARTS AND SERVICE, WHICH ARE NOT COVERED BY THIS LIMITED WARRANTY, ARE YOUR RESPONSIBILITY. (844) 200-1945 | sales@zenty.com Page 64 of 65 Copyright © Zenty AV... - Page 65 WWW.ZENTY.COM 9807 EMILY LANE STAFFORD, TX 77477 (844) 200-1945 SALES@ZENTY.COM (844) 200-1945 | sales@zenty.com Page 65 of 65 Copyright © Zenty AV...
Need help?
Do you have a question about the 154 and is the answer not in the manual?
Questions and answers