
Subscribe to Our Youtube Channel
Related Manuals for ROBO-TEK Prowler

Summary of Contents for ROBO-TEK Prowler
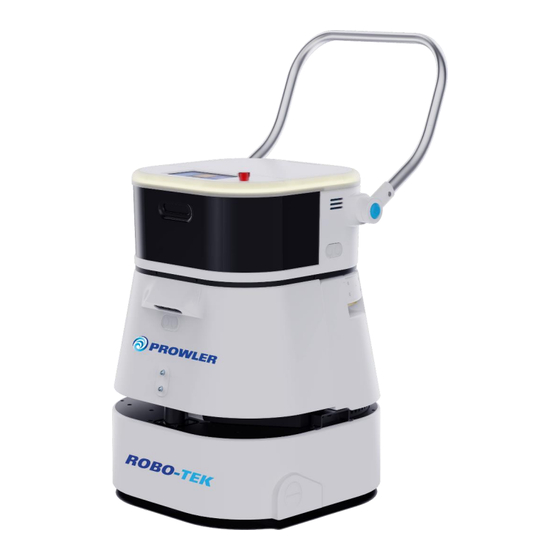
- Page 1 3 in 1 Industrial Floor Cleaner Cleaning Robot Please read this User Manual carefully before using this product and keep this manual properly.
- Page 2 Due to continuous updates, there may be some differences between the actual product and the User Manual. Please refer to the actual product. If you have any doubt, please contact our company. If you encounter any problem during using the product, please Robo-Tek customer service staff by the following ways: 1.
-
Page 3: Table Of Contents
CONTENTS Product Introduction In the package Detailed Description Product Use Safety Instructions Initial Deployment Parts Installation User guidance Product Specification Troubleshooting Fault Prompts Cleaning&Maintenance Parts maintenance Regular Checking Daily maintenance Warranty... -
Page 4: Product Introduction
Product Introduction In the Package Main body Accessories... -
Page 5: Detailed Description
Detailed Description Body explosion Sewage tank Battery Clean water tank Clean module... - Page 6 Main body Sewage Emergency stop tank button RGB light camera light camera Battery Charging contact point 2D LIDAR Touch screen Loud SIM card slot speaker Ultrasonic radar Clean water tank Lifting handle...
- Page 7 Remote control Joystick(Forward, Type-c connect backward, left, right) port Turn On/Off Indicator light Connection switch Charging Station Indicator light Charging contact pin Recognition zone Power port Charging dock...
-
Page 8: 07/ Product Use
Product Use Safety Instructions Use Restrictions Use the product according to the User Manual. User shall not disassemble and re-install without professional assistance. In particular, the disassembling of the collision mechanisms are strictly prohibited. User shall be liable for damage caused by unauthorized disassembling. ⚫... - Page 9 ⚫ Do not deploy and use the product in damp and humid environments. Excessive humid environment may cause damage to circuits or electronic modules in the product. Safety Tips ⚫ The product can only be used and kept by full-time staff that have received training.
- Page 10 Battery & Charging ⚫ Be sure to use a power supply that is correctly grounded in compliance with local regulations and requirements in the User Manual to avoid eclectic shock and damage to the robot. ⚫ Clip the charging dock into the bottom groove and lock the five screws at the bottom of the charging dock tightly before using the product.
-
Page 11: Initial Deployment
⚫ If the product is to be idle for a long time, charge it fully and power off the robot, then store it in a cool and dry place. Charge the product at least once every three months to avoid battery over-discharge. Initial Deployment Install the charging station Clip the charging station into the bottom groove and screw the six screws at the... - Page 12 Tips: ⚫ Reserve a minimum distance of 1m on both sides and a minimum distance of 1.5m at the front of the charging dock. Place the charging station by the wall as close as possible to avoid displacement. Avoid blocking the charging station’s recognition zone in any scenario. The ⚫...
- Page 13 Connect to the AllyBot APP The machine can be operated through Allybot APP, supporting Android system. (iphone is currently under development 2024) Installing APP User will receive the installation package file of the mobile AllyBot app from our company and install it directly on an Android mobile device; user can also enter the download interface directly by scanning the QR code below.
-
Page 14: Parts Installation
Parts Installation Install the roller brush Loosen the screws at the chamber right sides of the right cover of the scrubbing module chamber/vacuum module chamber to remove the chamber cover. Install the roller brush in the correct direction into the scrubbing module chamber/vacuum module chamber to form a roller brush module. - Page 15 Gently pull the brush to check if it is tightly fixed to the position, and try to rotate the brush to make sure it works. Finally, reinstall the brush limit bar back to its original place, and insert screws to fasten the module.
- Page 16 Filling clean water Press the lock button on the clean water tank base gently to unlock the water tank. Press the handles on both sides of the clean water tank, upward with hands to unlock the left and right buckles, and pull the water tank out backward horizontally.
- Page 17 Tips: ⚫ When the water volume in the clean water tank decreases to 1%, the robot will stop operation and stay in place automatically and send a low clean water level alarm. User can remotely control the robot to move to a water filling area.
- Page 18 Tips: ⚫ When installing the clean water tank, be sure to align the connection of the water outlet on the left side of the clean water tank, to avoid failure to discharge water or leakage at the water outlet. ⚫ When installing the clean water tank, ensure that the bottom buckle is successfully self-locked, and the buckle on both sides of the handle is tightly locked, so as to avoid the displacement of the water tank when the robot is...
- Page 19 Discharging sewage water After opening the flip cover at the top of the robot gently, user can see the sewage tank inside. Flip the sewage tank handle to a vertical angle and take the sewage tank out. Open the sewage tank cover and discharge sewage from the sewage tank, rinse the sewage tank with clean water or brush.
- Page 20 Install the dust mopping pad Insert the three grooves on the back of the dust mopping pad into the dust mopping base and attach the rest part of the dust mopping pad flatly onto the hook and loop of the dust mopping base to form a dust mopping module chamber. Installing dust mopping chamber Open the right flip cover at the bottom of the robot and slide the dust mopping module into the groove along the top slide rail.
- Page 21 Battery replacement Replace the battery when the robot is idle. Turn off the power switch and remove the battery. Afterwards, install a new battery to the battery position inside the battery compartment and turn on the power switch. Tips: ⚫ Replacing batteries during the robots automatic cleaning will terminate the current cleaning task, which cannot be resumed.
- Page 22 Chip upward Finally, re-align the protective cover, lock the screws, and cover the silicone flap. Tips: ⚫ Remove or install the sim card, please make sure that the robot is turned off. ⚫ If the sim card is not installed, the device may be offline and the mobile app cannot be used to operate the robot.
- Page 23 10) Matching remote control The machine needs to be turned on before matching, while meantime the remote control needs to be in shutdown status. Open the silicone clamshell at the back of the machine head, use a screwdriver to loosen a fixing screw on the protective cover, remove the protective cover, and store the screw and protective cover.
-
Page 24: User Guidance
User Guidance Power on/off Press the power button on the battery compartment on the robot side to power the robot on. The button light will turn on if the robot is powered on successfully. At this point, a boot screen will be displayed on the touch screen. When the robot is not being charged after it is powered on, pressing the power button in the battery compartment door, or directly removing battery will power the robot off. - Page 25 WIFI Settings Users can turn on the WiFi from the General settings in the onboard interface, searching surrounding available WiFi and inputting passwords. Once connected there will be notifications saying connect on, and there will appear WiFi icon in the interface status bar.
- Page 26 Mobile APP Operation Connect an Android device to the Internet. After logging in the AllyBot app successfully, add a robot by scanning the robot’s QR code and use the app to operate the robot. The main mobile app functions are as follows: Robot mode viewing Mapping and Message notification &...
- Page 27 Mapping with a charging station When selecting “Mapping” with a charging station”, fix the charging station position first and move the robot to the front of charging station to start mapping. Make sure that the robot is in remote control mode during map recording. Set mapping on the robot interface or by using the mobile app and use the remote controller to remotely control the robot to move in a target scene.
- Page 28 ⚫ After map saved, the robot will automatically i d e n t i f y the charging point, no need t o manual add.. When choosing mapping without charging station, the robot will automatically “ save” the start position as the charging station location;...
- Page 29 Tips: ⚫ A map can have only one charging point. If the position of the charging point is changed, please be sure to adjust the position of the charging point on the map accordingly. If not, it will affect the positioning and return of the robot.
- Page 30 13) Area divided cleaning Use the mobile app to divide the robot’s cleaning areas or routes on the map or use the remote controller to remotely control the robot to move and record target cleaning areas or routes. After finishing the cleaning area division, the robot willl automatically create a full coverage route (rectangular ambulatory shape).
- Page 31 16) Timer Cleaning You can use the mobile APP or web tool to set the cleaning time, cleaning area, cleaning mode, and cleaning frequencies. You can add multiple tasks and adjust their execution sequence. The robot will automatically start cleaning when it reaches the target cleaning area at the specified time, and automatically return to the charging station to charge after cleaning done.
- Page 32 19) Remote control cleaning In the remote control state, the remote cleaning operation can be started on the robot interface or using the mobile app/web tool software, and the cleaning mode and intensity can be changed. Tips: ⚫ Before starting the floor scrubbing/vacuuming operation, ensure that the sewage tank cover, sewage tank, and cleaning tank are installed in place, and the correct cleaning module are installed to achieve normal floor scrubbing/vacuuming cleaning.
- Page 33 20) Troubleshooting and error alarm The message notification module on the robot interface and the mobile app will send an error alarm prompt in the event of any error during running. At this point, the top light band will blink in red slowly. If it is determined that the error is resolved after self-check and no other errors are received, the alarm will be released promptly, users could check the history alarms in the abnormal alarm lists.
-
Page 34: Product Specification
Product Specifications Robot Item Specifications Dimensions 503*503*629mm Net weight: about 40kg ; Operating weight: about Weight 50kg (with the tank fully filled) 2D LiDAR, ultrasonic sensor, and structured light sensor Sensor configuration Moving speed 0~0.8m/s Water tank capacity Clean water tank 10L/ sewage tank 10L Cleaning width 440 mm Cleaning efficiency... -
Page 35: Charging Station
Charging Station Item Specifications 302*90*312mm Dimensions Maximum power 380W Rated input 100-240V~50/60Hz 5A 500VA Rated output 29V-13A... -
Page 36: Troubleshooting
Trouble shooting Issue Specific issues Possible causes Solutions types *The mobile phone's *Update the mobile phone's Fail to install the operating system version is operation system. app on a mobile out of update. *Download the app to an phone. *The operating system is not Android system mobile installation Android. -
Page 37: Fault Prompts
Fault Prompts Onboard screen Solutions pop-up texts *If occasionally prompted, this error does not affect normal operation and can be ignored. 2D LiDAR error *If frequently prompted, this error may be caused by a high LiDAR temperature. Power off the robot and let it stand still for a while. - Page 38 Onboard screen Solutions pop-up texts There is an error with the power connection. Check *The power switch is turned off. Turn on the power switch. whether the battery has been *The power plug is not installed correctly. Re-insert it tightly. installed correctly or whether the power switch has been turned on.
- Page 39 Onboard screen Solutions pop-up texts There is an error with the There is an error with the software. Reboot the robot positioning system. Reboot the device. Positioning failed. Remotely control the robot to move to Positioning is lost. Move the robot to the charging station. the charging station.
-
Page 40: Cleaning And Maintenance
Cleaning & Maintenance Parts maintenance Parts Name Recommended maintenance period Scrubbing module - Stiff To be cleaned once every week and replaced every three to six months bristle roller brush Scrubbing module- To be cleaned after each scrubbing and replaced every three months Squeegee Scrubbing module - Filter To be cleaned after each scrubbing and replaced every month... -
Page 41: Regular Checking
Regular checking Recommended inspection period Inspection item Check the drive motor for foreign matter. 30 days Check the wheels for foreign matter. 30 days Check the roller brush for foreign matter. 15 days Check the roller brush hair for wear and tear. 45 days 7 days Check the bottom cleaning module’s sewage suction port for blockage. -
Page 42: Daily Maintenance
Daily maintenance Roller brush *Suggested cleaning once per week Turnover the bottom cleaning module cover, pull out the module along the top rail. Remove the screws on the module limit bar, and save the screws carefully. - Page 43 Follow the arrow direction to hit downwards the module to take out the roller brush. Remove residual foreign matters or entangled hair in the roller brush and scrubbing module/vacuum module, or directly replace the roller brush with a new one. Reload the roller brush to the module, users can in reference the steps guidance in “Installation of roller brush”.
- Page 44 Squeegee *Suggested to clean after done every cleaning task Detach the cleaning module, check the squeegee and clean away the residues, if needed please replace with a new one. To replace the squeegee, please first remove the four screws, then take out the squeegees.
- Page 45 Mopping pad *Suggested to clean after every mopping Turnover the bottom cleaning module cover, pull out the module along the top rail. Turn over the dust mopping module and gently tear up the hook and loop on the dust mopping pad, then take the dust mopping pad out from the three grooves on the back of the dust mopping base to remove the dust mopping pad.
- Page 46 Filter bag/Dust collect bag *Suggested to clean after done every cleaning tasks Remove the sewage tank cover and loosen the filter bag’s pull rope under the sewage tank bellows, then remove the filter bag. Clean it with clean water and dry it. Or, replace it with a new one. Afterwards, put the clean filter bag back and tighten the pull rope.
- Page 47 HEPA filter *Suggested cleaning every two weeks Turn over the removed sewage tank’s upper cover and loosen the buckle of the HEPA filter flip cover, then turn over the flip cover. Take out the HEPA filter and clean it with clean water, then dry it. Or, replace it with a new one.
-
Page 48: Warranty
• a valid proof of purchase. • a completed warranty card. After testing and confirming, Robo-Tek will handle the warranty service. Refer to the table below for the warranty periods of the entire device and its parts: Name Warranty item Warranty period * Robot body;... - Page 49 03 9357 5662, o r • service@Robo-tek.com.au email and provide copies of the proof of purchase and warranty card. Robo-Tek will arrange a customer service specialist to answer any question you have during using the product.
Need help?
Do you have a question about the Prowler and is the answer not in the manual?
Questions and answers