
Related Manuals for Insignia IS-HC040917


Summary of Contents for Insignia IS-HC040917
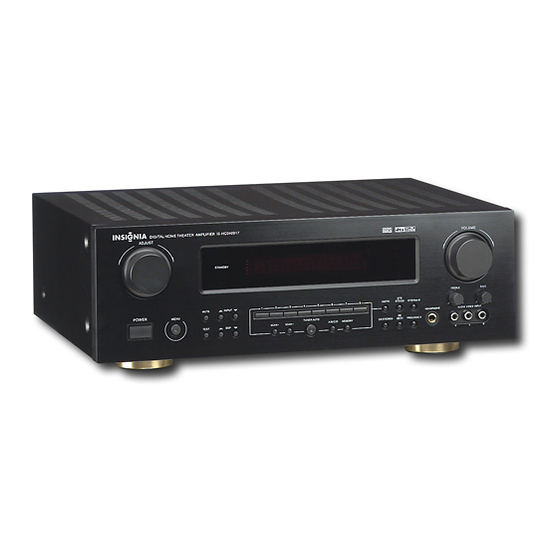
- Page 1 IS-HC040917 DIGITAL HOME THEATER AMPLIFIER DIGITAL HOME THEATER AMPLIFIER IS-HC040917 VOLUME AUDIO VIDEO INPUT User's Manual...
-
Page 2: Important Safety Instructions
Important Safety Instructions 1. Read Instructions - All the safety and operating instru- NOTICE! ! NOTICE! ! ctions should be read before the appliance is operated. 2. Retain Instructions - The safety and operating instru- Thank you for purchasing our product. ctions should be retained for future reference. - Page 3 Important Safety Instructions 15. Cleaning - Unplug this unit from the wall outlet before cle- Setup and Maintenance of the Receiver aning. Do not use liquid cleaners or aerosol cleaners. Use a Provide spaces for sufficient ventilation. damp cloth for cleaning. Do not connect to the AC power cords until all apparatus 16.
-
Page 4: Table Of Contents
Table of Content Table of Content Advanced Sound Control About the Listening Modes 2 Stereo Features 6 Stereo Dolby Pro Logic II Movie Dolby Pro Logic II Music Getting Started Dolby Digital Dolby Digital SurroundEX Fittings DTS 96/24 Installing batteries in the remote controller DTS-ES Discrete Notes About the Remote Control DTS-ES Matrix... -
Page 5: Features
Features Features Other Six-channels Power Amplifier Midnight Theater Mode: 2-Stage Standard stereo mode: 100W+100W(6 RMS), Automatic Audio Format Recognition Six channels mode: Sources Format Display Main channels: 100W+100W(6 RMS), Bass Management system Full Digital Front center channel: 100W(6 RMS), Pink Noise Generator for Speaker Balancing Surround channels: 100W+100W(6 RMS),... -
Page 6: Getting Started
Getting Started Fittings You should receive the following items: One receiver unit One Remote Control DIGITAL HOME THEATER AMPLIFIER IS-HC040917 AUDIO VIDEO INPUT Indoor FM antenna VOLUME AM loop antenna AAA,R3P,UM-4 batteries One instruction book AAA,R3P,UM-4 batteries IS-HC040917 batteries AAA,R3P,UM-4... -
Page 7: Installing Batteries In The Remote Controller
Since the remote control will be used for many of this unit's control operations, you should begin by installing the supplied batteries. DIGITAL HOME THEATER AMPLIFIER IS-HC040917 1.Turn the remote control over and slide the battery compartm- ent cover in the direction of the arrow. -
Page 8: Connecting To Audio-Visual Components
Getting Started Connecting to Audio-Visual Components If you have a LD player, DVD player or CD player with a digital output, you can make use of an optical digital connecting cord(not supplied) or coaxial digital connecting cord (not supplied) to carry the audio portion of the signal and enjoy Dolby Digital sound quality. -
Page 9: Digital Connections
Getting Started Digital Connections If your CD player, LD player, DVD player, TV/satellite tuner, etc, external unit, remove the cover from each optical terminal, and are equipped with coaxial or optical digital audio signal output then connect them by using a commercially available optical terminals, they can be connected to this unit's COAXIAL or fiber cable that conforms to EIAJ standards.Other cables might OPTICAL, or both terminals. -
Page 10: Connecting The Antenna
Getting Started Connecting the Antenna Connecting for Power Make sure you connect all your other electronic components and the speakers before plugging your receiver into the outlet. Plug the VIDEO power cord in the wall outlet, matching the wide blade of the plug with the wide slot in the outlet. -
Page 11: Connecting The Speakers
Getting Started Connecting the Speakers Or you also may use banana plug. FRONT RIGHT FRONT LEFT SPEAKER FRONT CENTER SPEAKER SPEAKER RIGHT LEFT SUB WOOFER VIDEO Method 2 Method 1 Speaker Polarity LEFT RIGHT Use this jack on the middle back panel to When connecting the speakers, make sure the polarities ( "+"... -
Page 12: Positioning Your Speaker
Getting Started Positioning Your Speaker Alignment Left, Right(Front Speakers) Align the center speaker evenly with (A),or slightly behind (B), the left and right speakers, but not ahead of them. They carry primarily music and sound effects. Center In surround mode, the center speaker carries much of the dialogue as well as music and effects. -
Page 13: Preferred Surround Placement
Getting Started Preferred Surround Placement Alternative Surround Placement Location Rear wall If possible, place surround speaker to either side of the listen- If rear wall mounting is the only choice, aim the speakers at ing area, not behind it. each other (A),towards the front (B) or even towards the side- walls (C,D). -
Page 14: Operating Your Receiver
Operating Your Receiver Panel Introduction DIGITAL HOME THEATER AMPLIFIER IS-HC040917 AUDIO VIDEO INPUT 14 15 1.MENU adjustment knob Receives signals from the remote control. ress 14 MENU button on the panel or MENU buttons on the remote to select a parameter, rotate the knob to adjust FM/AM band switches button parameter selected. - Page 15 Operating Your Receiver direction rotate the knob, main channels BASS parameter selection button. reduction when anticlockwise direction rotate the knob. Note: Input sources must be Dolby digital or Dolby Digital Surround EX-encoded. 13.POWER switch Press this switch to turn on the power. Press the switch again to turn off the power.
-
Page 16: Your Remote Control
Operating Your Receiver Your Remote Control Please be sure you have inserted the batteries into the remote control. VOLUME... -
Page 17: Remote Control Function
Operating Your Receiver Remote Control Function nput selector Stores a station in the memory Selects the input source you want to listen to or watch. 13. MUTE FM/AM band switches button Mute the sound. Press again to restore the audio out to the Press the button to switch the reception band between FM previous volume level. -
Page 18: Rear Panel Introduction
Operating Your Receiver Rear Panel Introduction VIDEO 14 15 16 17 18 19 20 21 22 1.FM antenna input 14.Digital coaxial jacks Notes: VIDEO analog signal (VIDEO RCA) input,COAX1 (VIDEO 2.AM antenna input digital signal), VIDEO Video and VIDEO S -Video belong to the same that input signal group. -
Page 19: Display
Operating Your Receiver Display MEMORY TUNED VIDEO TUNER 9.Output speaker Indicator 1.DOLBY DIGITAL/DIGITAL.EX/PRO LOGIC II The speaker is Lighted up when a signal is output from the Lights up when a Dolby Digital singnal is input to this unit. speaker output. Lights up when a Dolby Digital EX singnal is input to this unit. -
Page 20: Switching On / Off
DIGITAL HOME THEATER AMPLIFIER IS-HC040917 Adjust Low-frequency of Main Speakers Front Panel Front Panel... -
Page 21: Speaker Setting(Speaker Mode Settings)
Choices:LARGE,SMALL. Initial setting:LARGE. DIGITAL HOME THEATER AMPLIFIER IS-HC040917 LARGE: If your main speakers have a high ability for bass reproduction. In this position, full range signals present at the main channels are output from the main speakers. - Page 22 Operating Your Receiver 5.Subwoofer Speaker DIGITAL HOME THEATER AMPLIFIER IS-HC040917 Use the MENU button on the panel or the Left and Right buttons on the remote to select "SW SPEAK ", and turn the ADJUST knob on the panel or u...
-
Page 23: Adjusting Speaker Output Levels
Use the MENU button on the panel or the Left and Right DIGITAL HOME THEATER AMPLIFIER IS-HC040917 buttons on the remote to select "FR 00dB", and turn the ADJUST knob on the panel or u se the Up and Down buttons on the remote to set the level. - Page 24 Operating Your Receiver Operating Your Receiver The name of the currently selected speaker and its volume appear on the display, as shown. DIGITAL HOME THEATER AMPLIFIER IS-HC040917 MEMORY TUNED VIDEO TUNER Front Panel Remote Control The level can be adjusted from -10dB to +10dB in 1 dB steps.
-
Page 25: Speaker Level Calibration
1.Press the TEST button on the remote control or panel, you DIGITAL HOME THEATER AMPLIFIER IS-HC040917 will hear a test tone (like pink noise) from front left speaker, then front center speaker, then front right speaker, then surro- und right speaker, surround center, then surround left speaker, and then the subwoofer speaker. -
Page 26: Selecting The Input Source
Operating Your Receiver Selecting the Input Source Switch Synchro Audio/Video Sources If you have two or more video devices in your system, please This section explains how to select the input source (i.e., The use Audio/Video signal synchro switch function. AV component that you want to listen to or watch). -
Page 27: Sleep
Advanced Sound Control SLEEP DIGITAL HOME THEATER AMPLIFIER IS-HC040917 Use the built-in SLEEP timer to automatically turn this unit into the standby mode after the time you set elapses. The SLEEP timer is useful when you plan to fall asleep while this unit is playing back or recording a source. -
Page 28: Operating The Radio
2. Press the POWER swtich to turn on the receiver. Front Panel Remote Control MEMORY TUNED VIDEO DIGITAL HOME THEATER AMPLIFIER IS-HC040917 TUNER 6. Repeat steps 5 to tune another radio station. 7.Select sound effect if needed by pressing preset DSP sound Front Panel Remote Control or other available listen modes, 3. -
Page 29: Storing Radio Stations
Operating Your Receiver Manually Presetting Station Storing Radio Stations: 1.Press the FM/AM button on the front panel or the remote to Automatic Preset Storing: select the reception band. 1.Press the TUNER button on the remote or INPUT buttons on 2.Tune to a radio station(see "Manual tuning" on page 28 front panel to select TUNER as the input source. -
Page 30: Retrieving Preset Stations
Operating Your Receiver Retrieving Preset Stations 6 Channel External Input An external decoder (DTS, Dolby digital,etc...) or a device with 1.Press the FM/AM button on the front panel or the remote to built-in multi-channel decoder and 6 channel output connector select the reception band. -
Page 31: Advanced Sound Control
Advanced Sound Control Dolby Pro Logic II Movie About the Listening Modes With its built-in surround-sound decoders and DSP programs, Use this mode with DVDs and videos that bear the Dolby Sur- the AV receiver can transform your home listening room into a round logo or TV programs that feature Dolby Surround.You movie theater or concert hall. -
Page 32: Dts 96/24
Advanced Sound Control channel soundtrack and bear the Dolby Digital logo. Under DTS,DTS ES format source,this mode can be selected. Under Dolby Digital,Dolby Digital Surround EX format source, this mode can be selected. DTS-ES Matrix This is DTS with an added surround center channel for 6.1 su- This digital surround format offers a surround sound experience rround sound. -
Page 33: Sound Enhancement Systems
Advanced Sound Control Sound Enhancement Systems This receiver is equipped with several built-in sound enhance- ment systems. Dolby Pro Logic 1.Dolby Pro Logic has two modes: MOVIE for movies and 2/6 STEREO DTS Neo:6 MUSIC for 2-channel audio sources. PRO LOGIC II Front Panel Remote Control 2.When you play PCM-encoded music CDs, tuner or other... -
Page 34: Dts/Dts Es
Advanced Sound Control DTS/DTS ES to switch between 2 and 6 channel stereo listen modes. 1.When you play DTS ES-encoded or DTS-encoded DVD/CDs, 2 CH Stereo mode: only output from front Right,front Left and this unit automatically switches to DTS or DTS ES listen mode. subwoofer. -
Page 35: Adjusting The Dts,Dolby Digital Lfe Level
Advanced Sound Control Adjusting the DTS, Dolby Digital LFE Dynamic Range(Night Mode) Level By using Dynamic Range Compression technology, you can enjoy enhanced sound quality by Dolby digital at night without This adjustment is effective only when DTS , DTS ES, DOLBY interrupting your roommates or neighbors. -
Page 36: Adjusting The Delay Time
Advanced Sound Control 1.Select PRO LOGIC II MUSIC listen mode. Adjusting the Delay Time You can adjust the time difference between the beginning of the Use the MENU button on the panel or the Left and Right sound from the main speakers and the beginning of the sound buttons on the remote to select parameter you want to effect from the surround and center speakers. -
Page 37: Troubleshooting
Troubleshooting Refer to the chart below when this unit does not function properly. If the problem you are experiencing is not listed below or if the instruction below does not help,set this unit to the standby mode,disconnect the power cord, and contact the nearest au- thorized our authorization dealer or service center. - Page 38 Troubleshooting Problem Cause Remedy The sound suddenly The protection circuitry has been acti- Check that the speaker wires are not touching goes off. vated because of a short circuit, etc. each other and then turn this unit back on. The sleep timer has turned the unit off. Turn on the power, and play the source again.
- Page 39 Troubleshooting Problem Cause Remedy The connected component is not set Make an appropriate setting following the Dolby Digital or DTS to output Dolby Digital or DTS digital operations instructions for your component. sources cannot be signals. played.(Dolby Digital or DTS indicator in the front panel No appropriate digital input source Select an appropriate digital input source with...
-
Page 40: Tuner
Troubleshooting Tuner Problem Cause Remedy FM stereo reception is The characteristics of FM stereo Check the antenna connections. noisy. broadcasts may cause this problem Try using a high-quality directional FM when the transmitter is too far away or antenna. the antenna input is poor. Use the manual tuning method. -
Page 41: Other
DOLBY DIGITAL eters. including the "Speaker Setting", level, assign and tuner DOLBY DIGITAL EX presets. DOLBY PROLOGIC II MOVIE DOLBY PROLOGIC II MUSIC DIGITAL HOME THEATER AMPLIFIER IS-HC040917 DTS ES AUDIO VIDEO INPUT DTS 96/24 Neo:6 CINEMA Neo: 6 MUSIC... -
Page 42: Specifications
Specifications AMPLIFIER SECTION: Main Channels................100W X 2( 6 ohm 1% THD @ 1kHz) Other Channels ................100W X 4 (6 ohm 1% THD @ 1kHz) Subwoofer channel......................Line Out Muting Attenuation.........................65dB Frequency Response..................20Hz to 20 kHz 1.5 dB Signal to Noise Ratio..................75dB (Bypass mode) VIDEO SECTION: Input (Sensitivity/Impedance)..................1Vp-p/75ohm Output (Level/Impedance)..................1Vp-p/75 ohm... - Page 43 IS-HC040917 DIGITAL HOME THEATER AMPLIFIER Manufactured for Insignia Products 7601 Penn Ave S. Richfield, MN 55423 USA...
Need help?
Do you have a question about the IS-HC040917 and is the answer not in the manual?
Questions and answers
I hooked the optical cable to receiver and I have sound but no picture on TV. How do I hook up TV to receiver so I get a picture?
An optical cable only transmits audio, not video. To get a picture on your Insignia TV when using an optical cable for audio, you need to connect a video cable separately. Use one of the following video connections from the receiver to the TV:
1. S-Video – Connect an S-Video cable from the receiver's S-VIDEO OUT (TV) to the TV's S-VIDEO IN (TV).
2. Composite Video – Connect a video cable from the receiver's VIDEO OUT (TV) to the TV's VIDEO IN (TV).
Ensure the correct video input is selected on the TV. The optical cable should be connected to the digital optical jack on both the receiver and the TV if available, and the receiver should be set to OPTICAL input for audio.
This answer is automatically generated
I have satellite hooked up with optical. But still no picture. Where do you hook up TV?
To connect an Insignia TV with a satellite receiver using optical audio, follow these steps:
1. Ensure both the TV and satellite receiver have optical digital audio ports.
2. Remove the protective cover from each optical terminal.
3. Use a commercially available optical digital cable (not supplied).
4. Connect one end of the optical cable to the optical digital audio out port on the satellite receiver.
5. Connect the other end to the optical digital audio in port on the Insignia TV or receiver.
6. On the receiver, select OPTICAL as the input source.
7. Ensure the optical connection does not interfere with other components needing the same port.
This setup will provide better sound quality through the optical cable.
This answer is automatically generated
Where do you connect a dish receiver to the stereo?
Place the satellite receiver on the top shelf for proper ventilation. Connect the satellite receiver's audio output to the Insignia IS-HC040917 stereo using either digital optical or coaxial cables if available. If using digital optical, remove the cover from the optical terminal and connect the optical cable to the receiver's digital input jack, selecting "OPTICAL" input on the stereo. Ensure other components do not block the optical connection. If digital connections are unavailable, use standard audio cables to connect the satellite receiver’s audio output to the stereo’s audio input.
This answer is automatically generated
Trying to hook up my phone to my amp I have cables
To connect your Insignia IS-HC040917 amplifier to your phone using cables, follow these steps:
1. Check Your Phone's Output: Most phones use a 3.5mm headphone jack or USB-C/Lightning with an adapter.
2. Get the Right Cable: Use a 3.5mm to RCA cable (one end with a 3.5mm plug and the other with red and white RCA connectors).
3. Connect to the Amp: Plug the 3.5mm end into your phone’s headphone jack (or adapter). Connect the RCA ends to an available AUX or LINE IN input on the amplifier (match red to red and white to white).
4. Select the Input: On the amplifier, use the input selector to choose the corresponding AUX or LINE IN source.
5. Play Audio: Start playing music on your phone and adjust the volume on both devices.
If your phone only has USB-C or Lightning, use an appropriate adapter to convert it to 3.5mm before connecting.
This answer is automatically generated