Table of Contents
Advertisement
Available languages
Available languages
Quick Links
STYLE SELECTIONS and logo design
are trademarks or registered trademarks of
LF, LLC. All rights reserved.
Serial Number
Purchase Date
Thank you for purchasing
this STYLE SELECTIONS product.
Questions, problems or missing parts?
Before returning, contact us on:
877-888-8225, 8 a.m. - 8 p.m., EST, Monday - Sunday or ascs@lowes.com.
AK23015
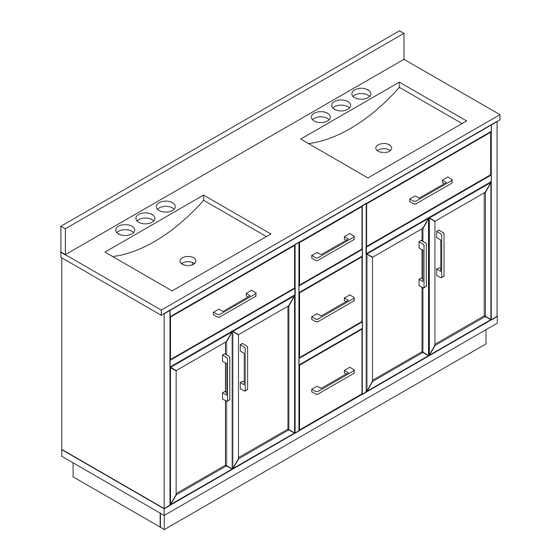
ITEM #5501949
MODEL #LW-8669-60
VANITY WITH
TOP
Español p. 10-18
ATTACH YOUR RECEIPT HERE
1
Advertisement
Table of Contents

Subscribe to Our Youtube Channel
Related Manuals for Style selections LW-8669-60


Summary of Contents for Style selections LW-8669-60
- Page 1 ITEM #5501949 MODEL #LW-8669-60 VANITY WITH STYLE SELECTIONS and logo design Español p. 10-18 are trademarks or registered trademarks of LF, LLC. All rights reserved. ATTACH YOUR RECEIPT HERE Serial Number Purchase Date Thank you for purchasing this STYLE SELECTIONS product.
-
Page 2: Package Contents
TABLE OF CONTENTS PACKAGE CONTENTS Package Contents..........................Hardware Contents..........................Safety Information..........................Preparation............................. Assembly or Installation Instructions...................... Care and Maintenance .......................... Troubleshooting............................Warranty..............................Replacement Parts List.......................... PART DESCRIPTION QUANTITY Vanity Vanity top Backsplash... -
Page 3: Safety Information
HARDWARE CONTENTS (shown actual size) PREPARATION Before beginning assembly of product, make sure all parts are present. Compare parts with package contents list and hardware contents list. If any part is missing or damaged, do not attempt to assemble the product. Estimated Assembly Time: 20-30 minutes Tools Required for Assembly (not included): Silicone compound, Utility knife, Phillips Screwdriver Touch up pen... -
Page 4: Care And Maintenance
ASSEMBLY INSTRUCTIONS ASSEMBLY INSTRUCTIONS Optional step 5: Replacing optional pulls 3. Installing the drawer(s) Open the doors (or drawers), remove the Pull the slide out as far as possible. Place the preassembled screws, change the optional pulls drawer on the slide and gently push drawer to make sure the drawer and slide lock each and relock the screws. -
Page 5: Troubleshooting
PART DESCRIPTION PART # Back splash LW-8669-60-BS Touch-up Pen BV-OX-0610 Optional Matte Black Pulls BV-8669-OMBP Brushed Nickel Pulls... - Page 6 Número de serie Fecha de compra Gracias por comprar este producto STYLE SELECTIONS. ¿Preguntas, problemas o piezas faltantes? Antes de regresar, cont áctenos: al teléfono 877-888-8225, de 8 a.m. a 8 p.m., hora est ándar del Este, de lunes a domingo, o al correo electrónico ascs@lowes.com.
-
Page 7: Table Of Contents
Contenido del ÍNDICE Contenido del paquete........................... Aditamentos ............................Información de seguridad........................Preparación............................Instrucciones de ensamblaje o instalación.................... 14-15 Cuidado y mantenimiento........................Solución de problemas.......................... Garantía..............................Lista de piezas de repuesto ........................PIEZA DESCRIPCIÓN CANTIDAD Tocador Cubierta para tocador Protector contra salpicaduras... -
Page 8: Aditamentos
ADITAMENTOS (se muestran en tamaño real) PREPARACIÓN Antes de comenzar a ensamblar el producto, asegúrese de tener todas las piezas. Compare las piezas con la lista del contenido del paquete y la lista de aditamentos. No intente ensamblar el producto si falta alguna pieza o si están dañadas. Tiempo aproximado de ensamblaje: 20 a 30 minutos (24 horas para que se seque el adhesivo). -
Page 9: Cuidado Y Mantenimiento
INSTRUCCIONES DE ENSAMBLAJE INSTRUCCIONES DE ENSAMBLAJE Paso opcional 5: reemplazo de tiradores opcionales 3. Instalación de los cajones Abra las puertas (o los cajones), retire los tornillos Saque la corredera lo más que pueda. preensamblados, cambie las perillas opcionales y Coloque el cajón en la corredera y empújelo vuelva a fijar los tornillos. -
Page 10: Solución De Problemas
PIEZA DESCRIPCIÓN PIEZA # Protector contra salpicaduras LW-8669-60-BS Aplicador de retoque BV-OX-0610 Perillas negras mate opcionales BV-8669-OMBP Perillas de níquel cepillado...
Need help?
Do you have a question about the LW-8669-60 and is the answer not in the manual?
Questions and answers