Table of Contents
Advertisement
Quick Links
Advertisement
Table of Contents

Subscribe to Our Youtube Channel
Related Manuals for Bosch SHX78CC5UC


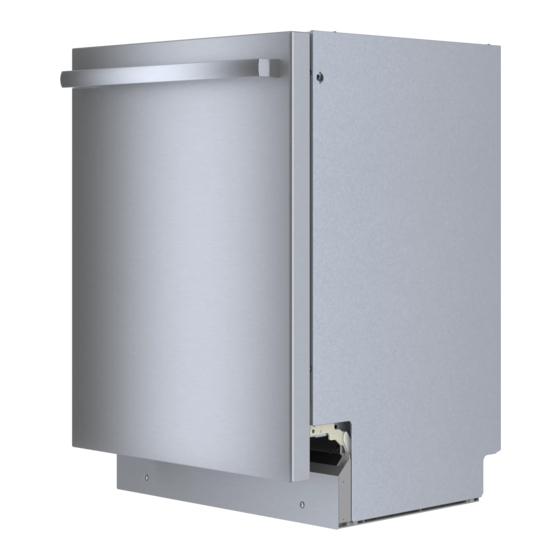
Summary of Contents for Bosch SHX78CC5UC
- Page 1 Dishwasher SHX78CC5UC [en-us] Use and Care Manual...
-
Page 2: Table Of Contents
en-us Further information and explanations are available online: Table of contents 1 IMPORTANT SAFETY 7.3 Silverware Basket ..... 21 INSTRUCTIONS...... 4 7.4 Silverware drawer ..... 21 1.1 Safety definitions...... 4 7.5 Cup shelf........ 22 1.2 General information..... 4 7.6 Flip tines ........ 23 1.3 Intended use ....... 5 7.7 Rack heights ...... 23 1.4 Restrictive use ...... 5 8 Before using for the first time .. 24... - Page 3 en-us 17 Troubleshooting...... 45 12.1 Damage to glass and 17.1 Clean drain pump.... 59 dishware ......... 30 12.2 Loading dishware .... 31 18 Transportation, storage and 12.3 Removing dishware.... 32 disposal ........ 59 12.4 Loading patterns ..... 33 18.1 Removing the appliance.. 59 18.2 Vacation and Storage.... 59 13 Basic Operation ...... 34 18.3 Transporting the appliance.. 60 13.1 Protection against 18.4 Disposal of your old...
-
Page 4: Important Safety Instructions
en-us IMPORTANT SAFETY INSTRUCTIONS READ AND SAVE THESE INSTRUCTIONS Read all instructions carefully before use. These precautions will reduce the risk of electrical shock, fire and injury to persons. When using kitchen appliances, basic safety precautions must be followed including those in the following pages. 1.1 Safety definitions Here you can find explanations of the safety signal words used in this manual. -
Page 5: Intended Use
en-us IMPORTANT SAFETY INSTRUCTIONS READ AND SAVE THESE INSTRUCTIONS 1.3 Intended use Only use this appliance: ¡ for cleaning household dishware. ¡ for normal household use and in enclosed spaces in a residential environment. ¡ Up to an altitude of 8200 ft (2500 m) above sea level. 1.4 Restrictive use This appliance is not intended for use by persons (including children) with reduced physical, sensory or mental capabilities, or lack of experience and knowledge,... - Page 6 en-us IMPORTANT SAFETY INSTRUCTIONS READ AND SAVE THESE INSTRUCTIONS ▶ Use this dishwasher only for its intended function, which is the washing of household dishware and kitchenware rated as dishwasher safe. ▶ Only use detergents or rinsing agents recommended for use in a dishwasher, and keep them out of the reach of children.
-
Page 7: Risk To Children
en-us IMPORTANT SAFETY INSTRUCTIONS READ AND SAVE THESE INSTRUCTIONS WARNING For safe care and operation of your appliance, observe the following. Follow the safety instructions and directions for use on the detergent and rinse ▶ aid product labels. Do not use harsh chemicals such as bleach-based products to clean your ▶... -
Page 8: State Of California Proposition 65 Warnings
en-us IMPORTANT SAFETY INSTRUCTIONS READ AND SAVE THESE INSTRUCTIONS 1.8 State of California Proposition 65 Warnings This product may contain a chemical known to the State of California, which can cause cancer or reproductive harm. Therefore, the packaging of your product may bear the following label as required by California:... -
Page 9: Preventing Material Damage
Preventing material damage en-us Detergent may damage the water Preventing material damage 2 Preventing material softening system. damage Only fill the dispenser of the water ▶ softening system with special Preventing material damage dishwasher salt. NOTICE: Harsh chemicals such as bleach- based products can damage your Environmental protection and energy-saving 3 Environmental protec- dishwasher. -
Page 10: Aquasensor
en-us Environmental protection and energy-saving During the drying phase, moisture from 3.4 Sensors the interior of the dishwasher is stored The sensors adjust the cycle sequence in the mineral and heat is released. and strength in the Auto cycles The heat is blown out into the interior depending on the level and type of of the dishwasher with dry air. -
Page 11: Familiarizing Yourself With Your Appliance
Familiarizing yourself with your appliance en-us Familiarizing yourself with your appliance 4 Familiarizing yourself with your appliance Familiarizing yourself with your appliance 4.1 Appliance Rating plate Rating plate with E number and FD number → Page 61 . You will need this data to contact Customer service → ... - Page 12 en-us Familiarizing yourself with your appliance Lower rack Lower rack → Page 21 Dispenser for special salt Add special salt to the special salt dispenser. → "Water softening system", Page 24 Lower spray arm The lower spray arm washes the dishware in the lower rack. If the dishware has not been washed properly, clean the spray arms.
-
Page 13: Controls
Familiarizing yourself with your appliance en-us 4.2 Controls You can use the control panel to configure all functions of your appliance and to obtain information about the operating status. ON/OFF button and reset Switching on the appliance → Page 34 button Switching off the appliance → ... - Page 14 en-us Familiarizing yourself with your appliance WLAN display Home Connect → Page 39 Water supply display Display for water supply Door handle Open the appliance door. Special salt refill indicator Water softening system → "Adding dishwasher salt", Page 25 Rinse aid refill indicator Rinse aid system → ...
-
Page 15: Dishwasher Cycles
Dishwasher Cycles en-us Dishwasher Cycles 5 Dishwasher Cycles Below is an overview of the different cycles available on your dishwasher. Dishwasher Cycles The running time may vary depending on the cycle selected. The running time depends on the water temperature, the quantity of dishware, the level of dirt and the option selected. - Page 16 en-us Dishwasher Cycles Cycle Purpose Cycle sequence Usage 1) Hour/min. 2) Electrical/ 3) Water/gal Normal Dishware: Most economical cycle: ¡ 1) 2:10 - 2:20 ¡ Cleaning mixed ¡ Pre-Rinse ¡ 2) 0.590 - dishware and ¡ Cleaning 127 °F – 136 0.840 silverware.
-
Page 17: Energy Guide
Dishwasher Cycles en-us Cycle Purpose Cycle sequence Usage 1) Hour/min. 2) Electrical/ 3) Water/gal Express Dishware: Time-optimized: ¡ 1) 0:35 ¡ Cleaning delicate ¡ Cleaning 113 °F ¡ 2) 0.560 dishware, ¡ Intermediate rinse ¡ 3) 2.8 silverware, ¡ Final rinse 126 °F temperature- sensitive plastics and glasses. -
Page 18: Favorite
en-us Options Upper rack Press the button for the relevant options. Press Favorite button for 3 seconds. a The selected cycle and option will flash. a The Favorite button flashes. a The program combination is saved. Tip: To reset the cycle, either use the Home Connect app or reset your appliance back to the factory settings. - Page 19 Options en-us Option Option ¡ The lower spray arm ¡ Using the provides intensive Home Connect® front custom cleaning for dishware app, customize the 4 in the front of the zones and the lower rack. cleaning intensity ¡ Place dirty, hard to level.
-
Page 20: Features
en-us Features Adjusting upper rack with Rack- WARNING Matic® Concerning dishware sanitation, be To wash large items in the racks, aware of the following. adjust the shelf height of the upper Only sanitizing cycles have been ▶ rack. designed to meet the requirements Pull out the upper rack. -
Page 21: Lower Rack
Features en-us 7.2 Lower rack 7.3 Silverware Basket Arrange pans and plates in the lower Arrange the silverware in the rack. silverware basket, ensuring that the items are not nestled together and with the sharp points down. WARNING The sharp points and edges of knives and other sharp utensils can cause serious injury. -
Page 22: Cup Shelf
en-us Features Arrange silverware with the points and sharp edges down. If you want to return the cutlery tray to You can reorganize the silverware its original position, fold the side shelf drawer to make more space for longer upward until it clicks into position. or wider utensils. -
Page 23: Flip Tines
Features en-us Folding down the tines 7.6 Flip tines If you do not need the tines, fold them Use the flip tines to position dishware down. securely, e.g. plates. Push the lever forward and fold down the tines . You can fold the tines down to arrange pans, bowls and glasses better. -
Page 24: Before Using For The First Time
en-us Before using for the first time Start the Program with the highest Before using for the first time 8 Before using for the cleaning temperature without first time dishware. To remove any marks from water or Before using for the first time other residues, we recommend you 8.1 Initial use operate the appliance without... -
Page 25: Setting The Water Softening System
Water softening system en-us Note: Set the water hardness the water hardness. The higher the determined on your appliance. water hardness, the greater the amount of salt required. → "Setting the water softening sys- tem", Page 25 NOTICE: With a water hardness of 0 - 8 °E you Detergent may damage the water do not need special salt for softening system. -
Page 26: Switching Off The Water Softening System
en-us Rinse aid system Note: Only use special salt substances can generally only be specified for dishwashers. used up to a water hardness of Do not use salt tablets. 26 °E without adding special salt. Do not use table salt. ¡ The water hardness is 0 - 8 °E. You can omit special salt. -
Page 27: Setting The Amount Of Rinse Aid
Rinse aid system en-us Press the catch on the lid of the a The display shows H:xx. dispenser for rinse aid and lift . a The display shows . Press repeatedly until the display shows the value set at the factory r:05. -
Page 28: Detergent
en-us Detergent To save the settings, press Detergent Description for 3 seconds. Powder Powder detergent is a The rinse aid system is switched off detergent recommended for shorter cycles. The and the rinse aid refill indicator is dosage can be adjusted deactivated. -
Page 29: Information On Detergent
Detergent en-us Add the detergent to the dry 11.3 Information on Detergent detergent dispenser. Follow the instructions on detergents in everyday use. 3 tbsp ¡ Detergents marked as "ecological" (45 ml) 1.75 tbsp (environmentally friendly) generally (25 ml) 1 tbsp contain lower levels of active agents (15 ml) or none at all. -
Page 30: Detergent Table
en-us Dishware detergent will spread around the 12.1 Damage to glass and washing tank and dissolve there. dishware Tablets will fall into the tablet Only put glasses and china in the collecting tray and dissolve in the dishwasher if they are labeled right dosage. -
Page 31: Loading Dishware
Dishware en-us appliance. The noise level may also Cause Recommendatio vary depending on the items placed in your dishwasher. Highly caustic If you use highly alkaline or highly caustic alkaline or acidic cleaning highly acidic WARNING solutions, in cleaning The sharp points and edges of knives particular solutions, in and other sharp utensils can cause... -
Page 32: Removing Dishware
en-us Dishware Tips – To avoid injury, arrange ¡ Using the appliance allows you to silverware with the points and save energy and water compared to sharp edges facing down. doing dishes by hand. – Position containers with the ¡ See our website for examples of openings facing down so no how to load your appliance water can collect in them. -
Page 33: Loading Patterns
Dishware en-us Check the washing tank and Third rack accessories for soiling and clean if necessary. → "Cleaning and maintenance", Page 41 12.4 Loading patterns Recommended loading patterns. 12 place settings: Lower rack Additional loading patterns for 10 place settings: Lower rack Upper rack Upper rack... -
Page 34: Basic Operation
en-us Basic Operation Third rack 13.2 Switching on the appli- ance Press . ▶ The program last selected and the additional function last selected will be set by default. If you do not perform any actions on the appliance for 10 minutes, it will automatically switch off. -
Page 35: Starting The Wash Cycle
Basic Operation en-us Press . 13.8 Terminating the wash a This activates the electronic delay cycle time. To end a cycle early or to switch from Note: To deactivate the electronic one that has already started, you will delay time, press repeatedly until need to cancel it first. -
Page 36: Basic Settings
en-us Basic settings Basic settings 14 Basic settings You can configure the basic settings for your appliance to meet your needs. Basic settings 14.1 Overview of the basic settings The basic settings depend on the features of your appliance. Basic setting Display text Selection Description W. - Page 37 Basic settings en-us Basic setting Display text Selection Description infoLight® I:01 I:00 - I:01 Switch InfoLight on or off. While the program is running, a spot of light is projected onto the floor below the appliance door. This light will not be visible if the appliance is installed at eye level with the cabinet front fitted flush.
- Page 38 en-us Basic settings Basic setting Display text Selection Description Wi-Fi Cn:00 Cn:00 - Cn:01 Switch the wireless network connection on or off. Level "Cn:00" switches the wireless network connection off. The basic setting is not available until you have connected the appliance with the Home Connect®...
-
Page 39: Setting Up The Home Connect® App
Home Connect® en-us To be able to use Home Connect®, 14.2 Changing the basic set- you must first set up the connection to tings the WLAN home network (Wi-Fi ) and Tip: Connect your appliance to a to the Home Connect® app. mobile device. You can conveniently The Home Connect®... -
Page 40: Home Connect® Settings
en-us Home Connect® Open the Home Connect® app and Requirements scan the following QR code. ¡ The appliance is connected to your WLAN home network. ¡ The appliance is connected to the Home Connect® app. ¡ "rc:01" is selected in the Basic set- tings → Page 38 of this function. ¡... -
Page 41: Data Protection
Cleaning and maintenance en-us 15.7 Data Protection Cleaning and maintenance 16 Cleaning and mainte- See the information on data protection. nance The first time your appliance is registered on a home network To keep your appliance working Cleaning and maintenance connected to the Internet, your efficiently for a long time, it is important appliance transmits the following types to clean and maintain it carefully. -
Page 42: Filter System
en-us Cleaning and maintenance Turn the coarse filter Action Benefit counterclockwise and remove the cloth and filter system . Make sure that no dishwashing liquid. foreign objects fall into the sump. If the appliance is This will prevent not going to be unpleasant odors. -
Page 43: Cleaning Spray Arms
Cleaning and maintenance en-us Carefully clean the rim of dirt 16.5 Cleaning spray arms between the coarse and fine filter. Limescale and debris in the Reassemble the filter system. dishwashing water may block the Make sure that the locking catches nozzles and bearings on the spray on the coarse filter click into arms. - Page 44 en-us Cleaning and maintenance Hold the spray arm in the center and lift straight up to remove. Check the outlet nozzles on the spray arms for blockages under running water and remove any foreign objects. Reinsert the lower spray arm by first setting it in the 6 o'clock position, then push down until it clicks.
-
Page 45: Troubleshooting
Troubleshooting en-us Troubleshooting 17 Troubleshooting You can eliminate minor issues on your appliance yourself. Please read the Troubleshooting information on eliminating issues before contacting Customer Service. This may avoid unnecessary repair costs. Issue Cause and troubleshooting E:20-60 lights up Appliance has detected that the heating element is alternately. - Page 46 en-us Troubleshooting Issue Cause and troubleshooting If the problem occurs again: E:32-00 lights up alternately or indicator Contact customer service. ‒ for water supply lights → "Customer Service", Page 60 E:34-00 lights up Water is continuously running into the appliance. alternately. Close the water supply valve. Contact customer service → ...
- Page 47 Troubleshooting en-us Issue Cause and troubleshooting Be sure there is a high loop in the drain hose and that E:61-03 lights up ▶ no debris has flushed back into the hose. alternately. Water is not draining. E:61-60 lights up There is a technical error. alternately.
- Page 48 en-us Troubleshooting Issue Cause and troubleshooting A different error code There is a technical issue. appears in the display Press window. Pull out the power cord plug of the appliance or switch off the breaker. E:01-00 to E:90-10 Wait at least 2 minutes. Insert the power cord plug of the appliance in a power outlet or switch on the breaker.
- Page 49 Troubleshooting en-us Issue Cause and troubleshooting Activate Extra Dry/intensive drying. Dishware is not dry. ▶ Dishware removed too early or drying process not yet ended. Wait until the program ends. Only remove dishware 30 minutes after the program has ended. Rinse aid used has a limited drying performance. Use a name-brand rinse aid.
- Page 50 en-us Troubleshooting Issue Cause and troubleshooting Clean the filters. Food remnants on ▶ → "Cleaning filters", Page 42 dishware. Filters are inserted incorrectly and/or not engaged. Insert the filters properly. → "Filter system", Page 42 Twist filters into place. Selected wash cycle is too light. Select a more intensive wash program.
- Page 51 Troubleshooting en-us Issue Cause and troubleshooting Detergent residue in The lid of the detergent dispenser is blocked by the tab the appliance and will not open. Position the tab in the detergent dispenser crosswise, ▶ not vertically. Tabs are used in the quick or short cycle. There is not enough time for the tab to dissolve.
- Page 52 en-us Troubleshooting Issue Cause and troubleshooting There are stubborn Hardness range is set incorrectly or the water hardness white coatings on the is too high. dishware, inside the Set the Water softening system to the water hardness ▶ or add special salt. appliance or on the door.
- Page 53 Troubleshooting en-us Issue Cause and troubleshooting Clean the appliance. There are colored ▶ coatings (blue, yellow, You can remove coatings with Mechanical cleaning brown) inside the → Page 41 or a machine cleaning product. It may not always be possible to completely remove coatings but appliance or on they are harmless to health.
- Page 54 en-us Troubleshooting Issue Cause and troubleshooting Arrange dishware in the upper rack so the tab There are removable collecting tray is not obstructed by dishware. streaks on glasses, → "Loading dishware", Page 31 glassware with a Items of dishware are blocking the dispenser lid. metallic appearance Do not place dishware or fragrance dispensers in the and silverware.
- Page 55 Troubleshooting en-us Issue Cause and troubleshooting Excessive formation of Detergent or machine care product used causes foam occurs. excessive foaming. Change the brand of detergent. ▶ Connection to home WLAN on router is not active. network is not Check the wireless network connection of your router. ▶...
- Page 56 en-us Troubleshooting Issue Cause and troubleshooting All LEDs light up or Electronics have detected a fault. flash. Press the main switch button for approx. 4 seconds. → "Controls", Page 13 The appliance is reset and restarted. If the problem occurs again: Switch off the appliance. ‒...
- Page 57 Troubleshooting en-us Issue Cause and troubleshooting Check whether the power cord plug is properly Appliance does not inserted in the power outlet and on the rear of the start. appliance. Appliance door is not closed properly. Close the appliance door. ▶ Wash cycle starts up You did not wait until the cycle ended.
- Page 58 en-us Troubleshooting Issue Cause and troubleshooting Lid on the detergent Detergent dispenser or lid are blocked by sticky dispenser cannot be detergent residue. closed. Remove detergent residue. ▶ Filling valves making Caused by the domestic installation. No fault present in knocking noises. the appliance.
-
Page 59: Clean Drain Pump
Transportation, storage and disposal en-us Insert the pump cover and press 17.1 Clean drain pump down . Large food remnants or foreign objects can block the drain pump. As soon as the dishwashing water no longer drains properly, the drain pump must be cleaned. -
Page 60: Transporting The Appliance
(Z-Nr.) of your Switch off the appliance. appliance. Close the water supply valve. USA: To empty the residual water out of 1-800-944-2904 the appliance, detach the supply www.bosch-home.com/us/owner- hose and let the water drain out. support/get-support www.bosch-home.com/us/shop 1-800-944-2904... -
Page 61: Model Number (E-Nr.), Production Number (Fd) And Consecutive Numbering (Z- Nr.)
Customer Service en-us www.bosch-home.ca/en/service/get- ¡ A condition of all warranty claims is support the appliance with AquaStop must www.bosch-home.ca/en/service/ have been installed and connected cleaners-and-accessories correctly in accordance with all For assistance with connecting to instructions; this also includes a Home Connect®, you can also view... -
Page 62: Technical Specifications
& Who it applies to ossrequest@bshg.com or BSH The limited warranty provided by BSH Hausgeräte GmbH, Carl-Wery-Str. 34, Home Appliances (“Bosch“) in this 81739 Munich, Germany. Statement of Limited Product Warranty The source code will be made available to you on request. -
Page 63: How Long The Warranty Lasts
BSH microprocessor or effectuate warranty coverage, it is the printed circuit board if it proves to be best way for Bosch to notify you in the defective in materials or unlikely event of a safety notice or workmanship (excludes labor product recall. -
Page 64: Repair/Replace As Your Exclusive Remedy
Bosch highly recommends to accessing or removing the Product, that you do not attempt to repair the Bosch will not incur any liability for, or Product yourself, or use a non- have responsibility, for work or costs authorized service provider; Bosch will... -
Page 65: Out Of Warranty Product
¡ Ordinary wear and tear, spills of 21.5 Out of warranty product food, liquid, grease accumulations, or other substances that accumulate Bosch is under no obligation, at law or on, in, or around the Product. otherwise, to provide you with any ¡ Any external, elemental and/or... -
Page 66: Obtaining Warranty Service
WARRANTIES, WHETHER EXPRESS OR IMPLIED. ANY WARRANTY To obtain warranty service for your IMPLIED BY LAW, WHETHER FOR product, you should contact Bosch MERCHANTABILITY OR FITNESS Customer Support at 1-800-944-2904 FOR A PARTICULAR PURPOSE, OR to schedule a repair. - Page 68 • Discounts for filters, cleaners, accessories & parts • Easy access to manuals & appliance specifications • Easy access to part lists • Customized offer for the Bosch Appliance Service Plan (sent by mail after appliance registration) Register here: www.bosch-home.com/us/owner-support/mybosch Looking for help? You'll find it here.
Need help?
Do you have a question about the SHX78CC5UC and is the answer not in the manual?
Questions and answers