Table of Contents
Advertisement
Quick Links
Owner's Manual
Model No.
4EXA075
5EXA100
6EXA130
7EXA165
CAUTION
Read all instructions
carefully before starting
the installation.
Save this manual
for reference.
These instructions
must be affixed on or
adjacent to the boiler.
InstallatIon • operatIon
WARNING Improper installation, adjustment, alteration, ser-
vice, or maintenance can cause injury or property damage. Re-
fer to this manual. For assistance or additional information consult a
qualified installer, service agency, or the gas supplier.
Sears, Roebuck and Co.,
Hoffman Estates, IL 60179 U.S.A.
eX
HIGH eFFICIenCY
oIl-FIreD
Hot Water BoIler
P/N# 240007135SK, Rev. D [1/09]
Advertisement
Table of Contents

Subscribe to Our Youtube Channel
Related Manuals for Sears Kenmore 4EXA075

Summary of Contents for Sears Kenmore 4EXA075
- Page 1 For assistance or additional information consult a These instructions qualified installer, service agency, or the gas supplier. must be affixed on or adjacent to the boiler. P/N# 240007135SK, Rev. D [1/09] Sears, Roebuck and Co., Hoffman Estates, IL 60179 U.S.A.
-
Page 2: Oil Fired Boilers
Owner’s Manual Model No. 4EXA075 5EXA100 6EXA130 7EXA165 These instructions must be affixed on or adjacent to the boiler. OIL FIRED BOILERS These boilers are low pressure, sectional cast iron boilers constructed and hydrostatically tested for a maximum working pressure of 65 psi in accordance with A.S.M.E. -
Page 3: Precautionary Measures
ImPORTANT SAFETy WARNING FOR FIBERGLASS & CERAmIC FIBERS WARNING WARNING This product contains refractory ceramic fibers This product contains fiberglass wool. Fiber- (RCF). RCF has been classified as a possible hu- glass has been classified as a possible human man carcinogen. After this product is fired, RCF carcinogen. When disturbed as a result of servic- may, when exposed temperature greater than ing or repair, fiberglass becomes airborne and, 1800°F, change into a known human carcinogen. if inhaled, may be hazardous to your health. may When disturbed as a result of servicing or repair, cause irritation to skin, eyes and respiratory RCF becomes airborne and, if inhaled, may be... -
Page 4: Table Of Contents
TABLE OF CONTENTS Rules For Safe Installation And Operation ......................5 Before You Start ..............................7 Boiler Ratings & Capacities ............................8 Locating The Boiler ..............................9 Installation Requirements ..........................10 Fresh Air For Combustion ............................ 11 Assembling The Boiler ............................13 Equipment And Accessories ..........................18 Boiler System Piping ............................ -
Page 5: Rules For Safe Installation And Operation
RULES FOR SAFE INSTALLATION AND OPERATION The following terms are used throughout this manual to bring atten- All boilers must be installed in accordance with National, State or tion to the presence of hazards at various risk levels, or to important Provincial and Local plumbing, heating and electrical codes and the information concerning product life. - Page 6 RULES FOR SAFE INSTALLATION AND OPERATION WARNING Improper installation, adjustment, alteration, service or maintenance can cause property damage, personal injury or loss of life. Failure to follow all instructions in the proper order can cause personal injury or death. Read and understand all instructions, including all those contained in component manufacturers’...
-
Page 7: Before You Start
BEFORE YOU START SAFE INSTALLATION AND OPERATION Read the Owner’s Manual for Safe Operation carefully. Failure Inspect the shipment carefully for any signs of damage. All to follow the rules for safe operation and the instructions can equipment is carefully manufactured, inspected and packaged. Our cause a malfunction of the boiler and result in death, serious responsibility ceases upon delivery of crated boiler to the carrier bodily injury, and/or property damage. -
Page 8: Boiler Ratings & Capacities
BOILER RATINgS & CAPACITIES This low pressure oil fired hot water boiler is constructed and hydrostatically tested for a maximum working pressure of 65 PSIG (pounds per square inch gauge) in accordance with the latest revision of the A.S.M.E. (American Society of Mechanical Engineers) Boiler and Pressure Ves- sel Code Section IV Standards for heating boilers. -
Page 9: Locating The Boiler
LOCATINg ThE BOILER Figure Locate the boiler in front of the final position before removing For minimum clearances to combustible materials, see the crate. Table 2B Locate the unit so the vent pipe connection to chimney will be Fresh air fo r combustion and ventilation must be available at the short and direct. -
Page 10: Installation Requirements
INSTALLATION REqUIREMENTS NOTICE Always keep the manual fuel supply valve shut off if the burner is shut down for an extended period of time. Figure 2 - general Requirements for a typical installation... -
Page 11: Fresh Air For Combustion
FRESh AIR FOR COMBUSTION Horizontal Ducts : Minimum free area of 1 square inch per WARNING 2,000 BTU per hour input of all equipment in space. Duct cross- Adequate combustion and ventilation air must be provided to sectional area shall be same as opening free area. assure proper combustion and to maintain safe ambient air tem- Alternate method for boiler located within confined peratures. - Page 12 FRESh AIR FOR COMBUSTION FRESh AIR DUCT CAPACITIES FOR DUCTS SUPPLYINg FRESh AIR TO BOILER IN TIghTLY CONSTRUCTED hOUSES TABLE 3: FRESH AIR DUCT CAPACITIES THROUGH LOUVERS ¼” mesh Wood metal Fresh Air Screen Louvers Louvers Duct Size (Btuh)* (Btuh)* (Btuh)* 3 ½”...
-
Page 13: Assembling The Boiler
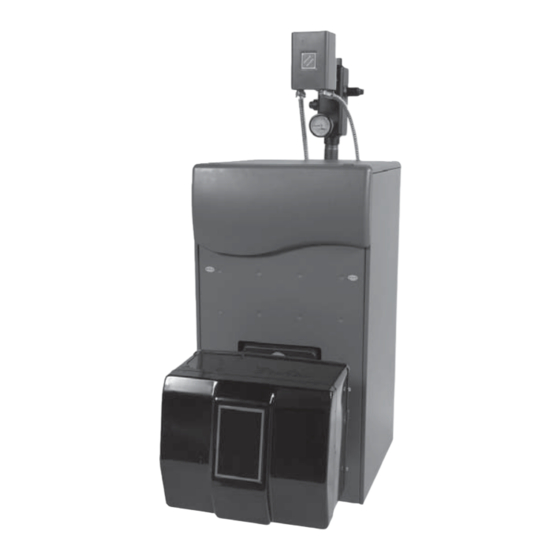
ASSEMBLINg ThE BOILER Remove Crate Inspect Swing door insulation and rope gasket. Remove all fasteners at crate skid. Inspect fiber rope located on the swing door. The rope must be evenly distributed around the perimeter of the door groove Lift outside container and remove all other inside protective and cannot bunch or overhang. - Page 14 ASSEMBLINg ThE BOILER Figure 3 Figure 4 Install Relief Valve (Refer to Figure #5) Locate 3/4”NPT x 90° elbow. Install elbow using 3/4” NPT WARNING boss on rear of control manifold. Elbow must be installed with outlet facing directly up. Install relief valve with outlet facing No valve may be installed between boiler and controls either horizontally right or left of boiler.
- Page 15 ASSEMBLINg ThE BOILER Figure 6 - All Optional Accessories Shown WARNING No valves may be installed between boiler and controls manifold or safety relief valve. High Temp Limit Controls Manifold Manual Reset (Optional) Relief Valve Aquastat Mounting Plug Aquastat Control Low Water Cut Off (Optional)
- Page 16 ASSEMBLINg ThE BOILER CAUTION Figure 7 - Liner Baffle These baffles will generate higher efficiencies and lower stack temperatures. Under certain conditions, a lower gross stack temperature entering the chimney has the potential to be cooled below the dew point and create condensate on interior surfaces.
- Page 17 ASSEMBLINg ThE BOILER (GREEN TO GROUND SCREW) BLACK TO YELLOW WHITE TO WHITE Circulator wiring Figure 11 - Control Box Wiring WARNING Ensure all conduit is secured to prevent contact with flue pipe. SUPPLIED JUMPERS AQUASTAT CONTROL HARNESS 120 VAC POWER BURNER HARNESS...
-
Page 18: Equipment And Accessories
ASSEMBLINg ThE BOILER Figure 12 - Drain Valve NOTICE When securing burner swing door, make sure door is drawn-in equally on both sides. Failure to follow the prescribed procedure could cause thread damage to casting or a leak in the door seal. If hinged side is tightened before the unhinged side, the hinged side of door cannot be drawn to provide an air-tight seal. - Page 19 EqUIPMENT AND ACCESSORIES DIAPhRAgM EXPANSION TANK (not provided) CIRCULATOR The diaphragm type expansion tank takes the place of the conven- Every forced hot water system requires a circulator. A separate tional expansion tank. Carefully read the instructions packed with circulator or zone valve is required for each zone, if there are two your tank assembly.
-
Page 20: Boiler System Piping
BOILER SYSTEM PIPINg WARNING NOTICE The use of a low water cut off device is recommended. Failure to pipe boiler correctly may result in excessive noise and other related problems. When the installation of the boiler is for a new heating system, first install all of the radiation units (panels, radiators, base- Existing water system evaluation board, or tubing) and the supply and return mains. -
Page 21: Piping Diagrams
BOILER SYSTEM PIPINg NOTICE A bypass valve cannot protect the boiler from sustained condensing operation for low temperature applications such as radiant floor heating. These types of system require active controls that prevent the return of cold return water to the boiler. Consult your local heating specialist. In addition, refer to the Radiant Panel Association (RPA) www.radiantpanelassociation.org for piping recommendations for non-condensing boiler applications. - Page 22 PIPINg DIAgRAMS Diagram 2 - Single Zone system with domestic hot water DhW priority CH CIRCULATOR WATER INLET EXPANSION TANK CIRCULATOR DHW Heater BOILER PRIORITY ZONE PRESSURE BALL VALVE CIRCULATOR HOSE BIB REDUCER VALVE AIR SEPARATOR FLOW CONTROL SHUT-OFF ZONE VALVE CHECK VALVE VAVLE VALVE...
- Page 23 PIPINg DIAgRAMS Diagram 3 - Multizone Piping With Zone Valves And Domestic hot Water Priority (With Zone Valve) ZONE 4 ZONE 3 ZONE 2 CH & DHW SYSTEM CIRCULATOR ZONE 1 (PRIORITY ZONE) WATER INLET *USE FULL PORT ZONE BOILER VALVE.
- Page 24 PIPINg DIAgRAMS Diagram 4 - Multizone System With Zone Valves And Domestic hot Water Priority (With Circulator) ZONE 4 ZONE 3 *USE FULL PORT ZONE VALVE. ZONE 2 CIRCULATOR ZONE 1 (PRIORITY ZONE) WATER INLET CIRCULATOR BOILER EXPANSION TANK PRESSURE BALL VALVE AIR SEPARATOR CIRCULATOR...
- Page 25 PIPINg DIAgRAMS Diagram 5 - Multizone System With Circulators And Domestic hot Water Priority ZONE 4 CIRC 4 ZONE 3 CIRC 3 ZONE 2 CIRC 2 ZONE 1 (PRIORITY ZONE) DHW CIRCULATOR WATER INLET EXPANSION TANK BOILER PRESSURE BALL VALVE AIR SEPARATOR CIRCULATOR REDUCER VALVE...
- Page 26 PIPINg DIAgRAMS Diagram 6 - Primary/Secondary Piping With Circulators And Domestic hot Water ZONE 4 ZONE 3 ZONE 2 ZONE 1 (PRIORITY ZONE) DHW PUMP 12" MAX APART (TO PREVENT FORCED FLOW IN SECONDARY) WATER INLET EXPANSION PRIMARY PUMP TANK (CH &...
- Page 27 PIPINg DIAgRAMS Diagram 7 - Primary/Secondary Multizone System Piping With Zone Valves And Domestic hot Water (With Zone Valve) ZONE 4 ZONE 3 ZONE 2 ZONE 1 (PRIORITY ZONE) *USE FULL PORT ZONE VALVE. FOR OPTIMUM TANK PERFORMANCE, CONSIDER USING ZONE CIRCULATOR (SEE FIGURE 13) SYSTEM CIRCULATOR...
- Page 28 PIPINg DIAgRAMS Diagram 8 - Primary/Secondary Piping With Zone Valves And Domestic hot Water (With Circulator) *USE FULL PORT ZONE VALVE. ZONE 4 ZONE 3 ZONE 2 CH CIRCULATOR PUMP ZONE 1 (PRIORITY ZONE) CIRCULATOR PUMP 12" MAX APART (TO PREVENT FORCED FLOW IN SECONDARY) WATER INLET EXPANSION...
- Page 29 PIPINg DIAgRAMS Diagram 9 -Bypass piping (automatic mixing valve) TO SYSTEM FROM SYSTEM WATER INLET EXPANSION TANK BOILER ALTERNATE CIRCULATOR LOCATION PRESSURE BALL VALVE AIR SEPARATOR CIRCULATOR REDUCER VALVE SHUT-OFF 3 WAY MIXING CHECK VALVE HOSE BIB VALVE VALVE...
-
Page 30: Expansion Tank
PIPINg DIAgRAMS Diagram 9 - Bypass Piping (Fixed Low Temp Only) Adjust the two throttling valves to maintain at least 130°F - 140°F in the boiler return. FROM SYSTEM TO SYSTEM SYSTEM CIRCULATOR WATER INLET EXPANSION TANK BOILER ALTERNATE CIRCULATOR LOCATION PRESSURE BALL VALVE... - Page 31 PIPINg DIAgRAMS Diagram 10 - Bypass Piping (4-Way Valve Option With Circulator On Supply Side) TO SYSTEM FROM SYSTEM WATER INLET EXPANSION TANK BOILER ALTERNATE CIRCULATOR LOCATION PRESSURE BALL VALVE AIR SEPARATOR CIRCULATOR REDUCER VALVE 4-WAY MIXING SHUT-OFF FLOW CONTROL CHECK VALVE HOSE BIB VALVE...
- Page 32 PIPINg DIAgRAMS Diagram 11 - Recommended Piping for Combination heating and Cooling (Refrigeration) System WATER CHILLER BOILER SHUT OFF SHUT OFF VALVES VALVES AIR CUSHION TANK CIRCULATOR SUPPLY MAIN TO RETURN MAIN FROM COMBINED HEATING COMBINED HEATING & COOLING SYSTEM &...
-
Page 33: Fuel Oil Piping
FUEL OIL PIPINg Connect Oil Lines To Boiler Use flexible oil lines so the burner swing door can be opened without disconnecting the oil supply piping. NOTICE A supply line fuel oil filter is required as a minimum for all fir- Some jurisdictions require the use of a fusible shutoff valve at the ing rates but a pleated paper fuel filter is recommended for the tank and/or the burner. -
Page 34: Antifreeze In The System
FUEL OIL PIPINg ANTIFREEZE IN ThE SYSTEM Antifreeze added to boilers must be nontoxic, and must be of a TABLE 5: TWO STAGE UNITS, TWO PIPE SySTEmS type specifically intended for use in closed hydronic heating systems. (SEE FIGURE #15) Under no circumstances should automotive antifreeze be used. -
Page 35: Electrical Connections
ELECTRICAL CONNECTIONS DANGER Positively assure all electrical connections are not powered before attempting installation or service of electrical components or con- nections of the boiler to building. Lock out all electrical boxes with padlock once power is turned off. WARNING Failure to properly wire electrical connections to the boiler may result in serious physical harm. - Page 36 ELECTRICAL CONNECTIONS Figure 18 - Wiring Diagram 240007363 - All Models (Optional Equipment Shown)
-
Page 37: Chimney And Chimney Connections
ChIMNEY AND ChIMNEY CONNECTIONS For oil fired boilers with connections to vents or chimneys, vent installations shall be in accordance with applicable provisions of NFPA31 IN- STALLATION OF OIL BURNING EQUIPMENT, latest revision, (U.S.) or CSA B139 (Canada) and applicable provisions of local building codes. NOTICE Fresh air (ventilation) is important to proper venting. -
Page 38: Stack Temperature
ChIMNEY AND ChIMNEY CONNECTIONS Overfire pressure- Measure pressure in 1/4”NPT test port. The VENT PIPE 3-pass boilers have higher pressure drop then a single pass. A Vent pipe is used to connect the boiler to the chimney. The Table 8A shows the expected pressure drop between the overfire vent pipe should be kept as short as possible. - Page 39 ChIMNEY AND ChIMNEY CONNECTIONS Figure 19 - Proper Draft Vent Locations Figure 21 - Pressure Tapping for Checking Draft Figure 20 - Typical Chimney Locations 1/4”NPT TEST PORT FOR OVERFIRE MEASUREMENT...
-
Page 40: Operating The Boiler - System Start-Up
OPERATINg ThE BOILER - SYSTEM START-UP WARNING All boilers equipped with burner swing door have a potential hazard which can cause severe property damage, personal injury or loss of life if ignored. Before opening swing door, turn off service switch to boiler to prevent accidental firing of burner outside the combustion chamber. Be sure to tighten swing door fastener completely when service is completed. - Page 41 OPERATINg ThE BOILER - SYSTEM START-UP Figure 22 - Aquastat TABLE 9: AQUASTAT DISPLAY TEXT DESCRIPTION DISPLAY Boiler Temperature High Limit Error Code Degrees Fahrenheit °F °C Degrees Celsius Control Operating Characteristics The L7248A can be in any three (3) operational states: Normal, High Limit and Error.
- Page 42 OPERATINg ThE BOILER - SYSTEM START-UP The switching action in the L7248A control has one setting, the Attach a plastic hose to fuel pump vent fitting and provide a high limit. The switching relay is controlled by the low voltage room pan to catch the oil.
- Page 43 OPERATINg ThE BOILER - SYSTEM START-UP Turn off burner and remove pressure gauge. Install gauge ton for 30 seconds. When the LED flashes twice, the device port/bleeder plug and tighten. Start burner again. has reset. WARNING T-T Jumper: All models have pre-installed T-T jumper. Do not remove jumper.
-
Page 44: Preliminary Steps
OPERATINg ThE BOILER - SYSTEM START-UP Figure 23 - CAD Cell Location CAUTION Due to the potential hazard of line voltage, only a trained, experienced service technician should perform the following safety checks. This control contains no field serviceable parts. Do not attempt to take it apart. - Page 45 OPERATINg ThE BOILER - SYSTEM START-UP IF CONTROLS DO NOT MEET REQUIREMENTS CHECk OPTIONAL LOW WATER CUT OFF replace control and repeat checkout procedures. CONTROL AND OPTIONAL MANUAL RESET TEMPERATURE LIMIT . These are optional kits. Please see instructions for installation, startup check out and maintenance. CAUTION Figure #23A shows where these optional kits are plugged into...
-
Page 46: Oil Burner, Nozzle, & Air Settings
OIL BURNER, NOZZLE, & AIR SETTINgS NOTICE All burners use an insertion depth of 2 5/8” and fired at a breech draft of -0.05 to 0.00 inches W.C. The burner settings provided are intended for initial start up only. Final adjustment must be made using combustion test instruments. - Page 47 OIL BURNER, NOZZLE & AIR SETTINgS...
- Page 48 OIL BURNER, NOZZLE & AIR SETTINgS...
-
Page 49: Conventional Expansion Tank
MAINTENANCE ANNUALLY: OIL BURNER MAINTENANCE: To assure trouble free operation, it is recommended that the flue passages, combustion chamber area (target wall, fire door insulation) For the Beckett AFG, the following preventative maintenance items burner adjustment, operation of the controls, and boiler seals (fire should be performed annually, preferably prior to the heating season. -
Page 50: Trouble Free Operation
MAINTENANCE sediment. Follow these steps to inspect, clean and / or replace the Add an appropriate amount of recommended boil out com- probe: pound. Turn off electric service to the boiler controls. Replace relief valve. Drain boiler water to a level below the tapping for the probe. Fill the entire system with water and purge. -
Page 51: Oil Boiler / Burner Cleaning Instructions
MAINTENANCE NOTICE WARNING IMPORTANT OPERATING AND MAINTENANCE This boiler contains controls which may cause the boiler to shut REQUIREMENTS: down and not restart without service. If damage due to frozen pipes is a possibility, the heating system should not be left unat- Keep your boiler and the area around it clean. -
Page 52: Oil Burner Cleaning
OIL BOILER / BURNER CLEANINg INSTRUCTIONS WARNING The boiler must be connected to an approved chimney in good condition. Serious property damage could result if the boiler is connected to a dirty or inadequate chimney. The interior of the chimney flue must be inspected and cleaned before the start of the heating season and should be inspected periodically throughout the heating season for any obstructions. -
Page 53: Troubleshooting
TROUBLEShOOTINg COMBUSTION III. Defective nozzle causing flame to be erratic. Nozzles- Not all manufacturers’ nozzles perform the same. Excessive airflow or draft causing flame to leave burner head. Table 15 Burner Settings in the section shows the nozzles Excessive back pressure causing erratic flame. that passed rigorous testing in our laboratory. -
Page 54: Possible Cause
TROUBLEShOOTINg You may avoid inconvenience and service calls by checking these points before you call for service: IF yOUR SySTEm IS NOT HEATING OR NOT GIVING ENOUGH HEAT . . . POSSIBLE CAUSE WHAT TO DO Thermostat is not set correctly Reset thermostat Burner is not operating properly Contact your service technician. -
Page 55: Installation And Check-Out Certificate
INSTALLATION AND CHECK-OUT CERTIFICATE Boiler model Serial # Date Installed___________ measured BTU/HR input____________ Installation instructions have been followed Checkout procedure and adjustments performed maintenance and Service issues reviewed with owner/ maintenance person Installation booklet affixed on or adjacent to boiler Installer (Company) Address Phone Installer’s Name Signature... -
Page 56: High Efficiency
• PART NUMBER • PART DESCRIPTION • MODEL NUMBER • NAME OF ITEM All parts listed may be ordered from any Sears Service Center. If the parts you need are not stocked locally, your order will be electronically transmitted to a Sears Repair Parts Distribution Center for han- dling.
Need help?
Do you have a question about the Kenmore 4EXA075 and is the answer not in the manual?
Questions and answers