
Related Manuals for KODA F Series


Summary of Contents for KODA F Series
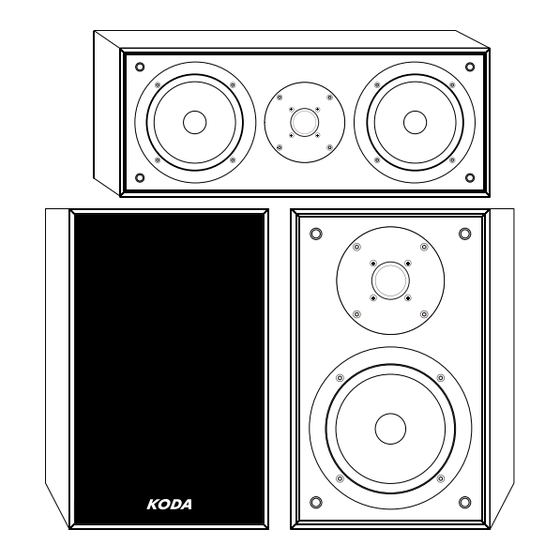
- Page 1 F, T or B, C, S, LCRS, LCR models Passive speakers Instruction Manual Edition 12-2020...
-
Page 2: Cabinet Care
Thanks to the technology used to build our speakers and the true passion of our designers, KODA is setting the standard for sonic excellence and offers the best value in sound performance. -
Page 3: Table Of Contents
Contents Important remarks Unpacking the speakers Placement Wall-Mounting of Satellite (S), Surround (S), Center (C), LCR and LCRS speakers Hooking up the wires Final adjustments... -
Page 4: Important Remarks
• If not clearly specified otherwise in the product specifications (available on the www.koda.pl website), this speaker is intended for indoor use only. • Please do not dismantle any parts of the speakers as this may void your warranty – servicing should be done only by a qualified KODA repair center. -
Page 5: Unpacking The Speakers
1) with the base (plinth) or feet and spikes or with 2) the spikes only. If your speaker is provided with the base (plinth) or feet, KODA recommends the first option. 1. BASE (PLINTH) / FEET with SPIKES [refer to a separate installation instruction]... -
Page 6: Final Step
Unpacking the speakers 2. SPIKES only 1 carton contains 1 piece of floorstanding speaker To prevent damage to the speaker, install the spikes while the speaker is still in the carton. Place the carton with the speaker on the floor in the upside down position and open it from the bottom, remove the protective bag. - Page 7 Unpacking the speakers Bookshelf (T or B), Satellite (S), Surround (S), LCR and LCRS Speakers and Home Theatre packages: Place the carton on the floor. Open it and carefully take out the speaker / speakers. Installing optional rubber pads Certain speakers may be supplied with self-adhesive rubber pads. If you plan to place your speakers on bookshelves, speaker stands and other surfaces you may protect your speakers and placement surfaces by installing the rubber pads to the bottom corners of your...
-
Page 8: Placement
Placement FLOORSTANDING SPEAKERS REMARKS: Never drag the speakers to move them, as this can damage the spikes and / or the cabinet. Always lift the speakers and carry them to a new location. The speakers have a high center of gravity and may become unstable and fall over during earthquakes, when rocked or improperly positioned. -
Page 9: Home Theatre
For BASS channel: use the active subwoofer. KODA active subwoofers will add impact and realism to both music and film soundtracks. Contact your KODA dealer to learn more about the best option for your system. Refer to your subwoofer instruction manual for more information about your subwoofer placement. - Page 10 Placement See the below example of speakers placement in Home Theatre systems. 5.0 / 5.1 System 6.0 / 6.1 / 7.0 / 7.1 System 1. TV or projection screen 7. Surround channel right speaker 2. Front channel left main speaker 7a.
- Page 11 Placement See the below example of Dipole / Bipole speakers placement in surround channels. Check with your local dealer more information about other placement options and multi-channel applications.
-
Page 12: Wall-Mounting Of Satellite (S), Surround (S), Center (C), Lcr And Lcrs Speakers
Wall-Mounting of Satellite (S), Surround (S), Center (C), LCR and LCRS speakers Certain speakers can be equipped with wall mounts located on the rear panels. They can be mounted on walls or other vertical surfaces. The customer is responsible for proper selection and use of mounting hardware (not provided with the product) to properly and safely install the speakers on walls. -
Page 13: Hooking Up The Wires
The speaker terminal can accommodate up to 10 AWG bare speaker cables (up to 14 AWG in selected models - consult your local KODA dealer). It is recommended to leave about 150 cm (5 feet) of extra cable at the speaker end to facilitate positioning and installation of the speaker. -
Page 14: Final Adjustments
If otherwise then check all wiring connections or consult your local KODA dealer. In stereo systems the amount of bass and the stereo-image quality will be affected by a number of different factors, including your room’s size and shape, and the position of the speakers in the room. - Page 15 We strongly advise to contact a professional installer or dealer in order to install KODA products. We recommend using high quality KODA installation accessories. Your product is marked with the symbol as showed on the left. For EU (European Union) member users:...
- Page 16 Modele F, T lub B, C, S, LCRS, LCR Kolumny pasywne Instrukcja obsługi Edycja 12-2020...
- Page 17 Dzięki technologii wykorzystanej przy produkcji kolumn, a także prawdziwej pasji inżynierów KODA ustanawia standard doskonałości brzmienia w przystępnej cenie. Niezależnie czy cieszysz się ulubioną muzyką czy filmem, głośniki KODA zapewniają dźwięk klasy high-end o ponadprzeciętnej czystości, przestrzenności oraz dynamicznym, niskim basie przy każdym poziomie głośności.
- Page 18 Spis treści Ważne uwagi Rozpakowanie kolumn Rozmieszczenie Montaż naścienny kolumn Satelitarnych (S), Surround (S), Centralnych (C), LCR i LCRS Montaż przewodów Ostateczne korekty...
-
Page 19: Ważne Uwagi
Prosimy zapoznać się dokładnie z niniejszą instrukcją i zachować ją na przyszłość. • Jeżeli wyraźnie nie określono inaczej w specyfikacji produktu (dostępnej na stronie www.koda.pl) ta kolumna jest przeznaczona wyłącznie do użytku w pomieszczeniach. • Prosimy nie demontować żadnych części kolumny, może to spowodować utratę ochrony gwarancyjnej - wszelkie naprawy powinien przeprowadzać... -
Page 20: Rozpakowanie Kolumn
Rozpakowując kolumny możesz wybrać 2 opcje instalacji: 1) z podstawą lub nóżkami i kolcami lub 2) wyłącznie z kolcami. Jeśli Twoje kolumny są dostarczane z podstawami lub nóżkami, KODA rekomenduje pierwszą opcję. 1. PODSTAWA / NÓŻKI z KOLCAMI [więcej informacji w oddzielnej instrukcji] 1 karton zawiera 1 kolumnę... - Page 21 Rozpakowanie kolumn 2. Wyłącznie KOLCE 1 karton zawiera 1 kolumnę podłogową Aby chronić głośnik przed uszkodzeniem, zamocuj kolce gdy kolumna jest wciąż w kartonie. Ustaw karton z kolumną „do góry nogami” na podłodze, otwórz go i zdejmij pokrowiec ochronny. Przykręć kolce w odpowiednie otwory umieszczone w podstawie kolumny (ustaw kolumnę tak jak na rysunkach A1 lub A2).
- Page 22 Rozpakowanie kolumn Kolumny Podstawkowe (T lub B), Satelitarne (S), Surround (S), LCR i LCRS oraz zestawy kina domowego: Ustaw karton na podłodze. Otwórz i delikatnie wyjmij kolumnę / kolumny. Instalacja opcjonalnych gumowych podkładek Niektóre kolumny są dostarczane z samoprzylepnymi gumowymi podkładkami.
-
Page 23: Rozmieszczenie
Rozmieszczenie KOLUMNY PODŁOGOWE - UWAGI: Nigdy nie przesuwaj kolumn, może to uszkodzić kolce i / lub obudowę. Zawsze podnoś kolumnę jeśli chcesz ją przenieść w nowe miejsce. Kolumny mają wysoko umieszczony środek ciężkości przez co mogą być niestabilne i upaść podczas trzęsień ziemi, po uderzeniu lub przy niepoprawnym ustawieniu. - Page 24 (jako kanał lewy i prawy) lub w kinie domowym (jako kanał przedni lub surround). Kolumny LCR / LCRS Kolumny LCR i LCRS KODA mogą być używane zarówno w systemach Stereo (jako kanał lewy i prawy) jak również w systemach kina domowego (jako kanał przedni, centralny lub surround).
- Page 25 Rozmieszczenie Poniższe rysunki obrazują rozmieszczenie kolumn w systemie Kina domowego System 5.0 / 5.1 System 6.0 / 6.1 / 7.0 / 7.1 1. TV lub ekran projekcyjny 7. Prawa kolumna Surround 2. Kanał przedni lewy główna kolumna 7a. Prawa kolumna Surround (nie stosowana 3.
- Page 26 Rozmieszczenie Sprawdź poniższy przykład umieszczenia kanałów dipolowych / bipolowych surround. Więcej informacji o rozmieszczeniu i wielokanałowych instalacjach uzyskasz u sprzedawcy.
-
Page 27: Montaż Naścienny Kolumn Satelitarnych (S), Surround (S), Centralnych (C), Lcr I Lcrs
Montaż naścienny kolumn Satelitarnych (S), Surround (S), Centralnych (C), LCR i LCRS Niektóre kolumny głośnikowe są wyposażone w uchwyty do montażu ściennego umieszczone na tylnym panelu. Mogą zostać zamontowane na ścianach lub innych pionowych powierzchniach. Użytkownik jest odpowiedzialny za prawidłowy wybór i użycie elementów montażowych (niedostarczonych w zestawie) w celu bezpiecznej i prawidłowej instalacji naściennej. -
Page 28: Montaż Przewodów
- skonsultuj się z lokalnym sprzedawcą). Rekomendujemy pozostawienie około 150 cm dodatkowego kabla przy kolumnie w celu późniejszej regulacji ustawienia kolumny. W zależności od modelu, kolumny terminale głośnikowe KODA obsługują większość popularnych wtyków (bananowe, widełkowe, itp.). Nie używaj spinek, gwoździ lub innych metalowych narzędzi do przytwierdzania kabli do powierzchni. -
Page 29: Ostateczne Korekty
Jeśli tak się nie stanie, sprawdź wszystkie połączenia lub skonsultuj się ze sprzedawcą KODA. W systemach stereo ilość basu i obrazowanie stereo będą definiowane przez wiele zmiennych, m. in wielkość i kształt pomieszczenia, oraz miejsce ustawienia kolumn. - Page 30 Zalecamy kontakt z profesjonalnym instalatorem lub dealerem w celu instalacji produktów KODA. Rekomendujemy użycie wysokiej jakości akcesoriów instalacyjnych KODA. Produkt jest oznaczony znakiem pokazanym na rysunku po lewej. Dla użytkowników z EU (Unii Europejskiej): Ten produkt został przetestowany i stworzony zgodnie z wymaganiami Wspólnoty Europejskiej, dyrektywa 2014/108/EC.
Need help?
Do you have a question about the F Series and is the answer not in the manual?
Questions and answers