
Related Manuals for BIOSENCY Bora NGD

Summary of Contents for BIOSENCY Bora NGD
- Page 1 Bora NGD (Network Gateway Device) Installation guide Version 1.0_A September 2024 Installa on Guide_EN- 1.0_A - September 2024...
-
Page 2: Table Of Contents
Table of contents Data feedback terminal installation guide ................3 Step 1: Start-up the data feedback terminal ................4 Meaning of the indicator lights for the data feedback terminal ........... 4 Connecting the terminal ......................5 Network connection ........................ 5 Configuring the Wi-Fi connection ..................... -
Page 3: Data Feedback Terminal Installation Guide
Data feedback terminal installation guide You have received a set of remote monitoring equipment consisting of a box for the data feedback terminal with: o The data feedback terminal with its cable o The charge adapter o User manuals The purpose of this document is to guide you in setting up the data feedback terminal so that vital signs can be transmitted to healthcare staff. -
Page 4: Step 1: Start-Up The Data Feedback Terminal
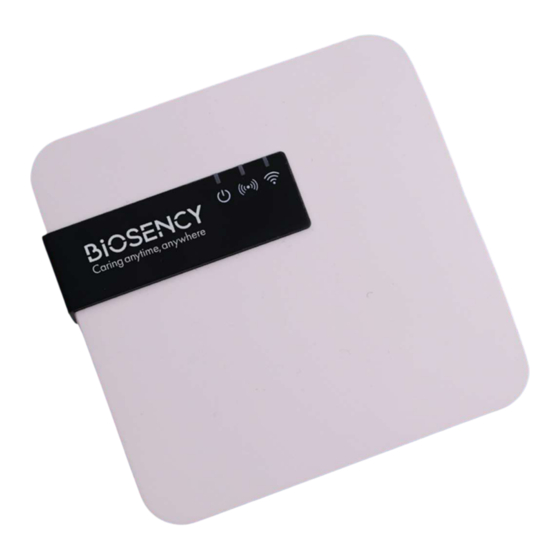
Step 1: Start-up the data feedback terminal Meaning of the indicator lights for the data feedback terminal The data feedback terminal has three indicator lights: Steady green: terminal on Flashing green: maintenance mode Steady red: no network connection Flashing red: network search Steady blue: connection to a Bora band device Flashing blue: data transmission GREEN light on and RED light flashing: the terminal is switched on... -
Page 5: Connecting The Terminal
A. Connecting the terminal Remove the terminal, connected to its cable, from its box. Plug the terminal cable into the charging adapter. Then plug the adaptor into an electrical socket. Figure 1: Terminal connection diagram A green light should appear opposite the first indicator light once all the components are connected. The data feedback terminal will only work if it is permanently plugged into an electrical socket. -
Page 6: Configuring The Wi-Fi Connection
Figure 3: Indicator light for the terminal currently searching the network. This shows that the terminal is looking for the network. The terminal is supplied with a SIM card for cellular data connection. o If the cellular data network is available, the flashing red light will turn itself off after a few minutes. -
Page 7: Direction For Sliding The Cover Figure 5: Maintenance Button Position
CONNECT TO THE TERMINAL'S INTERNAL WI-FI Open the Wi-Fi network configuration from a computer, tablet or mobile phone. From the available Wi-Fi networks, select: Biosency-NGD-<serial number>. You can find the serial number on the label stuck to the data feedback terminal at the cable outlet. -
Page 8: Exit Maintenance Mode
Figure 7: First connection screen Enter the following login and password: Username: maintenance_Gateway Password: NGD_Config$BSY2024 Press "Connection" to confirm. WI-FI CONFIGURATION You now have access to Wi-Fi network configuration. Enter the name and password of the Wi-Fi network on which the terminal will communicate. Generally, the network name and password appear on a label attached to the Internet router. -
Page 9: Step 2: Using The Bora Band
If you encounter any difficulties at any of these stages, please do not hesitate to contact us via our support: o by telephone on: 0800 910 073 (FR) / (+33) 02 21 65 70 01 o by e-mail to: support@biosency.com ® Step 2: Using the Bora band device for the first time ®... -
Page 10: Figure 10: Check That The Terminal Is Working Properly
Make sure the terminal is working properly: check that the data feedback terminal is switched on and that no red light is visible. Figure 10: Check that the terminal is working properly ® Check that the Bora band device is switched on by pressing the button once. The indicator light should glow steadily green for 3 seconds. - Page 11 If you encounter any difficulties, please do not hesitate to contact Biosency support: 0800 910 073 (FR) / (+33) 02 21 65 70 01 support@biosency.com Version 1.0_A September 2024 Installa on Guide 1.0_A - September 2024...
Need help?
Do you have a question about the Bora NGD and is the answer not in the manual?
Questions and answers