Table of Contents
Advertisement
Available languages
Available languages
Quick Links
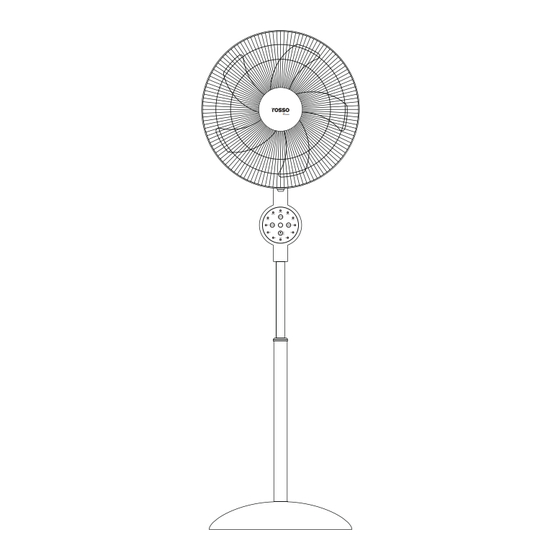
Venus
Instruction Manual
Fa. دفترچه راهنما
En. Instruction manual
2
and Fan
Stand Fan
مشتری گرامی ، لطفا قبل از روشن کردن دستگاه ، دفترچه راهنمای کاربر را به دقت مطالعه نمایید
Dear Customer, Please read the user manual carefully, before turning on the device
Venus
2
. Stand fan
2
Stand Fan
. Desktop fan
2
Stand Fan
. Wall fan
دفترچـه راهنمـا
Venus
Venus
سایت روسـو
Advertisement
Table of Contents

Summary of Contents for ROSSO Venus
- Page 1 Venus Instruction Manual Fa. دفترچه راهنما En. Instruction manual Venus Venus Venus and Fan . Stand fan Stand Fan . Desktop fan Stand Fan . Wall fan Stand Fan دفترچـه راهنمـا سایت روسـو مشتری گرامی ، لطفا قبل از روشن کردن دستگاه ، دفترچه راهنمای کاربر را به دقت مطالعه نمایید...
-
Page 2: Table Of Contents
فهرست مطالب ایمنی دستگاه/ اطالعات عمومی / کاربرد دستگاه / محدودیت گروه کاربری/ دستورالعمل های ۱ ..................ایمنی / هشدار _خطر برق گرفتگی ایمنی دستگاه/ هشدار_خطر سوختگی/ هشدار_خطر آسیب دیدگی/ جلوگیری از آسیب های ۲ ................مالی/ محدودیت گروه کاربری ۳ ..................... - Page 3 ایمنی دستگاه ،لطف ـ ـا ً ب ـ ـرای اطمین ـ ـان از ایمن ـ ـی دس ـ ـتگاه خود :دوشاخه دستگاه را در مواقع زیر از پريز برق جدا کنید .دس ـ ـتورالعمل ه ـ ـای ایمن ـ ـی را رعای ـ ـت کنید ،...
- Page 4 ایمنی دستگاه ۲ ! هشدار _ خطر آسیب دیدگی • هرگ ـ ـز دس ـ ـتگاهی را ک ـ ـه س ـ ـطح آن شکس ـ ـته • قطعــات متحــرک و دهانــه هــای دســتگاه .ی ـ ـا ت ـ ـرک خ ـ ـورده ب ـ ـه کار نیندازی ـ ـد .ممک...
- Page 5 آشنایی با قطعات ۳ :شرح قطعات ۴۱. پیچ نگهدارنده باال ۱. درپوش محافظ جلو ۵۱. پایه قابل تنظیم ۲. محافظ جلو ۶۱. مغزی پایه ۳. مهره نگهدارنده پروانه ۷۱. مهره مغزی ۴. پروانه 8۱. پیچ نگهدارنده پایینی ۵. حلقه اتصال محافظ جلو و عقب 9۱.
- Page 6 روش مونتاژ پنکه ایستاده کــه ولتــاژ و فرکانــس منــدرج بــر روی V V e e n n u u s s Venus Venus برچس ـ ـب مش ـ ـخصات فن ـ ـی محص ـ ـول ، ب ـ ـا ۳...
- Page 7 توضیحات دستگاه ۵ ( بــر رویB1 ) روی صفحــه کنتــرل یــا روشن کردن دستگاه ریم ـ ـوت و تنظی ـ ـم زم ـ ـان آن ، پنک ـ ـه ب ـ ـرای ۶ تصویر مـ ـدت زمانـ ـی کـ ـه شـ ـما تعییـ ـن میکنیـ ـد A ...
- Page 8 توضیحات دستگاه ۶ تمیز کردن دستگاه تغییر زاویه موتور پنکه تصویر تصویر جری ـ ـان ه ـ ـوا را میت ـ ـوان ب ـ ـا تغیی ـ ـر زاوی ـ ـه ) قب ـ ـل از تمی ـ ـز ک ـ ـردن، پنک ـ ـه را خام ـ ـوشa کل...
- Page 9 راهنمای کاربر ۷ راهنمای استفاده از پنکه صفحه کنترل پنل . دکمه روشن و خاموش/تنظیم ۳ سرعتA . تایمرB Normal Swing Natural . چرخشC MODE . دکمه تنظیم حالتD Sleep Power . نمایشگر اتصال به برقE SWING TIMER . نمایشگر حالت وزش باد در طبیعتF .
-
Page 10: Device Safety
Device safety Safety: Unplug the device in the following cases: • Cleaning the device. Please follow the safety instructions • moving the device. to ensure the safety of your device. • not using the device. General information Here you will find general information Note: User Group Restrictions about this manual. -
Page 11: User Group Restrictions
Device safety a short time, turn it off and unplug it pull the power plug from the pow- from power source. er source or cut off the fuse in the fuse box, and then contact custom- Warning: Risk of Burns! er after-sales service. -
Page 12: Description Of Parts
Description of parts 1. Grille cover 14. Upper retaining screw 2. Front grille 15. Adjustable tube 3. Blade retaining nut 16. Tube guide 4. Blade 17. Tube guide nut 5. Grille ring 18. Lower retaining screw 6. Grille ring screw 19. -
Page 13: Device Description
Upper body of the fan is mounted. Stand Fan mounting: Always operate the product from V V e e n n u u s s Venus Image a power source of the same volt- Place the mounted upper body... -
Page 14: Motor Speed Control / Motor Swing Control / Adgusting The Timer/ Mode Control
Device description Image The respective indicator (I) lights up. Switch on the appliance by press- When the set time has elapsed, ing the ON/SPEED button (A) on the fan switches off automat- the control panel or (A1) on the ically. The fan can set the timer remote. -
Page 15: Air Flow Adjustment / Turn Off The Device / Cleaning
Device description Air flow adjustment CLEANING Image The air flow can be adjusted by Image tilting the entire motor upwards a( Switch off and unplug from the or downwards. power supply before assembling or disassembling and cleaning. Turn off the device b( Keep the air vents at the rear of Image the main body free from dust or fluff,... -
Page 16: Operation Of The Product
User gride OPERATION OF THE PRODUCT Control Panel A. Power On/Off and 3 Speed Normal Swing Natural B. Timer MODE C. Swing Sleep Power D. Mode button E. Power indicator SWING TIMER F. Natural mode indicator G. Sleep mode indicator H. - Page 18 MODE SWING TIMER MODE SWING TIMER Venus Normal Normal Normal Swing Swing Natural Swing Natural MODE MODE MODE Power Sleep Sleep Power Power TIMER SWING TIMER SWING TIMER SWING 0.5H 0.5H 0.5H Swing Natural MODE Sleep Power Normal TIMER Natural...
- Page 19 13a) 13b) Normal Natural Swing MODE Sleep SWING TIMER 0.5H MODE SWING TIMER 13c)
- Page 20 ای ـ ـن دس ـ ـتگاه س ـ ـازگار ب ـ ـا محی ـ ـط زیس ـ ـت اس ـ ـت و .قطع ـ ـات پالس ـ ـتیکی آن قاب ـ ـل بازیاف ـ ـت م ـ ـی باش ـ ـد Rosso_home ? www.rosso-home.com v 021-62783...
Need help?
Do you have a question about the Venus and is the answer not in the manual?
Questions and answers