
Summary of Contents for WaterChef TrueHome ECO-SMART Series
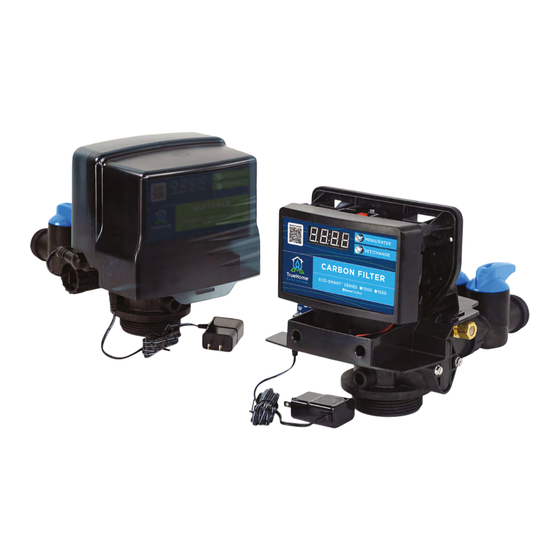
- Page 1 ECO-SMART ™ Series Softener & Carbon Filter Valves Installation and Operation Manual MODELS: ECO-SMART 48K Softener Enabled ECO-SMART 80K Softener ECO-SMART 1000 Carbon Filter ECO-SMART 1500 Carbon Filter...
-
Page 2: Table Of Contents
TABLE OF CONTENTS General Warnings . . . . . . . . . . . . . . . . . . . . . . . . . . . . . . . . . . . . . . . . . . . . . . . . . . . . . . . . . . . . . . . . . . . . . . . . . . . . . . . . . . . . . 2 Installation Requirements . -
Page 3: General Warnings
GENERAL WARNINGS WARNING: WARNING: LUBRICANTS Do NOT use Vaseline, oils, hydrocarbon lubricants or spray silicone anywhere! Petroleum base lubricants will cause swelling of o-rings and seals . The use of other lubricants may attack plastic Noryl® . It is recommended that Dow Corning® silicone grease be used as a lubricant for all control valves . Dow Corning®... -
Page 4: Installation Requirements
INSTALLATION REQUIREMENTS PLEASE NOTE THESE SPECIFICATIONS The water softener provides a Regeneration process BEFORE PROCEEDING: whereby brine solution enters the mineral tank, driving off the collected hardness ions, and replenishes the • Operating Pressure Range : 20 - 125 PSI surface of the resin beads with more sodium ions . -
Page 5: Major System Components
INSTALLATION REQUIREMENTS MAJOR SYSTEM COMPONENTS The brine tank drain line is gravity flow and must discharge below the overflow fitting . BRINE TANK - This tank holds the salt that is The brine overflow is provided as a back-up in the event added to the softener . -
Page 6: Installation Procedure
INSTALLATION PROCEDURE WATER SUPPLY CONNECTION DRAIN LINE INSTALLATION AND BYPASS VALVE 1 . The drain line flow control assembly is pre-assembled To allow for softener servicing, swimming pool filling for your convenience . Should you choose to hard or lawn sprinkling, a manual Bypass Valve has been plumb the drain line, please remove the barb fitting . -
Page 7: Electrical Connection
INSTALLATION PROCEDURE ELECTRICAL CONNECTION you can proceed to the section on mounting the faucet . 1 . Connect the power cord and plug power supply into a 120 volt/60 Hz receptacle . NOTE DO NOT plug into an outlet controlled by a wall switch or pull chain that could inadvertently be turned off. -
Page 8: Final Check
INSTALLATION PROCEDURE FINAL CHECK ANNUAL MAINTENANCE Annual replacement of the seal kit is required in all 1 . Be certain that the bypass valve is in Service single tank air systems due to air drying of the seals position and main valve is completely on . over time . -
Page 9: Operation, Care & Cleaning
OPERATION, CARE & CLEANING GENERAL CARE AND CLEANING ADDITIONAL OPERATIONS 1 . Do not place heavy or sharp objects on water BYPASS OPERATIONS softener or cabinet . When the bypass valve is in the SERVICE position 2 . Use only mild soap and warm water to clean exterior (position of bypass lever is parallel to the inlet/outlet of the unit . -
Page 10: Utilizing Bluetooth Control
UTILIZING BLUETOOTH CONTROL SOFTENER DASHBOARD & Enabled SETTINGS SCREENS NOTE Consult your dealer before making any changes. INSTALL LEGACY VIEW APP For simplified set up and control, please install the ORANGE From the Dashboard, all items in can be Legacy View App on a compatible Bluetooth 4 .0+ changed, while blue fields are informational only . -
Page 11: Filter Dashboard & Settings Screens
UTILIZING BLUETOOTH CONTROL ADVANCED SOFTENER SETTINGS Both Landscape and Portrait views are supported . From the Advanced Settings, all items in ORANGE • In portrait view the navigation menu may be collapsed . with a “set” button can be changed . •... -
Page 12: Status And History
UTILIZING BLUETOOTH CONTROL STATUS AND HISTORY MAIN MENU From the Status and History, all items in ORANGE 12:00 can be reset . 1 . To enter Main Menu, press the Menu/Enter button . (Time of Day will flash) 2 . To set the Time of Day, press the Set/Change button . -
Page 13: Programming The Control Valve
PROGRAMMING THE CONTROL VALVE NORMAL OPERATION STARTING EXTRA REGENERATION CYCLE HOME DISPLAY 1 . To Start Delayed Extra Cycle: Example: [1] Metered Softeners - will alternate between time of • If Gallons Remaining Until Next Regeneration does day and gallons remaining until next regeneration . not read ‘0000’, press and hold the Set/Change •... -
Page 14: Control Valve Powerhead Assembly Diagram
CONTROL VALVE POWERHEAD ASSEMBLY LETTERS IN DIAGRAM REPRESENT WIRING CONNECTIONS 13 | ECO-SMART SERIES - Softener & Filter Valves... -
Page 15: Control Valve & Bypass Assembly Parts List
CONTROL VALVE & BYPASS ASSEMBLY PARTS CONTROL VALVE PARTS LISTING BYPASS ASSEMBLY REF # DESCRIPTION Powerhead Assembly Circuit Board Assembly Encoder Front Plate Encoder Wheel Main Gear Power Supply REF # DESCRIPTION Back Plate Bypass Lower Front Base for Cover 1"... -
Page 16: Valve Body Assembly Diagram
VALVE BODY ASSEMBLY 5 - (2.4 GPM) 6 - (3.5 GPM) 15 | ECO-SMART SERIES - Softener & Filter Valves... -
Page 17: Valve Body Assembly Parts List
VALVE BODY ASSEMBLY PARTS REF # DESCRIPTION Piston Assembly 10-24 X 13/16 Hex Head Seal and Spacer Kit Bottom Spacer DLFC 2 .4 GPM Button DLFC 3 .5 GPM Button Drain Line Flow Control Housing DLFC Clip Brine Valve Brine Line Flow Control Assy . Brine Line Ferrule 10-24 X 1 Hex Screw Injector Cap... -
Page 18: System Service Procedure
SYSTEM SERVICING PROCEDURE SYSTEM SERVICING C. TO REPLACE PISTON ASSEMBLY 1 . Follow steps A1 - A3 . A. GENERAL PRELIMINARY INSTRUCTIONS 2 . Disconnect the meter signal wire from the circuit PERFORM BEFORE ALL SERVICING OPERATIONS: board . 1 . Turn off water supply to conditioner . 3 . - Page 19 SYSTEM SERVICING PROCEDURE E. TO SERVICE INJECTOR AND SCREEN 1 . Follow steps A1 - A2 . 2 . Unscrew injector cover screws and remove injector cover . 3 . Remove injector screen and clean or replace . 4 . Remove injector and clean or replace . 5 .
-
Page 20: Troubleshooting
TROUBLESHOOTING SYMPTOM PROBLEM CAUSE CORRECTION Power supply plugged into Connect to constant power source intermittent or dead power source Disconnected meter cable Reconnect cable Softener Fails to Improper control valve programming Reset program settings Regenerate Automatically Defective power supply Replace power supply Meter is dirty or defective Clean or replace meter assembly Defective drive motor... - Page 21 TROUBLESHOOTING SYMPTOM PROBLEM CAUSE CORRECTION High salt setting Lower brine tank refill time Excessive water in brine tank See symptom #7 High Salt Usage Indicates plumbing leak Constant flow through the unit (e .g . toilet tank) Lower hardness setting or increase Regenerating too frequently days between regeneration Plumbed in backward...
-
Page 22: Error Codes
ERROR CODES CONTROL VALVE ERROR CODE DIAGNOSIS 3 . Remove piston and seals from the valve body and inspect valve body for debris . Replace the seal Under normal operating conditions, when your control and spacer kit . Inspect piston and replace piston valve is in the “in service”... -
Page 23: Warranty Information
COMPONENTS rings and brine valve on all piston operated valves, TrueHome ECO-SMART Series water conditioning as well as valve disk flappers on Autotrol valves, and systems are assembled from the finest industry parts requiring replacement under recommended components available . - Page 24 Softener & Carbon Filter Valves 1-800-879-8909 waterchef.com TrueHome™ Water Systems by WaterChef® Inc . | 3760 Barron Way · Reno, NV 89511 USA 1 .800 .879 .8909 | 1 .775 .359 .9500 int'l | customercare@waterchef .com | waterchef .com 143-0019 r2405...
Need help?
Do you have a question about the TrueHome ECO-SMART Series and is the answer not in the manual?
Questions and answers