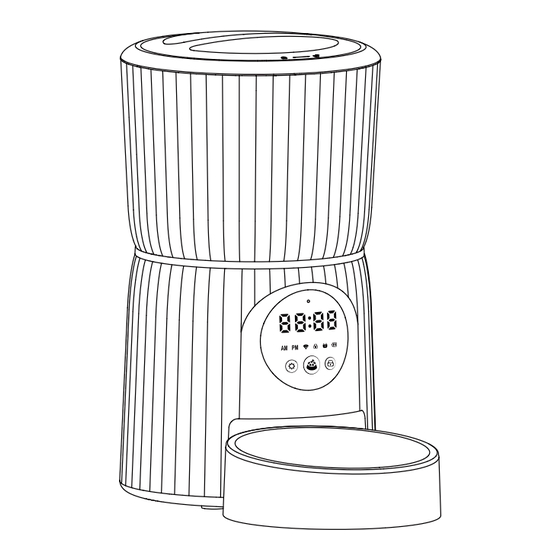
Summary of Contents for Petory PF01W
- Page 1 USER MANUAL Automatic Pet Feeder Wi-Fi Model: PF01W Please read this manual before using the product and keep it for future reference.
-
Page 2: Product Overview
PRODUCT OVERVIEW 1.Lid 2.Desiccant Box 3.Transparent Food Tank 4.Tank Base 5.Rotor 6.LCD Display 7.Button 8.Food Outlet 9.Feeder Base 10.Stainless Steel Bowl 11.Bowl Tray 12.Type-C Power Jack 13.On/Off Switch 14.Battery Compartment 15.Compartment Lid Bottom View... - Page 3 BUTTONS AND DISPLAY OVERVIEW Display Time or Before Noon After Noon Power lcon Wi-Fi lcon Lock lcon Icon Meaning Blue Light Flash: Pairing Mode; Blue Light On: Network Connected Red Light On: Network Error Light On: Buttons Locked Light Off: Buttons Unlocked Light On: Plugged In Light Off: Unplugged Light On: Batteries Installed...
- Page 4 HOW TO USE Assembly and Prepare for Setting 1. Unbox and take out the food bowl and bowl tray. 2. Install the food tank. Twist the food tank clockwise to install on the tank base. Switch the lock on the back of base. Up for Lock, Down for Unlock Lock Unlock 3.
- Page 5 4. Put the lid back on. To snap into place, turn the lid clockwise from the right rotating sign to the left rotating sign. 5. Install the Food Bowl Attach the bowl to the designated notches underneath the feeder base.
- Page 6 Connect Power Using the power adapter and Type-C power cable: Plug 5V power adapter into a wall outlet, turn on the switch. Using battery power: Install three D alkaline batteries into the battery compartment, turn on the switch. Display Icon Power Mode Always On Note: Display automatically turn off...
- Page 7 Connect to APP Step 1: Download and Install APP 1. Search for “Smart Life” in the App store or scan the QR code to download app 2. Sign up and log in your account. Step 2: Add the device (Auto) 3.Connected 1.Click "Add Device"...
- Page 8 Step 2: Add the device (Manually) 1.Click "Add Device" 3.Enter the 2.4G WiFi 2.in Small Home Appliances password, and then caregory, pet sub catedory, find Pet Feeder(WiFi); 6.Wait for connect -XXX Wi-Fi, Click Add successfully. Flashing"when the indicator when device found.
- Page 9 Note: If the pairing fails, press and hold the setting button for 10s to restore the factory settings, and then retry pairing steps. The feeder will enter the no network state when in pairing mode for more than 3 minutes, press and hold the setting button for 10s to restore the factory settings.
- Page 10 Other Setting Guide: Manual Feeding Swipe the number to select the feed portions(1-30), tap the Feed button Feeding Records The feeding records will be wiped at the end of the day.
- Page 11 Audio Record and Play 4.Click "save" 1.Click "Voice" to enter 2.Click add 5.Rename the record audio record. 3.Long press to start recording and save Setting Page Slow Feed Voice Times: Set from 0-10 times Factory Reset: Reboot the feeder Basic Indicator Child Lock Delay Time: slow feeding interval minutes (0-10mins)
-
Page 12: Clean And Care
CLEAN AND CARE 1. Open the lid and take out the desiccant 2. Twist anticlockwise to remove the tank base 3. Remove the feeding bowl and empty the grain in the hopper. Clean other parts The washableparts are as follows: with a dry cloth. -
Page 13: Troubleshooting
The food amount is not the same as the set WARRANTY 12 month warranty SPECIFICATIONS PF01W Model Capacity DC 5V power adapter with Type-C cable; Power 3 * alkaline D batteries (Not included) Dimensions 276*199*199 mm / 10.9*7.8*7.8 in... -
Page 14: Fcc Warning
FCC WARNING This device complies with part 15 of the FCC Rules. Operation is subject to the following two conditions: (1) this device may not cause harmful interference, and (2) this device must accept any interference received, including interference that may cause undesired operation.


Need help?
Do you have a question about the PF01W and is the answer not in the manual?
Questions and answers
Ik kan de porties voor een hele dag,niet meer invoeren! Kan ik het apparaat ook resetten?
Hoe kan ik het voer afwegen?
I can’t set the time on my feeder. I followed directions but number never blinked
Kan ik het voer ook wegen?