Advertisement
Quick Links
AutoCoop LayLight
Caution: This light is designed to be used inside a coop (or shed or other structure) and not outside
where it will be exposed to the elements, such as rain and snow. The LayLight will handle chicken dust
just fine, but it is not designed to get wet.
Mounting Instructions
1. Determine the location of the light and
controller.
2. The front lens of the LED light pops out and
you'll see three mounting holes. Use the
included mounting screws to secure the light.
Do not screw in too tightly or the light casing
may crack. Snap the lens back in place.
3. Use the other four screws to mount the
controller in a convenient location. Mount it
close enough to the light so the light cord will
reach it.
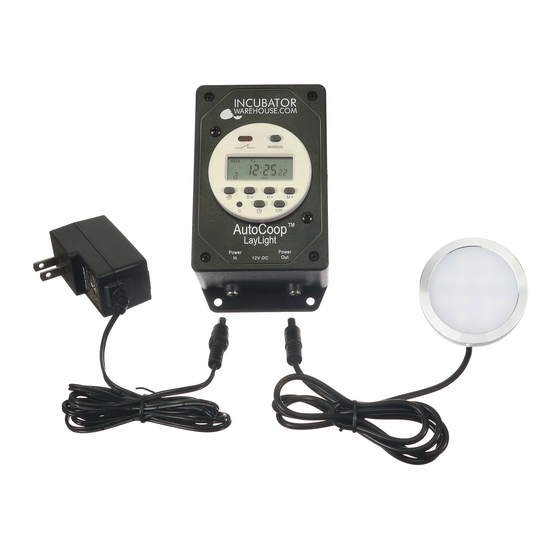
4. Plug the light cord into the "Power Out" plug on
the controller (see picture).
5. Plug the barrel connector side of power supply
into the "Power In" plug on the controller.
6. Plug the other end of the power supply into a
power outlet.
Programming
Hens will naturally decrease their egg production as daylight decreases in the Fall. A hen requires
approximately 12-16 hours of light per day to keep good egg production. Based on your location and
the time of year, set your controller to add enough light so the total per day will be in this range. For
example, if it gets light at about 7am and gets dark at around 5pm, that's 10 hours of light. So, for good
egg production, you'll need to set your controller to add light. You can set the light to come on in the
morning or evening, or split the difference and have the light come on both morning and evening. That's
up to you.
To set the controller, follow the steps below.
1. To unlock the screen, press the C/R button four times. After 30 seconds of inactivity, the screen will
automatically lock. A small lock symbol will appear in the lower left of the screen when it's locked.
2. Set the day and time
•
Day: While pressing the clock button (the circle with the small clock hands inside), press the
D+ button. You'll see the day of the week on the screen toggle from day to day.
•
Time: While pressing the clock button, press the H+ (hour) button until you get to the correct
hour.
Continue to press the clock button and press the M+ (Minute) button until you get to
the correct minute.
™
Au tom ati c Co o p L ig h t
by
Plug in the power
supply here
™
Plug in the LED
light here
Advertisement

Summary of Contents for Incubator Warehouse AutoCoop LayLight
- Page 1 AutoCoop LayLight ™ ™ Au tom ati c Co o p L ig h t Caution: This light is designed to be used inside a coop (or shed or other structure) and not outside where it will be exposed to the elements, such as rain and snow. The LayLight will handle chicken dust just fine, but it is not designed to get wet.
- Page 2 3. Set the time the power will come on (this will turn on the light) • Press the Program button (“P” inside a circle). You’ll see a small 1 appear near the left side of the display and “on” shown just below that. Then press the H+ and M+ to the hour and minute you desire.
Need help?
Do you have a question about the AutoCoop LayLight and is the answer not in the manual?
Questions and answers