Advertisement
Available languages
Available languages
USA office: Fontana
AUS office: Truganina
GBR office: FDS Corporation Limited,Unit 4, Blackacre Road, Great Blakenham,Ipswich, Ip6 0FL,United Kingdom
If you're having difficulty, our friendly
customer team is always here to help.
FRA office: Saint Vigor d'Ymonville
THIS INSTRUCTION BOOKLET CONTAINS IMPORTANT SAFETY INFORMATION.
USA:cs.us@costway.com
AUS:cs.au@costway.com
PLEASE READ AND KEEP FOR FUTURE REFERENCE.
GBR:cs.uk@costway.com
FRA:cs.f r @costway.com
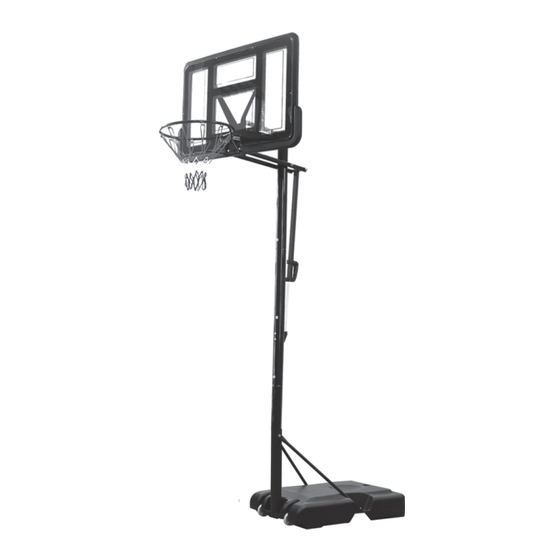
Portable Basketball Hoop
Panier de Basket-Ball Portable
SP38178
Advertisement
Table of Contents

Summary of Contents for Costway SP38178
- Page 1 GBR office: FDS Corporation Limited,Unit 4, Blackacre Road, Great Blakenham,Ipswich, Ip6 0FL,United Kingdom THIS INSTRUCTION BOOKLET CONTAINS IMPORTANT SAFETY INFORMATION. USA:cs.us@costway.com If you're having difficulty, our friendly AUS:cs.au@costway.com PLEASE READ AND KEEP FOR FUTURE REFERENCE. GBR:cs.uk@costway.com customer team is always here to help. FRA:cs.f r @costway.com...
- Page 2 Basketball Hoop Installation Instructions Before You Start Please read all instructions carefully. Retain instructions for future reference. Separate and count all parts and hardware. Read through each step carefully and follow the proper order. We recommend that, where possible, all items are assembled near to the area in which they will be placed in use, to avoid moving the product unnecessarily once assembled.
-
Page 3: Height Adjustment
Safety Instructions for Use Height Adjustment In order to ensure safety, the user must read the instructions carefully before installation and use, and follow the instructions to Adjust the height of the basketball stand by pressing the pull install. rod handle to the corresponding hole position. Avoid any damage to the product and the user! 1. -
Page 4: Parts List
Parts List Parts List Name Part No. Name Remarks Connect the backboard (P) to Croissant rack the upper end of the croissant G1.G2 M8*12MM rack (L) Pull rod long arm tube Connecting base (C) and H1.H2.H3 M8*20MM diagonal tie rod (Q1Q2) Connect the hoop (O), the U1.U2 Spring hook... -
Page 5: Installation Details
Installation details H2 H3 M8x40 MM M8x12 MM M8x20 MM Insert the wheel pin (N) into Wheel (F), Base( C) and end of Bottom Tube (X) as shown. M2 M3 M8x75 MM M8x45 MM J3 J4 J5 M8x110 MM M8x80 MM E1 E2 M10x170 MM M10x170 MM... - Page 6 Installation details Installation details As shown in the picture, open the Connect the middle tube (Y) croissant rack (L) by hand until it is in to the fixing block (V) with 2 the shape of the horn. screws (E1.E2.E3) As shown in the figure, use spring screws (J1.J2.J3.J4.J5) to fix the hoop (O), croissant rack (L) and backboard (P);...
- Page 7 Installation details Installation details Take 2 WB screws in order WB1.WB2.WB3.WB3.WB2. WB4, Connect the tail hole of the support tube (short)(R1R2) to the first hole of the upper tube (Z) with a screw WB in the sequence shown in Figure 3.
- Page 8 Installation details Installation details Filling the Base(C) with water or sand to keep steady. Connect the Take 2 spring hooks (U1. upper tube (Z) U2) and hook the hookon Sand and middle tube one side of the spring to (Y) with screws the croissant rack (L) and (D1.
- Page 9 Instructions d’Utilisation en Sécurité Instructions d’Installation du Panier de Basket-Ball Afin de garantir la sécurité, l'utilisateur doit lire attentivement les instructions avant l'installation et l'utilisation, et suivre les instructions d'installation. Évitez tout dommage au produit et à l'utilisateur ! 1. Il est recommandé que 2 adultes ou plus l’installent. Il est interdit aux enfants d’installer et de grimper ;...
-
Page 10: Réglage De La Hauteur
Liste des Pièces Réglage de la hauteur N° de Pièce Quantité Remarques Connecter le panneau arrière (P) Ajustez la hauteur du support de basket-ball en appuyant sur la à l'extrémité supérieure de G1.G2 M8*12MM poignée du tube de traction dans la position du trou I'étagère à... - Page 11 Liste des Pièces H2 H3 N° de Pièce Quantité M8x40 MM M8x12 MM M8x20 MM Étagère à croissants M2 M3 M8x75 MM M8x45 MM Tube de traction à bras long J3 J4 J5 M8x110 MM M8x80 MM U1.U2 Crochet à ressort M10x170 MM M10x170 MM R3.R4...
- Page 12 Détails de l’Installation Détails de l’Installation Insérez l’axe de roue (N) dans la roue (F), la base (C) et l’extrémité du tube inférieur (X) comme indiqué. Connectez le tube central (Y) au bloc de fixation (V) à l’aide de 2 vis (E1. E2. E3) E1 E2 Comme indiqué...
- Page 13 Détails de l’Installation Détails de l’Installation Comme indiqué sur l’image, ouvrez l’étagère à croissant (L) à la main jusqu’à ce qu’il ait la forme de la corne. Comme indiqué sur la figure, utiliser les vis à ressort (J1.J2.J3.J4.J5) pour fixer le panier (O), l’étagère à croissant (L) et le panneau arrière (P) ;...
- Page 14 Détails de l’Installation Détails de l’Installation Connecter le Prendre 2 crochets à Prendre 2 vis WB dans l'ordre tube supérieur ressort (U1U2) et WB1.WB2.WB3.WB3.WB2.W (Z) et le tube accrocher le crochet d'un B4. Connecter le trou de central (Y) avec côté...
- Page 15 Détails de l’Installation Remplir la base (C) avec de l’eau ou du sable pour rester stable. Return / Damage Claim Instructions Sable DO NOT discard the box / original packaging. In case a return is required, the item must be returned in original box. Without this your return will not be accepted.


Need help?
Do you have a question about the SP38178 and is the answer not in the manual?
Questions and answers