Advertisement
Available languages
Available languages
Quick Links
Advertisement

Related Manuals for okköbi OBI-12

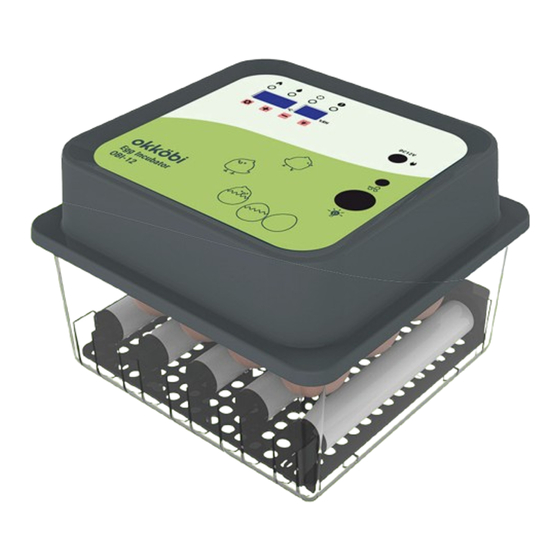
Summary of Contents for okköbi OBI-12
- Page 2 INDEX ENGLISH ......FRANÇAIS ......DEUTSCH .
- Page 3 (99.5°F/ 37.5°C and 55-60% under the conditions mentioned in the section “Before using the OBI-12 humidity). It will help the incubator to be already warm when you will set the incubator”...
- Page 4 HATCHING TURKEY EGGS ENGLISH Step 2 - Setting eggs DAY 1 Plan to set a minimum of six eggs at a time. Setting fewer eggs, especially if they have been shipped, will often result in only one or no turkey hatching. Turkeys are animals that depend on companions to be healthy and happy.
- Page 5 HATCHING TURKEY EGGS ENGLISH Step 3: Candling eggs Step 4 - Candling eggs If you observe an egg that is clear, without veins or DAY 7-10 spots, the egg is infertile or the embryo died at an early DAY 7-10 stage.
- Page 6 HATCHING TURKEY EGGS ENGLISH Step 4: Pre-hatching DAY 25 Stop egg-turning at day 25 by removing the rotating tubes from the incubator. You can place the eggs on the mesh tray, at this point, the turkey will position itself for hatching inside the egg. Step 5: Baby turkeys start hatching DAY 28 Turkeys usually hatch on DAY 28;...
- Page 7 INSTRUCTIONS fluctuations de température. Ces instructions sont un résumé, veuillez lire les sections “Avant d’utiliser l’incubateur OBI-12” et “Installation de l’incubateur / Guide de montage” Veuillez également laisser les œufs stockés se réchauffer naturellement pendant du manuel avant de commencer.
- Page 8 FAIRE ÉCLORE DES OEUFS DE DINDE FRANÇAIS Étape 2 - Mettez en place les œufs JOUR 1 Prévoyez de placer un minimum de six œufs dans la couveuse. Si vous mettez moins d’œufs, surtout s’ils ont été expédiés, vous risquez de ne voir éclore qu’un seul ou aucun dindon.
- Page 10 FAIRE ÉCLORE DES OEUFS DE DINDE FRANÇAIS Étape 4 : Pré-éclosion JOUR 25 Stoppez la rotation des œufs au jour 25 en retirant les tubes rotatifs de la couveuse. Vous pouvez placer les œufs sur le plateau grillagé, à ce moment-là, le dindon se positionnera tout seul pour l’éclosion.
- Page 11 Du die Eier einlegst (Schritt 2). Luftfeuchtigkeit beeinflussen. Wenn das der Fall ist, stelle den Inkubator bitte unter den “Vor der Benutzung des OBI-12 Inkubators” im Handbuch Wenn du Temperaturschwankungen bemerkst, mach Dir keine Sorgen: Das ist genannten Bedingungen auf.
- Page 12 TRUTHAHN EIER AUSBRÜTEN DEUTSCH Schritt 2 - Eier legen TAG 1 Plane, mindestens sechs Eier auf einmal zu brüten. Wenn Du weniger Eier brütest, besonders wenn sie auf dem Postweg zu Dir kamen, schlüpft oft nur ein oder gar kein Küken. Küken sind Tiere, die auf Gesellschaft von anderen Küken angewiesen sind, um gesund und glücklich zu sein.
- Page 13 TRUTHAHN EIER AUSBRÜTEN DEUTSCH Schritt 3- Eier kandieren Schritt 4- Eier kandieren Wenn Du ein Ei siehst, das beim Beleuchten leer aussieht, TAG 7-10 ohne Adern oder Flecken, ist das Ei unfruchtbar oder der 7. BIS 10. TAG Embryo ist in einem frühen Stadium gestorben Beim Durchleuchten eines Eies wird geprüft, ob die Schale Candling an egg means looking through the egg to see if the shell is intact and intakt ist und ob sich ein Embryo entwickelt.
- Page 14 TRUTHAHN EIER AUSBRÜTEN DEUTSCH Schritt 4: Vor dem Schlüpfen TAG 25 Stoppe die Eidrehung an Tag 25, indem Du die rotierenden Röhren aus dem Inkubator nimmst. Du kannst die Eier auf die Gitterablage legen. Zu diesem Zeitpunkt positioniert sich das Küken selbst zum Schlüpfen im Ei. Schritt 5: Die Küken schlüpfen TAG 28 Die Küken schlüpfen in der Regel am Tag 28;...
- Page 15 ISTRUZIONI temperatura. Queste istruzioni sono un riassunto, gentilmente fare riferimento alle sezioni “Prima di utilizzare l’incubatore OBI-12” e “Montaggio Inoltre, lasciate che le uova conservate si riscaldino naturalmente per 6-8 ore a dell’incubatrice” del manuale prima di iniziare. temperatura ambiente prima di metterle nell’incubatrice.
- Page 16 COVARE LE UOVA DI TACCHINO ITALIANO Passo 2 - Deporre le uova GIORNO 1 È consigliabile deporre un minimo di sei uova alla volta. La deposizione di un numero inferiore di uova, soprattutto se sono state spedite, comporta spesso la nascita di uno solo o di nessun tacchino.
- Page 17 COVARE LE UOVA DI TACCHINO ITALIANO Fase 4 - Speratura Passo 3: Speratura Se si vede un uovo chiaro senza vene o macchie, l'uovo è sterile o l'embrione è morto in una fase iniziale. GIORNO 7-10 GIORNI 7-10 È consigliabile guardare attraverso l'uovo per vedere se il guscio è...
- Page 18 COVARE LE UOVA DI TACCHINO ITALIANO Passo 4: Prima della schiusa GIORNO 25 Interrompere la rotazione delle uova al 25° giorno rimuovendo i tubi rotanti dall’incubatrice. È possibile posizionare le uova sul vassoio a rete. A questo punto, il pulcino di tacchino si posizionerà per schiudersi all’interno dell’uovo. Passo 5: Le uova di tacchino iniziano a schiudersi GIORNO 28 Le uova di tacchino di solito si schiudono al 28°...
- Page 19 Si este es el caso, por favor, prepara la incubadora según las condiciones Si notas una fluctuación de temperatura, no te preocupes. Es completamente indicadas in the section “Before using the OBI-12 incubator” in the manual. normal durante el proceso. Las crías abandonan sus nidos en determinados Si deseas desactivar el sonido de la alarma, pulsa “-”.
- Page 20 INCUBACIÓN DE HUEVOS DE PAVO ESPAÑOL Paso 2 - Poner los huevos DÍA 1 Planifica la puesta de un mínimo de seis huevos a la vez. Poner menos huevos, especialmente si han sido enviados, a menudo hará que solo nazca uno o ningún pavezno.
- Page 21 INCUBACIÓN DE HUEVOS DE PAVO ESPAÑOL Paso 4 - Poner los huevos al trasluz de las velas Paso 3 - Poner los huevos al trasluz de las velas Si observas un huevo claro, sin venas ni manchas, el huevo es infértil o el embrión ha muerto en una fase DÍA 7-10 temprana.
- Page 22 INCUBACIÓN DE HUEVOS DE PAVO ESPAÑOL Paso 4 - Preeclosión DÍA 25 Detén la rotación de los huevos el día 25 retirando los tubos giratorios de la incubadora. Puedes colocar los huevos en la bandeja de malla. En este momento, el pavezno se posicionará...
Need help?
Do you have a question about the OBI-12 and is the answer not in the manual?
Questions and answers
I lost my Manual and I’m trying to adjust the settings I can’t remember which is which