Advertisement
Advertisement
Table of Contents

Related Manuals for Asus UX363E Series


Summary of Contents for Asus UX363E Series
- Page 1 Disassembly Procedure ASUS UX363E Series Repair Manual...
- Page 2 Disassembly Procedure...
-
Page 3: Safety Precautions
Disassembly Procedure • ASUS is not responsible for direct, indirect, intentional o unintentional damages resulting from improper installation and operation. • Carefully read through this Service Guide for a look at various components of the device before performing any service and repairs. - Page 4 Disassembly Procedure • Photograph the appearance of cables, cable routing, connectors, and screws for later reference before proceeding with each step. Pre-repair checklist • Read the entire manual before starting any service procedures and follow all instructions. • Back up the data on your device. •...
-
Page 5: Service Overview
Disassembly Procedure Service Overview Please pay special attention to the cautions below to prevent any damages to the notebook and please be sure to select the appropriate tools described in this section to perform any services desired. Precautions Before you perform any service or repair on the notebook, please follow the steps below first. 1. - Page 6 Disassembly Procedure 9. Screw Appearance Criteria. If the screws have the following damaged appearance, please do not use. a. Shape deformed. b. Paint scratched off. c. Rusty. d. Damaged head – unable to drive in. e. Damaged unable to securely tighten.
- Page 7 Disassembly Procedure Appropriate Tools The illustrations below show the appropriate tools that should be used for the notebook’s service and repair. ➢ Cross Screwdriver Please accord to different screw specification to choose different screwdriver and head. Below photos are for reference only. Use a cross screwdriver to fasten/remove screws.
- Page 8 Disassembly Procedure ➢ Thickness gauge Thickness compass specification 0.05mm-1.5mm. Use it to measure the gap.
- Page 9 Disassembly Procedure Bottom Case Module The illustrations below show how to remove the Bottom Case Module. Notice: Before disassembly, please be sure to pull out adapter and disconnect the battery more than ten seconds in order to avoid IC damage. 1.
-
Page 10: Battery Module
Disassembly Procedure Parts: ⚫ Total screw * 9 ⚫ UX363JA-2K BOTTOM CASE ASSY//GUANG DEZHUCHANG * 1 ⚫ (Actual part name depends on different SKU) Battery Module The illustrations below show how to remove the Battery Module. Push back the anti-off metal then disconnect the battery cable from MB. Notice: Before disassembly, please be sure to pull out adapter and disconnect the battery more than ten seconds in order to avoid IC damage. - Page 11 Disassembly Procedure Follow below numbers to remove 8 screws on the battery module. Assembly Notice: Follow the reverse numbers to lock screws. Screw tightening torque (Kg F-cm): 2.0KG±0.2kgf. 3. Remove the Battery...
- Page 12 Disassembly Procedure Notice:Add battery mylar BATTERY SUP MYLAR//SUNYIEH02 Align left acnd right white lines Align the bottom edge of the battery Parts: ⚫ Total screw * 8 ⚫ UX363JA BATT 4CELL 67WH//SMP/4248C1F*1 ⚫ (Actual part name depends on different SKU)
- Page 13 Disassembly Procedure Speaker Speaker The illustrations below show how to remove the 1. Disconnect speaker cable from mother board and remove speaker. Please well arrange the Speaker Cable and Antenna Cable when you assemble it. Parts: ⚫ Total screw * 17 ⚫...
- Page 14 Disassembly Procedure Antenna The illustrations below show how to remove the Antenna. Remove Mylar from Keyboard module and disconnect antenna from mother board. Please well arrange the Antenna Cable and Mylar when you assemble it.
-
Page 15: Ssd Module
Disassembly Procedure Notice:When assembling the Antinna Cable, put the mylar in place before installing the absorber on the motherboard. Parts: ⚫ UX363JA WIFI MAIN ANTENNA//INPAQ/MDA-LB-02-022*1 ⚫ UX363JA WIFI AUX ANTENNA//INPAQ/MDA-LB-01-011*1 ⚫ (Actual part name depends on different SKU.) SSD Module The illustrations below show how to remove the SSD Module. -
Page 16: Thermal Module
Disassembly Procedure Parts: ⚫ UX363JA SSD M2 2280 P3X4(PERF) 1TB//WD/SDBPNTY-1T00-1002/11101000*1 ⚫ UX305UA SSD ABSORBER//LAIRD/75CA022076.010MI00*1 ⚫ (Actual part name depends on different SKU.) Thermal Module The illustrations below show how to remove the Thermal Module. Remove 7 Screws and disconnect fan cable from Thermal Module, and remove Thermal Module from Keyboard Module. - Page 17 Disassembly Procedure Notice:Please use the correct technique of taking fans in order to avoid being out of shape.
- Page 18 Disassembly Procedure Correct demonstration Wrong demonstration Parts: ⚫ Total Srews * 7 ⚫ UX363JA THE FAN//AVC*1 ⚫ UX363JA THE MOD ASSY//AURAS*1 ⚫ K401UQK TH PAD 25*12//翰興 * 1 ⚫ (Actual part name depends on different SKU.) IO Board The illustrations below show how to remove the Motherboard Module. 1.
- Page 19 Disassembly Procedure 2. Remove 2 Screws from Mother Board and disconnect IO FPC from Mother Board.
- Page 20 Disassembly Procedure Assembly notice: Please change new one, If FFC is damage during disassembly. Here are some samples of FFC damage: Parts: ⚫ Total Srews * 10 ⚫ UX363JA IO U3 BD.//R2.0 *1 ⚫ UX370UA IO FPC NUT//HONTECH/HT-G4015M20TFE * 1 ⚫...
- Page 21 Disassembly Procedure Motherboard Module The illustrations below show how to remove the Motherboard Module. 1. Disconnect Backlight Cable, Keyboard Cable, TP FFC, cable. Remove mylar from hinge and remove 4 screws from hinge.
- Page 22 Disassembly Procedure...
-
Page 23: Touchpad Module
Disassembly Procedure Touchpad Module The illustrations below show how to remove the Touchpad Module. 1. Remove 3 Screws from Touchpad Module. Screw tightening torque (Kg F-cm): 2.0KG±0.2kgf. - Page 24 Disassembly Procedure 2. Disconnect TP cable from Touchpad Module. Parts: ⚫ Total screw * 3 ⚫ UX363JA-2K TOP CASE MODULE//(NP) * 1 ⚫ UX363JA TP FFC 8P 0.5MM L80//GOO DONG/G12469-B * 1 ⚫ (Actual part name depends on different SKU.)
-
Page 25: Power Button
Disassembly Procedure Power Button The illustrations below show how to remove the Top Case Module. Remove Power Button from Keyboard Module. Parts: ⚫ UX363JA-2K POWER BUTTON//URC * 1 ⚫ (Actual part name depends on different SKU.) - Page 26 Disassembly Procedure Top Case Module The illustrations below show how to remove the Top Case Module. Remove the Top Case Module Attention:two magnets are added to the C side to prevent the magnet from not holding the A Cover when the notebook is turned 360° Parts: ⚫...
-
Page 27: Lcd Module
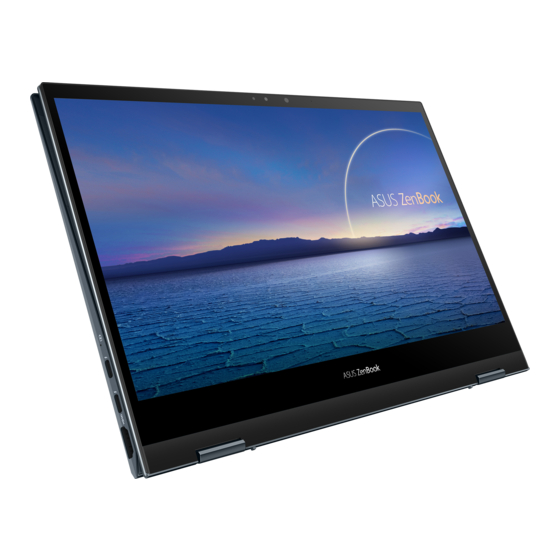
Disassembly Procedure LCD Module The illustrations below show LCD Module. Notice: The LCD Module doesn’t need todisassemblefor repair .This part has beenpacked as module. Parts: ⚫ UX363JA-2K OLED 13.3' UHD WV //SAMSUNG/ATNA33TP11-0*1 ⚫ (Actual part name depends on different SKU.)
Need help?
Do you have a question about the UX363E Series and is the answer not in the manual?
Questions and answers
What is the *iardm* smd ic