
Subscribe to Our Youtube Channel
Summary of Contents for Master-force 240-5237
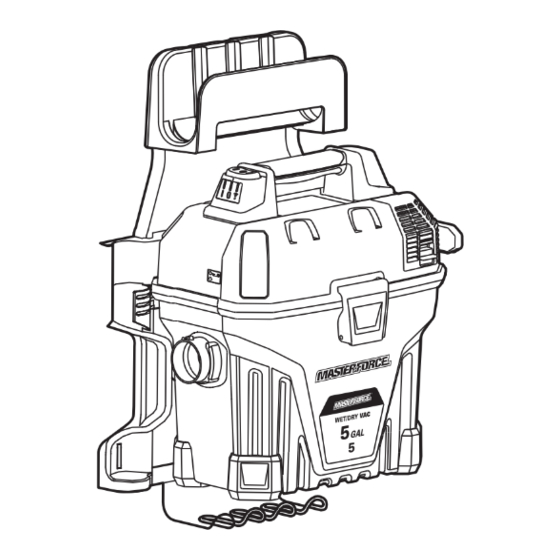
- Page 1 Wet/Dry Vacuums 240-5237 OPERATOR’S MANUAL CAUTION: To Reduce The Risk Of Injury, User Must Read And Understand Operator's Manual. Save These Instructions For Future Reference.
-
Page 2: Table Of Contents
TABLE OF CONTENTS SECTION PAGE Safety Instructions & Warnings ......................2 Double Insulation & Instructions .....................5 Extension Cords ..........................5 Unpacking & Checking Carton Contents ..................6 General Assembly Instructions .......................8 Dry Vacuum Operation .........................12 Liquid Vacuum Operation ......................14 Blower Operation ..........................16 Care & Maintenance ........................17 Installing &... -
Page 3: Safety Instructions & Warnings
SAFETY INSTRUCTIONS & WARNINGS The purpose of safety symbols is to attract our attention to possible dangers. The safety symbols, and the explanations with them, deserve your careful attention and understanding. The symbol warnings do not by themselves eliminate any danger. The instructions and warnings they give are no substitutes for proper accident prevention measures. - Page 4 SAFETY INSTRUCTIONS & WARNINGS IMPORTANT SAFETY INSTRUCTIONS FOR • To reduce the risk of health hazards from FUTURE REFERENCE vapors or dusts, do not vacuum toxic materials. Read and understand this operator's manual • D o n o t u s e o r s t o r e n e a r h a z a r d o u s and all labels on the Wet/Dry Vacuum cleaner materials.
- Page 5 SAFETY INSTRUCTIONS & WARNINGS (2) This device must accept any interference to radio communications. However, there is received, including interference that may no guarantee that interference will not occur cause undesired operation. in a particular installation. If this equipment does cause harmful interference to radio or Any changes or modifications not expressly television reception, which can be determined a p p r o v e d b y t h e p a r t y r e s p o n s i b l e f o r...
-
Page 6: Double Insulation Instructions
DOUBLE INSULATION INSTRUCTIONS T h i s We t / D r y Va c i s d o u b l e - i n s u l a t e d , A DOUBLE-INSULATED APPLIANCE, NOR eliminating the need for a separate grounding SHOULD A MEANS FOR GROUNDING BE system. -
Page 7: Unpacking & Checking Carton Contents
UNPACKING & CHECKING CARTON CONTENTS Remove all contents from the box. Remove the power head and take out any contents inside the collection tank. Check each item against the carton contents list. Hose Storage Rack Hose Storage Support Wall Mount Rack Vac Assembly Extension Wands Wire Accessory Rack... - Page 8 UNPACKING & CHECKING CARTON CONTENTS Hose Storage & Wall Protector Handle Power Switch Accessory Power Head Storage Blower Port Cover Mounting Rack Latch Vacuum Port Collection Tank Extension Wand Storage Accessory Storage Page 7...
-
Page 9: General Assembly Instructions
GENERAL ASSEMBLY INSTRUCTIONS WARNING: 4. Remove the contents from inside the T O R E D U C E T H E collection tank. Make sure you have all R I S K O F E L E C T R I C S H O C K - D O N O T contents as listed on page 6 (Fig. - Page 10 GENERAL ASSEMBLY INSTRUCTIONS 7. Insert the steel rod with hose storage rack MOUNTING THE VACUUM ONTO THE RACK into the two holes located on the top of the 1. Your vacuum comes ready for dry vacuum mounting rack (Fig. 7). cleaning.
- Page 11 GENERAL ASSEMBLY INSTRUCTIONS Fig. 12 Fig. 15 5. Insert the locking end of the hose into the Fig. 13 vacuum port and lock into place (Fig. 16). Fig. 16 3. Mount the vacuum onto the mounting rack by aligning the vac hanging hook on the rear with slot on the mounting rack and slide downward until it locks (Fig.
- Page 12 GENERAL ASSEMBLY INSTRUCTIONS POLARIZED PLUG 2. Lift the vacuum up and out of the rack by the handle (Fig. 2). To reduce the risk of electrical shock, this appliance has a polarized plug (one blade wider Fig. 2 than the other). This plug will fit in a polarized outlet only one way.
-
Page 13: Dry Vacuum Operation
DRY VACUUM OPERATION DRY VACUUMING stops against the power head (Fig. 2). Your Wet/Dry Vac comes with the cartridge WARNING: B E S U R E T O R E A D , filter pre-installed. For filter installation UNDERSTAND, AND APPLY INFORMATION, instructions, see page 18. - Page 14 DRY VACUUM OPERATION O P E R A T I N G I N S T R U C T I O N S : D R Y VACUUMING Fig. 7 5. Insert the locking end of the hose into the vacuum port and lock in place.
-
Page 15: Liquid Vacuum Operation
LIQUID VACUUM OPERATION LIQUID VACUUMING 2. Remove the cartridge filter, then carefully install the foam wet filter over the filter cage WARNING: B E S U R E T O R E A D , (Fig. 2). and place the power head back UNDERSTAND, AND APPLY INFORMATION, on the collection tank. - Page 16 LIQUID VACUUM OPERATION I M P O R T A N T ! W h e n v a c u u m i n g l a r g e quantities of liquids, do not immerse the nozzle Fig. 5 completely in the liquid;...
-
Page 17: Blower Operation
BLOWER OPERATION This Wet/Dry Vac has blowing capabilities. To into position. (fig. 3) use the blower feature follow the instructions Fig. 3 listed. WARNING: ALWAYS WEAR SAFETY GOGGLES COMPLYING WITH ANSI Z87.1 (or in Canada, CSAZ94.3) BEFORE USING BLOWER. CAUTION: K E E P B Y S T A N D E R S CLEAR FROM BLOWING DEBRIS. -
Page 18: Care & Maintenance
CARE & MAINTENANCE WARNING: 5. Clear all dirt or debris from the collection ALWAYS DISCONNECT tank and hose (Fig. 4). THE PLUG FROM THE POWER OUTLET BEFORE REMOVING THE POWER HEAD Fig. 4 FROM THE COLLECTION TANK. 1. Verify that the power cord is disconnected from the outlet (Fig. -
Page 19: Installing & Cleaning Cartridge Filter
INSTALLING & CLEANING THE CARTRIDGE FILTER Installing Cartridge Filter Removing and Cleaning Cartridge Filter 1. Unlock and remove the filter retainer by 1. Verify that the power cord is disconnected turning retainer handle counterclockwise. from the outlet (Fig. 1). 2. Carefully remove the cartridge filter by sliding it off the filter cage (Fig. -
Page 20: Installing & Cleaning Foam Wet Filter
INSTALLING & CLEANING THE FOAM WET FILTER Installing Foam Wet Filter Cleaning Foam Wet Filter 1. Verify that the power cord is disconnected 1. With the removed power head in an upside from the outlet (Fig. 1). down position, carefully remove foam wet filter (Fig. -
Page 21: Resetting The Remote Control
RESETTING THE REMOTE CONTROL 1. Have the remote control accessible. Set the 4. If the “ON” button is not pressed and held power switch on the vacuum to the remote within a 15 second window, the reset will control position “ ”... - Page 22 RESETTING THE REMOTE CONTROL 4. Lift the foam cover to expose the battery 7. Slide the remote cover so that the white and remove the old battery (Fig. 5). triangle is over the locked symbol “ ” (Fig. 9 & 10) Fig.
-
Page 23: Troubleshooting
TROUBLESHOOTING WARNING: ALWAYS DISCONNECT THE PLUG FROM THE POWER OUTLET BEFORE REMOVING THE POWER HEAD FROM THE COLLECTION TANK. Symptom Possible Causes Corrective Action 1) Check power supply – cord, 1) No power supply. breakers, fuses. 2 ) U n p l u g a n d c h e c k t h e power cord. -
Page 24: Exploded View & Parts List
EXPLODED VIEW & PARTS LIST Description Part # Description Part # 1 Power Head Assembly 11 Cartridge Filter 551301101 2 Latch Assembly 551001176 12 Concentrator Nozzle 551001182 3 Vacuum Port Assembly 551001153 13 Utility Nozzle 240-5262 4 Collection Tank 14 Extension Wand 240-5264 5 Bumper Foot 551001177... - Page 25 NOTES Page 24...
- Page 26 NOTES Page 25...
-
Page 27: Warranty
Wet/Dry Vacuums LIMITED LIFETIME WARRANTY ® This MASTERFORCE brand wet/dry vacuum carries a Limited Lifetime Warranty to the original purchaser. The Limited Lifetime Warranty lasts for the lifetime of your wet/dry vac. The normal run life of the wet/dry vacs will equate to many years of normal usage in a household environment. - Page 28 01/2022 2022 Menard, Inc., Eau Claire, Wl 54703...
Need help?
Do you have a question about the 240-5237 and is the answer not in the manual?
Questions and answers
Having trouble finding filter that fits this vacuum. I see in the owner's manual the part # 551301101, but that number doesn't help me at Menards or Amazon. I have tried twice to buy filters that state they fit Masterforce 5-16 gallon vac's but those filters are too large. How/where can I get replacement filters for this vac?