
Related Manuals for National Geographic EXPLORER 7


Summary of Contents for National Geographic EXPLORER 7
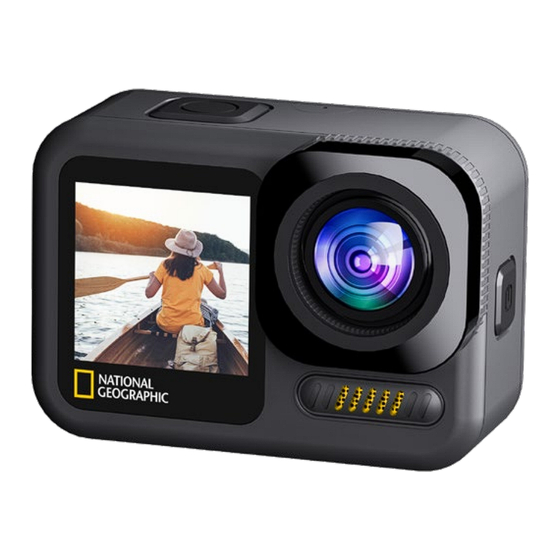
- Page 1 E X P LO R E R 7 ULTRA HD | WIFI Operating instructions Instrucciones de uso Bedienungsanleitung Art.Nr: 9683600...
-
Page 2: Manual Download
Manual Download ¿Desearía recibir unas instrucciones de uso completas sobre este producto en un idioma determinado? Entonces visite nuestra página web utilizando el siguiente enlace (código QR) para ver las versiones disponibles. Visit our website via the following QR Code or web link to find further information on this product or the available translations of these instructions. -
Page 3: Service And Warranty
FULL MANUAL DOWNLOAD: www.bresser.de/download/9683600 APP DOWNLOAD „iSmart DV2“: SERVICE AND WARRANTY: www.bresser.de/warranty_terms Operating instructions ............. 4 Instrucciones de uso ............. 24 Apple and the Apple logo are trademarks of Apple Inc., registered in the U.S. and other countries. App Store is a service mark of Apple Bedienungsanleitung ............. -
Page 4: General Warnings
About this Instruction Manual cables and connections for damage. Never use a damaged unit or a unit with damaged power cables. Damaged parts must be This Quick Start guide is not intended to replace the more exchanged immediately by an authorised service centre. detailed user manual. -
Page 5: Ec Declaration Of Conformity
EC Declaration of Conformity The integrated battery must only be removed for disposal. Opening the device housing can damage the Bresser GmbH has issued a “Declaration of Conformity” unit. in accordance with applicable guidelines and corre- Drain the battery completely before disposal. Remove all the sponding standards. -
Page 6: Scope Of Delivery
Scope of delivery Camera USB-C cable Wireless Microphone / Camera housing 1/4” Tripod adapter (male/female) Bicycle mount and straps Thumb knob and screwdriver? Battery pack Retaining clip for Base mount Thumb knob and Multifunction mount Base for flat surface + sticker... -
Page 7: First Steps
First Steps Remove the films from the lens and screen before use. Installing or removing the battery A. Open the battery cover. B. Correctly install the battery into the camera. C. Close the battery cover. Battery cover door Charging A. Charging can be done by connecting the action camera to a computer via the usb cable. B. -
Page 8: Inserting Micro Sd Card
Inserting Micro SD card* Notes: • Speed class: U3 (UHS-III rating at least for 4K Video resolution ) • Please insert the memory card • Capacity up to 128 GB correctly to avoid damage. • To remove: Press the Micro SD card with your fingernail. The •... -
Page 9: Front Display
Functions 1. Front display 5. Micro SD-Card port (behind battery cover) 2. Lens 6. Battery cover door (Pull down and open) 3. Speaker 7. USB-C port (behind battery cover) 4. Battery cover... - Page 10 8. Indicator 9. Display (Touch screen) 10. Power/Mode button: Long press: Power On/off Short press: Switch between video and photo mode...
- Page 11 11. Shutter button: Short press: Shutter button / Select button Long press: Switch to front display 12. Internal microphone...
- Page 12 How to use the Base mount Base mount (e.g. for helmet mount): Mount examples: Base mount Helmet mount Bicycle mount ...
- Page 13 Mode selection Delete videos and photos on your camera 1. Tap on the icon at the bottom centre of the screen or swipe up 1. Enter playback mode. on the touchscreen. 2. Choose Video playback or photo gallery. 2. Choose a mode: Video, Photo, Burst photo, Time lapse video, 3.
-
Page 14: Mode Overview
Mode overview There are 6 shooting modes: Video Mode, Photo Mode, Burst Photo Mode, Time Lapse Video Mode, Time Lapse Photo Mode and PreRe- cord Mode. Video mode Video mode is the default mode when you switch on the camera. Press the shutter button in video mode and the camera starts recording video;... -
Page 15: Photo Mode
Photo mode Tap on the icon at the bottom centre of the screen or press the power/mode button [ ] once to switch to photo mode after switching on the camera. In photo mode, press the shutter button and the camera will take a photo. In video or photo mode, swipe quickly from right to left or left to right on the touchscreen to switch between video and photo mode. -
Page 16: Burst Photo Mode
Burst photo mode Burst takes up to 15 photos per time and is therefore ideal for capturing fast-moving activities. In burst photo mode, press the shutter button and the camera continuously takes 3, 7 or 15 photos. Time lapse video mode Time-lapse video creates a video from images taken at specific time intervals. -
Page 17: Prerecord Mode
Time lapse photo mode Time-lapse photo takes a series of photos at specific intervals. Use this mode to take photos of any activity and then select the best ones later. In time-lapse photo mode, press the shutter button and the camera will take a series of photos at the set interval. PreRecord mode If you activate the PreRecord function, the camera can start recording videos a few seconds before you press the shutter button The PreRecord function is ideal for recording exciting moments during unexpected activities, such as fishing. -
Page 18: Setting Modes
Setting modes Video Setting mode Make sure that you are in video, time-lapse or pre-recording mode. Tap the settings icon to access the settings mode for video, time-lapse video or pre-recording. Notes: • When capturing video at high resolution or high frame rates such as 4K 60/30fps, the camera may become hot and consume more power, which is normal. - Page 19 • If you use Time-Lapse Video function, Loop Video, Slow Motion and Fast Motion will not be available automatically. • If you want to set Time Lapse Duration, please turn on Time Lapse Interval first. • Please select 1080P 120FPS, 720P 240FPS or 720P 120FPS when you want to record slow motion movie. •...
-
Page 20: System Setting Mode
System Setting mode Make sure that you are in video or photo mode. Tap the settings icon to enter video settings mode or photo settings mode and then tap the system settings icon to enter system settings mode: Notes: • Snorkeling mode provides colour correction while capturing footage in blue water or clear freshwater at depths of 1.5 to 10 m (5 to 33ft). - Page 21 Playback videos and photos on your camera 1. Turn on the camera. 2. Tap the playback icon at the left corner of the screen to enter playback mode. 3. Tap the video file icon or photo file icon. 4. Tap the forward or backward icon to playback video or photo files. 5.
- Page 22 2-IN-1 Wireless transmitter 4. Work indicator light: blue light, red light • Blue light: working state/fully charged The 2-in-1 transmitter uses low-latency 2.4G wireless transmissi- • Red light: charging state on technology that is compatible with wireless microphone and 5. Pairing indicator Light wireless remote control functions.
-
Page 23: Technical Data
Technical data Display 2 Zoll (5.08 cm) touchscreen display + 1.5" (3.8 cm) front display Lens 170° wide angle Waterproof Waterproof up to 20 m (IP68) Resolution of photos 30 MP*, 20 MP, 16 MP, 14 MP, 12 MP, 8 MP, 5 MP Photo format .JPG Resolution of videos... -
Page 24: Advertencias Generales
Sobre este manual de instrucciones erlo en funcionamiento, compruebe que el aparato, los cables y las conexiones no estén dañados. Nunca utilice una unidad Antes de utilizar el aparato, lea detenidamente las indica- dañada o con cables de alimentación dañados. Las piezas ciones de seguridad y el manual de instrucciones. -
Page 25: Declaración De Conformidad Ce
Declaración de conformidad CE La batería integrada solo debe retirarse para su reciclaje. Abrir la carcasa del aparato puede dañarlo. Bresser GmbH ha emitido una Declaración de Conformidad Vacíe la batería por completo antes de desecharla. Retire de acuerdo con las directrices y normas correspondientes todos los tornillos de la carcasa y abra la carcasa del aparato. -
Page 26: Volumen De Suministro
Volumen de suministro Cámara Cable USB-C Micrófono inalámbrico y Carcasa de la cámara Adaptador de trípode de 1/4" (macho/hembra) y correas Montaje para bicicleta Paquete de batería Pomo y llave Clip para montaje de la base Pomo y soporte multifunción Base para superficie plana + adhesivo... -
Page 27: Primeros Pasos
Primeros pasos Retire las películas del objetivo y de la pantalla antes de utilizarlos. Instalación o extracción de la batería A. Retire la tapa del compartimento de batería. B. Instale correctamente la batería en la cámara. C. Cierre la tapa del compartimento para la batería. Tapa de la batería Carga A. -
Page 28: Encendido Y Apagado De La Cámara
Inserción de la tarjeta Micro SD* Notas: • Clase: U3 (Clasificación UHS-III al menos para resolución de • Inserte la tarjeta de memoria vídeo 4K). correctamente para evitar daños. • Capacidad de hasta 128 GB • Formatee la tarjeta de memoria antes •... - Page 29 Funciones 1. Pantalla frontal tapa de la batería) 2. Lentes 6. Puerta de la tapa de la batería (Tire hacia 3. Altavoz abajo y abra) 4. Tapa de la batería 7. Puerto USB-C (detrás de la tapa de la 5.
- Page 30 8. Indicador 9. Pantalla (táctil) 10. Botón de encendido/modo: Pulsación larga: Encendido/Apagado Pulsación corta: Cambiar entre modo vídeo y foto...
- Page 31 11. Botón del obturador: Pulsación corta: Botón del obturador / Botón de selección Pulsación larga: Cambia a la pantalla frontal 12. Micrófono interno...
- Page 32 Como usar la base del soporte Instalación en una base (p.e. para el soporte del casco): Montaje - Ejemplos: Montaje de la base Montaje de la carcasa Soporte para bicicleta ...
-
Page 33: Modo De Configuración
Selección de modo Eliminar videos y fotos en tu cámara 1. Toca el icono en la parte inferior central de la pantalla o deslizar hacia arriba en la pantalla táctil. 1. Entra en el modo de reproducción. 2. Elige un modo: Video, Foto, Foto en ráfaga, Video en lapso de 2. -
Page 34: Modo Vídeo
Modos Hay 6 modos de disparo: Modo Vídeo, Modo Foto, Modo Foto Ráfaga, Modo Vídeo Cámara Rápida, Modo Foto Cámara Rápida y Modo PreGrabación. Modo vídeo El modo vídeo es el modo predeterminado al encender la cámara. Pulse el botón del obturador en modo vídeo y la cámara comen- zará... - Page 35 Modo foto Pulse en el icono en el centro inferior de la pantalla o presione el botón de encendido/modo [ ] una vez para cambiar a modo foto después de encender la cámara. En modo foto, presione el botón del obturador y la cámara tomará...
- Page 36 Modo foto ráfaga El modo ráfaga permite tomar hasta 15 fotos por vez y es ideal para capturar actividades de movimiento rápido. En modo foto ráfaga, presione el botón del obturador y la cámara tomará continuamente 3, 7 o 15 fotos. Modo vídeo cámara rápida El vídeo cámara rápida crea un vídeo a partir de imágenes tomadas a intervalos de tiempo específicos.
- Page 37 Modo foto cámara rápida La foto cámara rápida toma una serie de fotos a intervalos específicos. Utilice este modo para tomar fotos de cualquier actividad y luego seleccionar las mejores más tarde. En modo foto cámara rápida, presione el botón del obturador y la cámara tomará...
- Page 38 Configuración de modos Modo de configuración de vídeo Asegúrese de estar en modo vídeo, cámara rápida o pregrabación. Pulse el icono de configuración para acceder al modo de config- uración de vídeo, vídeo de cámara rápida o pregrabación. Notas: • Al capturar vídeo en alta resolución o altas tasas de fotogramas como 4K 60/30fps, es normal que la cámara se caliente y consuma más energía.
- Page 39 • El Vídeo de cámara rápida se captura sin audio. • Si utiliza la función de Vídeo de cámara rápida, la cámara no puede grabar el vídeo a más de 30fps. • Si utiliza la función de Vídeo de cámara rápida, Vídeo en Bucle, Movimiento Lento y Movimiento Rápido no estarán disponibles au- tomáticamente.
- Page 40 • Si desea utilizar la Duración de cámara rápida, active primero el intervalo de Foto de cámara rápida. • Si utiliza la función de Foto Ráfaga, entonces Foto de cámara rápida, Duración de cámara rápida y Exposición Larga no estarán dis- ponibles automáticamente.
- Page 41 Hay 2 modos de reproducción: modo de reproducción de vídeo y modo de reproducción de foto. En modo de reproducción, puede reproducir o eliminar su contenido en la cámara. Reproduzca vídeos y fotos en su cámara 1. Encienda la cámara. 2.
- Page 42 Nota: Si su tarjeta de memoria contiene mucho contenido, podría 3. Botón de grabación tardar un minuto en cargarlo. • Comenzar la grabación: Cuando la cámara está encendida, presione brevemente para comenzar a grabar. • Detener la grabación: Durante el proceso de grabación, Transmisor inalámbrico 2 en 1 presione brevemente para detener la grabación.
-
Page 43: Datos Técnicos
Datos técnicos Pantalla Pantalla táctil de 2 pulgadas (5.08 cm) + pantalla frontal de 1.5" (3.8 cm) Lente Ángulo amplio de 170° Impermeable Impermeable hasta 20 m (IP68) Resolución de fotos 30 MP*, 20 MP, 16 MP, 14 MP, 12 MP, 8 MP, 5 MP Formato de foto .JPG Resolución de vídeos... -
Page 44: Allgemeine Informationen
Allgemeine Informationen knicken, quetschen oder zerren. Schützen sie Kabel vor schar- fen Kanten und Hitze. Überprüfen Sie das Gerät, die Kabel und Diese Schnellstart-Anleitung ersetzt nicht die ausführliche Anschlüsse vor Inbetriebnahme auf Beschädigungen. Beschä- Bedienungsanleitung! Lesen Sie vor Benutzung des Geräts digtes Gerät oder ein Gerät mit beschädigten stromführenden aufmerksam die Sicherheitshinweise und die ausführliche Teilen niemals in Betrieb nehmen! Beschädigte Teile müssen... -
Page 45: Eg-Konformitätserklärung
• Reinigen Sie die Schutzhülle nach jedem Gebrauch mit klarem, Entsorgung alter Geräte oder Batterien, die nach dem sauberem Wasser und trocknen Sie es gründlich. 01.06.2006 produziert wurden, erfahren Sie beim kommunalen Entsorgungsdienstleister oder Umweltamt. EG-Konformitätserklärung Der integrierte Akku darf nur zur Entsorgung entnommen Eine „Konformitätserklärung“... - Page 46 Lieferumfang Kamera USB-C Kabel Funkmikrofon / Kameragehäuse 1/4” Stativadapter (male/female) Fahrradhalterung Akku Flügelschraube und Schraubenzieher Basis-Verbindungsstück Flügelschraube und Multifunktions-Verbindungsstück Basis-Halterungen für flache Oberflächen + Klebepads...
-
Page 47: Erste Schritte
Erste Schritte Entfernen Sie vor dem Gebrauch die Folien von Linse und Bildschirm. Akku einsetzen oder entfernen A. Öffnen Sie die Batterieabdeckung. B. Akku in korrekter Richtung einsetzen. C. Batterieabdeckung schließen. Klappe der Batterieabdeckung Akku aufladen A. Der Akku kann über das USB Kabel am Computer aufgeladen werden. B. - Page 48 Micro SD-Speicherkarte einsetzen* Hinweise: • Geschwindigkeitsklasse: U3 (UHS-III rating at least for 4K • Bitte setzen Sie die Speicherkarte Video resolution ) richtig ein, um Schäden zu vermeiden. • Kapazität bis zu 128 GB • Bitte formatieren Sie die Speicherkarte, •...
- Page 49 Funktionen 1. Bildschirm vorne abdeckung) 2. Linse 6. Batteriefachabdeckung (nach unten 3. Lautsprecher ziehen und öffnen) 4. Batterieabdeckung 7. USB-C Anschluss (hinter der Batterieab- 5. Micro SD Steckplatz (hinter der Batterie- deckung)
- Page 50 8. Indikator 9. Bildschirm (Touchscreen) 10. Ein-/Aus-Taste / Modus-Taste: Lange drücken: Einschalten/Ausschalten Kurz drücken: Umschalten zwischen Video- und Fotomodus...
- Page 51 11. Auslöser-Taste: Kurz drücken: Auslöser / Auswahltaste Lange drücken: Zum vorderen Bildschirm wechseln 12. Internes Mikrofon...
- Page 52 Verwendung der Halterungen Befestigung an Basis-Halterung (z.B. Helm-Montierung): Montierungen - Beispiele: Basis-Montierung Helm-Montierung Fahrrad-Montierung ...
- Page 53 Modusauswahl Videos und Fotos auf Ihrer Kamera löschen 1. Tippen Sie auf das Symbol unten in der Mitte des Bildschirms oder wischen Sie auf dem Touchscreen nach oben. 1. Rufen Sie den Wiedergabemodus auf. 2. Wählen Sie einen Modus: Video, Foto, Serienbild, Zeitraffervideo, Zeitraf- 2.
- Page 54 Modusübersicht Es gibt 6 Aufnahmemodi: Videomodus, Fotomodus, Serienbildmodus (Burst), Zeitraffer-Videomodus, Zeitraffer-Fotomodus und Vorauf- nahmemodus (PreRecord). Videomodus Der Videomodus ist der Standardmodus, wenn Sie die Kamera einschalten. Drücken Sie die Auslösetaste im Videomodus und die Kamera beginnt mit der Videoaufnahme. Drücken Sie die Auslösetaste erneut, um die Videoaufnahme zu beenden.
- Page 55 Fotomodus Tippen Sie auf das Symbol in der unteren Bildschirmmitte oder drücken Sie einmal die Ein-/Aus/Modus-Taste [ ], um nach dem Einschalten der Kamera in den Fotomodus zu wechseln. Drücken Sie im Fotomodus die Auslösetaste und die Kamera nimmt ein Foto auf. Wischen Sie im Video- oder Fotomodus schnell von rechts nach links oder von links nach rechts auf dem Touchscreen, um zwischen Video- und Fotomodus zu wechseln.
- Page 56 Serienbildmodus (Burst) Der Serienbildmodus nimmt bis zu 15 Fotos pro Aufnahme auf und ist daher ideal für die Aufnahme von sich schnell bewegenden Aktivitäten. Drücken Sie im Serienbildmodus die Auslösetaste und die Kamera nimmt kontinuierlich 3, 7 oder 15 Fotos auf. Zeitraffer-Videomodus Der Zeitraffer erstellt ein Video aus Bildern, die in bestimmten Zeitintervallen aufgenommen wurden.
- Page 57 Zeitraffer-Fotomodus Der Zeitraffer macht eine Reihe von Fotos in bestimmten Abständen. Verwenden Sie diesen Modus, um Fotos von Aktivitäten zu machen und dann später die besten auszuwählen. Drücken Sie im Zeitraffer-Fotomodus die Auslösetaste und die Kamera nimmt im einge- stellten Intervall eine Reihe von Fotos auf. Voraufnahmemodus (PreRecord) Wenn Sie die Voraufnahmemodus-Funktion aktivieren, kann die Kamera einige Sekunden vor dem Drücken der Auslösetaste mit der...
- Page 58 Einstellungsmodus Videoeinstellungsmodus Stellen Sie sicher, dass Sie sich im Video-, Zeitraffer- oder Voraufnahmemodus befinden. Tippen Sie auf das Einstellungssymbol um auf den Einstellungsmodus für Video, Zeitraffervideo oder Voraufnahme zuzugreifen. Notizen • Bei der Aufnahme von Videos mit hoher Auflösung oder hohen Bildraten wie 4K 60/30fps kann die Kamera heiß werden und mehr Strom verbrauchen, was normal ist.
- Page 59 • Wenn Sie die Time-Lapse Video-Funktion verwenden, sind Loop Video, Zeitlupe und Fast Motion nicht automatisch verfüg- bar. • Wenn Sie die Zeitrafferdauer einstellen möchten, aktivieren Sie bitte zuerst das Zeitrafferintervall. • Bitte wählen Sie 1080P 120FPS, 720P 240FPS oder 720P 120FPS, wenn Sie Zeitlupenfilme aufnehmen möchten. •...
- Page 60 Systemeinstellungsmodus Stellen Sie sicher, dass Sie sich im Video- oder Fotomodus befinden. Tippen Sie auf das Einstellungssymbol , um in den Video- oder Fotoeinstellungenmodus zu gelangen, und tippen Sie dann auf das Systemeinstellungensymbol , um in den Systemeinstellungenmo- dus zu gelangen: Notizen: •...
- Page 61 Wiedergabe von Videos und Fotos auf Ihrer Kamera 1. Die Kamera einschalten. 2. Tippen Sie auf das Wiedergabesymbol in der linken Ecke des Bildschirms, um in den Wiedergabemodus zu gelangen. 3. Tippen Sie auf das Videodateisymbol oder Fotodateisymbol. 4. Tippen Sie auf das Vorwärts- oder Rückwärtssymbol, um Video- oder Fotodateien wiederzugeben. 5.
-
Page 62: Kopplung (Pairing)
2-IN-1 Funksender 4. Arbeitsanzeigeleuchte: blaues Licht, rotes Licht • Blaulicht: Betriebszustand/voll aufgeladen Der 2-in-1-Sender verwendet eine 2,4G-Funkübertragungstech- • Rotlicht: Ladezustand nologie mit geringer Latenz, die mit drahtlosen Mikrofon- und 5. Kopplungsanzeige Licht Funkfernsteuerungsfunktionen kompatibel ist. • Warten auf Pairing: Das blaue Licht blinkt •... -
Page 63: Technische Daten
Technische Daten Bildschirm 2 Zoll (5,08 cm) Touchscreen-Display + 1,5" (3,8 cm) Frontdisplay Linse 170° Weitwinkel Wasserdicht Wasserdicht bis 20 m (IP68) Auflösung von Fotos 30 MP*, 20 MP, 16 MP, 14 MP, 12 MP, 8 MP, 5 MP Fotoformat .JPG Auflösung von Videos 5K* 30 fps (EIS)/4K 60 fps (EIS)/30 fps (EIS)/2,7K 60 fps (EIS)/30 fps (EIS)/2K 30 fps (vertikal... - Page 64 © National Geographic Partners LLC. All rights reserved. NATIONAL GEOGRAPHIC and Yellow Border Design are trademarks of National Geographic Society, used under license. Bresser GmbH Gutenbergstr. 2 · DE-46414 Rhede www.bresser.de · service@bresser.de Errors and technical changes reserved. • Reservado el derecho a errores y modificaciones técnicas.
Need help?
Do you have a question about the EXPLORER 7 and is the answer not in the manual?
Questions and answers
No puedo reproducir videos en el móvil
You may not be able to play videos on your National Geographic EXPLORER 7 mobile device for several reasons:
1. Unsupported Format – The camera records videos in H.264 format with .MOV or .MP4 extensions. If your mobile device does not support these formats, the videos may not play.
2. Resolution Compatibility – The camera records in high resolutions like 5K, 4K, and 2.7K. If your mobile device does not support these resolutions, playback may not work.
3. Memory Card Compatibility – If you are trying to play videos directly from the microSD card, ensure your device supports SDHC Class 10 or higher cards up to 128 GB.
4. Playback Method – If inserting the memory card into the mobile device, playback resolution depends on the device’s capability. Some devices may not support direct playback of high-resolution videos.
5. File Corruption – If the video file was not recorded or transferred properly, it may not play.
Try converting the video to a lower resolution or a more compatible format, or use a media player that supports H.264 .MOV/.MP4 files.
This answer is automatically generated