Table of Contents
Advertisement
Quick Links
Advertisement
Table of Contents

Subscribe to Our Youtube Channel
Related Manuals for AEG LTR8E363E


Summary of Contents for AEG LTR8E363E
- Page 1 EN User Manual | Washing Machine LTR8E363E aeg.com\register...
-
Page 2: Table Of Contents
FOR PERFECT RESULTS Thank you for choosing this AEG product. We have created it to give you impeccable performance for many years, with innovative technologies that help make life simpler – features you might not find on ordinary appliances. Please spend a few minutes reading to get the very best from it. -
Page 3: Safety Information
SAFETY INFORMATION Before beginning the installation and use of this appliance, carefully read the supplied instructions. The manufacturer is not responsible for any injuries or damage that are the result of incorrect installation or usage. Always keep the instructions in a safe and accessible location for future reference. -
Page 4: Safety Instructions
• This appliance is designed for single household domestic use in an indoor environment. • This appliance may be used in, offices, hotel guest rooms, bed & breakfast guest rooms, farm guest houses and other similar accommodation where such use does not exceed (average) domestic usage levels. -
Page 5: Electrical Connection
• Always take care when moving the • Connect the mains plug to the mains appliance as it is heavy. Always use safety socket only at the end of the installation. gloves and enclosed footwear. Make sure that there is access to the •... -
Page 6: Product Description
• Make sure that all metal objects are • Concerning the lamp(s) inside this product removed from the laundry. and spare part lamps sold separately: These lamps are intended to withstand 2.5 Service extreme physical conditions in household appliances, such as temperature, •... -
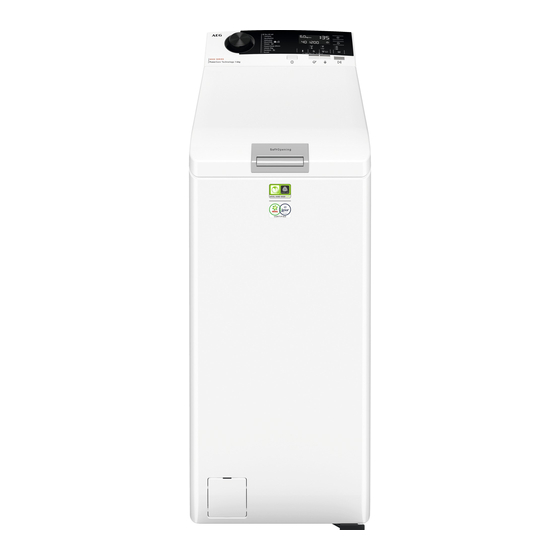
Page 7: Appliance Overview
3.2 Appliance overview 10 11 Control panel Drain hose Mains cable Lid push handle Transit bolts Drain pump filter Hose support Lever to move the appliance Rating plate Feet for levelling the appliance Inlet hose Information for register product. The rating plate reports the model name The info label reports the model name (A), (A) , product number (B), electrical ratings (C) product number (B ) and serial number (C). -
Page 8: Technical Data
4. TECHNICAL DATA Dimension Width/ Height/ Total depth 39,7 cm /90,3 cm /59,9 cm Electrical connection Voltage 230 V Overall power 2100 W Fuse 10 A Frequency 50 Hz Level of protection against ingress of solid particles and moisture ensured IPX4 by the protective cover, except where the low voltage equipment has no protection against moisture... -
Page 9: The Inlet Hose
We recommend that you keep the packaging and the transit bolts for any transport of the appliance. Adjust the appliance correctly to prevent vibration, noise and movement of the appliance when it operates. WARNING! Do not put cardboard, wood or equivalent materials below the appliance feet to adjust the level. -
Page 10: Water Drainage
5.3 Water drainage min.600 mm max.1000 mm The drain hose should stay at a height of no less than 600 mm and not more than 1000 mm. You can extend the drain hose to maximum 4000 mm. Contact the authorised service centre for the other drain hose and the extension. -
Page 11: Control Panel
For any electrical work required to install this failure to comply with the above safety appliance, contact our Authorised Service precaution. Centre. The manufacturer does not accept any responsibility for damage or injury through 6. CONTROL PANEL 6.1 Control panel description 12 11 On/Off push button •... - Page 12 6.2 Display The indicator flashes during the laundry load estimation. Maximum laundry indicator. It flashes when the laundry load exceeds the maximum de‐ clared load of the selected programme. Lid locked indicator. Delay start indicator. The digital indicator can show: •...
-
Page 13: Programme Chart
No spin speed indicator. Spin phase is off, the appliance performs only the draining phase. Rinse hold indicator. Extra silent indicator. Time saving indicator. 7. PROGRAMME CHART Washing programmes Programme Programme description White cotton and fast-coloured cotton. Normally soiled items. The energy Eco 40-60 consumption decreases and the time of the washing programme is extended, ensuring good washing results. - Page 14 Programme Programme description Do not use fabric softener and make sure that there is no softener residue in the detergent dispenser. Outdoor clothing, technical, sport fabrics, waterproof and breathable jack‐ ets, shell jackets with a removable fleece or inner insulation. The recom‐ mended laundry load is 2 kg.
-
Page 15: Programme Options Compatibility
Programme Default temperature Reference spin speed Maximum load Temperature range Spin speed range 1 kg Steam 30 °C 1300 rpm 3 kg 60 °C - 30 °C 1300 rpm - 400 rpm PowerClean 59min 30 °C 1200 rpm 3 kg 40 °C - 30 °C 1200 - 400 rpm 20min 3kg... - Page 16 Options ■ ■ Stain ■ ■ Prewash ■ ■ ■ ■ ■ Extra Rinse ■ ■ ■ ■ ■ ■ ■ ■ Only Rinse ■ Anti-allergy ■ ■ ■ ■ Time Save ■ ■ ■ ■ ■ ■ ■ ■ ■...
-
Page 17: Options
▲ = Recommended -- = Not recommended 7.1 Woolmark Wool Care - Green The wool wash cycle of this machine has been approved by The Woolmark Company for the washing of wool gar‐ ments labelled as «hand wash» provided that the prod‐ ucts are washed according to the instructions on the gar‐... - Page 18 • In case of smaller load, touch this button The display shows the indicator twice to set an extra quick programme. The lid stays locked. The drum turns The display shows the indicator regularly to reduce creasing. You must drain the water to unlock the lid. Touch the Start/Pause button: the appliance performs only the draining This option can also be used to shorten...
-
Page 19: Delay Start
The indicator flashes on the display during steam phase. This option can increase the programme duration and is not The drum performs smooth movements for available with a temperature lower about 30 minutes. The duration of the steam phase changes accordingly to the selection. than 40 °C. -
Page 20: Settings
9. SETTINGS 9.1 Acoustic signals 9.4 Permanent Extra Rinse To deactivate the acoustic signals when the With this option you can permanently have an extra rinse when you set a new programme. programme is completed touch the • To activate/deactivate this option touch and the Anti-allergy buttons simultaneously for about 3 seconds. -
Page 21: Daily Use
2. Turn the programme knob to the Synthetics programme (3rd position clockwise). If the procedure does not work (due to timeout, wrong programme dial position 3. Press and hold the buttons or wrong keys combination), switch the for some seconds (within 10 seconds appliance off and repeat sequence from after the switching on. -
Page 22: Liquid Or Powder Detergent
Make sure not to put too much laundry in the drum. 5. Close the drum and the lid. CAUTION! Before you close the lid of your appliance, make sure that you close the drum correctly. 11.3 Detergent compartments. Using detergent and additives 1. -
Page 23: Cycle Time Recalculation
11.7 Cycle time recalculation • Position A for powder detergent (factory setting). • Position B for liquid detergent. After approximately 15 minutes from the start of the programme: When you use the liquid detergent: • The appliance adjusts automatically • Do not use gelatinous or thick liquid the cycle time to the laundry you have detergents. -
Page 24: Cancelling A Running Programme
programme again. The ProSense phase can 3. Press the button Start/Pause again. be repeated up to three times (see point 1). The programme continues. Important! If the laundry amount will not be 11.11 Cancelling a running reduced, the washing programme starts programme anyway, despite the overload. -
Page 25: Draining Water Out After End Of Cycle
You must drain the water to open the lid: 1. Press button Start/Pause 1. If necessary, decrease the spin speed. The lid lock indicator goes off. 2. Open the appliance lid. 2. Press the Start/Pause button. 3. Close the lid and press button Start/ The appliance drains the water and spins. -
Page 26: Stubborn Stains
• Follow the washing instructions on the laundry care labels. • Do not wash white and coloured items together. • Some coloured items can discolour with the first wash. We recommend that you wash them separately for the first couple of times. -
Page 27: Ecological Hints
– there is large amounts of foam during • With adequate pre-treatment, stains and washing. limited soiling can be removed; the • When using detergent tabs or pods, laundry can then be washed at a lower always put them inside the drum, not in temperature. -
Page 28: Removing Foreign Objects
13.2 Removing foreign objects Always follow the instructions that you find on the packaging of the product. Make sure that pockets are empty and all loose elements are tied up before 13.5 Maintenance wash running your cycle. Refer to "The laundry load"... -
Page 29: Cleaning The Detergent Dispenser
13.8 Cleaning the detergent dispenser 13.9 Cleaning the drain filter Always keep a rag nearby to dry up any water spillages when removing the filter. Regularly check the drain pump filter and make sure that it is clean. Clean the drain pump if: •... -
Page 30: Cleaning The Inlet Hose And The Valve Filter
Proceed as follows to clean the pump: 13.10 Cleaning the inlet hose and the valve filter 13.11 Emergency drain 13.12 Frost precautions If the appliance cannot drain the water, carry If the appliance is installed in an area where out the same procedure, described in the temperature can reach values around 0°... -
Page 31: Troubleshooting
4. Empty the drain pump. Refer to the WARNING! emergency drain procedure. 5. When the drain pump is empty, install the Make sure that the temperature is higher inlet hose again. than 0 °C before you use the appliance again. The manufacturer is not responsible for damages caused by low temperatures. - Page 32 • The programme was not finished properly or the appliance stopped too early. Switch the appliance off and on again. No communication between • If the alarm code appears again, contact the Authorised Service Centre. electronic elements of the appliance. •...
-
Page 33: Consumption Values
Problem Possible solution • Make sure the levelling of the appliance is correct. Refer to "Installation in‐ struction". The appliance makes an un‐ • Make sure that the packaging and/or the transit bolts are removed. Refer to usual noise and vibrates. "Installation instruction". - Page 34 15.2 Legend Laundry load. hh:mm Programme duration. Energy consumption. °C Temperature in the laundry. Litres Water consumption. Spin speed. Remaining moisture at the end of spinning phase. The higher is the spin speed, the higher is the noise and the lower is the remaining moisture. Values and programme duration may differ depending on different conditions (e.g.
-
Page 35: Quick Guide
Programme rpm 1) Litres hh:mm °C Cottons 1.70 3:45 53.00 1300 60°C Cold 0.25 2:45 53.00 1300 20°C Synthetics 0.55 2:15 35.00 1200 40°C Delicates 0.30 1:00 35.00 1200 30°C Wool/Silk 0.20 1:05 30.00 1200 30°C Reference indicator of the spin speed. Suitable for washing heavily soiled textiles. -
Page 36: Cleaning The Drain Pump Filter
16.2 Cleaning the drain pump filter Clean the filter regularly and, especially, if the alarm code appears on the display. 16.3 Programmes Programmes Load Product description Eco 40-60 6 kg White and coloured cottons. Normally soiled garments. 6 kg White cotton and coloured cotton. Cottons 3 kg Synthetic items or mixed fabric items. -
Page 37: Environmental Concerns
17. ENVIRONMENTAL CONCERNS appliances marked with the symbol with Recycle materials with the symbol . Put the the household waste. Return the product to packaging in relevant containers to recycle it. your local recycling facility or contact your Help protect the environment and human municipal office. - Page 40 135964210-A-252023...
Need help?
Do you have a question about the LTR8E363E and is the answer not in the manual?
Questions and answers