Table of Contents
Advertisement
Quick Links
Advertisement
Table of Contents
Troubleshooting

Summary of Contents for dB ZEUS ACDS 010
-
Page 2: Table Of Contents
MANUAL INDEX Description Page Description Page 1.0 INTRODUCTION 4.2.1 Typical Control Sequence With 4 Stage ..........3 Operating Thermostat At 10°C Return Water Physical Specifications ......... 4 Setpoint, 6.0°C Differential ........ 42 4.2.2 Keypad Operation ..........43 4.2.3 IR33 Electronic Thermostat Parameter List ..43 2.0 INSTALLATION 4.2.4 IR33 Electronic Thermostat Troubleshooting .. -
Page 3: Introduction
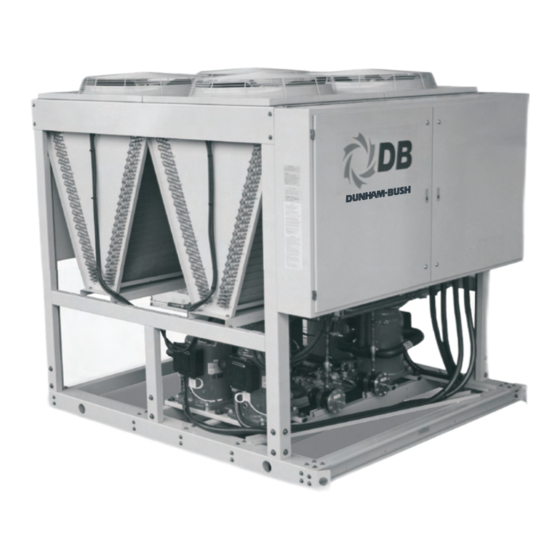
1.0 INTRODUCTION This manual is prepared to provide all the necessary information of installation, operation and maintenance of the latest generation of Dunham-Bush air-cooled chillers with scroll compressors. In order to be able to make full use of the manual, you must first determine your unit model number from the unit name plate. -
Page 4: Physical Specifications
1.0 INTRODUCTION 1.1 PHYSICAL SPECIFICATIONS 50 Hz Model ACDS Unit Nominal Capacity TR[kW] 9.4 [33] 18.6 [65] 25.9 [91] 38.8 [136] 52.3 [184] 61.1 [215] 66.2 [233] 68.9 [242] Unit Nominal Power Input 11.7 23.1 32.4 48.3 65.0 76.6 75.6 86.2 9.71 9.65... - Page 5 1.0 INTRODUCTION 60 Hz Model ACDS Unit Nominal Capacity TR[kW] 10.0[35.2] 21.2[74.6] 26.7[94.0] 42.8[150.4] 53.2[187.0] 62.1[218.4] 68.3[240.2] 81.4[286.3] Unit Nominal Power Input 12.3 25.9 32.0 51.7 65.0 76.8 85.6 101.8 9.79 9.82 10.04 9.87 9.82 9.70 9.57 9.59 COMPRESSOR 3500 Min.
-
Page 6: Installation
2.0 INSTALLATION 2.1 GENERAL with forks. The skids should not be removed until the unit is at its final location. The ACDS chiller is designed to cool water or other The ACDS model can be lifted by the method showing non-corrosive liquids. - Page 7 2.0 INSTALLATION FIGURE 2.3.2 ACDS RIGGING ACDS 010 ACDS 020, 030 50Hz: ACDS 040, 050, 060 50Hz: ACDS 065, 070, 080, 095, 105, 115, 125, 60Hz: ACDS 040, 050, 060, 070 60Hz: ACDS 080, 090,100, 120, 135, 150 50Hz: ACDS 175 60Hz: ACDS 165, 180 - 7 -...
-
Page 8: Top View
2.0 INSTALLATION FIGURE 2.4.2B DIMENSIONAL DATA 50 Hz ACDS 010 NOTES: AIR IN 1. ALL DIMENSIONS ARE IN INCHES AND MILLIMETERS. 2. ALLOW 60in [1524mm] CLEARANCE AT CONTROL PANEL 48 [1219] END OF UNIT FOR SERVICE. 3. USE MINIMUM 36in [914mm] FLEXIBLE CONDUIT TO 50 1/4 [1275] 60 [1524] CONTROL BOX TO ISOLATE UNIT. - Page 9 2.0 INSTALLATION 50 Hz ACDS 030 NOTES: 1. ALL DIMENSIONS ARE IN INCHES AND MILLIMETERS. AIR IN 2. ALLOW 60in [1524mm] CLEARANCE AT CONTROL PANEL END OF UNIT FOR SERVICE. 48 [1219] 24 [610] 3. USE MINIMUM 36in [914mm] FLEXIBLE CONDUIT TO CONTROL BOX TO ISOLATE UNIT.
-
Page 10: Rear View
2.0 INSTALLATION 50 Hz ACDS 065, 070, 080 60 [1524] 24 [610] NOTES: AIR IN 1. ALL DIMENSIONS ARE IN INCHES AND MILLIMETERS. POWER ENTRY 2. ALLOW 60in [1524mm] CLEARANCE AT CONTROL (BOTTOM) PANEL END OF UNIT FOR SERVICE. 3. USE MINIMUM 36in [914mm] FLEXIBLE CONDUIT TO CONTROL BOX TO ISOLATE UNIT. - Page 11 2.0 INSTALLATION 50 Hz ACDS 105 NOTES: 1. ALL DIMENSIONS ARE IN INCHES AND MILLIMETERS. 2. ALLOW 60in [1524mm] CLEARANCE AT CONTROL PANEL END OF UNIT FOR SERVICE. 3. USE MINIMUM 36in [914mm] FLEXIBLE CONDUIT TO CONTROL BOX TO ISOLATE UNIT. 4.
- Page 12 2.0 INSTALLATION 50 Hz ACDS 125 NOTES: 1. ALL DIMENSIONS ARE IN INCHES AND MILLIMETERS. 2. ALLOW 60in [1524mm] CLEARANCE AT CONTROL PANEL END OF UNIT FOR SERVICE. 3. USE MINIMUM 36in [914mm] FLEXIBLE CONDUIT TO CONTROL BOX TO ISOLATE UNIT. 4.
- Page 13 2.0 INSTALLATION 50 Hz ACDS 175 - 13 -...
- Page 14 2.0 INSTALLATION 60 Hz ACDS 010 AIR IN NOTES: 48 [1219] 1. ALL DIMENSIONS ARE IN INCHES AND MILLIMETERS. 2. ALLOW 60in [1524mm] CLEARANCE AT CONTROL 50 1/4 [1275] 60 [1524] PANEL END OF UNIT FOR SERVICE. FOR SERVICE ACCESS 3.
- Page 15 2.0 INSTALLATION 60 Hz ACDS 030 AIR IN NOTES: 48 [1219] 24 [610] 1. ALL DIMENSIONS ARE IN INCHES AND MILLIMETERS. 2. ALLOW 60in [1524mm] CLEARANCE AT CONTROL PANEL END OF UNIT FOR SERVICE. CLEARANCE, SERVICE AND 3. USE MINIMUM 36in [914mm] FLEXIBLE ACCESS REQUIREMENTS.
- Page 16 2.0 INSTALLATION 60 Hz ACDS 050, 060, 070 CHILLED WATER CONNECTION INLET/OUTLET 60 [1524] AIR IN NOTES: 1. ALL DIMENSIONS ARE IN INCHES AND MILIMETERS. 2. ALLOW 60 [ 1524 ] CLEARANCE AT CONTROL PANEL END OF UNIT FOR SERVICES. 3.
- Page 17 2.0 INSTALLATION 60 Hz ACDS 100, 120 NOTES: 1. ALL DIMENSIONS ARE IN INCHES 60 [1524] AIR IN AND MILLIMETERS. 48 [1219] 24 [610] 2. ALLOW 60in [1524mm] CLEARANCE POWER ENTRY AT CONTROL PANEL END OF UNIT FOR (BOTTOM) SERVICE. 3.
- Page 18 2.0 INSTALLATION 60 Hz ACDS 165, 180 - 18 -...
- Page 19 2.0 INSTALLATION FIGURE 2.5.1 FLOOR LOADING DIAGRAM 50 Hz ACDS 010 ACDS 020, 030 ACDS 040, 050, 060 ACDS 065, 070, 080, 095, 105, ACDS 175 115, 125, 135 POINT LOAD LOCATION Dimensions – inches [mm] Model ACDS 40 3/4 [1035] 8 [203] 34 1/4 [870] 8 [203]...
- Page 20 2.0 INSTALLATION 60 Hz ACDS 010 ACDS 020, 030 ACDS 040, 050, 060, 070 ACDS 080, 090, 100, 120, 135, 150 ACDS 165, 180 POINT LOAD LOCATION Dimensions – inches [mm] MODEL ACDS 40 3/4 [1035] 8 [203] 34 1/4 [870] 8 [203] 46 [1168] 14 1/4 [362]...
-
Page 21: Vibration Isolation
2.0 INSTALLATION 2.6 VIBRATION ISOLATION 2.7 PIPING CONNECTIONS In case of structure-borne vibration may be of concern, 2.7.1 WATER CONNECTIONS it is recommended to install vibration isolators under the base of the Packaged Chiller. CHILLED WATER PIPING Rubber-in-shear or spring vibration isolators are offered After the unit has been leveled, the external water as optional items. -
Page 22: Water Connections Multiple Packaged Chillers
2.0 INSTALLATION 2.7.2 WATER CONNECTIONS - in evaporator is corrosive, high in mineral content or entrained solids, the water can reduce the performance Multiple Packaged Chillers and even damage the heat exchangers. Therefore, it Multiple unit package chillers have been successfully may be necessary to obtain the service of a water applied to parallel and series piping systems for years. - Page 23 2.0 INSTALLATION FIGURE 2.7A FIGURE 2.7B FIGURE 2.7C FIGURE 2.7D FIGURE 2.7E - 23 -...
-
Page 24: Operation
3.0 OPERATION GENERAL SYSTEM START-UP The unit should be started up only by a refrigeration Before starting the compressor(s), check all three technician who is familiar with the accepted operation phases of supply voltage, of all legs of the motor. practices for refrigeration systems. - Page 25 3.0 OPERATION FIGURE 3.2.1 TYPICAL PIPING SCHEMATIC 50Hz ACDS 010 ACDS 020, 030 - 25 -...
- Page 26 3.0 OPERATION 50Hz ACDS 040, 050, 060 - 26 -...
- Page 27 3.0 OPERATION 50Hz ACDS 065, 070, 080 - 27 -...
- Page 28 3.0 OPERATION 50Hz ACDS 095 - 28 -...
- Page 29 3.0 OPERATION 50Hz ACDS 105, 115 - 29 -...
- Page 30 3.0 OPERATION 50Hz ACDS 125, 135 - 30 -...
- Page 31 3.0 OPERATION 50Hz ACDS 175 - 31 -...
- Page 32 3.0 OPERATION 60Hz ACDS 010 ACDS 020, 030 - 32 -...
- Page 33 3.0 OPERATION 60Hz ACDS 040, 050, 060, 070 - 33 -...
- Page 34 3.0 OPERATION 60Hz ACDS 080, 090, 100, 120 - 34 -...
- Page 35 3.0 OPERATION 60Hz ACDS 135, 150 - 35 -...
- Page 36 3.0 OPERATION 60Hz ACDS 165, 180 - 36 -...
-
Page 37: Oil Type
3.0 OPERATION 3.5.2 OIL TYPE On multiple compressor units, capacity is controlled by compressor staging. If the oil becomes discolored indicating contamination, Refer to Table 3.7.1 to determine the capacity control the contamination can be take care of by installing a scheme for your specific unit. -
Page 38: Electrical Controls
3.0 OPERATION HTR - Crankcase Heater Set point of the opstat should be your design leaving chilled water temperature (TLW) for Energized continuously as long as control circuit power water chillers. The standard adjustment disconnect switch (not supplied with the unit) is closed range for AC units is 32 to 104°F [0°... - Page 39 3.0 OPERATION FIGURE 3.6 WATER SIDE PRESSURE DROP 50 Hz 1a.) Imperial Units ACDS 010 ACDS 020 ACDS 030 ACDS 040 ACDS 080 ACDS 050 ACDS 095 ACDS 060 ACDS 105 ACDS 115 ACDS 125 ACDS 135 ACDS 065 ACDS 175 ACDS 070 1000 WATER FLOW RATE - USgpm...
- Page 40 3.0 OPERATION 60 Hz 1a.) Imperial Units ACDS 010 ACDS 020 ACDS 030 ACDS 040 ACDS 090 ACDS 050 ACDS 100 ACDS 060 ACDS 120 ACDS 070 ACDS 080 ACDS 135 ACDS 150 ACDS 165 ACDS 180 1000 WATER FLOW RATE - USgpm 1b.) SI Units 1000 ACDS 010...
-
Page 41: Electrical
4.0 ELECTRICAL ELECTRICAL DATA Unit Electrical Data (Standard Unit) Compressor Data Condenser Fan Motor Data Model Max. Inrush FLA/Mtr Power Supply : 400Vac-3Ph-50Hz ACDS 010 ACDS 020 ACDS 030 ACDS 040 ACDS 050 ACDS 060 ACDS 065 ACDS 070 ACDS 080 ACDS 095 ACDS 105 ACDS 115... -
Page 42: Ir33 Electronic Thermostat Front Panel
4.0 ELECTRICAL IR33 ELECTRONIC THERMOSTAT FRONT PANEL The display shows the temperature in the range –50°C to +150°C in the models with temperature inputs only and in the range -199 to +800°C in the models with universal inputs. The temperature is displayed with resolution to tenths between –19.9°C &... -
Page 43: Keypad Operation
4.0 ELECTRICAL 4.2.2 KEYPAD OPERATION Pressing the button alone: If pressed for more than 5 seconds, accesses the menu for setting the type P parameters (frequent); Mutes the audible alarm (buzzer) and deactivates the alarm relay; When editing the parameters, pressed for 5 s, permanently saves the new values of the parameters; When setting the time and the on/off times returns to the complete list of parameters. - Page 44 4.0 ELECTRICAL Par. Description Min. Max. Default Fac. Set Output models only (A and Z) 4 = Rotation of relays 3 & 4 (No rotation for 1 & 3) 5 = Rotation of relays 1 & 2 (No rotation for 3 & 4) 6 = Separate rotation of coupled relays 1-2 &...
-
Page 45: Ir33 Electronic Thermostat Troubleshooting
4.0 ELECTRICAL 4.2.4 IR33 ELECTRONIC THERMOSTAT TROUBLESHOOTING Code Cause Control Action Reset Remedies Depends on parameter Probe B1 fault Automatic Check probe connections If c19=19 & c0=1/2, as Probe B2 fault for E01, otherwise Automatic Check probe connections control does not stop Digital contact open (immediate alarm, delayed Check parameters c29, c30, c31. -
Page 46: Vision 2020I Controller And Terminal
4.0 ELECTRICAL 4.3.1.1 The fifteen polycarbonate buttons: VISION 2020i a) Seven polycarbonate buttons at top row CONTROLLER AND Button Description TERMINAL Displays the analog inputs and INPUT STATUS digital inputs status measured by Vision2020i controller is equipped with a user friendly the probes/sensors. -
Page 47: Status Reading
4.0 ELECTRICAL Press down arrow key or output key to go to 4.3.2 STATUS READING next screen: 4.3.2.1 Input status key To read inputs status press input status key: The display is showing the data as follows: The display is showing the data as follows: Hot Gas Bypass ANALOG INPUTS Supply Temp... -
Page 48: Real Time Clock
4.0 ELECTRICAL The display is showing the data as follows: 4.3.2.4 Setpoint key: To read the setpoint value press setpoint REAL TIME CLOCK > MONDAY Time > 16:10 Date > 05/12/05 The display is showing the data as follows: SETPOINT 1 To set the date and time, you must be Supply Water Temp Set point=... -
Page 49: Authorization
4.0 ELECTRICAL 4.3.3 AUTHORIZATION Press down arrow key or user key to go to next screen for other setpoint: 4.3.3.1 Authorization key authorization level, press authorization key: To alter setpoint data, press enter key to select the setpoint to alter and use the up- down arrow key to change the value and The display is showing the current access press enter key to confirm. - Page 50 4.0 ELECTRICAL The display is showing the data as follows: Use up or down arrow key to move the cursor to the desired 'Sensor Calibration', Technician Setpoints Main Menu Comp FLA Calibration ■ Sensor Calibration The display is showing the data as follows: Manual Control Compressor Control Sensors Override...
- Page 51 4.0 ELECTRICAL Use up or down arrow key to move the four times to move the cursor to the manual cursor to the desired digital input or relay control sub-menu: output, The display is showing the data as follows: The display is showing the data as follows: Technician Setpoints Digital Inputs Main Menu...
-
Page 52: Control Functions
4.0 ELECTRICAL The display is showing the data as follows: NOTE: All compressors will revert back to automatic control if the computer is the Sensors Manual computer is not given a load, unload, or Override hold command at least once every 15 minutes. - Page 53 4.0 ELECTRICAL Start point is the percent of full load at which 4.3.6.3 Anti-Recycle Timer the ramp begins. The ramp rate A setpoint The compressor motor requires an anti- can be set anywhere from 0.1 to 1.0, smaller recycle time delay which prevents restart values producing slower loading rates.
-
Page 54: Condenser Fan Control Logic
4.0 ELECTRICAL 4.3.6.9 Sump Heater Control factory set to AUTO to allow automatic start after PCR failure. Compressor will not start Each compressor is fitted with an oil sump for 15 minutes after failure. To select band-heater. The heater is energized at all manual reset, set power loss setpoint to times when compressor is off and de- MANUAL. -
Page 55: Air-Cooled Condenser Control Setpoints
4.0 ELECTRICAL 1. Adaptive Individual Air-cooled Condenser COND FAN1 ON when discharge pressure is > 230psig Control [15.9BAR] (COND Stage 1 ON setpoint) This type of control is based upon a single COND FAN2 ON when discharge pressure is > 250psig compressor per circuit. -
Page 56: Master/Slave Control Sequence
4.0 ELECTRICAL The cut-in offset (COND ON OFFSET) Master/Slave Control will be decreased by 5 psig [0.3BAR] if Sequence the last fan to be turned on has not cycled off within 1 hour. The offset will The optional master/slave control sequence is used to continue decrease psig... -
Page 57: Sequence Of Operation
4.0 ELECTRICAL 4.5.2 Sequence Of Operation VISION 2020i LOCAL AREA When the customer enable input is ‘on’ to start the NETWORK (DBLAN) lead unit, the chilled water pump starter or motorized valve control point will close and water A DBLAN network is made up of several chillers’ will start to flow through the evaporator, this will controller. -
Page 58: Network Connection Diagram
4.0 ELECTRICAL NETWORK CONNECTION DIAGRAM Adr:17 Adr:18 Adr:19 Vision 2020i Vision 2020i Vision 2020i Terminal Terminal Terminal Telephone Cable Telephone Cable Telephone Cable Adr:1 Adr:2 Adr:3 Vision 2020i Vision 2020i Vision 2020i Controller Controller Controller RS 485 Cable RS 485 Cable max 500 meters max 500 meters The 6 core telephone cables (to J10 socket) are supply by the manufacturer. -
Page 59: Addressing The Vision 2020I Dbg1 Terminal
4.0 ELECTRICAL (for first chiller, it is 01) that you want to configure. *********************************** Once you select the address then press ‘enter’ button SELF TEST The display will appears: PLEASE WAIT ************************************ Terminal config Press ENTER To continue The following mask will appear. Set pLAN address to 1 (or accordingly) using “Up”... -
Page 60: Vision 2020I Controller Led Status
4.0 ELECTRICAL Set Trm1, Trm2 and Trm3 to ’18 Pr’,’32 Sh’ and ‘None Set Trm1, Trm2 and Trm3 to ’19 Pr’,’32 Sh’ and ‘None ---’, change the 'NO' to 'YES'(to confirm and save) and ---’, change the 'NO' to 'YES'(to confirm and save) and press enter. -
Page 61: Typical Wiring Schematic
4.0 ELECTRICAL 4.9 TYPICAL WIRING SCHEMATIC (50Hz) - 61 -... - Page 62 4.0 ELECTRICAL - 62 -...
- Page 63 4.0 ELECTRICAL - 63 -...
-
Page 64: Maintenance
5.0 MAINTENANCE 5.1 GENERAL water flow before, during and after compressor operation. As with all mechanical equipment, a program of regular d.) Avoid "pump-down" function inspection, cleaning and preventive maintenance by e.) When starting up a system, wait a trained personnel will contribute greatly to the long moment before starting the condenser satisfactory service life of this product. -
Page 65: Air Cooled Condenser Cleaning
5.0 MAINTENANCE 5.4.2.2. Strainers electric utility to investigate the problem. If circuit breaker or motor overload relay or motor over If any of the media contains particle larger temperature protectors trip, this is a sign of possible 1mm (0.04 inches), we recommend that a motor trouble. - Page 66 5.0 MAINTENANCE TABLE 5.4 R410A PRESSURE/ TEMPERATURE PROPERTIES Pressure Temperature Pressure Temperature Pressure Temperature Pressure Temperature psig °F °C psig °F °C psig °F °C psig °F °C 10.8 74.5 -40.0 -40.0 62.2 428.9 10.0 -12.2 169.6 1169.4 60.0 15.6 364.1 2510.4 110.0...
-
Page 67: Trouble Shooting
5.0 MAINTENANCE 5.8 TROUBLE SHOOTING SYMPTOM POSSIBLE CAUSE REMEDY 1. Unit will not 1. Power off 1. Check main disconnect switch. start 2. Main line open 2. Check main fuses. 3. Incorrect wiring 3. Check with wiring diagrams. 4. Loose terminals 4. -
Page 68: Sample Log Sheet
5.0 MAINTENANCE 5.9 SAMPLE LOG SHEET SHEET NO......... DUNHAM-BUSH SCROLL COMPRESSOR PACKAGED CHILLER NAMEPLATE DATA: UNIT MODEL NO............UNIT NO........VOLTS: ......Hz ....UNIT SERIAL NO............COMPRESSOR MODEL NOS..............START UP : DATE .......... TIME ............ DATE TIME ELAPSED TIME METERS...
Need help?
Do you have a question about the ZEUS ACDS 010 and is the answer not in the manual?
Questions and answers