Table of Contents
Advertisement
Available languages
Available languages
Quick Links
Advertisement
Chapters
Table of Contents

Summary of Contents for ENGWE M1
- Page 1 CAUTION READ THIS MANUAL BEFORE USING YOUR EQUIPMENT...
- Page 2 Safety Guidelines for E-Bike Usage Thank you for choosing the ENGWE series product.To ensure a quick and safe riding experience, please familiarize yourself with this manual. The company reserves the right to interpret and explain this manual. 1. Before using this product, ensure the rider has read the manual 2.
-
Page 3: Table Of Contents
Table of contents lmportant warning General components Bicycle front introduction Attachment:technical parameters Product installation Install the handlebar 6 - 7 Install the front light Install the front wheel Install the saddle Install The Fender Install The Pedal Instrument instructions 13 - 18 Battery 19 - 20 Charging... -
Page 4: Lmportant Warning
lmportant warning This manual include important safety performance information and service information.Please make sure you have read the following warning content before the first time you use our product. lf you borrow your electric bicycle to other people, please let the user read this manual, it could help to decrease the risk of accident. Please wear a suitable and safe helmet before riding, please wear the clothes with fluorescent and reflective stripes when you ride at night.Don't exceed speed limit, it is a main reason of traffic accident, we should abide by the traffic rule, we shouldn't exceed the speed limit. -
Page 5: General Information
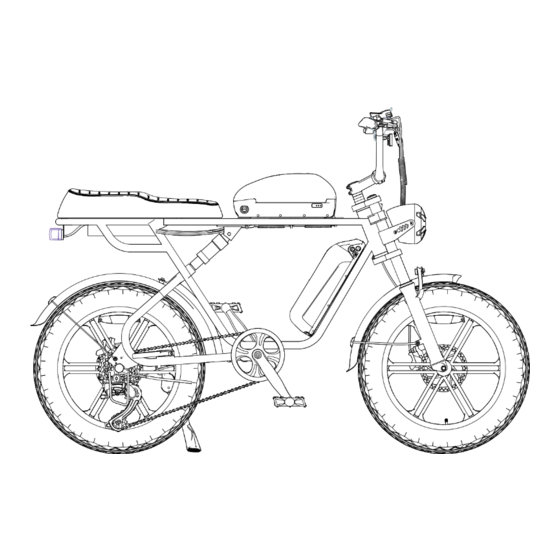
General information Bike Components Battery M1(dual battery) Battery Saddle Front Fork Freewheel Motor Tire Rear Transmission Pedal Chainwheel&Cranks Battery M1(single battery) Saddle Front Fork Freewheel Tire Motor Rear Transmission Pedal Chainwheel&Cranks... -
Page 6: Bicycle Front Introduction
Bicycle front introduction Left brake handlebar 7 speed shift controller Right brake handlebar LCDmeter power button Handle light button power level - horn button power level +... -
Page 7: Performance Index
Attachment:technical parameters Performance index Project M1 EU M1 EU (singel battery) (dual battery) Vehide Size 1698*720*1135mm 1698*720*1135mm wheel Size 20inches 20lnches Body Material carbon steel carbon steel Maximum Load 150KG 150KG Vehicle weight 39.5KG 43KG Maximum Speed 25km/h 25km/h Maximum Gradient 15°... -
Page 8: Product Installation
Product Installation Saddle CAUTION READ THIS MANUAL BEFORE USING YOUR EQUIPMENT 3mm/4mm/5mm/6mm Socket wrench... -
Page 9: Install The Handlebar
Install The Handlebar (1)Dismantle the foam, and then rotate the meter to handlebar (2)Place the handlebar at an appropriate position,make sure the "crosssymbol"is located at the center. - Page 10 Install The Handlebar (1)Use a 4mm hex key to install the 4 bolts by turning clockwise.The sequence is shown in the picture below.Please do not fully tighten them yet. (2)Once the bolts and the handlebar are in the right place, tighten the bolt fully with appropriate force, making sure not to overtighten.
-
Page 11: Install The Front Light
Install The Front Light (1)Take the headlight out of the carton. (2)Please follow the steps below to assemble the headlamp. 1.Align the installation position. 3.Align the screwholes, and then insert the screwsto tighten them. 2.The fixing piece shall be inserted into the mounting hole. -
Page 12: Install The Front Wheel
Install The Front Wheel (1)The front wheel is assembled according to the following steps. The spacer and washer shall be installed according to the picture. (2)Clamp the front wheel with the front fork and lock the front wheel screw with a wrench. The shaft sleeve is clamped inside the front fork. -
Page 13: Install The Saddle
Install the saddle (1)Take out the socket spanner and 6 bolts (2)Use the socket spanner to install the 6 bolts by turning clockwise, tight the bolt fully with appropriate force. -
Page 14: Install The Fender
Install The Fender (1)Install as shown in the figure below. The lifting lug of the mudguard is connected with the hole of the frontfork axle pipe, and then screw the screw to tighten it. The mudguard support shallbe aligned with the front fork mudguard take-up holeposition, and then screw the screw for tightening. -
Page 15: Install The Pedal
Install The Pedals (1)The pedals are marked with "R" (Right) and "L" (Left).This refers to the two sides of the e-bike.The R pedal goes to the side ofthe carbon belt, and the L pedal goes to the other side. Left Right (2)Manually install the left pedal by turning counterclockwise.Tighten the pedal securely with a 15mm wrench. -
Page 16: Display Instructions
Display Instructions Functional area layout Light ON/OFF Gear Information Walk Boost Real Time Speed Warning Sign Battery Level Power Display Functional Value Unit Display DZ32/2 functional area distribution interface Button definitions power key: , headlight key: , adjustment key: , adjustment key:... - Page 17 Display Instructions Turn on/off Maintain the normal connection between the instrument and the controller, long press the button (1 second) during the instrument shutdown, then enter the base interface and start working normally; long press the button (2 seconds) during the instrument shutdown. If the rider does not perform any operation on the meter for 5 minutes (speed is 0), the meter will automatically turn off.
- Page 18 Display Instructions Walk boost mode After the speed is less than 6KM / H long press button ,enter the power push state, the upper right position of the screen shows , release the key , that is the exit power implementation mode. The interface of assisted implementation mode switching is as shown below (only in the implementation state): Headlamp switch Short press the button...
- Page 19 Display Instructions Fault information Error code Definition Error code Definition Brake failure Controller receives fault Low battery Controller transmits fault Motor malfuntion Hall anomaly Throttle failure Communication failure Controller malfuntion...
- Page 20 Questions And Resolutions Frequently asked questions and resolutions Problem Problem analysis Troubleshooting 1.The key is not turn on 1.Twist key at ON position 2.The battery is not in place 2.Re-install the battery E-bike not 3.Power switch wire is loosed or 3.Remove the frame electrical parts power up disconnected...
- Page 21 Display Instructions Wiring definition Standard Standard line color function line order red (VCC) Instrument power cord Power supply control cable for the blue (KP) controller black (GND) Instrument ground line hispid arthraxon (RX) Data receiving line of the instrument yellow (TX) Data transmission line of the meter...
-
Page 22: Battery
Battery Don’t Ride Until You Read This: ① Always wear a helmet when riding your electric bike. ② Make sure your electric bike has a full battery before taking it out to ride. ③ Always be aware of local laws, and follow them. ④... - Page 23 Battery average speeds can continuous longer travel range. WARNING: Beware of chemical burns! And immediately stop using the damaged battery. If the battery is completely empty, it may cause the battery to no longer charge. Overheating or undercharging the battery may shorten battery life and decrease product run time. IMPORTANT: BATTERY DISPOSAL...
-
Page 24: Charging
Charging time is 5-7 hours depends on the battery capacity remain. WARNING: the internal structure and protection board of the lithium battery. the internal structure and protection board of the lithium battery. If the product has problems with the following forms during the protection period, we will provide customer service as part of the product quality guarantee. -
Page 25: Warranty Policy
Please enter into the official website https://engwe-bikes-eu.com/ to view the warranty policy of Engwe. After purchasing Engwe products, please kindly contact Engwe after-sales service for help when there is a quality issue, which means that you can contact customer service of the seller where you buy your e-bike from. - Page 27 Nederlands versie LEES DEZE HANDLEIDING AANDACHTIG DOOR VOORDAT U UW ELEKTRISCHE FIETS GAAT GEBRUIKEN...
- Page 28 Veiligheidsrichtlijnen voor het gebruik van e-bikes Dank u voor het kiezen van het product uit de ENGWE-serie. Om er zeker van te zijn dat u snel en veilig kunt rijden, raden wij u aan om vertrouwd te raken met deze handleiding. Het bedrijf behoudt zich het recht voor om deze handleiding te interpreteren en uit te leggen.
- Page 29 Inhoudsopgave Belangrijke waarschuwing Algemene onderdelen Fiets voorzijde introductie Bijlage: technische parameters Installatie van het product Installeer het stuur 6 - 7 Installeer de koplamp Installeer het voorwiel Installeer het zadel Installeer het spatbord Installeer het pedaal Instructies weergeven 13 - 18 Accu 19 - 20 Opladen...
-
Page 30: Belangrijke Waarschuwing
belangrijke waarschuwing Deze handleiding bevat belangrijke informatie over veiligheidsprestaties en service-informatie. Zorg ervoor dat u de volgende waarschuwingen hebt gelezen voordat je ons product voor het eerst gebruikt. Als u uw e-bike aan iemand anders uitleent, vraag dan de gebruiker om deze handleiding te lezen. Draag een geschikte en veilige helm voordat je gaat rijden, draag kleding met fluorescerende en reflecterende strepen als je 's nachts rijdt. - Page 31 Algemene informatie Fietsonderdelen accu M1(dubbele accu) accu zadel voorvork vrijloop Motor banden achteroverbrenging pedaal kettingwiel & cranks accu M1(enkele accu) zadel voorvork vrijloop banden Motor achteroverbrenging pedaal kettingwiel & cranks...
- Page 32 Fiets introductie vooraan linker remhendel schuifregelaar met 7 versnellingen rechter remhendel LCD-meter krachttoets handgreep lichttoets Ondersteuningsniveaul- claxon Ondersteuningsniveau+...
-
Page 33: Bijlage: Technische Parameters
Bijlage: technische parameters Prestatie-index Project M1 EU M1 EU (enkele accu) (dubbele accu) Voertuiggrootte 1698*720*1135mm 1698*720*1135mm Wielmaat 20inch 20lnch Materiaal behuizing koolstofstaal koolstofstaal Maximale belasting 150KG 150KG Gewicht voertuig 39.5KG 43KG Maximale snelheid 25km/u 25km/u Maximale helling 15° 15° Achterderailleur... - Page 34 productinstallatie hoofdframe zadel voorwiel gereedschapskist zadel gereedschapskistenlijst CAUTION READ THIS MANUAL BEFORE USING YOUR EQUIPMENT handleiding 8-10mm/14-15mm sleutel lader kruiskopschroevendraaier 3/4/5/6mm fietspedalen sleutel inbussleutel Inspecteer de artikelen in de doos zorgvuldig om er zeker van te zijn dat ze intact zijn. Als er iets ontbreekt of beschadigd is, neem dan onmiddellijk contact op met de klantenservice.
-
Page 35: Installeer Het Stuur
Installeer het stuur (1)Demonteer het schuim en draai de meter naar het stuur. (2)Plaats het stuur in de juiste positie en zorg ervoor dat het "kruissymbool" in het midden staat. - Page 36 installeer het stuur (1)Gebruik een 4 mm inbussleutel om de 4 bouten met de klok mee te draaien. De volgorde wordt getoond in de afbeelding hieronder. Draai ze nog niet helemaal vast. (2)Als de bout en het stuur op de juiste plaats zitten, draait u de bouten volledig aan met de juiste kracht en zorgt u ervoor dat u ze niet te vast aandraait.
-
Page 37: Installeer De Koplamp
installeer de koplamp (1)Neem de koplamp uit de doos. (2)Volg de onderstaande stappen om de koplamp te monteren. 1.Lijn de installatiepositie uit. 3.Lijn de schroefgaten uit en draai de schroeven vast. 2.Het bevestigingsstuk moet in het montagegat worden gestoken. -
Page 38: Installeer Het Voorwiel
Installeer het voorwiel (1)Het voorwiel wordt gemonteerd volgens de volgende stappen. De afstandsbus en sluitring moeten worden geïnstalleerd volgens de afbeelding. (2)Klem het voorwiel vast met de voorvork en borg de schroef van het voorwiel met een sleutel. Sleutel De asbussen worden in de voorvork geklemd. -
Page 39: Installeer Het Pedaal
Installeer het pedaal (1)Verwijder de dopsleutel en 6 bouten (2)Gebruik de dopsleutel om de 6 bouten met de klok mee te draaien en draai de bout volledig vast met de juiste kracht... - Page 40 Installeer het spatbord (1)Installeer zoals aangegeven in de onderstaande afbeelding. inbussleutel Het hijsoog van het spatbord wordt verbonden met het gat van de voorvorkasbuis en vervolgens wordt de schroef erin gedraaid om het vast te draaien. De spatbordsteun wordt uitgelijnd met de positie van het gat voor de voorvorkspatbordopname en vervolgens in de schroef gedraaid om vast te draaien.
- Page 41 Installeer het pedaal (1)De pedalen zijn gemarkeerd met "R" (Rechts) en "L" (Links). Dit verwijst naar de twee kanten van de e-bike. Het R pedaal gaat naar de kant van de carbon riem en het L pedaal gaat naar de andere kant. Links Rechts (2)Monteer het linker pedaal handmatig door het linksom te draaien.
- Page 42 display-instructies Functionele ruimteindeling licht AAN/UIT informatie over de versnelling Walk Boost Realtime snelheid waarschuwingsteken accuniveau power display functionele waarde Eenheidsweergave DZ32/2 functioneel gebied distributie-interface Knopdefinities vermogen: , koplampsleutel: , afstelsleutel: , afstelsleutel:...
- Page 43 display-instructies Aan/uitzetten Houd de normale verbinding tussen het instrument en de controller in stand, geef de lange knop (1 seconde) weer tijdens het uitschakelen van het instrument, ga dan naar de basisinterface en begin normaal te werken; start de lange knop (2 seconden) tijdens het uitschakelen van het instrument.
- Page 44 display-instructies Boost-modus Nadat de snelheid minder is dan 6KM / H lange druk op de knop ,enteruggaan naar de power push staat, de rechter bovenste positie van het scherm toont , laat de toets , dat is de exit power implementatie modus. De interface van de ondersteunde implementatiemodus schakelen is zoals hieronder getoond (alleen in de implementatiestatus): Koplampschakelaar Korte knop...
- Page 45 display-instructies Fault information Foutcode Definitie Foutcode Definitie remhendel defect Regelaar ontvangt fout Accu bijna leeg controller verzendt fout Motorstoring Hal anomalie gaspedaal falen Communicatiestoring Storing controller...
- Page 46 display-instructies Veel gestelde vragen en oplossingen Probleem Probleemanalyse Problemen oplossen 1. De sleutel is niet 1.Draai de sleutel in de AAN-stand ingeschakeld 2.De accu is niet geplaatst 2. Installeer de accu opnieuw 3.De draad van de 3. Verwijder de montagedoos van de E-bike start niet op stroomschakelaar zit los of is elektrische onderdelen van het frame en...
- Page 47 display-instructies Definitie van bedrading Standaard Standaard lijnkleur Func�e lijnbestelling rood (VCC) Netsnoer van instrument blauw (KP) Voedingskabel voor de controller zwart (GND) Instrumentaardleiding Gegevensontvangstlijn van het hispid arthraxon (RX) instrument geel (TX) Gegevensoverdrachtslijn van de meter...
- Page 48 Niet rijden tot je dit gelezen hebt Niet rijden tot je dit gelezen hebt 1.Draag altijd een helm als je op je elektrische fiets rijdt. 2.Zorg ervoor dat je elektrische fiets een volle accu heeft voordat je ermee gaat rijden. 3.Wees altijd op de hoogte van de plaatselijke wetgeving en volg deze op.
-
Page 49: Accu
1.Houd de accu buiten het bereik van kinderen. 2.Probeer nooit de accu te openen. 3.Gebruik alleen de bijgeleverde ENGWE accu. 4.Gebruik geen accuen van andere productmodellen. 5.Als de accu beschadigd is doordat deze ergens is gevallen of een fietsongeluk heeft gehad, kan er elektrolyt lekken. - Page 50 accu 1.Je kunt de fiets direct opladen of je kunt de accu verwijderen om op te laden. 2.Het RODE lampje geeft aan dat de accu wordt opgeladen en het GROENE lampje geeft aan dat de accu volledig is opgeladen. Meestal is de oplaadtijd 5-7 uur, afhankelijk van de resterende accucapaciteit. WAARSCHUWING: 1.Charging tijd meer dan 10 uur is verboden, houd het uit de buurt van hoge temperatuur omgeving en slaat het op een koele plaats 2.Zorg ervoor dat de acculader en de laadstekker altijd droog staan en nooit nat worden.
-
Page 51: Garantiebeleid
Ga naar de officiële website https://engwe-bikes-eu.com/ om het garantiebeleid van Engwe te bekijken. Als u Engwe-producten hebt gekocht, neem dan contact op met de klantenservice van Engwe als er een kwaliteitsprobleem is. Dit betekent dat u contact kunt opnemen met de klantenservice van de verkoper waar u uw e-bike hebt gekocht. - Page 52 ENGWE INTELLIGENT TECHNOLOGY CO.. LIMITED Adres: 4th foor, Building c, Jinhongde Industry Park, South XuegangRoad, Bantian Street, Longgang District, Shenzhen, Guangdong, LEES DEZE HANDLEIDING ZORGVULDIG DOOR VOORDAT U UW E-BIKE GEBRUIKT China Postcode: 518129...
Need help?
Do you have a question about the M1 and is the answer not in the manual?
Questions and answers