
Subscribe to Our Youtube Channel
Related Manuals for Lori Vertical Queen Home Office Kit


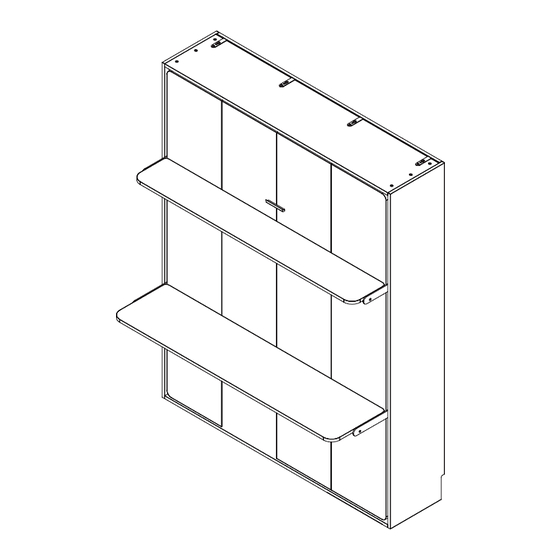
Summary of Contents for Lori Vertical Queen Home Office Kit
- Page 1 T h e L o r i B e d V e r t i c a l Q u e e n H o m e O f f i c e K i t A s s e m b l y I n s t r u c t i o n s...
-
Page 3: Parts List
CASE 1: Assemble The Vertical Queen Lori Bed with a Home Office Kit (Desk + Shelf) - From Page 4 CASE 2: Install the add-on option - Home Office Kit (Desk + Shelf) to an existing Lori Bed Vertical Queen - From Page 19... - Page 4 CASE 1 Assemble The Lori Bed Home Office Kit 1. Assemble the Lori Bed Vertical Queen from Case 1 - Step 10 in this guide book to complete the bed with Home Office Kit (Desk + Shelf). 2. Use the alternative parts and hardware provided in the Home Office Kit (Desk + Shelf).
-
Page 5: Piston Assembly
Tool Hardware 2 Persons assembly recommended PISTON ASSEMBLY * NOTE: If you are assembling your Lori Bed with a Home Office Kit (Desk + Shelf) or Shelf Kit (2 x Shelf), you must continue assembly per the assembly guide provided with the Home Office Kit or Shelf Kit. - Page 6 STEP 10 Y1 x 2 I x 4 Piston Installation Hardware 2 Person assembly recommended Tool REMOVE THE PISTON COMPRESSION STRAPS STEP 10.3 With a partner, gently press down on the bed platform to compress the Piston and loosen the metal straps. Carefully remove the compression straps while your partner is holding the bed...
- Page 7 STEP 11 D x 8 K x 4 Hardware Tool Install Desk Legs and Shelf Legs DESK LEG AND SHELF LEG ASSEMBLY STEP 11 Attach part (37) to the left side of the outer frame of the Metal Platform using 1 x washer (D) on each side of the hole on the Metal Platform, fastening in place with screw (K).
- Page 8 STEP 12 C x 4 D x 4 E x 4 K x 6 Hardware Tool Install Motion Arms MOTION ARM ASSEMBLY STEP 12.1 Attach Motion Arm part (29) to the Mechanism Plate (12) as shown, using 1 x washer (D) on each side of the hole on the part (29), fastening in place with screw (K).
- Page 9 STEP 13 D1 x 2 W x 1 R x 4 H x 2 Hardware Tool Install the Key Lock KEY LOCK ASSEMBLY STEP 13.1 STEP 13.2 Install the Key Lock (W) and Attach the Key Lock Bar 2 x Lock Bar Connectors Short (24) and Key Lock Bar (D1) to the Wood Platform Long (23) to the Lock Bar...
- Page 10 STEP 13 D1 x 2 W x 1 R x 4 H x 2 Install the Key Lock Hardware Tool INSTALL KEY LOCK BEZEL RING STEP 13.5 After attaching the Key Lock Bezel Ring, securely tighten all bolts (R) in the back of Key Lock.
- Page 11 STEP 14 S x 2 T x 1 Hardware Tool Install the Handle HANDLE STEP 14 Using a hand-help Phillips screwdriver, attach the Handle part (T) to the Wood Platform Panels (8) and (9) with 2 x screws (S).
- Page 12 STEP 15 C1 x 4 Install the Mattress Straps Hardware MATTRESS STRAPS STEP 15 Thread the Mattress Strap (30) end through the mattress strap anchor bracket on the Metal Platform frame. Feed the Mattress Strap pin (C1) through the Mattress Strap (30) end to secure it to the Mattress Strap Anchor Bracket.
- Page 13 STEP 16 F1 x 28 G1 x 14 Hardware Install the Comfort Slats COMFORT SLATS STEP 16.1 Attach the Comfort Slat Mounts Inner (G1) to the Metal Platform center beam (18) by firmly pressing the pins of the Comfort Slat Mounts Inner (G1) into the corresponding holes on the Metal Platform center beam (18).
- Page 14 STEP 17 Install the Mattress Rests MATTRESS RESTS STEP 17.1 Assemble the Mattress Rest by connecting the 2 x parts (32) as shown inthe diagram below. STEP 17.2 Place the 2 ends of the Mattress Rest into the corresponding holes on the Metal Platform and raise the Mattress Rest i(32) into position as show in the diagram.
- Page 15 STEP 18 Q x 10 Hardware Tool Install the Mechanism Covers MECHANISM COVERS STEP 18 Fasten the Mechanism Covers (33) to the Wood Cabinet using screws (Q) on both sides.
- Page 16 STEP 19 Raise the Bed Platform Raise the Bed Platform to prepare to assemble the Desk and Shelf Panels.
- Page 17 STEP 20 K1 x 4 Q x 10 Hardware Tool Desk and Shelf Panel Assembly DESK AND SHELF PANEL ASSEMBLY STEP 20.1 Fasten metal part (34) to Desk Panel part (35) using 5 x screws (Q). Repeat these steps for Shelf Panels (36). STEP 20.2 Attach 2 x Rubber Glide (K1) to Part (34).
- Page 18 STEP 21 M1 x 4 Q x 12 Hardware Tool Install Assembly from Step 20 DESK AND SHELF PANEL ASSEMBLY STEP 21.1 Install Shelf Panel Assembly from Step 20 with Shelf Legs by Q on both sides. STEP 21.2 Install Desk Panel Assembly from Step 20 with Desk Leg by Q on both sides.
- Page 19 Install the add-on Desk and Shelf CASE 2 Kit to an Existing Lori Bed 1. Uninstall the required parts and hardware. 2. Switch the alternate parts and hardwares from the Shelf Kit box as guided. 3. Follow the assemble steps in this guide to complete the bed with the new configuration.
- Page 20 STEP 1 Remove existing Pistons Tool 2 Persons assembly recommended STEP 1.1 Remove the Mechanism Covers (33) on both left and right sides. Save all screws (Q) as they are required to re-install later on. STEP 1.2 Loosen the piston nuts on both left and right sides (I) using tool (T4).
- Page 21 STEP 1 Tool Remove existing Pistons 2 Persons assembly recommended STEP 1.3 Raise the platform to about a 30 degree angle from the floor. Install the Compression Straps to the existing Pistons (Y) on both left and right sides of the bed.
- Page 22 STEP 2 Y1 x 2 Replace the Pistons Hardware Tool 2 Persons assembly recommended STEP 2.1 Install Pistons (Y1) on both left and right sides. STEP 2.2 Using the (I) nuts you saved, tighten by hand to secure. Repeat for both left and right sides.
- Page 23 STEP 2 Y1 x 2 Hardware Tool 2 Persons assembly recommended Replace the Pistons STEP 2.3 With a partner, gently press down on the bed platform to compress the Piston and loosen the metal straps. Carefully remove the compression straps while your partner is holding the bed platform steady.
- Page 24 STEP 3 Tool Remove Motion Arm Brackets and Legs In order to remove the required parts, you may have to remove some of the Comfort Slats. Note: DO NOT remove the screws that fasten the Motion Arm (29) to the Mechanism Plates on the cabinet.
- Page 25 STEP 3 Tool Install Desk Legs and Shelf Legs STEP 3.3 Install the Shelf Legs (39) and (40) and Desk Legs (37) and (38) per STEP 11 and STEP 12 of this assembly guide. Reuse hardware (C), (D), (E) and, (K) that you saved from STEP 2.
- Page 26 STEP 4 Install Mechanism Covers STEP 4 Re-install Mechanism Covers (33) on both sides, using the screws (Q) you saved per STEP 1 of this guide.
- Page 27 STEP 5 Raise the Bed Platform Raise the Bed Platform to prepare to assemble the Desk and Shelf Panels.
- Page 28 STEP 6 K1 x 4 Q x 10 Hardware Tool Desk and Shelf Panel Assembly STEP 6.1 Fasten metal part (34) to Desk Panel part (35) using 5 x screws (Q). Repeat these steps for Shelf Panels (36). STEP 6.2 Attach 2 x Rubber Glide (K1) to Part (34).
- Page 29 STEP 7 M1 x 4 Q x 12 Hardware Tool Install Assembly from Step 6 STEP 7.1 Install Shelf Panel Assembly from Step 6 with Shelf Legs by Q on both sides STEP 7.2 Install Desk Panel Assembly from Step 6 with Desk Leg by Q on both sides.
Need help?
Do you have a question about the Vertical Queen Home Office Kit and is the answer not in the manual?
Questions and answers