Table of Contents
Advertisement
Available languages
Available languages
Owner's Use and Care Guide
Guide de soin d'utiliser-et
Model • Modèle
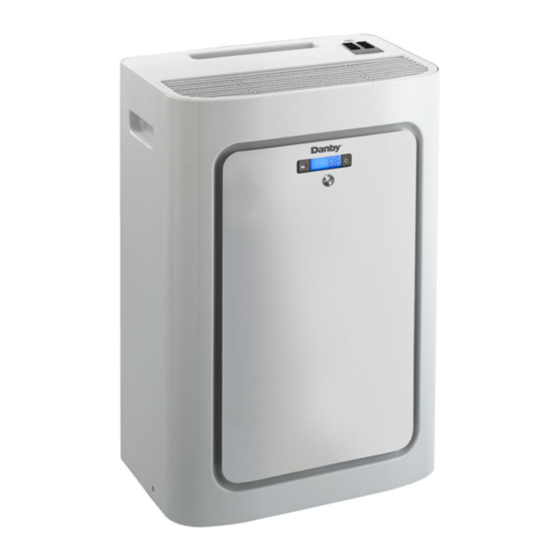
DPAC 7099
CAUTION: Read and follow all safety rules and operating instructions before first use
of this product.
MISE EN GARDE : Veuillez lire attentivement les consignes de sécurité et les directives
d'utilisation avant l'utilisation initiale de ce produit.
PORTABLE AIR CONDITIONER
Table of contents
. . . . . . . . . . . . . . . . . . . . . . . . . . . . . . . . . . . . . . .1
CLIMATISEUR PORTATIF
Table des matières
. . . . . . . . . . . . . . . . . . . . . . . . . . . . . . . . . . . . .13
KEEP THESE INSTRUCTIONS FOR FUTURE REFERENCE: If the unit changes
ownership, be sure this manual accompanies the unit.
CONSERVER CES INSTRUCTIONS POUR CONSULTATION ULTÉRIEURE: En cas de revente du
l'unité, ce manuel doit être inclus avec l'appareil.
Danby Products Ltd, PO Box 1778, Guelph, Ontario Canada N1H 6Z9
Danby Products Inc, PO Box 669, Findlay, Ohio USA 45839-0669
Version 1.11.08 JF
Advertisement
Chapters
Table of Contents

Subscribe to Our Youtube Channel
Related Manuals for Danby DPAC7099


Summary of Contents for Danby DPAC7099
- Page 1 CONSERVER CES INSTRUCTIONS POUR CONSULTATION ULTÉRIEURE: En cas de revente du l’unité, ce manuel doit être inclus avec l’appareil. Danby Products Ltd, PO Box 1778, Guelph, Ontario Canada N1H 6Z9 Danby Products Inc, PO Box 669, Findlay, Ohio USA 45839-0669...
-
Page 2: Table Of Contents
TABLE OF CONTENTS UNIT SPECIFICATIONS PART IDENTIFICATION IMPORTANT SAFETY INFORMATION Electrical Specifications Energy Saving Tips INSTALLATION Window Kit Installation OPERATION Features of the Control Panel Remote Control ..........7 Draining Excess Water Air Conditioning . -
Page 3: Unit Specifications
Thank you for choosing a Danby appliance to provide you and your family with all of the “Home Comfort” requirements of your home, cottage, or office. This Owner’s Use and Care Guide will provide you with valuable information necessary for the proper care and maintenance of your new appliance. If properly maintained, your Danby appliance will give you many years of trouble free operation. -
Page 4: Part Identification
EXTENSION CORDS WITH THIS UNIT. If it is necessary to use an extension cord with this unit, use an approved “air conditioner” extension cord only (available at most local hardware stores). 5) To avoid the possibility of personal injury, always disconnect the power supply to the unit before installing and/or servicing. -
Page 5: Power Supply Cord
• The power supply cord must be replaced if it fails to reset when the “TEST” button is pushed in. Your Danby appliance is designed to be highly efficient in energy savings. Follow these recommendations for greater efficiency. 4) Start your air conditioner before the... -
Page 6: Installation
ELECTRIC SHOCK HAZARD: To avoid the possibility of personal injury, disconnect power to the unit before installing or servicing. FIG 1. INSTALLATION ACCESSORIES Flexible Exhaust Hose (13cm), Exhaust nozzle connector (Fix to unit) (1pc)...1/set Adjustable window door slider kit (3 pcs)... from ”(72cm) up to 80”... -
Page 7: Features Of The Control Panel
OPERATION- Features of the Control Panel Display Water Full Indicator EMERGENCY ON/OFF Switch • This switch is used when unit needs to be temporarily switched on/off. • Pressing the emergency will turn on the unit. The running mode and fan speed mode will be set automatically. -
Page 8: Remote Control
Cool Mode. • Dehumidify Mode Air is dehumidified as it passes through the air conditioner, without being in full cooling mode. If room temperature is higher than 25°C (77°F), fan speed can be adjusted; otherwise fan speed is fixed to low. -
Page 9: Draining Excess Water
OPERATING INSTRUCTIONS DRAINING EXCESS WATER 1) Drain excess water from the tank by placing a pan under the drain water outlet (Fig. 4) 2) Remove the drain plug and let the water drain into the pan. 3) When the water stops draining out, replace the drain plug, and put the tube back in with the clip pointing up. -
Page 10: Dehumidifier
OPERATING INSTRUCTIONS (cont’d) DEHUMIDIFIER 1) Press the POWER SWITCH key (Fig. G) to switch the unit on. 2) Press the MODE key (Fig. H) until the DRY indicator light illuminates on the control panel (Fig. I). Each depression of the MODE key will advance to a different mode setting (Cool Dehumidify - Fan - Auto... -
Page 11: Cleaning The Air Filter
CARE AND MAINTENANCE CLEANING THE UNIT CAUTION: Before cleaning or servicing this unit, disconnect from any electrical supply outlet. 1) DO NOT use gasoline, benzene, thinner, or any other chemicals to clean this unit, as these substances may cause damage to the finish and deformation of plastic parts. 2) Never attempt to clean the unit by pouring water directly over any of the surface areas, as this will cause deterioration of electrical components and wiring insulation. -
Page 12: Troubleshooting
Occasionally, a problem may occur that is minor, and a service call may not be necessary. Use this troubleshooting guide for a possible solution. If the unit continues to operate improperly, call an authorized service depot or Danby’s Toll Free Number for assistance. PROBLEM •... - Page 13 TABLE DES MATIÈRES SPÉCIFICATIONS DE L’UNITÉ IDENTIFICATION DE PARTIE CONSIGNES DE SÉCURITÉ IMPORTANT Spécifications Électriques Suggestions pour économiseur d'énergie INSTALLATION ......... . . 17 Installation de kit de fenêtre UTILISATION Dispositifs de panneau de commande...
-
Page 14: Spécifications De L'unité
Merci d’avoir choisi un appareil Danby qui vous fournira ainsi qu’à votre famille, le confort au foyer, à la maison, au chalet ou au bureau. Ce manuel d’utilisation vous offre des renseignements pratiques pour le soin et l’entretien de votre nouvel appareil. Un appareil Danby bien entretenu vous fournira plusieurs années de service sans ennui. -
Page 15: Identification De Partie
IDENTIFICATION DE PARTIE Sortie d’air Commutateur Marche/Arrêt CONSIGNES DE SÉCURITÉ IMPORTANT LISEZ TOUTE L'INFORMATION DE SÉCURITÉ AVANT UTILISATION SPÉCIFICATIONS ÉLECTRIQUES 1) Vérifiez l'alimentation d'énergie disponible et résolvez tous les problèmes de câblage AVANT installation et opération de cette unité. Tout le câblage doit être conforme aux codes électriques locaux et nationaux et être installé... -
Page 16: Cordon D'alimentation
• Le cordon d’alimentation doit être remplacé s’il ne se réinitialise pas lorsque le bouton ‘TEST’ est enfoncé. Votre appareil ménager Danby est conçu pour l’efficacité en économie de l’énergie. Pour le rendement maximal, observer les recommandations qui suivent. 4) Activer votre climatiseur avant que la température de l’air extérieur ne soit très... -
Page 17: Installation
RISQUE DE CHOC ÉLECTRIQUE: Pour éviter la possibilité de blessures corporelles, débrancher l’alimentation de courant à l’unité avant d’entreprendre l’installation ou le service. Fig. 1: Accessoires D’Installation Tuyay d’echappement flexible (13cm) Connecteur de tuyère d'échappement (connect à l'unité 1 mcx)...1/ensemble Kit réglable de fenêtre/glisseur de porte (3 mcx)... -
Page 18: Dispositifs De Panneau De Commande
OPÉRATION- Dispositifs de Panneau de Commande Affichage plein indicateur de l'eau Commutateur "Marche/Arrêt" de secours • Ce commutateur est utilisé quand l'unité doit être "Marche/Arrêt" temporairement commuté. • Appuyer sur le bouton de secours allumera l'unité. Le mode courant et le mode de vitesse de le ventilateur seront programmés automatiquement. -
Page 19: Télécommande
Commande Puissance La Commande Puissance tourné l’unite “Marche/Arrêt” Commande Mode La Commande Mode à 4 arrangements:• Frais • Sec • Ventilateur • Automatique. Les arrangements sont ajustés par le bouton de commande de mode • Mode de Refroidissement Pendant le mode de refroidissement l'air est refroidi et de l'air chaud est épuisé... -
Page 20: Climatiseur
VINDAGE DE L’EXÉS D’EAU 1) Évacuez l’exès d’eau le réservoir en plaçant une casserole sous l’eau de drain sortie (Fig. 4) 2) Enlevez le bouchon de vidange et laissez l’eau vidanger dans la casserole. 3) Quand l’eau cesse de s’écouler dehors, remplacez le bouchon de vidange, et remettez le tube dedans avec l’agrafe se dirigeant vers le haut. -
Page 21: Déshumidificateur
FONCTIONNEMENT (suite) DÉSHUMIDIFICATEUR 1) Appuyer sur la touche INTERRUPTEUR pour activer l’unité (Fig. G). 2) Appuyer sur la touche MODE (Fig. H) jusqu’à l’affichage du symbole Déshumidification sur le panneau de commande (Fig. I). Chaque dépression sur la touche MODE avancera l’affichage à... -
Page 22: Nettoyage De L'unité
NETTOYAGE DE L'UNITÉ MISE EN GARDE: Avant de nettoyer ou de faire le service sur cette unité, il est recommandé de débrancher le cordon d’alimentation de la prise de courant électrique. 1) NE PAS utliser d’essence, de benzène, de diluant ou tous autres produits chimiques pour nettoyer cette unité. -
Page 23: Dépannage
être nécessaire. Employez ce guide de dépannage pour une solution possible. Si l'unité continue à fonctionner incorrectement, demandez un dépôt autorisé de service ou le numéro de appel sans frais Danby pour l'aide. PROBLEME • L'unité ne fonctionne pas •...
Need help?
Do you have a question about the DPAC7099 and is the answer not in the manual?
Questions and answers