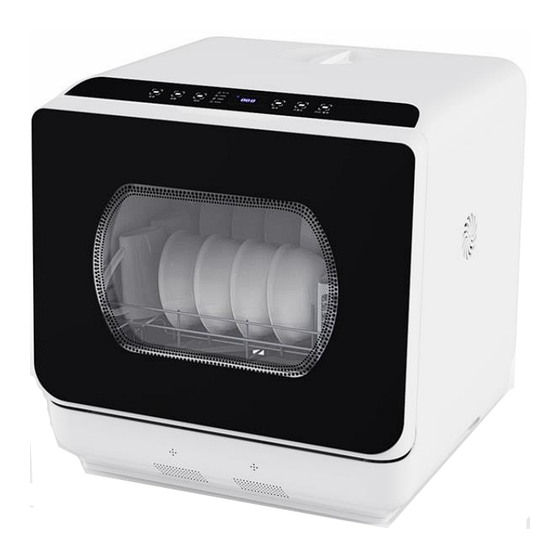
Summary of Contents for Deco Home DGDISHW01
- Page 1 COUNTERTOP DISHWASHER OPERATING MANUAL DGDISHW01 PLEASE NOTE A plastic or burning odor may be noticeable during the first one or two wash cycles. This is normal and will dissipate shortly.
-
Page 2: Control Panel
Parts Parts Water tank cover Handle Control panel Filter screen Spray arm Filter Inner Glass Door Top Spray Dish rack Control panel... -
Page 3: Accessories List
Accessories list Dishwasher Water tank cover Pipe clamp (for drainage pipe) Operating manual Dish rack Drainage pipe Water inlet pipe Measuring cup Chopsticks box Fruit basket Suction pad Products Features High temperature wash ◼ Table dishwasher, easy to install ◼ Rapid wash, only 29 minute runtime ◼... - Page 4 dangerous to leave it exposed to the rain and elements. 8. Do not place any heavy objects or water container, it will influence the dishwasher work or cause damage. 9. The water inside the dishwasher is not suitable for drinking. Do not use solvents of any kind inside your dishwasher.
-
Page 5: Positioning The Appliance
Put dish rack back properly ⚫ Tips: each appliance was tested before leaving factory to ensure quality. Water droplets may be present upon opening the dishwasher for the first time. Positioning the appliance 1. When positioning the appliance in the desired location, ensure a vertical height over 500mm, leave a distance over 50mm for four sides. -
Page 6: Electrical Connection
6. Fix drainage pipe on the sink with suction pad 7. Connect the water inlet pipe - Connect the water inlet pipe to the threaded G1/2 connector - Make sure it is fastened in place. - If the pipe is new or has not been used for a long time, run water to ensure that the water is clear and free of impurities. - Page 7 Methods for adding water Adding water manually ⚫ - Open water tank cover, then add 4.5 liters of water. - Before startup, fill up with water, appliance will make a “di-di-di” sound. - After start up, if the tank is out of water the “ ”...
- Page 8 1) 1) Short press Dry and choose any mode of Intensive/Eco/Normal/Rapid , it will work 90mins each alternate 12hrs, will be turned off after 163.5hrs. 2) Long press Dry Key 3~5s at standby status to activate drying process 90mins each alternate 12hrs separately, then turned off after 163.5hrs. (NOTE:If you need one extra Dry cycle after each washing program for better drying result,please turn off the machine manually after first 90mins dry finished)
-
Page 9: How To Fill The Detergent
Silverware should be placed in the silverware basket with the handles at the bottom; if the rack has side baskets, the spoons should be located individually into the appropriate slots. Especially long utensils should be placed in the horizontal position. Capacity of dish rack: Deep plate Spoon... -
Page 10: Program Data
Damage to glassware and other dishes Possible causes Type of glass or manufacturing process ⚫ Chemical composition of detergent ⚫ Water temperature and duration of dishwasher program. ⚫ Suggested remedy Use glassware or porcelain dishes that have been marked “dishwasher safe ” by the ⚫... -
Page 11: Interrupting The Program
End of program Six beeps will indicate that the wash cycle has finished and then the dishwasher will be turned off. Several minutes after the program has ended: Open the door. ⚫ Turn the water tap off. ⚫ Remove dishes, etc. when they have cooled ⚫... -
Page 12: Care And Maintenance
To remove spots or stains from the surface of the interior, use a cloth dampened with water and a little white vinegar, or a cleaning product made specifically for dishwashers. Moving the Appliance ⚫ If the appliance must be moved, try to keep it in a vertical position. If absolutely necessary, it can be positioned on its back. -
Page 13: Spray Arm
Spray arm Lime and remnants of food in the wash water can block the nozzles in the spray arms Inspect the nozzles in the for blocked holes due to remnants of ⚫ food. If necessary, pull the lower arm upwards and lift it off. ⚫... - Page 14 Do not forget that repairs should only be carried out by a qualified specialist. Improper repairs can lead to considerable equipment damage as well as danger to the user..with the appliance itself Error display on the time-remaining indicator Problem indicate problem possible reason remark...
- Page 15 Water supply has been interrupted. ⚫ Knocking sound can be heared while washing is taking place A spray arm is knocking against the dishes inside the appliance. ⚫ Rattling sound can be heared while washing is taking place ⚫ Crockery has not been stacked properly inside the appliance. ⚫...
- Page 16 Selected program did not include drying function ⚫ Items were removed from dishwasher too soon. ⚫ Tea stains or traces of lipstick have not been completely removed Detergent does not have a sufficient bleaching effect ⚫ Washing temperature was set too low. ⚫...

Need help?
Do you have a question about the DGDISHW01 and is the answer not in the manual?
Questions and answers