Advertisement
Quick Links
Advertisement

Related Manuals for Costway baby joy BB0496


Summary of Contents for Costway baby joy BB0496
- Page 1 USER'S MANUAL Baby playard BB0496...
- Page 4 TO ASSEMBLE PLAYARD Check the parts list on the back cover to make sure you have all the parts for this model before assembling the playard. Playard Mattress Playard Travel / Storage Bag Bassinet with metal support tubes ATTENTION: Playard must be fully assembled and securely locked before installing or using other accessories.
- Page 5 FOLDING PLAYARD IMPORTANT: Test each top rail by pushing securely in place before use (Fig. 3b). 7) • Release the hook and loop fastener holding IMPORTANT: The handle located in the the Mattress from underneath the Playard MUST remain raised (Approx. 45.7 cm or 18 inches) while aside.
- Page 6 • Connect opposing Mattress Support 9) • Gather four (4) corners and center all together tightly (Fig. 9). Wrap Mattress around Playard Tubes that are attached to the bottom of the Bassinet (Fig. 11a). frame with padded side facing inward. •...
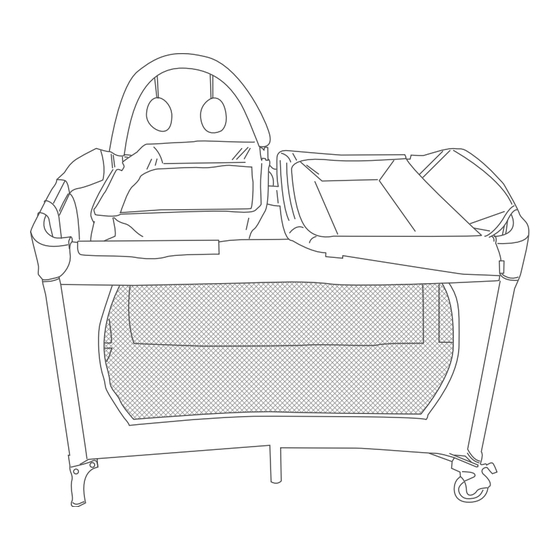
- Page 7 TO ASSEMBLE CHANGING TABLE Fig. 14c Fig. 14d 1 Changing Table 2 Long Curved Bars 2 Short Bar with Connector Knobs WARNING FALLING HAZARD: Children may 15) • Insert Connector Knob Prongs into holes located on both corners of the Playard (Fig.15a).
- Page 8 TO USE THE CHANGING TABLE RESTRAINT SYSTEM TO SECURE THE CHANGING TABLE TO THE PLAYARD 19) • Place child on the changing table, make sure hands and arms are clear of the IMPORTANT! restraint.Bring the restraint around the child’s waist and clip the male and female ends of the buckle together (Fig.
- Page 9 WARNING: FALL HAZARD: Deluxe Side Pocket Organizer • To prevent falls, stop using the product when infant: WARNING: Begins to wiggle out of position or turn over in the Do not place hot liquids or more product. than 2 pounds in the Deluxe Side Pocket Organizer. Serious burns or unstable conditions could result.
- Page 10 ATTENTION: Playard and Full-size bassinet must be fully assembled and securely 23) • At the Top of the napper, insert the left and right frame bar into each of the locked before installing or using the napper and inclined sleeper feature. right and left end of the napper support tube and slide inward until they lock in place (Fig.
- Page 11 TOY BAR INSTALLATION Toy Bar with plush toys* Type may vary 26) • Push down on the ends of the toy bar to secure it onto the top of the frame (Fig. 26). Fig. 26...
Need help?
Do you have a question about the baby joy BB0496 and is the answer not in the manual?
Questions and answers