Table of Contents
Advertisement
Quick Links
OPERATOR'S MANUAL
60V Lithium-Ion Cordless Commercial Series
Top-handle Chain Saw
Model number:TC717
Battery and Charger Sold Separately
WARNING: To reduce the risk of injury, the user must
read and understand the Operator's Manual before using this
product. Save these instructions for future reference.
Advertisement
Table of Contents

Summary of Contents for SUNSEEKER TC717
- Page 1 OPERATOR’S MANUAL 60V Lithium-Ion Cordless Commercial Series Top-handle Chain Saw Model number:TC717 Battery and Charger Sold Separately WARNING: To reduce the risk of injury, the user must read and understand the Operator’s Manual before using this product. Save these instructions for future reference.
-
Page 2: Safety Symbols
READ ALL INSTRUCTIONS! READ & UNDERSTAND OPERATOR'S MANUAL WARNING: Some dust created by power sanding, sawing, grinding, drilling and other construction activities contains chemicals known to the state of California to cause cancer, birth defects or other reproductive harm. Some examples of these chemicals are: Your risk from these exposures varies, depending on how often you do this type of work. -
Page 3: Safety Instructions
pictographs. WARNING! The operation of any power tools can result in foreign objects being thrown into your eyes, which can result in severe eye damage. Before beginning power tool operation, always wear safety goggles or safety glasses with side shields and a full-face shield when needed. - Page 4 Wear Gloves Wear gloves when using the product Wear Boots Wear slip-resistant footwear when using the device Do not expose to rain Do not expose to rain Safe distance Keep a distance from bystanders Take the replaceable battery from the appliance before extension,...
-
Page 5: Work Area Safety
Wear cut-proof protective clothing. Volt Voltage Direct Current Type or a characteristic of current Centimeter Length or size Millimeter Length or size Inch Length or size Kilogram Weight Pound Weight GENERAL BATTERY-OPERATED POWER TOOL SAFETY WARNINGS WARNING! Read all safety warnings, instructions, illustrations and specifications provided with this power tool. -
Page 6: Personal Safety
Keep children and bystanders away while operating a power tool. Distractions can cause you to lose control. Electrical safety Power tool plugs must match the outlet. Never modify the plug in any way. Do not use any adapter plugs with earthed (grounded) power tools. Unmodified plugs and matching outlets will reduce risk of electric shock. - Page 7 Carrying power tools with your finger on the switch or energising power tools that have the switch on invites accidents. Remove any adjusting key or wrench before turning the power tool on. A wrench or a key left attached to a rotating part of the power tool may result in personal injury.
- Page 8 moving parts, breakage of parts and any other condition that may affect the power tool’s operation. If damaged, have the power tool repaired before use. Many accidents are caused by poorly maintained power tools. Keep cutting tools sharp and clean. ...
- Page 9 Do not use a battery pack or tool that is damaged or modified. Damaged or modified batteries may exhibit unpredictable behavior resulting in fire, explosion or risk of injury. Do not expose a battery pack or tool to fire or excessive temperature. ...
- Page 10 Adequate protective equipment will reduce personal and feet is recommended. injury from flying debris or accidental contact with the saw chain. Do not operate a chain saw on a ladder, from a rooftop, or any unstable support. Operation of a chain saw in this manner could result in serious personal injury. Always keep proper footing and operate the chain saw only when standing on ...
- Page 11 Do not operate a chain saw in a tree unless you have been specifically trained to do so. Operation of a chain saw in a tree without proper training could increase the risk of serious personal injury. CAUSES AND OPERATOR PREVENTION OF KICKBACK Kickback may occur when the nose or tip of the guide bar touches an object, or when the wood closes in and pinches the saw chain in the cut.
- Page 12 Kickback Safety Precautions Kickback safety precaution for chainsaw users: kickback may occur when the nose or tip of the guide bar touches an object or when the wood closes in and pinches the saw chain in the cut. In some cases, tip contact may cause a lightning-fast reverse reaction, kicking the guide ...
-
Page 13: Important Safety Instructions
hands when operating a chainsaw, one of which operates the trigger. Otherwise, this can result in the chain saw "skating" or skidding, which can result in personal injury due to loss of control. Keep a good firm grip on the saw which both hands (Fig 3), with the right hand on the rear ... -
Page 14: Specifications
If you lend this tool to someone else, also lend these instructions to them to prevent misuse of the product and possible injury. SAVE THESE INSTRUCTIONS! SPECIFICATIONS Model number TC717 Motor Power 1800W (max) Voltage Cutting lengh... -
Page 15: Packing List
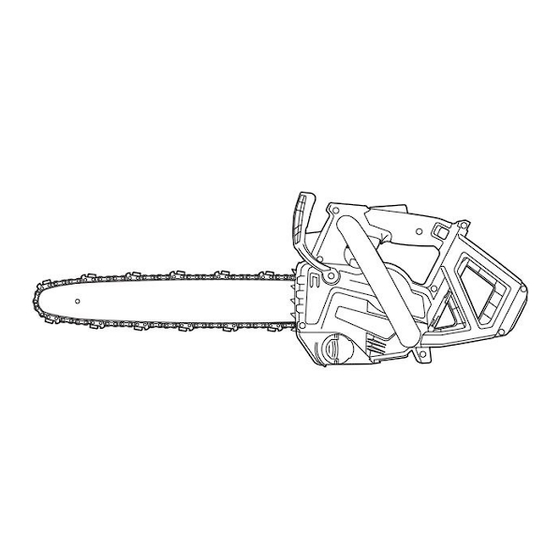
PACKING LIST PART NAME QUANTITY Chain saw Guide bar cover Wrench Operator’s Manual DESCRIPTION KNOW YOUR CHAIN SAW (Fig 4) The safe use of this product requires an understanding of the information on the tool and in this operator’s manual, as well as knowledge of the project you are attempting. Before using this product, familiarize yourself with all operating features and safety rules. - Page 16 1. Front hand guard 10. Oil tank cover 2. Left handle (used for the left 11. Oil tank hand) 3. Rear handle (for the right hand) 12. Battery release button 4. Sprocket cover 13. Oil pump 5. Sprocket cover nut 14.
- Page 17 Sprocket cover nut Keep the sprocket cover and guide bar in place. Lifting hook For hanging the saw to the harness when working in the tree. Chain Catcher Reduces risk of operator contact with the chain if it comes off the bar or breaks. WARNING: Never operate the tool without the guard firmly in place.
- Page 18 listed in the packing list are included. Inspect the tool carefully to make sure that no breakage or damage occurred during shipping. Do not discard the packing material until you have carefully inspected and satisfactorily operated the tool. If any part is damaged or missing, please return the product to the place of purchase.
- Page 19 4. Adjust the chain tension adjuster (E) and assemble the guide bar (C) and chain (D) as shown in Fig 7. Fig 7 5.Tighten sprocket cover nut (A) to install the sprocket cover (B) (Fig 8). Fig 8 6. Hold the guide bar nose up and turn the adjuster (E) clockwise until the chain fits snugly against the underside of the bar.
- Page 20 Chain Lubricant Proper lubrication of the chain while in operation minimizes friction between the chain, the guide bar and sprocket. Use Sunseeker genuine chain oil or Sunseeker recommended chain oil specially formulated for bars and chains for proper lubrication. These oils contain tackifiers, anti-aging and anti-oxidizing agents.
-
Page 21: Operation
Battery Tool Use and Care section. The battery and charger are sold separately. Insert Sunseeker 4Ah battery pack (Model# LBC60140) into the socket, until you hear a clear “click” sound (Fig 12). Fig 12... - Page 22 bar, then pull the battery pack out from the socket (Fig 13). Fig 13 HOLDING AND USING THE CHAIN SAW WARNING: Dress properly to reduce the risk of injury when operating this tool. Do not wear loose clothing or jewelry. Wear eye and ear/hearing protection. Wear heavy-duty, long trousers, boots and gloves.
-
Page 23: Starting/Stopping The Chain Saw
STARTING/STOPPING THE CHAIN SAW To Start Press the power button “ ” on Multi Control Display Unit to light the screen (Fig 15). Pull the Front hand guard towards the front handle (Fig 16). Squeeze the Trigger switch lockout and Trigger switch at the same time to start the chain saw (Fig 16).. - Page 24 WARNING: When servicing, use only identical replacement parts. Use of any other parts may create a hazard or cause product damage. To ensure safety and reliability, all repairs should be performed by an authorized dealer/distributor. WARNING: To avoid serious personal injury, always remove the power cord from the product when cleaning or performing any maintenance.
- Page 25 safe distance between two or more operators when working together simultaneously. Correct Use of Chain Brake WARNING: Kickback is very hazardous. If the tip of the bar touches wood or the like, the guide bar kicks back instantly. The chain brake reduces the possibility of injury due to kickback.
- Page 26 The operator's hand may not be in position to contact the front hand guard. Brake will not be tripped. Lack of proper maintenance lengthens the brake's stopping time, making it less effective. Dirt, grease, oil, pitch, etc. getting into the working parts of the mechanism may lengthen the stopping time.
-
Page 27: Maintenance
adopt a secure work position that allows them to hold both handles of the saw. This results in an increased risk of injury due to: not having a firm grip on the saw if it kicks back, a lack of control of the saw such that it is more likely to come into contact with climbing ... - Page 28 Servicing Guidelines COMPONENT ORSYSTEM MAINTENANCE PROCEDURE Skill Level Daily Or Before Use Saw Chain Inspect / Sharpen / Replace /Clean Battery / Battery Compartment Inspect / Clean / Charge Guide Bar Inspect / Clean Cooling System / Air Filter Inspect / Clean / Replace Chain Brake Inspect / Clean / Replace Inspect / Clean / Replace Screws / Nuts / Bolts...
- Page 29 NOTICE: Inspect the drive sprocket, brake lining for wear or damage when replacing the chain. If signs of wear or damage are present in the areas indicated, have the drive sprocket, brake lining replaced by qualified service technician. How to Sharpen the Cutters Be careful to file all cutters to the specified angles and to the same length, as fast cutting can be obtained only when all cutters are uniform.
- Page 30 WARNING: Failure to replace or repair a damaged chain can cause serious injury Top Plate Sharpening Angles (Fig 21) ◾ CORRECT 30°- This optimal angle can be obtained only when the specified files and proper setting are used. File holders are marked with guide marks to align the file properly to produce the correct top plate angle.
- Page 31 Depth-Gauge Clearance 1. The depth gauge should be maintained at a clearance of 0.025 in. (0.6 mm), as shown in Fig 23. Use a depth-gauge tool (available separately) to check the depthgauge clearances. 2. Check the depth-gauge clearance every time the chain is filed. Use a flat file and a depth-gauge jointer (both available separately) to lower all gauges uniformly (Fig 24).
-
Page 32: Transporting And Storing
CLEANING After each use, clean debris from the chain and guide bar with a soft brush. Wipe the chain saw surface with a clean cloth moistened with a mild soap solution. For deep clearing, remove the side cover assembly, take down the guide bar and ... -
Page 33: Troubleshooting
TROUBLESHOOTING PROBLEM CAUSE SOLUTION chain Battery not installed Check the battery installation. saw doesn’t properly work. Unit does Battery discharged. Remove the battery and allow to cool Battery outside acceptable when turned temperature range. Battery outside acceptable Remove the battery and allow to temperature range cool Unit electronics too hot... - Page 34 ERROR ALARM INDICATOR CAUSE SOLUTION (Light flash times- 0.3s on, 0.3s off) Contact the service point for a professional MOS abnormal consultant or repairing. Contact the service point for a professional Wire short circuit consultant or repairing. Take out the battery and then slide in to restart.
Need help?
Do you have a question about the TC717 and is the answer not in the manual?
Questions and answers