Table of Contents
Advertisement
Available languages
Available languages
Quick Links
Bedienungsanleitung
Manual de instrucciones
Notice d'utilisation
Istruzioni per l'uso
Handleiding
Instruction manual
2.1 Internet Radio mit Basslautsprecher
Radio Internet 2.1 avec caisson de basses
2.1 Internet-radio met lagetonenluidspreker
Radio por internet 2.1 con altavoz de bajos
Radio internet 2.1 con subwoofer
2.1 Internet radio with bass speaker
MEDION
P85444
®
(MD 89295)
Advertisement
Chapters
Table of Contents

Subscribe to Our Youtube Channel
Related Manuals for Medion P85444


Summary of Contents for Medion P85444
- Page 1 2.1 Internet Radio mit Basslautsprecher Radio Internet 2.1 avec caisson de basses 2.1 Internet-radio met lagetonenluidspreker Radio por internet 2.1 con altavoz de bajos Radio internet 2.1 con subwoofer 2.1 Internet radio with bass speaker MEDION P85444 ® (MD 89295)
-
Page 3: Table Of Contents
Inhaltsverzeichnis Informationen zu dieser Bedienungsanleitung .........5 1.1. Zeichenerklärung ....................5 Bestimmungsgemäßer Gebrauch ...............7 Allgemeine Sicherheitshinweise ..............7 EU - Konformitätsinformation ..............10 Informationen zu Markenzeichen ..............11 Lieferumfang ....................11 Geräteübersicht ..................12 7.1. Vorderansicht......................12 7.2. Rückseite .........................13 7.3. Fernbedienung .....................14 Gerät aufstellen ..................15 8.1. - Page 4 Zusatzinformationen, Coverbild ...............27 Wiedergabe über den Anschluss LINE IN ..........27 Audioausgabe über den Anschluss LINE OUT ..........27 ® Bluetooth -Modus ..................28 19.1. Bluetooth-Geräte koppeln ................28 19.2. Steuerung der Titel .....................28 19.3. Bluetooth-Menü ....................28 Sleeptimer und Wecker ................29 20.1. Sleeptimer ......................29 20.2.
-
Page 5: Informationen Zu Dieser Bedienungsanleitung
Informationen zu dieser Bedienungsanlei- tung Vielen Dank, dass Sie sich für unser Produkt entschieden haben. Wir wünschen Ihnen viel Freude mit dem Gerät. Lesen Sie vor Inbetriebnahme die Sicherheitshinweise und die gesamte Anleitung aufmerksam durch. Beachten Sie die Warnungen auf dem Ge- rät und in der Bedienungsanleitung. - Page 6 Auszuführende Sicherheitshinweise Schutzklasse II Elektrogeräte der Schutzklasse II sind Elektrogeräte, die durchge- hend doppelte und/oder verstärkte Isolierung besitzen und keine Anschlussmöglichkeiten für einen Schutzleiter haben. Benutzung in Innenräumen Geräte mit diesem Symbol sind nur für die Verwendung in Innen- räumen geeignet.
-
Page 7: Bestimmungsgemäßer Gebrauch
2. Bestimmungsgemäßer Gebrauch Ihr Gerät bietet Ihnen vielfältige Möglichkeiten der Nutzung: Das Gerät dient zum Abspielen von Tonmedien (Bluetooth®, USB-Geräte) sowie zum Radioempfang (DAB, FM und Internet). Der genannte Empfangsbereich stellt die technischen Möglich- keiten des Gerätes dar. Außerhalb dieses Bereiches empfangene Informationen dürfen nicht verwendet oder weiter verbreitet werden. - Page 8 Stellen Sie keine mit Flüssigkeit gefüllten Gefäße, wie z. B. Va- sen, auf das Gerät oder in die nähere Umgebung und schüt- zen Sie alle Teile vor Tropf- und Spritzwasser. Das Gefäß kann umkippen und die Flüssigkeit kann die elektrische Sicherheit beeinträchtigen.
- Page 9 Halten Sie neue und gebrauchte Batterien von Kindern fern. Batterien nicht verschlucken, es besteht die Gefahr einer che- mischen Verätzung. Batterien sind kein Spielzeug! Kontakt mit Batteriesäure vermeiden. Bei Kontakt mit Haut, Augen oder Schleimhäuten die betroffene Stellen mit reich- lich klarem Wasser spülen und umgehend einen Arzt aufsu- chen.
-
Page 10: Eu - Konformitätsinformation
4. EU - Konformitätsinformation Hiermit erklärt die MEDION AG, dass sich dieses Gerät in Übereinstim- mung mit den grundlegenden Anforderungen und den übrigen ein- schlägigen Bestimmungen befindet: • RE- Richtline 2014/53/EU • Öko-Design Richtlinie 2009/125/EG • RoHS-Richtlinie 2011/65/EU Alle Multimediageräte, die an die entsprechenden Anschlüsse des Gerätes ange- schlossen werden, müssen den Anforderungen der Niederspannungsrichtlinie ent-... -
Page 11: Informationen Zu Markenzeichen
5. Informationen zu Markenzeichen Die Bluetooth® Wortmarke und die Logos sind eingetragene Marken von Bluetooth SIG, Inc. und werden von MEDION unter Lizenz verwendet. Andere Warenzeichen sind Eigentum ihrer jeweiligen Besitzer. 6. Lieferumfang GEFAHR! Erstickungsgefahr! Verpackungsmaterial ist kein Spielzeug! Verpackungs- folien können verschluckt oder unsachgemäß... -
Page 12: Geräteübersicht
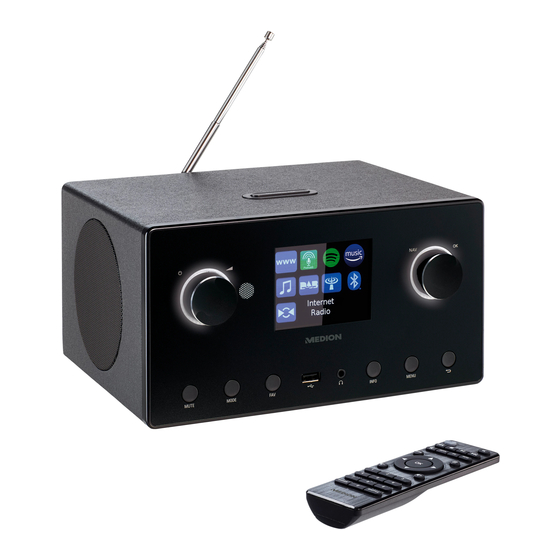
7. Geräteübersicht 7.1. Vorderansicht Display 2. N A V – durch Drehen im Menü navigieren; O K – durch Drücken Menüauswahl bestätigen; manuelle Sendersuche im FM- Modus 3. Lautsprecher – Eine Menüebene zurück 5. M E N U – Einstellmenü aufrufen 6. -
Page 13: Rückseite
7.2. Rückseite DC 16 V 2,5 A 15. D C P O W E R O N / O F F – Ein-/Ausschalter 16. D C – Buchse für Steckernetzteil 17. DAB/FM-Antenne 18. L I N E O U T – Audioausgang Cinchbuchse L/R 19. -
Page 14: Fernbedienung
7.3. Fernbedienung – Stummschaltung 22. – Vorherigen Titel wiedergeben, FM-Sendersuchlauf rückwärts S T O P – Wiedergabe anhalten – Nächsten Titel wiedergeben, FM-Sendersuchlauf vorwärts – Wiedergabe starten/unterbrechen; gedrückt halten: WLAN deaktivieren / aktivieren 23. I N F O – Displayanzeigen wechseln/ WPS-Funktion 24. -
Page 15: Gerät Aufstellen
30. S L E E P / S N O O Z E – Ausschaltzeit/Weckwiederholung einstellen 31. M O D E – Betriebsart wählen 32. S C A N – Sendersuchlauf starten (DAB/FM-Radio) – Sender speichern/ gespeicherte Sender aufrufen – Gerät in den Standby Modus schalten 8. -
Page 16: Antenne Ausrichten
8.3. Antenne ausrichten Auf der Rückseite des Gerätes befindet sich eine Teleskopantenne zum Radioemp- fang DAB und FM. Ziehen Sie die Antenne vollständig heraus und richten Sie sie für den besten Empfang aus. 9. Inbetriebnahme Mit den Tasten am Gerät können Sie die wesentlichen Wiedergabefunktionen Ihres Geräts genutzt. -
Page 17: Ersteinrichtung
9.3. Ersteinrichtung Wenn das Gerät zum ersten Mal gestartet wird, durchläuft es die Ersteinrichtung, um die Einstellungen für die Sprache, Datum/Uhrzeit und Netzwerk zu konfigurie- ren. Wählen Sie zunächst die gewünschte Sprache. Folgen Sie dann den Anweisungen zum Zustimmen der Datenschutzbestim- mungen. -
Page 18: Verbindung Zu Einem Netzwerk Herstellen
9.3.2. Verbindung zu einem Netzwerk herstellen Beachten Sie für die folgenden Schritte zur Verbindung mit einem Netz- werk auch die Bedienungsanleitung Ihres Routers. Wählen Sie, ob das Netzwerk immer (auch im Standby-Modus) mit dem Gerät vebunden bleiben soll und bestätigen Sie die Auswahl. Die empfangbaren Netzwerke werden gesucht. -
Page 19: Netzwerkschlüssel Eingeben
Das Gerät speichert die Verbindungsdaten, sodass sie bei einer erneuten Verbin- dung nicht noch einmal eingegeben werden müssen. PIN eingeben Wenn der Router über keine WPS-Taste verfügt, aber die Möglichkeit der WPS-Ver- bindung über die PIN-Eingabe im Web-Interface des Routers bietet, wählen Sie die Option PIN EINGEBEN. -
Page 20: Betriebsart Wählen
9.4. Betriebsart wählen Drücken Sie die Taste M O D E . Wählen Sie mit (N A V / O K drehen am Gerät) die gewünschte Betriebsart und bestätigen mit O K . Die gewählte Be- triebsart wird im Display angezeigt: –... -
Page 21: Kopfhörer Anschließen
9.5.3. Kopfhörer anschließen Auf der Vorderseite des Gerätes befindet sich ein 3,5 mm Kopfhöreranschluss. Öffnen Sie die Abdeckung, hinter der sich mehrere Anschlüsse befinden. Stecken Sie einen Kopfhörer mit einem 3,5 mm Klinkenstecker in den Kopfhörer- anschluss . Ist ein Kopfhörer angeschlossen, werden die Lautsprecher abgeschaltet. -
Page 22: Dab- & Fm-Radio
11. DAB- & FM-Radio Sie können mit dem Gerät sowohl DAB- als auch FM-Radiosender empfangen. Wäh- len Sie den gewünschten Radiobetrieb: Drücken Sie die Taste M O D E . Wählen Sie mit (N A V / O K drehen am Gerät) die Betriebsart DAB+ RADIO oder FM RADIO aus und bestätigen mit O K . -
Page 23: Favoritenlisten
– AUTOM. SPEICHERUNG – Automatischen Suchlauf mit Speicherung aller gefundenen Sender starten. – SYSTEMEINSTELLUNGEN – siehe „21. Systemeinstellungen“ auf Seite 30. – HAUPTMENÜ – siehe „9.4. Betriebsart wählen“ auf Seite 20 12. Favoritenlisten Sie können Internet-, DAB- oder FM-Sender sowie Podcasts Favoritenlisten ablegen. Jeder Modus hat eine eigene Liste mit jeweils 40 Speicherplätzen. -
Page 24: Spotify Connect
13. Spotify Connect Verwende dein Smartphone, Tablet oder deinen Computer als Fernbedienung für Spotify. Auf spotify.com/connect er- fährst du mehr. The Spotify Software is subject to third party licenses found here: https://www.spotify.com/connect/third-party-licenses Drücken Sie die Taste M O D E . Wählen Sie mit (N A V / O K drehen am Gerät) die Betriebsart SPOTIFY aus und bestätigen mit O K . -
Page 25: Usb-Speicher Wiedergeben
15. USB-Speicher wiedergeben Sie können mit dem Gerät USB-Speicher wiedergeben. Wählen Sie die gewünschte Betriebsart: Drücken Sie die Taste M O D E . Wählen Sie mit (N A V / O K drehen am Gerät) die Betriebsart MUSIKABSPIELER aus und bestätigen mit O K . ... -
Page 26: Wiedergabeliste
15.4. Wiedergabeliste Mit einer Wiedergabeliste wählen Sie nur bestimmte Titel zur Wiedergabe aus. Die Reihenfolge, in der die Kapitel wiedergegeben werden, können Sie dabei selbst be- stimmen. 15.4.1. Titel hinzufügen Wählen Sie zunächst einen Titel aus, den Sie zur Wiedergabeliste hinzufügen möchten. -
Page 27: Zusatzinformationen, Coverbild
16. Zusatzinformationen, Coverbild Es können Zusatzinformationen wie z. B. der Sendername, der Titelinformationen oder die aktuelle Art der Sendung zu einem Radiosender oder Podcast angezeigt werden. Drücken Sie die Taste I N F O wiederholt, um Zusatzinformationen nacheinander abzurufen. Das Logo eines Senders/einer Sendung kann groß... -
Page 28: Bluetooth ® -Modus
® 19. Bluetooth -Modus Sie können mittels Bluetooth schnurlos Titel von externen Geräten (z. B. MP3 Player oder Mobiltelefon mit Bluetooth) auf diesem Gerät wiedergeben. Drücken Sie die Taste M O D E . Wählen Sie mit (N A V / O K drehen am Gerät) die Betriebsart BLUETOOTH aus und bestätigen mit O K . -
Page 29: Sleeptimer Und Wecker
20. Sleeptimer und Wecker 20.1. Sleeptimer Mit dem Sleeptimer (Schlummer) schaltet sich das eingeschaltete Gerät nach einer definierten Zeit automatisch ab. Drücken Sie die Taste S N O O Z E wiederholt, um die gewünschte Dauer zum Abschalten des Gerätes einzustellen. Das Gerät schaltet nach der voreingestellten Zeit ab. -
Page 30: Systemeinstellungen
21. Systemeinstellungen Das Systemmenü beinhaltet allgemeine Einstellungen, die das Gerät betreffen. Das Menü erreichen Sie in allen Betriebsarten. Drücken Sie in einer beliebigen Betriebsart die Taste (MENU am Gerät). Wählen Sie mit den Eintrag SYSTEMEINSTELLUNGEN und bestätigen Sie mit O K . - Page 31 Menüname Beschreibung ZEIT/DATUM ZEIT/DATUM Manuelle Einstellung der Uhrzeit und des EINSTELLEN Datums AUTOM. UP Wählen Sie, ob Datum und Uhrzeit auto- DATE matisch über das DAB-, das FM-Signal oder über Netzwerk eingestellt werden sollen oder nicht. Die automatische Einstellung erfolgt täglich zwischen 4 und 5 Uhr.
-
Page 32: Steuerung Über Die App
22. Steuerung über die App Mit der App auf Ihrem Smartphone oder Tablet PC können Sie Ihr Internetradio steuern. Neben den gängigen Einstellungsmöglichkeiten wie Start, Stopp, Repeat oder das Erstellen von Favoriten-Listen und Sendersuchläufen, bietet die App die Möglich- keit, den Klang individuell anzupassen. 22.1. -
Page 33: Reinigung
Wenn die WLAN-Funktion in Betriebsarten, die kein WLAN verwenden (AUX-IN, FM-Radio, DAB-Radio,), ausgeschaltet wird, funktioniert die Steuerung über die MEDION LifeStream 2 Applikation nicht. 23. Reinigung Bevor Sie das Gerät reinigen, ziehen Sie unbedingt immer zuerst den Netzstecker. Verwenden Sie für die Reinigung nur ein trockenes, weiches Tuch. Benutzen Sie kei- ne chemischen Lösungs- und Reinigungsmittel, weil diese die Oberfläche und/oder... -
Page 34: Wenn Störungen Auftreten
25. Wenn Störungen auftreten Sollten Störungen auftreten, prüfen Sie bitte zunächst, ob Sie das Problem selbst beheben können. Die folgende Übersicht kann Ihnen dabei helfen. Störung Mögliche Ursache Maßnahme Kein Ton Die aktuelle Lautstärke ist zu Erhöhen Sie die Lautstärke. gering eingestellt. -
Page 35: Entsorgung
26. Entsorgung VERPACKUNG Ihr Gerät befindet sich zum Schutz vor Transportschäden in einer Verpa- ckung. Verpackungen sind aus Materialien hergestellt, die umweltscho- nend entsorgt und einem fachgerechten Recycling zugeführt werden können. GERÄT (nur für Deutschland) Alle mit dem nebenstehenden Symbol gekennzeichneten Elektro- bzw. Elektronikgeräte dürfen nicht im normalen Hausmüll entsorgt werden, sondern sind vom Endnutzer am Ende ihrer Lebenserwartung einer vom unsortierten Siedlungsabfall getrennten Erfassung zuzuführen. - Page 36 der Altgeräte zur Verfügung. Die Adressen können Sie von Ihrer Kom- munalverwaltung erhalten. Verfügt das Altgerät über Datenspeicher, sollten vor der Rückgabe alle Daten extern gesichert und von dem Altgerät dauerhaft und unwider- ruflich gelöscht werden. Endnutzer sind ausschließlich selbst dafür ver- antwortlich, dass alle personenbezogenen Daten auf den zu entsorgen- den Altgeräten gelöscht sind.
-
Page 37: Technische Daten
27. Technische Daten Netzadapter Hersteller GME Technology (Shenzhen) Co., Ltd Importeur: MEDION AG Am Zehnthof 77 45307 Essen Deutschland HR-Nummer: HRB 13274 Modellbezeichnung GME48E-160250FGR Eingangsspannung / Strom / Eingangs- 100–240 V~, 50 – 60 Hz, 1,2 A wechselstromfrequenz Ausgangsspannung / Strom... - Page 38 Radio UKW-Band 87,5–108 MHz DAB-Band III 174,928–239,200 MHz Senderspeicher 40 (DAB), 40 (UKW), 40 (Internetradio) Ausgangsleistung 2 x 7,5 W + 1x 15 W RMS Spannungsversorgung DC 16,0 V 2,5 A Leistungsaufnahme im Betrieb 24 W WLAN aktiviert: 0,91 W Leistungsaufnahme im Standby-Modus WLAN deaktiviert: 0,71 W Standard USB Host (Version 2.0) mit bis USB-Eingang zu 128 GB und MP3-Decoding...
- Page 39 Innen ca. 35 – 100 m / Reichweite Außen ca. 100 – 300 m MHz: 2412–2472 Kanäle: 22 max. Sendeleistung/dBm: 15,99 MHz: 5180–5700 Frequenzbereiche Kanal: 47 max. Sendeleistung/dBm: 13,83 MHz: 5745–5825 Kanal: 12 max. Sendeleistung/dBm: 8,44 Anschlüsse für externe Funktionen FM-Antenne Telekopantenne 3,5 mm Klinkenstecker...
-
Page 40: Serviceinformationen
Ihre Erfahrungen austauschen und Ihr Wissen weiter- geben. Sie finden unsere Service-Community unter community.medion.com. • Gerne können Sie auch unser Kontaktformular unter www.medion.com/contact nutzen. • Selbstverständlich steht Ihnen unser Serviceteam auch über unsere Hotline oder postalisch zur Verfügung. -
Page 41: Impressum
Diese Bedienungsanleitung ist urheberrechtlich geschützt. Vervielfältigung in mechanischer, elektronischer und jeder anderen Form ohne die schriftliche Genehmigung des Herstellers ist verboten. Das Copyright liegt bei der Firma: MEDION AG Am Zehnthof 77 45307 Essen Deutschland Bitte beachten Sie, dass die oben stehende Anschrift keine Retourenanschrift ist. - Page 43 Sommaire Informations concernant la présente notice d’utilisation .......45 1.1. Explication des symboles .................45 Utilisation conforme ...................47 Consignes de sécurité générales ...............47 Information relative à la conformité UE ..........50 Informations sur les marques déposées ........... 51 Contenu de l’emballage ................51 Vue d’ensemble de l’appareil ..............52 7.1.
- Page 44 Informations complémentaires, photo de couverture ......67 Lecture via le port LINE IN ................67 Sortie audio par le port LINE OUT .............67 ® ............................68 Mode Bluetooth 19.1. Couplage d’appareils Bluetooth ..............68 19.2. Gestion des titres ....................68 19.3. Menu Bluetooth ....................68 Minuterie de sommeil et réveil ..............69 20.1.
-
Page 45: Informations Concernant La Présente Notice D'utilisation
Informations concernant la présente notice d’utilisation Merci d’avoir choisi notre produit. Nous vous souhaitons une bonne uti- lisation. Veuillez lire attentivement les consignes de sécurité et la notice d’utili- sation dans son intégralité avant la mise en service de l’appareil. Tenez compte des avertissements figurant sur l’appareil et dans la notice d’uti- lisation. - Page 46 Consignes de sécurité à respecter Classe de protection II Les appareils électriques de la classe de protection II sont des appa- reils électriques qui possèdent une isolation double continue et/ou renforcée et qui ne présentent pas de possibilité de branchement pour une mise à la terre. Utilisation en intérieur Les appareils portant ce symbole sont exclusivement destinés à...
-
Page 47: Utilisation Conforme
2. Utilisation conforme Cet appareil vous offre les possibilités d’utilisation suivantes : L’appareil peut être utilisé pour la lecture de différents médias (Bluetooth®, périphériques USB), ainsi que la réception radio (DAB, FM et Internet). La plage de réception mentionnée représente les possibilités techniques de l’appareil. - Page 48 Ne posez pas de récipients remplis de liquide tels que des vases sur l’appareil ou à proximité de celui-ci et protégez toutes les pièces contre les gouttes et projections d’eau. Le ré- cipient peut se renverser et le liquide risque de compromettre la sécurité...
- Page 49 Conservez les piles neuves et usagées hors de portée des enfants. L’ingestion de piles présente un risque de brûlure chimique. Les piles ne sont pas des jouets ! Évitez tout contact avec l’acide des piles. En cas de contact avec la peau, les yeux ou les muqueuses, rincez abondam- ment les zones concernées à...
-
Page 50: Information Relative À La Conformité Ue
4. Information relative à la conformité UE Par la présente, MEDION AG déclare que cet appareil est conforme aux exigences essentielles et autres dispositions applicables : • Directive RE 2014/53/UE • Directive sur l’écoconception 2009/125/CE • Directive RoHS 2011/65/UE Tous les appareils multimédia raccordés aux ports correspondants de l’appareil doivent satisfaire aux exigences de la directive basse tension. -
Page 51: Informations Sur Les Marques Déposées
5. Informations sur les marques déposées Le nom de marque et les logos Bluetooth® sont des marques déposées de Bluetoo- th SIG, Inc. et sont utilisés par MEDION sous licence. Les autres marques déposées appartiennent à leurs propriétaires respectifs. 6. Contenu de l’emballage DANGER ! -
Page 52: Vue D'ensemble De L'appareil
7. Vue d’ensemble de l’appareil 7.1. Vue de face Écran 2. NAV - Tourner pour naviguer dans le menu ; OK - Appuyer pour confirmer une option de menu ; rechercher manuellement des stations en mode FM 3. Haut-parleurs - Reculer d'un niveau dans le menu 5. -
Page 53: Face Arrière
7.2. Face arrière DC 16 V 2,5 A 15. DC POWER ON/OFF - Bouton Marche/Arrêt 16. DC - Prise pour l’adaptateur secteur 17. Antenne DAB/FM 18. LINE OUT - sortie audio prise RCA G/D 19. LINE IN - entrée audio jack stéréo 3,5 mm 20. -
Page 54: Télécommande
7.3. Télécommande – Mise en sourdine 22. - Lecture de la piste précédente, recherche des stations FM en arrière STOP - arrêter la lecture - Lecture de la piste suivante, recherche des stations FM en avant - Démarrer/interrompre la lecture ; maintenir la touche enfoncée : désacti- ver/activer le Wi-Fi 23. -
Page 55: Installation De L'appareil
30. SLEEP/SNOOZE - Régler l'heure d'extinction/répétition du réveil 31. MODE – Sélection du mode de fonctionnement 32. SCAN - Démarrer la recherche des stations (radio DAB/FM) - Mémorisation de stations/affichage des stations mémorisées - Mettre l’appareil en mode veille 8. Installation de l’appareil ... -
Page 56: Orientez Convenablement L'antenne
8.3. Orientez convenablement l’antenne À l’arrière de l’appareil se trouve une antenne télescopique pour la réception radio DAB et FM. Dépliez entièrement l’antenne et orientez-la de manière à obtenir la meilleure réception possible. 9. Mise en service Vous pouvez utiliser les fonctions de lecture essentielles de votre appareil à l’aide de ses boutons. -
Page 57: Configuration Initiale
9.3. Confi guration initiale Lorsque l’appareil est démarré pour la première fois, il passe par la configuration ini- tiale pour configurer les paramètres de langue, de date/heure et de réseau. Tout d’abord, sélectionnez la langue souhaitée. Suivez ensuite les instructions pour accepter la politique de confidentialité. ... -
Page 58: Connexion À Un Réseau
9.3.2. Connexion à un réseau Reportez-vous également au mode d’emploi de votre routeur pour connaître les étapes suivantes pour vous connecter à un réseau. Indiquez si vous souhaitez que le réseau reste toujours connecté à l’appareil (même en mode veille) et confirmez la sélection. Les réseaux de réception sont recherchés. -
Page 59: Saisie De La Clé De Réseau
Saisie du code PIN Si le routeur ne comporte pas de bouton WPS, mais permet d’établir une connexion WPS en saisissant le code PIN sur l’interface Web du routeur, sélectionnez l’option ENTRER LE CODE PIN. Lorsque vous y êtes invité, saisissez le code PIN indiqué sur l’écran de la radio In- ternet sur l’interface Web du routeur et confirmez votre saisie.. -
Page 60: Sélection Du Mode De Fonctionnement
9.4. Sélection du mode de fonctionnement Appuyez sur le bouton MODE. Sélectionnez (à l’aide du bouton rotatif NAV/OK sur l’appareil) le mode de fonctionnement souhaité, puis OK pour valider la sélection. Le mode de fonctionnement sélectionné s’affiche à l’écran : –... -
Page 61: Radio Internet & Podcasts
9.5.3. Connexion d’un casque audio Sur la face avant, l’appareil est équipé d’une prise pour casque de 3,5 mm . Ouvrez le cache derrière lequel se trouvent plusieurs raccords. Branchez un casque doté d’un connecteur jack 3,5 mm sur cette prise . Lorsque le casque audio est connecté, les haut-parleurs sont désactivés. -
Page 62: Radio Dab Et Fm
11. Radio DAB et FM Vous pouvez recevoir les stations de radio DAB et FM avec cet appareil. Sélectionnez le mode de radio souhaité : Appuyez sur le bouton MODE. Sélectionnez (à l’aide du bouton rotatif NAV/OK sur l’appareil) le mode de fonctionnement DAB RADIO ou FM RA DIO, puis OK pour valider la sélection. -
Page 63: Liste De Favoris
Radio FM – RÉGLAGES RECHERCHE – Indiquez si la recherche doit porter sur toutes les stations (y compris celles dont le signal est faible) ou seulement sur les sta- tions dont le signal est fort. – RÉGLAGES AUDIO – Choisissez si vous souhaitez lire le son mono ou le son stéréo. -
Page 64: Spotify Connect
13. Spotify Connect Utilisez votre smartphone, tablette ou ordinateur comme télécommande pour Spotify. Connectez-vous sur spotify. com/connect pour en savoir plus. L’utilisation du logiciel Spotify fait l’objet de licences tierces disponibles à l’adresse suivante : https://www.spotify.com/connect/third-party-licenses Appuyez sur le bouton MODE. Sélectionnez (à l’aide du bouton rotatif NAV/OK sur l’appareil) le mode SPOTIFY, puis OK pour valider la sélection. -
Page 65: Lecture De Clés Usb
15. Lecture de clés USB Vous pouvez utiliser l’appareil pour lire des clés USB. Sélectionnez le mode de fonc- tionnement souhaité : Appuyez sur le bouton MODE. Sélectionnez (à l’aide du bouton rotatif NAV/OK sur l’appareil) le mode USB, puis OK pour valider la sélection. ... -
Page 66: Liste De Lecture
15.4. Liste de lecture : Avec une liste de lecture, vous ne sélectionnez que certains titres à lire. Vous pouvez déterminer vous-même l’ordre de lecture des titres dans ce répertoire. 15.4.1. Ajouter un titre Sélectionnez d'abord un titre que vous souhaitez ajouter à la liste de lecture. Pour ce faire, ouvrez le menu LECTURE USB en appuyant sur le bouton prenez un titre actuel pendant la lecture. -
Page 67: Informations Complémentaires, Photo De Couverture
16. Informations complémentaires, photo de couverture D’autres informations peuvent être affichées, telles que le nom de la station, les informations sur le titre ou le type d’émission actuel d'une station radio ou d'un po- dcast Appuyez sur le bouton INFO à plusieurs reprises pour obtenir des informations supplémentaires l’une après l’autre. -
Page 68: Mode Bluetooth
® 19. Mode Bluetooth Via Bluetooth, vous pouvez démarrer la lecture sans fil de titres à partir de périphé- riques externes (p. ex. lecteur MP3 ou téléphone portable Bluetooth). Appuyez sur le bouton MODE. Sélectionnez (à l’aide du bouton rotatif NAV/OK sur l’appareil) le mode BLUETOOTH, puis OK pour valider la sélec- tion. -
Page 69: Minuterie De Sommeil Et Réveil
20. Minuterie de sommeil et réveil 20.1. Minuterie de sommeil Grâce à la minuterie de sommeil (Schlummer), l’appareil s’éteint automatiquement au terme d’une durée définie. Appuyez sur le bouton SNOOZE à plusieurs reprises pour régler la durée sou- haitée pour l'arrêt de l'appareil. L’appareil s’éteint après la durée prédéfinie. -
Page 70: Configuration
21. Confi guration Le menu système contient les paramètres généraux qui s’appliquent à l’appareil. Le menu est accessible dans tous les modes de fonctionnement. Dans n'importe quel mode de fonctionnement, appuyez sur le bouton (MENU sur l'appareil). Utilisez pour sélectionner CONFIGURATION et confirmez avec OK. Vous pouvez effectuer les réglages suivants : Nom du menu Description... - Page 71 Nom du menu Description Réglage manuel de l’heure et de la date DATE/ RÉGLAGE HEURE HEURE ET DATE Choisissez si la date et l’heure doivent être MAJ AUTO réglées automatiquement ou non via le si- MATIQUE gnal DAB ou FM ou via le réseau. Le réglage automatique s’effectue tous les jours entre 4 et 5 heures.
-
Page 72: Commande Via L'application
Nom du menu Description RÉTROÉCLAI VARIATION Durée au bout de laquelle la variation d’in- RAGE D'INTENSITÉ tensité de l’écran en fonctionnement doit EN FONCTION être réalisée lorsqu'aucune commande n'est NEMENT effectuée. LUMINOSITÉ Sélection de la luminosité de l'écran en fonc- EN FONCTION... - Page 73 – Dans DURCHSUCHEN vous pouvez rechercher des stations de radio Inter- net/podcasts. Si la fonction Wi-Fi est désactivée dans les modes n’utilisant pas le Wi-Fi (AUX-IN, radio FM, radio DAB) – la commande via l’application MEDION LifeStream 2 ne fonctionne pas.
-
Page 74: Nettoyage
23. Nettoyage Avant de nettoyer l’appareil, débranchez impérativement la fiche d’alimentation de la prise de courant. Pour le nettoyage, utilisez uniquement un chiffon doux et sec. Évitez les solvants et les produits d’entretien chimiques qui pourraient endommager la surface et/ou les inscriptions de l’appareil. - Page 75 Problème Cause possible Mesure Réception ra- Les signaux émis sont trop Ajustez la fréquence de la dio inexistante faibles. station. ou de mau- Changez éventuellement la vaise qualité radio de place ou modifiez l’orientation de l’antenne pour améliorer la réception. Aucune fonc- Le bloc d’alimentation n’est Vérifiez que le bloc d’ali-...
-
Page 76: Recyclage
26. Recyclage EMBALLAGE L’appareil est placé dans un emballage afin de le protéger contre tout dommage pendant le transport. Les emballages sont fabriqués à partir de matériaux qui peuvent être recyclés de manière écologique et remis à un service de recyclage approprié. APPAREIL Il est interdit d’éliminer les appareils usagés portant le symbole ci-contre avec les déchets ménagers. -
Page 77: Caractéristiques Techniques
27. Caractéristiques techniques Adaptateur secteur Fabricant GME Technology (Shenzhen) Co., Ltd Importateur : MEDION AG Am Zehnthof 77 45307 Essen Allemagne Numéro HR : HRB 13274 Modèle GME48E-160250FGR Tension/courant d’entrée/fréquence 100–240 V~, 50 – 60 Hz, 1,2 A du courant alternatif d’entrée Tension/courant de sortie 16,0 V... - Page 78 Radio Bande FM 87,5–108 MHz Bande DAB III 174,928–239,200 MHz Emplacements mémoire pour stations 40 (DAB), 40 (FM), 40 (radio internet) Puissance de sortie 2 × 7,5 W + 1× 15 W RMS Alimentation électrique 16,0 V CC 2,5 A Consommation en fonctionnement 24 W Wi-Fi activé : 0,91 W Consommation en mode veille Wi-Fi désactivé : 0,71 W Hôte USB standard (version 2.0), 128 Go Entrée USB...
- Page 79 À l’intérieur env. 35 – 100 m / Portée À l’extérieur env. 100 – 300 m MHz : 2412-2472 Chaînes : 22 Puissance d’émission max./dBm : 15,99 MHz : 5180-5700 Gamme de fréquences Canal : 47 Puissance d’émission max./dBm : 13,83 MHz : 5745-5825 Canal : 12 Puissance d’émission max./dBm : 8,44 Ports pour fonctions externes Antenne FM Antenne télescopique...
-
Page 80: Informations Relatives Au Service Après-Vente
Au sein de notre Service-Community, vous pouvez discuter avec d’autres utili- sateurs ainsi qu’avec nos collaborateurs pour partager vos expériences et vos connaissances. Vous pouvez accéder à notre Service-Community ici : community.medion.com. • Vous pouvez également utiliser notre formulaire de contact disponible ici : www.medion.com/contact. - Page 81 02 - 200 61 98 Hotline SAV (Luxembourg) 34 - 20 808 664 Adresse du service après-vente MEDION B.V. John F.Kennedylaan 16a 5981 XC Panningen Pays-Bas La présente notice d’utilisation et bien d’autres sont disponibles au téléchargement sur le portail du SAV www.medionservice.com.
-
Page 82: Mentions Légales
La présente notice d’utilisation est protégé par les droits d’auteur. Toute reproduction sous forme mécanique, électronique ou sous toute autre forme que ce soit est interdite sans l’autorisation préalable écrite du fabricant. L’entreprise suivante possède les droits d’auteur : MEDION AG Am Zehnthof 77 45307 Essen Allemagne Veuillez noter que l’adresse ci-dessus n’est pas celle du service des retours. - Page 83 Inhoudsopgave Informatie over deze gebruiksaanwijzing ..........85 1.1. Betekenis van de symbolen ................85 Gebruiksdoel ....................87 Algemene veiligheidsvoorschriften ............87 EU-conformiteitsinformatie ..............90 Informatie over handelsmerken ..............91 Inhoud van de levering ................91 Overzicht van het apparaat ...............92 7.1. Vooraanzicht ......................92 7.2.
- Page 84 Aanvullende informatie, coverafbeelding ..........107 Afspelen via de aansluiting LINE IN ............107 Audio afspelen via de aansluiting LINE OUT .......... 107 ® Bluetooth -modus ..................108 19.1. Bluetoothapparaten koppelen ..............108 19.2. Bediening voor het afspelen ................. 108 19.3. Bluetoothmenu ....................108 Sleeptimer en wekker................109 20.1.
-
Page 85: Informatie Over Deze Gebruiksaanwijzing
Informatie over deze gebruiksaanwijzing Hartelijk dank dat u voor ons product hebt gekozen. Wij wensen u veel plezier met het apparaat. Lees de veiligheidsvoorschriften en de volledige gebruiksaanwijzing aandachtig door voordat u het apparaat in gebruik neemt. Neem de waarschuwingen op het apparaat en in de gebruiksaanwijzing in acht. Houd de gebruiksaanwijzing altijd binnen handbereik. - Page 86 Veiligheidsklasse II Elektrische apparaten van veiligheidsklasse II zijn elektrische appa- raten die zijn voorzien van een dubbele en/of extra sterke isolatie en geen aansluitmogelijkheden hebben voor een aardleiding. Gebruik binnenshuis Apparaten met dit symbool zijn alleen geschikt voor gebruik bin- nenshuis.
-
Page 87: Gebruiksdoel
2. Gebruiksdoel Het apparaat heeft veel gebruiksmogelijkheden: het apparaat dient voor het afspelen van geluidsmedia (Blue- tooth®, USB-apparaten) en voor radio-ontvangst (DAB, FM en internet). Het vermelde ontvangstbereik geeft de technische mogelijk- heden van het apparaat aan. Informatie die buiten dit bereik wordt ontvangen, mag niet worden gebruikt of verder worden verspreid. - Page 88 Zet geen met vloeistof gevulde voorwerpen, zoals vazen, op of vlak bij het apparaat en bescherm alle onderdelen tegen druip- en spatwater. Het betreffende voorwerp kan omvallen en de vloeistof kan de elektrische veiligheid in gevaar bren- gen. Open nooit de behuizing van het apparaat en de netadapter en steek geen voorwerpen door de sleuven en openingen in het apparaat.
- Page 89 Houd nieuwe en gebruikte batterijen uit de buurt van kinde- ren. Slik batterijen niet in; er bestaat gevaar voor chemische brandwonden. Batterijen zijn geen speelgoed! Vermijd contact met batterijzuur. Spoel bij contact met de huid, de ogen of de slijmvliezen de betreffende lichaamsde- len met overvloedig schoon water en raadpleeg onmiddellijk een arts.
-
Page 90: Eu-Conformiteitsinformatie
4. EU-conformiteitsinformatie Hierbij verklaart MEDION AG dat dit apparaat in overeenstemming is met de fundamentele eisen en de overige toepasselijke voorschriften: • RE-richtlijn 2014/53/EU • Ecodesignrichtlijn 2009/125/EG • RoHS-richtlijn 2011/65/EU Alle multimedia-apparaten die worden aangesloten op de daarvoor bedoelde aan- sluitingen van het apparaat, moeten voldoen aan de eisen van de laagspannings- richtlijn. -
Page 91: Informatie Over Handelsmerken
5. Informatie over handelsmerken Het woordmerk en de logo’s van Bluetooth® zijn gedeponeerde merken van Blue- tooth SIG, Inc. en worden door MEDION onder licentie gebruikt. Andere handelsmerken zijn eigendom van de betreffende eigenaren. 6. Inhoud van de levering GEVAAR! -
Page 92: Overzicht Van Het Apparaat
7. Overzicht van het apparaat 7.1. Vooraanzicht Display 2. NAV – Draaien om in het menu te navigeren; OK – indrukken om een menuop- tie te bevestigen; handmatig naar zenders zoeken in de FM-modus 3. Luidspreker – Eén menuniveau terug 5. -
Page 93: Achterkant
7.2. Achterkant DC 16 V 2,5 A 15. DC POWER ON/OFF – aan-uitschakelaar 16. DC – aansluiting voor netadapter 17. DAB-/FM-antenne 18. LINE OUT – Audio-uitgang, tulpaansluiting L/R 19. LINE IN – Audio-ingang 3,5-mm stereoaansluiting 20. Wifi-antenne... -
Page 94: Afstandsbediening
7.3. Afstandsbediening – Geluid dempen 22. – Vorig nummer afspelen, achteruit zoeken naar FM-zenders STOP – Afspelen pauzeren – Volgend nummer afspelen, vooruit zoeken naar FM-zenders – Afspe- len starten/pauzeren; ingedrukt houden: wifi deactiveren/activeren 23. INFO – Wisselen tussen displayweergaves/WPS-functie 24. -
Page 95: Apparaat Plaatsen
30. SLEEP/SNOOZE – Uitschakeltijd/sluimertijd wekker instellen 31. MODE – Modus selecteren 32. SCAN – Zoeken naar zenders starten (DAB/FM-radio) – Zenders opslaan/opgeslagen zenders kiezen – Apparaat in stand-bymodus zetten 8. Apparaat plaatsen Plaats het apparaat op een vlakke, stabiele ondergrond. Sommige agressieve meubellakken kunnen de rubberen voetjes van het apparaat aantasten. -
Page 96: Antenne Uitrichten
8.3. Antenne uitrichten Aan de achterkant van het apparaat bevindt zich een telescopische antenne voor radio-ontvangst DAB en FM. Trek de antenne helemaal uit en richt hem zodanig uit dat de ontvangst opti- maal is. 9. Ingebruikname Met de toetsen op het apparaat kunt u de belangrijkste afspeelfuncties van het ap- paraat activeren. -
Page 97: Eerste Installatie
9.3. Eerste installatie Wanneer het apparaat voor de eerste keer wordt opgestart, doorloopt het de eerste installatie om de instellingen voor taal, datum/tijd en netwerk te configureren. Selecteer eerst de gewenste taal. Volg dan de instructies voor het accepteren van de privacyverklaring. ... - Page 98 9.3.2. Verbinding met een netwerk maken Raadpleeg ook de handleiding van uw router voor de volgende stappen om verbinding te maken met een netwerk. Kies of het netwerk altijd verbonden moet blijven met het apparaat (ook in stand-bymodus) en bevestig de keuze. De beschikbare netwerken worden gezocht.
- Page 99 Het apparaat bewaart de verbindingsgegevens zodat deze bij een nieuwe verbin- ding niet nog eens hoeven te worden ingevoerd. Pincode invoeren Als de router geen WPS-knop heeft, maar wel de mogelijkheid biedt om via invoer van een pincode in de webinterface van de router een WPS-verbinding tot stand te brengen, kiest u de optie PIN INVOEREN.
-
Page 100: Modus Selecteren
9.4. Modus selecteren Druk op de toets MODE. Selecteer met (NAV/OK draai aan het apparaat) de gewenste modus en bevestig met OK. De gekozen modus wordt weergege- ven op het display: – INTERNET RADIO – Internetradio – PODCASTS – Podcastmodus –... -
Page 101: Internetradio En Podcasts
9.5.3. Hoofdtelefoon aansluiten Aan de voorkant van het apparaat bevindt zich een 3,5-mm aansluiting voor een hoofdtelefoon . Open de afdekking waarachter zich verschillende aansluitingen bevinden. Sluit een hoofdtelefoon met een 3,5-mm jackplug aan op de hoofdtelefoonaan- sluiting . Als er een hoofdtelefoon is aangesloten, worden de luidsprekers uitgeschakeld. -
Page 102: Dab- & Fm-Radio
11. DAB- & FM-radio U kunt met het apparaat zowel DAB- alsook FM-radiozenders ontvangen. Kies de gewenste radiomodus: Druk op de toets MODE. Selecteer met (NAV/OK draai aan het apparaat) de modus DAB+ RADIO of FM RADIO en bevestig met OK. Wanneer de radio’s voor het eerst worden gebruikt, wordt er automa- tisch naar zenders gezocht en wordt er een zenderlijst met de gevonden zenders aangemaakt. -
Page 103: Favorietenlijsten
FM-radio – SCANINSTELLING – Selecteer of u wilt zoeken naar alle zenders (ook zwak- ke) of alleen naar sterke zenders. – AUDIOINSTELLING – Kies of u mono- of stereogeluid wilt afspelen. – AUTOM. OPSLAAN – Automatisch zoeken starten en alle gevonden zen- ders opslaan. -
Page 104: Spotify Connect
13. Spotify Connect Gebruik uw smartphone, tablet of computer als afstands- bediening voor Spotify. Ga voor meer informatie naar spo- tify.com/connect. Voor Spotify-software gelden licenties van derden die hier te vinden zijn: https://www.spotify.com/connect/third-party-licenses Druk op de toets MODE. Selecteer met (NAV/OK draai aan het apparaat) de modus SPOTIFY en bevestig met OK. -
Page 105: Afspelen Vanaf Usb-Geheugen
15. Afspelen vanaf USB-geheugen U kunt het apparaat gebruiken om af te spelen vanaf een USB-geheugen. Selecteer de gewenste modus: Druk op de toets MODE. Selecteer met (NAV/OK draai aan het apparaat) de modus USB en bevestig met OK. ... -
Page 106: Afspeellijst
15.4. Afspeellijst Met een afspeellijst selecteert u alleen bepaalde nummers om af te spelen. De volg- orde waarin de nummers worden afgespeeld, kunt u hierbij zelf bepalen. 15.4.1. Nummer toevoegen Selecteer eerst een nummer dat u wilt toevoegen aan de afspeellijst. Hiervoor opent u het menu MIN AFSPILNINGSLISTE met de toets of selecteert u een huidig nummer tijdens het afspelen. -
Page 107: Aanvullende Informatie, Coverafbeelding
16. Aanvullende informatie, coverafbeelding Er kan extra informatie over een radiozender of podcast worden weergegeven, zoals de naam van de zender, informatie over het nummer of het actuele type uitzending. Druk herhaaldelijk op de toets INFO om de aanvullende informatie achtereen- volgens op te vragen. -
Page 108: Bluetooth ® -Modus
® 19. Bluetooth -modus U kunt met bluetooth nummers van externe apparaten (bijvoorbeeld mp3-spelers of mobiele telefoons met bluetooth) draadloos op dit apparaat afspelen. Druk op de toets MODE. Selecteer met (NAV/OK draai aan het apparaat) de modus BLUETOOTH en bevestig met OK. 19.1. -
Page 109: Sleeptimer En Wekker
20. Sleeptimer en wekker 20.1. Sleeptimer Met de sleeptimer (sluimerfunctie) wordt het ingeschakelde apparaat na een be- paalde tijd automatisch uitgeschakeld. Druk herhaaldelijk op de toets SNOOZE om in te stellen na hoeveel tijd het apparaat uitschakelt. Het apparaat schakelt na de vooraf ingestelde tijd uit. ... -
Page 110: Systeeminstellingen
21. Systeeminstellingen Het systeemmenu bevat algemene instellingen die van invloed zijn op het appa- raat. Het menu is beschikbaar in alle modi. Druk in een willekeurige modus op de toets (MENU op het apparaat). Selecteer met de optie SYSTEMEINSTELLUNGEN en bevestig met OK. De volgende instellingen zijn beschikbaar: Menu Omschrijving... - Page 111 Menu Omschrijving Tijd en datum handmatig instellen TIJD/DA TIJD/DATUM INSTELLEN Selecteren of de datum en tijd automatisch AUTOMA via het DAB-signaal, FM-signaal of het net- TISCH UPDA werk moeten worden ingesteld. De automa- tische instelling vindt dagelijks plaats tussen 4 en 5 uur. 12- of 24-uursnotatie instellen.
- Page 112 Menu Omschrijving ACHTER TIMEOUT Duur waarna het scherm tijdens gebruik GRONDVER moet worden gedimd als er geen bediening LICHTING plaatsvindt. AAN STAND De helderheid van het scherm tijdens gebruik selecteren TIMEOUT Duur waarna het scherm tijdens gebruik STANDBY moet worden gedimd in de stand-bymodus als er geen bediening plaatsvindt.
-
Page 113: Bediening Via De App
22. Bediening via de app Met de app op uw smartphone of tablet kunt u uw internetradio bedienen. Naast de gebruikelijke instelmogelijkheden als starten, stoppen, herhalen, het ma- ken van favorietenlijsten en het zoeken naar zenders biedt de app de mogelijkheid om de geluidsinstellingen naar eigen wens aan te passen. -
Page 114: Reiniging
Als bij modi die geen wifi gebruiken (AUX-IN, FM-radio, DAB-radio) de wififunctie uitgeschakeld wordt, is bediening van het apparaat met de MEDION LifeStream 2-app niet mogelijk. 23. Reiniging Haal voordat u het apparaat gaat reinigen, altijd eerst de netstekker uit het stopcon- tact. -
Page 115: Als Zich Storingen Voordoen
25. Als zich storingen voordoen Als zich een storing voordoet, controleer dan eerst of u het probleem zelf kunt op- lossen. Hierbij kunt u het volgende overzicht gebruiken. Storing Mogelijke oorzaak Maatregel Geen geluid Het volume is te laag inge- Verhoog het volume. -
Page 116: Afvalverwerking
26. Afvalverwerking VERPAKKING Uw apparaat zit ter bescherming tegen transportschade in een verpak- king. De verpakking bestaat uit materialen die milieuvriendelijk kunnen worden afgevoerd en vakkundig kunnen worden gerecycled. APPARAAT Alle apparaten die zijn gemarkeerd met het hiernaast afgebeelde sym- bool, mogen bij afdanking niet bij het normale huisvuil worden gedaan. -
Page 117: Technische Gegevens
27. Technische gegevens Netadapter Fabrikant GME Technology (Shenzhen) Co., Ltd Importeur: MEDION AG Am Zehnthof 77 45307 Essen Duitsland HR-nummer: HRB 13274 Modeltype GME48E-160250FGR Ingangsspanning/-stroom/-frequentie 100-240 V~, 50-60 Hz, 1,2 A Uitgangsspanning/-stroom 16,0 V 2,5 A Uitgangsvermogen 40,0 W Gemiddelde efficiëntie tijdens gebruik 90,24% Efficiëntie bij lage belasting (10%) - Page 118 Radio FM-band 87,5 - 108 MHz DAB-band III 174,928 - 239,200 MHz Geheugenplaatsen voor zenders 40 (DAB), 40 (FM), 40 (internetradio) Uitgangsvermogen 2 x 7,5 W + 1x 15 W RMS Voedingsspanning DC 16,0 V 2,5 A Opgenomen vermogen bij gebruik 24 W Wifi geactiveerd: 0,91 W Opgenomen vermogen in stand-bymodus Wifi gedeactiveerd: 0,71 W...
- Page 119 Binnen ca. 35-100 m / Bereik Buiten ca. 100-300 m MHz: 2412-2472 Kanalen: 22 Max. zendvermogen/dBm: 15,99 MHz: 5180-5700 Frequentiebereik Kanaal: 47 Max. zendvermogen/dBm: 13,83 MHz: 5745-5825 Kanaal: 12 Max. zendvermogen/dBm: 8,44 Aansluitingen voor externe functies FM-antenne Telescopische antenne Jackplug 3,5 mm LINE OUT Jackplug 3,5 mm Aansluiting voor hoofdtelefoon...
-
Page 120: Service-Informatie
• In onze Service-Community vindt u andere gebruikers en onze medewerkers en daar kunt u uw ervaringen uitwisselen en uw kennis delen. U vindt onze Service-Community onder community.medion.com. • U kunt natuurlijk ook ons contactformulier gebruiken onder www.medion.com/contact. -
Page 121: Colofon
Deze gebruiksaanwijzing is auteursrechtelijk beschermd. Verveelvoudiging in mechanische, elektronische of welke andere vorm dan ook zonder schriftelijke toestemming van de fabrikant is verboden. Het copyright berust bij de firma: MEDION AG Am Zehnthof 77 45307 Essen Duitsland Houd er rekening mee dat het bovenstaande adres geen retouradres is. Neem eerst... - Page 123 Índice Información acerca de este manual de instrucciones ......125 1.1. Explicación de los símbolos ................125 Uso conforme a lo previsto ..............127 Indicaciones generales de seguridad ............. 127 Información sobre la conformidad UE ............ 130 Información sobre marcas registradas ............131 Volumen de suministro ................131 Vista general del aparato .................
- Page 124 15.5. Repetición, reproducción aleatoria ............146 Información adicional, foto de portada ..........147 Reproducción mediante la conexión LINE IN ......... 147 Emisión de audio mediante la conexión LINE OUT ........ 147 ® ............................148 Modo Bluetooth 19.1. Emparejamiento de equipos con Bluetooth ........... 148 19.2.
-
Page 125: Información Acerca De Este Manual De Instrucciones
Información acerca de este manual de ins- trucciones Muchas gracias por haber elegido nuestro producto. Le deseamos que disfrute con este aparato. Antes de la puesta en servicio, lea atentamente las indicaciones de segu- ridad y todo el manual. Tenga en cuenta las advertencias que aparecen en el propio aparato y en el manual de instrucciones. - Page 126 Clase de protección II Los aparatos eléctricos de la clase de protección II son aparatos que disponen de un aislamiento doble o reforzado continuo y que no tienen posibilidad de conexión de un conductor de puesta a tierra. Uso en interiores Los aparatos con este símbolo solo son aptos para su uso en interio- res.
-
Page 127: Uso Conforme A Lo Previsto
2. Uso conforme a lo previsto Su aparato le ofrece diversas posibilidades de uso: el aparato sirve para reproducir medios de audio (Bluetooth®, dispositivos USB), así como para la recepción de radio (DAB, FM e Internet). Las posibilidades técnicas del aparato vienen dadas por la zona de cobertura indicada. - Page 128 No coloque recipientes llenos de líquido, p. ej., jarrones, sobre el aparato o cerca de este y proteja todas las piezas contra go- tas de agua o agua pulverizada. El recipiente podría volcar y el líquido podría perjudicar la seguridad eléctrica. ...
- Page 129 Mantenga las pilas nuevas y usadas alejadas de los niños. No ingiera las pilas, ya que existe peligro de quemaduras quími- cas. ¡Las pilas no son un juguete! Evite el contacto con el ácido de las pilas. En caso de contacto con la piel, los ojos o las mucosas, lave inmediatamente las zonas afectadas con abundante agua limpia y acuda de inme- diato al médico.
-
Page 130: Información Sobre La Conformidad Ue
4. Información sobre la conformidad UE Por la presente, MEDION AG declara que este aparato cumple los requi- sitos básicos y el resto de disposiciones pertinentes: • Directiva 2014/53/UE sobre la comercialización de equipos ra- dioeléctricos • Directiva 2009/125/CE sobre diseño ecológico •... -
Page 131: Información Sobre Marcas Registradas
5. Información sobre marcas registradas La marca denominativa Bluetooth® y los logotipos son marcas registradas de Blue- tooth SIG, Inc. utilizadas por MEDION con la correspondiente licencia. La titularidad de otras marcas es de su respectivo propietario. 6. Volumen de suministro ¡PELIGRO! ¡Peligro de asfixia! -
Page 132: Vista General Del Aparato
7. Vista general del aparato 7.1. Vista delantera Pantalla 2. NAV: girar para navegar por el menú; OK: presionar para confirmar la selección de menú; búsqueda de emisoras ma- nual en el modo FM 3. Altavoz : retroceder un nivel de menú 5. -
Page 133: Parte Trasera
7.2. Parte trasera DC 16 V 2,5 A 15. DC POWER ON/OFF: interruptor de encendido/apagado 16. DC: conector hembra para la fuente de alimentación 17. Antena DAB/FM 18. LINE OUT: salida de audio (conector hembra RCA izq./dcha.) 19. LINE IN: entrada de audio (conector hembra estéreo de 3,5 mm) 20. -
Page 134: Mando A Distancia
7.3. Mando a distancia : modo silencioso 22. : reproducir la pista anterior, buscar emisoras FM hacia atrás STOP: detener la reproducción: reproducir la siguiente pista, buscar emi- soras FM hacia delante : iniciar/interrumpir la reproducción; pulsación prolongada: desactivar/activar wifi 23. -
Page 135: Colocación Del Aparato
30. SLEEP/SNOOZE: ajustar hora de apagado/repetición de alarma 31. MODE: seleccionar el modo operativo 32. SCAN: iniciar la búsqueda de emisoras (radio DAB/FM) : guardar emisoras/abrir emisoras guardadas : cambiar el aparato al modo Standby 8. Colocación del aparato Coloque el aparato sobre una superficie plana y firme. Algunas pinturas de mue- bles agresivas pueden dañar las patas de goma del aparato. -
Page 136: Orientación De La Antena
8.3. Orientación de la antena En la parte posterior del aparato hay una antena telescópica para la recepción de radio DAB y FM. Extraiga la antena por completo y oriéntela para obtener la mejor recepción. 9. Puesta en servicio Con las teclas del aparato puede utilizar las funciones de reproducción más impor- tantes de su aparato. -
Page 137: Primera Configuración
9.3. Primera confi guración Cuando el aparato se inicia por primera vez, se lleva a cabo la configuración inicial para ajustar el idioma, la fecha/hora y la red. En primer lugar, seleccione el idioma que desee. Siga entonces las instrucciones para aceptar la política de privacidad. ... - Page 138 9.3.2. Establecimiento de conexión a una red Consulte también el manual de instrucciones de su rúter para realizar los pasos que se indican a continuación para conectarse a una red. Seleccione si la red debe permanecer siempre conectada al dispositivo (incluso en modo Standby) y confirme la selección.
- Page 139 Introducción del PIN Si el rúter no dispone de tecla WPS, pero ofrece la posibilidad de conexión WPS me- diante la introducción de un PIN en la interfaz web del rúter, seleccione la opción INTRODUCIR PIN. Cuando se le solicite, introduzca en la interfaz web del rúter el número PIN mos- trado en la pantalla de la radio por Internet y confirme la entrada.
-
Page 140: Selección Del Modo Operativo
9.4. Selección del modo operativo Pulse la tecla MODE. Con (o en el aparato, girando NAV/OK), seleccione el modo operativo deseado y confirme con OK. El modo operativo seleccionado se muestra en la pantalla: – INTERNET RADIO: radio por Internet –... -
Page 141: Conexión De Los Auriculares
9.5.3. Conexión de los auriculares En la parte delantera del aparato hay una conexión para auriculares de 3,5 mm. Abra la cubierta detrás de la cual hay varias conexiones. Enchufe los auriculares con un conector jack de 3,5 mm a la conexión para auri- culares . -
Page 142: Radio Dab Y Fm
11. Radio DAB y FM Con el aparato puede recibir emisoras de radio DAB y FM. Seleccione el modo de radio deseado: Pulse la tecla MODE. Con (o en el aparato, girando NAV/OK), seleccione el modo operativo DAB+ RADIO o FM RADIO y confirme con OK. La primera vez que se utiliza la radio, se lleva a cabo una búsqueda auto- mática de emisoras y se crea una lista de emisoras con las emisoras en- contradas. -
Page 143: Listas De Favoritos
– CONFIGURAR AUDIO: seleccione si debe reproducirse el sonido mono o estéreo. – AUTOM. ALMACENAJE: iniciar una búsqueda automática de emisoras guardando todas las emisoras encontradas. – CONFIGURAR SISTEMA: véase «21. Ajustes del sistema» en la página 150. – MENÚ PRINCIPAL: véase «9.4. Selección del modo operativo» en la pági- na 140. -
Page 144: Spotify Connect
13. Spotify Connect Utilice su smartphone, tablet u ordenador como mando a distancia para Spotify. Encontrará más información en spo- tify.com/connect. El software de Spotify está sujeto a licencias de terceros que pueden encontrarse aquí: https://www.spotify.com/connect/third-party-licenses Pulse la tecla MODE. Con (o en el aparato, girando NAV/OK), seleccione el modo operativo SPOTIFY y confirme con OK. -
Page 145: Reproducción De Memorias Usb
15. Reproducción de memorias USB Puede reproducir memorias USB con el aparato. Seleccione el modo operativo de- seado: Pulse la tecla MODE. Con (o en el aparato, girando NAV/OK), seleccione el modo operativo USB y confirme con OK. ... -
Page 146: Lista De Reproducción
15.4. Lista de reproducción Con una lista de reproducción puede elegir solamente determinadas pistas para la reproducción. El orden en el que se reproducen los capítulos puede determinarlo usted mismo. 15.4.1. Añadir pistas Seleccione en primer lugar una pista que desee añadir a la lista de reproducción. Abra el menú... -
Page 147: Información Adicional, Foto De Portada
16. Información adicional, foto de portada Puede visualizarse información adicional, como el nombre de la emisora, la informa- ción de la pista o el tipo actual de emisión para una emisora de radio. Pulse la tecla INFO varias veces para ir viendo la información adicional de mane- ra sucesiva. -
Page 148: Modo Bluetooth
® 19. Modo Bluetooth Mediante Bluetooth puede reproducir de forma inalámbrica pistas de dispositivos externos (p. ej., reproductor MP3 o teléfono móvil con Bluetooth) en este aparato. Pulse la tecla MODE. Con (o en el aparato, girando NAV/OK), seleccione el modo operativo BLUETOOTH y confirme con OK. -
Page 149: Temporizador De Apagado Y Alarma
20. Temporizador de apagado y alarma 20.1. Temporizador de apagado Con el temporizador de apagado (sleeptimer), el aparato encendido se apaga auto- máticamente tras un tiempo definido. Pulse repetidamente la tecla SNOOZE para ajustar el tiempo deseado hasta la desconexión del aparato. -
Page 150: Ajustes Del Sistema
21. Ajustes del sistema El menú del sistema contiene ajustes generales relacionados con el aparato. El menú está disponible desde todos los modos operativos. Desde cualquier modo operativo, pulse la tecla (MENU en el aparato). Seleccione con la entrada CONFIGURAR SISTEMA y confírmela con OK. Están disponibles los siguientes ajustes: Nombre del menú... - Page 151 Nombre del menú Descripción Ajuste manual de la hora y la fecha HORA/FE FIJAR HORA/ FECHA Seleccione si deben ajustarse automática- ACTUALIZA mente o no la fecha y la hora mediante la CIÓN AUTO señal DAB o FM o a través de la red. El ajuste MÁTICA automático se lleva a cabo todos los días en- tre las 4 y las 5 de la mañana.
-
Page 152: Control A Través De La App
Nombre del menú Descripción LUZ DE FON TIEMPO DE ES Tiempo tras el cual debe atenuarse la panta- PERA lla durante el funcionamiento si no se pulsa ninguna tecla. EN EL NIVEL Selección del brillo de la pantalla en funcio- namiento. -
Page 153: Limpieza
Si la función wifi se desconecta en los modos operativos que no utilizan wifi (AUX-IN, Radio FM, Radio DAB), no será posible controlar el sistema de audio a través de la aplicación MEDION LifeStream 2. 23. Limpieza Antes de limpiar el aparato, desenchúfelo siempre primero de la red eléctrica. -
Page 154: En Caso De Fallos
25. En caso de fallos En caso de que se produzcan fallos, compruebe primero si puede solucionar usted mismo el problema. La siguiente tabla puede resultarle de ayuda. Fallo Posible causa Medida No hay sonido. El volumen se ha ajustado Suba el volumen. -
Page 155: Eliminación
26. Eliminación EMBALAJE Su aparato se envía embalado para protegerlo de posibles daños duran- te el transporte. Los embalajes están hechos con materiales que pueden desecharse de forma respetuosa con el medio ambiente y llevarse a un punto de reciclaje. APARATO Todos los aparatos antiguos marcados con el símbolo adjunto no deben eliminarse con la basura doméstica normal. -
Page 156: Datos Técnicos
27. Datos técnicos Adaptador de alimentación Fabricante GME Technology (Shenzhen) Co., Ltd Importador: MEDION AG Am Zehnthof 77 45307 Essen Alemania N.º de registro mercantil: HRB 13274 Nombre del modelo GME48E-160250FGR Tensión/corriente de entrada / frecuen- 100 - 240 V~, 50 - 60 Hz, 1,2 A cia de corriente alterna de entrada Tensión/corriente de salida... - Page 157 Radio Banda VHF 87,5 - 108 MHz Banda DAB III 174,928 - 239,200 MHz sí Memoria de emisoras 40 (DAB), 40 (FM), 40 (radio por inter- net) Potencia de salida 2 × 7,5 W + 1 × 15 W RMS Alimentación de tensión CC 16,0 V 2,5 A Consumo de potencia durante el fun-...
- Page 158 Codificación WEP/WPA/WPA2 interiores aprox. 35 - 100 m / Alcance exteriores aprox. 100 - 300 m MHz: 2412 - 2472 Canales: 22 Potencia de emisión máx./dBm: 15,99 MHz: 5180 - 5700 Rangos de frecuencia Canal: 47 Potencia de emisión máx./dBm: 13,83 MHz: 5745 - 5825 Canal: 12 Potencia de emisión máx./dBm: 8,44...
-
Page 159: Informaciones De Asistencia Técnica
• Si lo desea, también puede utilizar nuestro formulario de contacto que encon- trará en www.medion.com/contact. • Por supuesto, nuestro equipo de asistencia técnica también está a su disposición a través de nuestra línea directa o por correo postal. -
Page 160: Aviso Legal
Este manual de instrucciones está protegido por derechos de autor. Queda prohibida la reproducción mecánica, electrónica o de cualquier otro tipo sin la autorización por escrito del fabricante. El copyright pertenece a la empresa: MEDION AG Am Zehnthof 77 45307 Essen Alemania Tenga en cuenta que la dirección indicada arriba no es una dirección para devolu-... - Page 161 Indice dei contenuti Informazioni relative alle presenti istruzioni per l’uso ......163 1.1. Spiegazione dei simboli .................. 163 Utilizzo conforme ..................165 Indicazioni generali di sicurezza ............. 165 Informazioni sulla conformità UE ............168 Informazioni sui marchi ................169 Contenuto della confezione ..............169 Panoramica dell’apparecchio ..............
- Page 162 Informazioni aggiuntive, immagine di copertina ........184 Riproduzione tramite la presa LINE IN ............ 185 Riproduzione audio tramite la presa LINE OUT ........185 ® ..........................185 Modalità Bluetooth 19.1. Associazione di dispositivi Bluetooth ............186 19.2. Controllo dei brani .................... 186 19.3.
-
Page 163: Informazioni Relative Alle Presenti Istruzioni Per L'uso
Informazioni relative alle presenti istruzio- ni per l’uso Grazie per aver scelto il nostro prodotto. Ci auguriamo che sia di vostro gradimento. Prima della messa in funzione, leggere attentamente queste istruzioni e le indicazioni di sicurezza. Osservare le avvertenze riportate sull’appa- recchio e nelle istruzioni per l’uso. - Page 164 Indicazioni di sicurezza da seguire Classe di protezione II Gli apparecchi elettrici della classe di protezione II possiedono un isolamento doppio e/o rinforzato permanente e non hanno possibi- lità di allacciamento per un conduttore di terra. Utilizzo in ambienti chiusi Gli apparecchi contrassegnati da questo simbolo possono essere utilizzati solo in ambienti chiusi.
-
Page 165: Utilizzo Conforme
2. Utilizzo conforme L’apparecchio può essere utilizzato in diversi modi: L’apparecchio serve per la riproduzione di supporti audio (Blue- tooth® e dispositivi USB) nonché per la ricezione radio (DAB, FM e Internet). La gamma di ricezione indicata riflette le possibilità tecniche dell’apparecchio. - Page 166 Non appoggiare recipienti contenenti liquidi, ad es. vasi, sull’apparecchio o nelle sue immediate vicinanze e protegge- re tutte le parti dell’apparecchio da gocce e spruzzi d’acqua. Il recipiente potrebbe infatti rovesciarsi e il liquido pregiudicare la sicurezza dei circuiti elettrici. ...
- Page 167 Tenere le batterie nuove e usate fuori dalla portata dei bam- bini. Non ingerire le batterie. Pericolo di ustione chimica. Le batterie non sono un giocattolo! Evitare il contatto con l’acido delle batterie. In caso di contat- to con la pelle, gli occhi o le mucose, sciacquare i punti inte- ressati con abbondante acqua pulita e contattare immediata- mente un medico.
-
Page 168: Informazioni Sulla Conformità Ue
4. Informazioni sulla conformità UE MEDION AG dichiara che l’apparecchio è conforme ai requisiti fonda- mentali e alle altre disposizioni vigenti in materia: • Direttiva RED 2014/53/UE • Direttiva sulla progettazione ecocompatibile 2009/125/CE • Direttiva RoHS 2011/65/UE Tutti gli apparecchi multimediali collegati al prodotto mediante le apposite connes- sioni devono essere conformi ai requisiti della direttiva “Bassa tensione”. -
Page 169: Informazioni Sui Marchi
5. Informazioni sui marchi Il marchio Bluetooth® e i relativi loghi sono marchi registrati di Bluetooth SIG, Inc. e vengono utilizzati da MEDION su licenza. Gli altri marchi registrati appartengono ai rispettivi proprietari. 6. Contenuto della confezione PERICOLO! Pericolo di soffocamento! Il materiale di imballaggio non è... -
Page 170: Panoramica Dell'apparecchio
7. Panoramica dell’apparecchio 7.1. Vista anteriore Display 2. NAV – Ruotare la manopola per navigare all’interno del menu; OK – Premere per confermare la voce di menu selezionata; ricerca manuale del- le stazioni in modalità FM 3. Diffusori acustici – Visualizzazione del livello di menu precedente 5. -
Page 171: Lato Posteriore
7.2. Lato posteriore DC 16 V 2,5 A 15. DC POWER ON/OFF – Interruttore On/Off 16. DC – Presa per alimentatore a spina 17. Antenna DAB/FM 18. LINE OUT – Connettore RCA L/R per uscita audio 19. LINE IN – Ingresso audio, connettore stereo da 3,5 mm 20. -
Page 172: Telecomando
7.3. Telecomando – Disattivazione dell’audio 22. – Riproduzione del brano precedente, avvio della ricerca delle stazioni FM all’indietro STOP – Arresto della riproduzione – Riproduzione del brano successivo, ricerca delle stazioni FM in avanti – Avvio/interruzione della riproduzione; pressione lunga: disattivazione / attivazione Wi-Fi 23. -
Page 173: Posizionamento Dell'apparecchio
29. SHUFFLE/REPEAT – Riproduzione casuale/funzione di ripetizione 30. SLEEP/SNOOZE – Impostazione del tempo di spegnimento/della ripetizione della sveglia 31. MODE – Selezione della modalità di funzionamento 32. SCAN – Avvio della ricerca delle stazioni (radio DAB/FM) – Memorizzazione della stazione/Richiamo delle stazioni memorizzate –... -
Page 174: Orientamento Dell'antenna
8.3. Orientamento dell’antenna Sul retro dell’apparecchio si trova un’antenna telescopica per la ricezione radio DAB e FM. Estrarre completamente l’antenna e orientarla in modo da ottenere la ricezione migliore. 9. Messa in funzione I tasti sull’apparecchio permettono di usufruire delle principali funzioni di riprodu- zione dell’apparecchio stesso. -
Page 175: Prima Configurazione
9.3. Prima confi gurazione Al primo avvio, il dispositivo esegue la configurazione iniziale per configurare le im- postazioni di lingua, data/ora e rete. Per prima cosa, selezionare la lingua desiderata. Seguire le istruzioni per accettare le disposizioni sulla protezione dei dati. ... - Page 176 9.3.2. Connessione a una rete Per i seguenti passaggi per la connessione a una rete, consultare anche le istruzioni per l’uso del router. Selezionare se si desidera che la rete rimanga sempre collegata all’apparecchio (anche in modalità standby) e confermare la selezione. La ricerca delle reti disponibili viene avviata.
-
Page 177: Selezione Della Modalità Di Funzionamento
Immissione del PIN Se il router non dispone di un tasto WPS, ma offre l’opzione di connessione WPS tramite immissione del PIN nell’interfaccia web del router, selezionare l’opzione IM METTI PIN. Quando richiesto, immettere nell’interfaccia web del router il numero PIN visua- lizzato sul display della radio Internet e confermare l’immissione. -
Page 178: Audio
9.5. Audio 9.5.1. Regolazione del volume/disattivazione dell’audio Regolare il volume con i tasti (manopola di regolazione sul dispo- sitivo). Premere (MUTE sul dispositivo) per disattivare l’audio. Premere nuovamente il tasto per riattivare l’audio. La disattivazione dell’audio del dispositivo è dispo- nibile solo nelle modalità... -
Page 179: Radio Internet E Podcast
10. Radio Internet e podcast Con l’apparecchio è possibile ascoltare le trasmissioni della radio Internet e i po- dcast. Selezionare la modalità di funzionamento desiderata Premere il tasto MODE. Selezionare con (ruotare la manopola NAV/OK sull’apparecchio) la modalità di funzionamento INTERNET RADIO o PODCA STS e confermare con OK. -
Page 180: Menu Della Radio
11.2. Menu della radio Premere (MENU sul dispositivo) per visualizzare ulteriori impostazioni: Radio DAB – LISTA STAZIONI – Visualizzazione dell’elenco delle stazioni radio. – RICERCA – Avvio di una ricerca completa delle stazioni radio e creazione di una nuova lista di stazioni radio. –... -
Page 181: Richiamo Delle Stazioni Preferite
12.2. Richiamo delle stazioni preferite Tenere premuto il tasto per aprire l’elenco di memoria. Selezionare lo slot di memoria con . Premere la manopola di selezione OK per riprodurre la stazione radio o la tra- smissione. 12.3. Ricerca delle stazioni radio (solo radio FM) ... -
Page 182: Ascolto Di Brani Musicali Tramite Amazon Music
14. Ascolto di brani musicali tramite Amazon Music Tramite la radio Internet è possibile riprodurre dati audio del servizio di streaming musicale Amazon Music. Il presupposto fondamentale è che la radio internet e il di- spositivo sui cui è installata l’app per radio internet siano connessi alla stessa rete e che sia disponibile una connessione internet. -
Page 183: Menu Di Riproduzione
15.1. Menu di riproduzione Premere (MENU sul dispositivo) per aprire il menu: – RIPRODUZIONE USB – Visualizzazione del contenuto del dispositivo USB; selezionare qui il brano ed eventualmente la cartella. – LA MIA PLAYLIST – Visualizzazione dell’elenco di riproduzione specificato. –... -
Page 184: Riproduzione Di Un Brano
15.4.2. Riproduzione di un brano Aprire il menu di riproduzione con Selezionare con il menu SVUOTA MIA PLAYLIST e aprirlo con OK. Viene visualizzato l’elenco di riproduzione creato sopra. Selezionare con il brano desiderato nell’elenco e avviarne la riproduzione con OK. -
Page 185: Riproduzione Tramite La Presa Line In
17. Riproduzione tramite la presa LINE IN Il connettore LINE IN è previsto per il collegamento a un dispositivo di riproduzio- ne esterno (ad es. lettore CD o lettore MP3). Mettere il sistema audio in modalità standby. Spegnere il dispositivo esterno. ... -
Page 186: Associazione Di Dispositivi Bluetooth
19.1. Associazione di dispositivi Bluetooth Attivare la funzione Bluetooth anche sull’apparecchio esterno ed eseguire l’asso- ciazione. A tale scopo leggere le istruzioni dell’apparecchio esterno. Il nome del sistema audio è “MD 89295”. Qualora sul display dell’apparecchio esterno sia richiesto l’inserimento di una password, digitare il codice “0000”. -
Page 187: Timer Di Spegnimento E Sveglia
20. Timer di spegnimento e sveglia 20.1. Timer di spegnimento Il timer di spegnimento (Snooze) permette di disattivare automaticamente il dispo- sitivo dopo un tempo definito. Premere di nuovo il tasto SNOOZE per impostare la durata desiderata dello spegnimento del dispositivo. Il dispositivo si spegne dopo il tempo preimpostato. -
Page 188: Configurazioni Di Sistema
21. Confi gurazioni di sistema Il menu di sistema contiene le impostazioni generali che riguardano l’apparecchio. Il menu è disponibile in tutte le modalità di funzionamento. Premere il tasto (MENU sul dispositivo) in una qualsiasi delle modalità di fun- zionamento. - Page 189 Nome menu Descrizione Impostazione manuale dell’ora e della data ORA/DATA IMPOSTA ORA/DATA Selezionare se la data e l’ora devono essere AUTOM. impostate automaticamente attraverso il UPDATE segnale DAB, il segnale FM o tramite la rete. L’impostazione automatica avviene ogni gior- no tra le 4 e le 5 del mattino.
- Page 190 Nome menu Descrizione ILLUMINA TIMEOUT Tempo trascorso il quale la luminosità del di- ZIONE DEL splay viene ridotta durante il funzionamento LO SFONDO qualora non venga impartito alcun comando. A LIVELLO Selezione della luminosità del display duran- te il funzionamento TIMEOUT Tempo trascorso il quale la luminosità...
-
Page 191: Comando Tramite L'app
22. Comando tramite l’app Con l’app sullo smartphone o sul tablet PC è possibile comandare la radio Internet. Oltre alle impostazioni consuete, come avvio, arresto, ripetizione o creazione di elenchi di preferiti e ricerche di stazioni, l’app offre la possibilità di regolare indivi- dualmente il suono. -
Page 192: Pulizia
Quando la funzione Wi-Fi è disattivata nelle modalità che non utilizzano la rete Wi-Fi (AUX-IN, Radio FM, Radio DAB), non è possibile comandare la radio tramite l’app MEDION LifeStream 2. 23. Pulizia Prima di pulire il dispositivo, staccare la spina di alimentazione dalla presa elettrica. -
Page 193: In Caso Di Problemi
25. In caso di problemi Se dovessero presentarsi problemi, innanzitutto verificare se sia possibile risolverli autonomamente. La seguente tabella può essere di aiuto. Problema Possibile causa Rimedio Audio assente Il volume attuale è impostato Aumentare il volume. troppo basso. L’audio è stato disattivato. Riattivare l’audio. -
Page 194: Smaltimento
26. Smaltimento 27. Smaltimento IMBALLAGGIO L’imballaggio protegge l’apparecchio da eventuali danni durante il tra- sporto. Gli imballaggi sono prodotti con materiali che possono essere smaltiti nel rispetto dell’ambiente e destinati a un corretto riciclaggio. APPARECCHIO Tutti gli apparecchi usati contrassegnati con il simbolo a lato non devo- no essere smaltiti insieme ai rifiuti domestici. -
Page 195: Dati Tecnici
28. Dati tecnici Alimentatore Produttore GME Technology (Shenzhen) Co., Ltd Importatore: MEDION AG Am Zehnthof 77 45307 Essen Germania Numero di registro delle imprese: HRB 13274 Nome del modello GME48E-160250FGR Tensione di ingresso / corrente / fre- 100–240 V~, 50–60 Hz, 1,2 A quenza della corrente alternata di... - Page 196 Radio Banda FM 87,5–108 MHz Banda DAB III 174,928–239,200 MHz sì Memoria stazioni 40 (DAB), 40 (FM), 40 (radio internet) Potenza in uscita 2 x 7,5 W + 1x 15 W RMS Alimentazione elettrica DC 16,0 V 2,5 A Potenza assorbita durante il funziona- 24 W mento Wi-Fi attivato: 0,91 W Potenza assorbita in modalità...
- Page 197 Interni ca. 35–100 m / Portata esterni ca. 100–300 m MHz: 2412–2472 Canali: 22 Potenza max. di trasmissione/dBm: 15,99 MHz: 5180-5700 Gamme di frequenza Canale: 47 Potenza max. di trasmissione/dBm: 13,83 MHz: 5745-5825 Canale: 12 Potenza max. di trasmissione/dBm: 8,44 Prese per funzioni esterne Antenna FM Antenna telescopica Connettore jack da 3,5 mm...
-
Page 198: Informazioni Relative Al Servizio Di Assistenza
Orari di apertura Assistenza Post-Vendita Lun.-ven.: 9.00-19.00 0848 - 33 33 32 Indirizzo del servizio di assistenza MEDION/LENOVO Service Center Ifangstrasse 6 8952 Schlieren Svizzera Queste e altre istruzioni per l’uso possono essere scaricate dal portale dell’assistenza www.medionservice.com. Per ragioni di sostenibilità abbiamo deciso di non stampare le condizioni di garanzia: le nostre condizioni di garanzia sono re- peribili sul nostro portale dell’assistenza. -
Page 199: Note Legali
Le presenti istruzioni per l’uso sono protette da copyright. È vietata la riproduzione in forma meccanica, elettronica e in qualsiasi altra forma senza l’autorizzazione scritta da parte del produttore. Il copyright appartiene all’azienda: MEDION AG Am Zehnthof 77 45307 Essen Germania L’indirizzo riportato sopra non è... - Page 201 Contents Information about this user manual ............203 1.1. Explanation of symbols ...................203 Proper use ....................205 General safety instructions ..............205 EU – Declaration of Conformity .............. 208 Trademark information ................209 Package contents ..................209 Appliance overview .................. 210 7.1. Front view ......................210 7.2.
- Page 202 Additional information, cover ..............225 Playback via the LINE IN connection ............225 Audio output via the LINE OUT connection ..........225 ® Bluetooth mode ..................226 19.1. Connecting Bluetooth devices ..............226 19.2. Controlling the tracks ..................226 19.3. Bluetooth menu ....................226 Sleep timer and alarm ................227 20.1.
-
Page 203: Information About This User Manual
Information about this user manual Thank you for choosing our product. We hope you enjoy using this ap- pliance. Please read the safety instructions and the user manual carefully before using the appliance for the first time. Note the warnings on the appli- ance and in the user manual. - Page 204 Protection class II Electrical appliances in protection class II are electrical appliances that permanently have double and/or reinforced insulation and do not have the option of connecting a protective earth. Indoor use Appliances with this symbol are intended exclusively for use in- doors.
-
Page 205: Proper Use
2. Proper use Your appliance can be used in a range of ways: The appliance is used to play sound media (Bluetooth®, USB de- vices) and for radio reception (DAB, FM and internet). The specified reception frequency range represents the techni- cal possibilities of the appliance. - Page 206 Do not place containers filled with liquid, e.g. vases, on or near the appliance, and protect all the parts from dripping or sprayed water. Such containers may tip over and the liquid may impair the electrical safety of the appliance. ...
- Page 207 Keep new and used batteries out of the reach of children. Do not swallow batteries as they can cause chemical burns. Bat- teries are not a toy! Avoid contact with battery acid. If battery acid comes into contact with skin, eyes or mucous membranes, rinse the af- fected areas with plenty of clean water and consult a doctor as soon as possible.
-
Page 208: Eu - Declaration Of Conformity
4. EU – Declaration of Conformity MEDION AG hereby declares that this appliance complies with the fun- damental requirements and the other relevant provisions of: • Radio Equipment Directive 2014/53/EU • Ecodesign Directive 2009/125/EC • RoHS Directive 2011/65/EU All multimedia equipment that can be connected to the corresponding connections of the appliance must comply with the requirements of the Low Voltage Directive. -
Page 209: Trademark Information
5. Trademark information The Bluetooth® word mark and logos are registered trademarks of Bluetooth SIG, Inc. and are used by MEDION under licence. Other trademarks are the property of their respective owners. 6. Package contents DANGER! Risk of choking and suffocation! -
Page 210: Appliance Overview
7. Appliance overview 7.1. Front view Display 2. NAV – Turn to navigate through the menu; OK – Press to confirm menu selection; manual station search in FM mode 3. Speaker – Back a menu level 5. MENU – Call up settings menu 6. -
Page 211: Back
7.2. Back DC 16 V 2,5 A 15. DC POWER ON/OFF – On/Off switch 16. DC – Socket for plug-in mains adapter 17. DAB/FM antenna 18. LINE OUT – Audio output, cinch socket L/R 19. LINE IN – Audio input, 3.5 mm stereo socket 20. -
Page 212: Remote Control
7.3. Remote control – Mute 22. – Play back previous track, FM station search backwards STOP – Pause playback – Play back next track, FM station search forwards – Start/pause playback; press and hold: Enable/disable WLAN 23. -
Page 213: Setting Up The Appliance
30. SLEEP/SNOOZE – Set switch-off time/snooze function 31. MODE – Select operating mode 32. SCAN – Start station search (DAB/FM radio) – Store station/call up stored station – Switch appliance to standby mode 8. Setting up the appliance Place the appliance on a sturdy, level surface. Some aggressive varnishes can corrode the rubber feet on the appliance. -
Page 214: Adjusting The Aerial
8.3. Adjusting the aerial A telescopic aerial for DAB and FM radio reception is located on the back of the ap- pliance. Pull out the antenna completely and align it for the best reception. 9. Getting started You can use the main play functions on your audio system using the buttons on the appliance. -
Page 215: Initial Set-Up
9.3. Initial set-up When the appliance is started for the first time, it runs through the initial set-up to configure the settings for the language, date/time and network. First select the desired language. Follow the instructions to agree to the data protection provisions. ... -
Page 216: Establishing A Connection To A Network
9.3.2. Establishing a connection to a network Please also refer to the user manual of your router for the following steps to connect to a network. Select whether the network should always remain connected to the appliance (even in standby mode) and confirm your selection. The appliance searches for available networks. -
Page 217: Entering A Pin
The appliance stores the connection data so that it does not need to be re-entered to re-establish the connection. Entering a PIN If the router does not feature a WPS button but does provide the option for a WPS connection by entering a PIN on the router’s web interface, select ENTER PIN. ... -
Page 218: Selecting The Operating Mode
9.4. Selecting the operating mode Press the MODE button. Use (turn NAV/OK on the appliance) to select the desired operating mode and confirm with OK. The selected operating mode appears in the display: – INTERNET RADIO – Internet radio –... -
Page 219: Connecting Headphones
9.5.3. Connecting headphones You will find a 3.5 mm headphone socket on the front of the appliance. Open the cover and there are several connections behind it. Insert headphones with a 3.5mm jack plug into the headphone socket . When headphones are connected, the speakers are disabled. -
Page 220: Dab And Fm Radio
11. DAB and FM radio This appliance can receive both DAB and FM radio stations. Select the required radio mode: Press the MODE button. Use (turn NAV/OK on the appliance) to select the operating mode DAB+ RADIO or FM RADIO and confirm with OK. The first time the radio is used, an automatic station search is carried out and a station list is created with the stations found. -
Page 221: Favourites Lists
FM radio – SCAN SETTING – Select whether to search for all (even weak) or only strong stations. – AUDIO SETTING – Choose whether mono or stereo sound is to be played. – AUTO. STORE – Automatic search and storage of all stations found. –... -
Page 222: Spotify Connect
13. Spotify Connect Use your smartphone, tablet or computer as a remote con- trol for Spotify. Learn more at spotify.com/connect. The Spotify software is subject to third party licences found here: https://www.spotify.com/connect/third-party-licenses Press the MODE button. Use (turn NAV/OK on the appliance) to select the operating mode SPOTIFY and confirm with OK. -
Page 223: Play Usb Flash Drive
15. Play USB fl ash drive You can use the appliance to play USB flash drives. Select the desired operating mode: Press the MODE button. Use (turn NAV/OK on the appliance) to select the operating mode MUSIC PLAYER and confirm with OK. ... -
Page 224: Playlist
15.4. Playlist You can select specific tracks for playback using a playlist. You can specify the order in which the list is played yourself. 15.4.1. Adding tracks First select a track you want to add to the playlist. To do so, either open the USB PLAYBACK menu with the button or select a current track during playback. -
Page 225: Additional Information, Cover
16. Additional information, cover It is possible to display additional information, such as the station name, track infor- mation or the current type of programme for a radio station or podcast. Press the INFO button repeatedly to call up the additional information in suc- cession. -
Page 226: Bluetooth ® Mode
® 19. Bluetooth mode You can use Bluetooth to play tracks wirelessly from external devices such as MP3 players or mobile phones with Bluetooth on this appliance. Press the MODE button. Use (turn NAV/OK on the appliance) to select the operating mode BLUETOOTH and confirm with OK. -
Page 227: Sleep Timer And Alarm
20. Sleep timer and alarm 20.1. Sleep timer If you select the sleep timer (snooze) function, the appliance switches off automati- cally after a defined period of time. Repeatedly press the SNOOZE button to set the desired time to appliance switch-off. -
Page 228: System Settings
21. System settings The system menu contains general settings that affect the appliance. You can access the menu in all operating modes. In any operating mode, press the button (MENU on the appliance). Use to select the SYSTEM SETTINGS and confirm with OK. The following settings are available: Menu name Description... - Page 229 Menu name Description TIME/DATE Manually set the time and date TIME/DATE AUTOM. UP Choose whether or not the date and time are DATE set automatically via the DAB or FM signal or via the network. Automatic adjustment takes place daily between 4 and 5 AM. SET TIME FOR...
-
Page 230: Using The App As The Control
22. Using the app as the control You can control your internet radio using the app on your smartphone or tablet PC. In addition to the established setting options such as start, stop, repeat or the crea- tion of favourites lists and station searches, the app makes it possible to individually customise the sound output. -
Page 231: Cleaning
When WLAN function is switched off for operating modes that do not use WLAN such as AUX-IN, FM radio and DAB radio, it is not possible to control the appliance using the MEDION LifeStream 2 app. 23. Cleaning Always disconnect the appliance from the mains before cleaning it. -
Page 232: Troubleshooting
25. Troubleshooting If a fault occurs, first see whether you can resolve the problem yourself. You might find this overview useful. Fault Possible cause Corrective action No sound The current volume is set too Increase the volume. low. The mute setting is activated. Switch off the mute setting. -
Page 233: Disposal
26. Disposal PACKAGING The product has been packaged to protect it from damage in transit. The packaging is made of materials that can be recycled in an environ- mentally friendly manner. DEVICE All old appliances marked with the symbol illustrated must not be dis- posed of in normal household rubbish. -
Page 234: Technical Specifications
27. Technical specifi cations Mains adapter Manufacturer GME Technology (Shenzhen) Co., Ltd Importer: MEDION AG Am Zehnthof 77 45307 Essen Germany HR number: HRB 13274 Model name GME48E-160250FGR Input voltage/current/input AC fre- 100–240 V~, 50–60 Hz, 1.2 A quency Output voltage/current 16.0 V 2.5 A Output power 40.0 W... - Page 235 Radio FM band 87.5–108 MHz DAB band III 174.928–239.200 MHz Station memory 40 (DAB), 40 (FM), 40 (internet radio) Output power 2× 7.5 W + 1× 15 W RMS Power supply DC 16.0 V 2.5 A Power consumption during operation 24 W WLAN enabled: 0.91 W Power consumption in standby mode WLAN disabled: 0.71 W Standard USB host (version 2.0) with up...
- Page 236 Indoors approx. 35–100 m / Range outdoors approx. 100–300 m MHz: 2412–2472 Channels: 22 Transmitting power/dBm: 15.99 MHz: 5180–5700 Frequency ranges Channels: 47 Transmitting power/dBm: 13.83 MHz: 5745–5825 Channels: 12 Transmitting power/dBm: 8.44 Connections for external functions FM antenna Telescopic antenna 3.5 mm jack LINE OUT 3.5 mm jack Headphone socket...
-
Page 237: Service Information
In our Service-Community, you can meet other users, as well as our staff, and you can exchange your experiences and pass on your knowledge there. You will find our Service-Community at community.medion.com. • Alternatively, use our contact form at www.medion.com/contact. -
Page 238: Legal Notice
Please note that you cannot use the address below for returns. Please contact the Service Centre mentioned above. MEDION AG Am Zehnthof 77 45307 Essen Germany Importer for GB market by: MEDION AG c/o MEDION ELECTRONICS LTD. 120 Faraday Park, Faraday Road, Dorcan Swindon SN3 5JF, Wiltshire United Kingdom...
Need help?
Do you have a question about the P85444 and is the answer not in the manual?
Questions and answers