Table of Contents
Advertisement
Advertisement
Table of Contents

Subscribe to Our Youtube Channel
Related Manuals for MicroMetl ECD-SRTCB-D2

Summary of Contents for MicroMetl ECD-SRTCB-D2
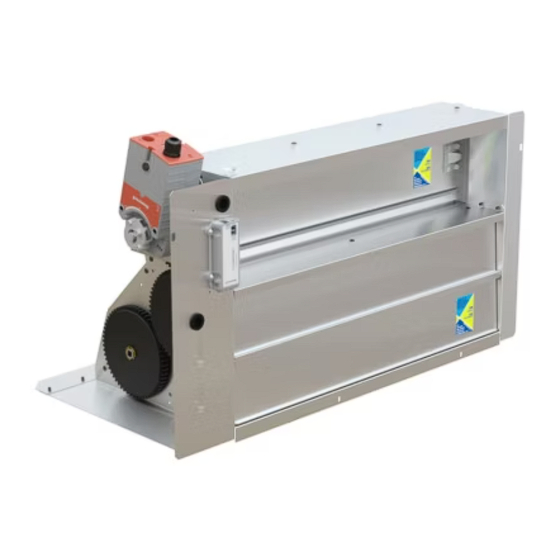
- Page 1 Economizer Install Guide ECD-SRTCB-D2 Foremost HVAC Accessory Manufacturer...
- Page 2 Table of Contents Topic Topic Page Number Page Number General Install Instructions Honeywell Wiring Diagram Honeywell Manual...
-
Page 3: Installation Instructions
MicroMetl 3 to 15 Ton ULL Vertical Economizer Accessory Since 1965 Installation Instructions CONTENTS WARNING Safety Consideration ELECTRICAL SHOCK HAZARD General Descriptions Failure to follow this warning could cause personal injury or death. Before performing service or maintenance operations on the unit, always turn off Usage Chart, Package Contents, Sensors main power switch to unit and install lock(s) and lockout tag(s). - Page 4 9901-2021 outdoor air dry bulb sensor Supply Blower then you must purchase a different harness. Dry Bulb is field installed on "D2DH" economizer. (MicroMetl P/N 9962-0407 & 9962-0407SAOAEXT, if a NV customer, Single 9901-2022 outdoor air enthalpy sensor then purchase P/N 1002-0407).
-
Page 5: Accessories List
MicroMetl Since 1965 INSTALLATION ACCESSORIES LIST - The Economizer system has several Step 1: Turn off power supply(s) and install lockout tag. field-installed accessories available to optimize performance. Refer Step 2: Remove the existing unit filter access panel. Raise the to Table 6 for authorized parts and power exhaust descriptions. - Page 6 MicroMetl Since 1965 Step 7: Remove and save the 12-pin jumper plug from the unit Fig. 4 - Connect Economizer Harness to economizer harness – located in the upper left corner of the unit. Unit PL6 Economizer Harness Insert the PL6 plug to the economizer actuator, then Insert the economizer plug into the unit wiring harness.
- Page 7 W7220 MAT must purchase a different harness Sensor Ref (MicroMetl P/N 9962-0407 & 9962-0407-SAOAEXT, NV Customers order P/N1002-0407). 2 - If you have a 48/50JC 04-07 unit with System VU, these controls will not work properly. Please let your distributor know that you will need...
- Page 8 MicroMetl Since 1965 Step 15: Connect the pink and violet wires from the 4-wire harness to the pink and violet terminals in the wire bundle in the indoor blower section. See Figure 11. Step 16: If using differential return sensor or DCV sensor install it Pink and now.
- Page 9 MicroMetl Since 1965 Step 20: After powering controller, program the Jade W7220 2500 controller per the instructions to follow. See 9901-2022 Sensor Dip Switch Settings for summarized 2000 controller set up instructions. 1500 ECD-SRT12CA-D2*H After all settings have been made, re-install the unit control box panel.
- Page 10 Single Enthalpy and Dual Enthalpy High Limit Curves POINT P1 POINT P2 ENTHALPY TEMP. DRY TEMP. ENTHALPY HUMIDITY HUMIDITY CURVE BULB (F) DEWPOINT (F) (btu/lb/da) TEMP. (F) TEMP. (F) (%RH) (%RH) 28.0 36.8 66.3 80.1 26.0 39.6 63.3 80.0 34.0 42.3 59.7 81.4...
- Page 11 DEMAND CONTROL VENTILATION Refer to economizer wiring diagram and DCV instructions if demand control ventilation (CO2 sensor) is used. CO2 sensor will wire into the blue and black connection (IAQ COM & IAQ 2-10) at the Jade Black Wire controller. If a field installed CO2 sensor is connected to the IAQ 2-10 Vdc economizer controller, a demand-controlled ventilation strategy will operate automatically.
- Page 12 MicroMetl Instructions for 48/50LC 07-12 Units Only Since 1965 Important: This page is for economizer installation instructions on 48/50LC 07-12 units only. Step LC1 Follow steps 1 through 10earlier in these instructions. Step LC2 The 48/50LC 07-12 units require different wiring than is factory attached to the W7220 Jade controller.
- Page 13 Important: This page is for economizer installation instructions on 48/50LC 07-12 units only. Step LC4 The connectors on the right side of 48LCHSRAD—A00 harness attach to the Jade W7220 controller installed in the unit control box. 48LCHSRAD—A00 harness connectors are labeled to easily identify the plug-in location on the controller.
- Page 14 Important: This page is for economizer installation instructions on 48/50LC 07-12 units only. Typical Wiring Diagram For 48/50LC 07-12 Units NOTES: Harness shown in bold is 48LCHSRADH--A00 harness, which Harness attached to the W7220 controller from the Carrier is shipped in the control box of 48/50LC 07-12 units and must factory is removed and not used with 48/50LC 07-12 units economizer.
- Page 15 ECD, ECH-SRT12CB Series Wiring Diagram Supplement For Installing JADE W7220 Economizer on Unit with Vane Axial Indoor Fan (with Unit Control Board HK50AA055 or HK50AA058) ECONOMIZER RETURN CHAMBER INDOOR BLOWER SECTION UNIT CONTROL BOX COMPARTMENT 9901-2021 9901-2021 Dry bulb Outside Air Mixed Air Sensor Sensor Field Mount on...
- Page 16 ECD, ECH-SRT12CB Series Wiring Diagram For Installing JADE W7220 Economizer on Unit with Central Terminal Board (CTB) ECONOMIZER RETURN CHAMBER INDOOR BLOWER SECTION UNIT CONTROL BOX COMPARTMENT 9901-2021 9901-2021 9962-0407-SAOEXT Dry bulb Outside Air Mixed Air Sensor Harness with Sensor Field Mount on 4-Pin Female Plug 4-Pin Male...
- Page 17 MicroMetl General Jade W7220 Controller and Sensor Information Since 1965 W7220 ECONOMIZER Using the Keypad with Settings and Parameters The economizer controller used on electro mechanical units is the To use the keypad when working with Setpoints, System Setup Honeywell W7220 which is to be located in the RTU base unit’s Advanced Settings, Checkout Tests and Alarms: Control Box.
-
Page 18: System Setup
MicroMetl Since 1965 SETPOINTS PROGRAMMING THE JADE W7220 MAT SET: this sets the mixed air temperature (MAT) setting. CONTROLLER The controller has a default of 53 degrees, but the range is anywhere from 38 to 70 degrees F. The next several pages detail the different status displays, setpoints, setup, and alarms available on the controller. -
Page 19: Menu Structure
MicroMetl Since 1965 Table 11 Menu Structure* Parameter Parameter Menu Parameter Default Notes Range and Increment Value ECON AVAIL YES/NO ECONOMIZING AVAILABLE YES = economizing available; the system can use outside air for free cooling when required ECONOMIZING YES/NO ECONOMIZING ACTIVE YES = Outside air being used for 1st stage cooling. - Page 20 MicroMetl Since 1965 Table 11 Menu Structure (cont)* Parameter Parameter Menu Parameter Default Range and Notes Value Increment ON/OFF ON = relay closed OFF = relay open ON/OFF ENERGY RECOVERY UNIT RELAY OUTPUT STATUS ON = relay closed (cont) OFF = relay open...
- Page 21 MicroMetl Since 1965 Table 11 Menu Structure (cont)* Parameter Parameter Menu Parameter Default Notes Range and Increment Value INSTALL 01/01/10 Display order = MM/DD/YY Setting order = DD, MM, then YY. UNITS DEG °F or °C Sets economizer controller in degrees Fahrenheit or Celsius.
-
Page 22: Checkout Tests
MicroMetl Since 1965 Table 11 Menu Structure (cont)* Parameter Parameter Menu Parameter Default Notes Range and Increment Value DAMPER VMIN .HS Positions OA damper to VMIN High Speed position DAMPER OPEN Positions OA damper to the full open position. DAMPER CLOSE... -
Page 23: W7220 Economizer Module Wiring
MicroMetl Since 1965 W7220 ECONOMIZER MODULE WIRING Use tables 12 and 13 to locate the wiring terminals for the Economizer module. Table 13 - Economizer Module - Table 12 - Economizer Module - Right Hand Terminal Blocks Left Hand Terminal Blocks... -
Page 24: Start-Up And Operation
MicroMetl Since 1965 START-UP AND OPERATION Cooling with Economizer — For Occupied mode operation of Should 100% outside air not be capable of satisfying the space economizer, there must be a 24-v signal at terminals R and OCC temperature, space temperature will rise until Y2 is called for. The economizer control will call for compressor operation. -
Page 25: Troubleshooting
MicroMetl Since 1965 TROUBLESHOOTING Clearing Alarms — For a list of common operating issues and concerns see Table 15. cause has been removed (e.g. replaced faulty sensor). They can Power Loss (Outage or Brownout) — All setpoints and advanced be cleared from the display.
Need help?
Do you have a question about the ECD-SRTCB-D2 and is the answer not in the manual?
Questions and answers